

Kootenay National Park Or The Land Of Ice And Fire (Experiencing Nature’s Game Of Contrasts)

Sep 12, 2024

Last Updated on: Sep 1, 2025

Travel Guides

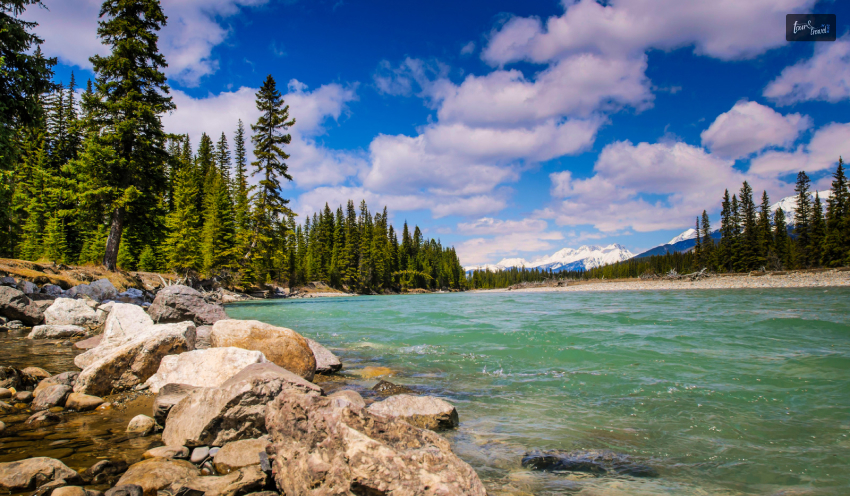
No, it’s not the battle of the Starks, Lannisters, and other houses of Westeros. In Canada lies Kootenay National Park, the actual land of ice and fire. The glacier-made canyons and valleys sing the song of the ice, while the hot springs and grasslands keep the “fire” element alive here. 

Also, the national park is a hub of ancient fossils, encouraging walks through the fossil trails. Moreover, you can take a scenic drive through the park, rich in Indigenous culture, history, architecture, and cultural landscape.  

So, do you want a virtual tour of this Canadian national park? THIS is where your journey begins!

THESE Are The Things You Will Do At Kootenay National Park

Things You Will Do At Kootenay National Park

With no cell service available in Kootenay National Park, you can get lost in the wilderness and explore the most fascinating landscape. However, being respectful to the wildlife is a must for this national park. This August, I came across disturbing news while doing my research on Kootenay National Park. 

I have been in touch with a local from Radium Hot Springs for quite some time now. He told me that a grizzly bear coming out of Kootenay National Park was almost struck by an SUV on 19th August 2024

This incident occurred on a busy highway in southeastern British Columbia, and fortunately, the Kia Sportage SUV made its way to the other side safely. Further, it was a lesson on why following the safety guidelines is crucial while driving in and around the Kootenay National Park.

On the major routes of Kootenay National Park, you will have to maintain a maximum speed of 56 mph.
However, on the minor routes, the highest driving speed limit will be 37 mph. 

Also, around one month before the incident, on 24th July 2024, there was a minor fire in the  Sinclair Canyon slopes (near Radium Hot Springs) of the national park. It was called the Berland Ridge wildfire. This fire was under control thanks to a helicopter bucketing water on it.

However, outside the park’s southern boundary, there was a blazing fire that was brought under control after pain-stricken efforts. 

So, these incidents show how mindful and cautious you need to be while taking part in the following activities. 

Hiking In Kootenay National Park (Hikers’ Favorite Trails)

Hiking In Kootenay National Park (Hikers’ Favorite Trails)

The hiking trails in Kootenay National Park are full of elevation gains and losses. Also, today, the national park has more than 70 hiking trails at easy, moderate, and difficult levels. 

However, I have curated a few hiking trails in the table below. After interacting with a couple of hikers, I found out that these are the ones most preferred.

Name of the Trail Difficulty LevelDistanceLocationHighlights
Marble CanyonEasy1.4 Km with 42 M Elevation Gain Located near Lake Louise, AlbertaHiking, snowshoeing, and running are the favorite activities here.
It is a pet-friendly and kid-friendly trail. 
It is a year-long hiking trail. 
Stanley Glacier Trail Difficult 10.9 Km with 607 M Elevation Gain Located near Lake Louise, AlbertaSnowshoeing, camping, and hiking are popular activities on this trail.
You can take your dog as a company.
June to September is the best time to hike this trail. 
Sinclair Canyon via Juniper Trail Moderate5.8 Km with 291 M Elevation GainIt is close to Radium Hot Springs in British Columbia.You will have to hike through a beautiful cedar fir forest on this trail.
The view of verdant Sinclair Canyon Falls and the Columbia Valley from this trail is breathtaking.
Marble Canyon to Paint PotsModerate2.9 Km with 110 M Elevation GainRadium Hot Springs (Marble Canyon Parking Lot  – 89 km east of Radium Hot Springs, Paint Pots – 86 Km east of Radium Hot Springs).Explore a good mix of mature and burnt forest throughout the trail.
Behold the Vermillion River running parallel to the trail. 
Floe LakeDifficult10.5 Km with 1,110 M Elevation Gain Near Radium Hot Springs (72 Km East)Backpacking and camping are popular activities on this trail. 
The trail leads to the Floe Lake Backcountry campground. 
This popular meadowy trail is known for its views of peaks, glaciers, and the beautiful Floe Lake. 
Numa CreeksModerate 6.3 Km with 385 M Elevation GainThe trailhead is near the Numa Falls, which is 80 Km east of the Radium Hot Springs. It is a forested trail.
The trail leads to heavy avalanche paths in the park. 

The hikers’ words about the trails in this national park are quite encouraging. Let’s find out what they are saying about the mesmerizing hiking trails. 

This is a beautiful, deep canyon hike. The trail crosses the canyon multiple times to view the ferocious Kootenay river below. Hiking boots aren’t necessary since it is a well-traveled trail.” – Deborah Turcotte on the Marble Canyon Trail 

The trail was mostly dry and in very good condition. No snow on the trail, just a few short wet spots. Trek up is mostly sheltered but a bit chilly and windy in the bowl so bring layers as the temp changes quickly when the sun is behind clouds. Still lots of snow in the bowl. Found one rock with fossils. There are a few small waterfalls on Stanley Peak. Lots of boulders at the base of the bowl to sit and enjoy a lunch and 360 views. An easy to moderate 3-4 hour hike with nice views of Stanley Peak, Storm Mtn, and the Kootenay Valley.” – Sue W on the Stanley Glacier Trail 

Kootenay National Park Camping 

Kootenay National Park Camping

Kootenay National Park is a wonderful place for frontcountry and backcountry camping. You can even live in oTENTiks and spend some unforgettable days in the park under the sky. 

Frontcountry Camping

You can camp near the Vermillion, Kootenay, and Simpson rivers. Also, you can find some quiet spots near Radium Hot Springs village

Summer is the best season for front-country camping in the national park. However, the sites remain crowded. So, you must go for a prior booking. 

Further, the daytime temperature in the national park remains between 16-23 degrees centigrade. Still, the temperature at night can drop below 0 degrees centigrade. So, abiding by the camping rules is crucial, and especially, be particular about the things you will have to carry.

Moreover, like camping in any national park, here also you have to ensure that you don’t leave any trace behind as you leave the site. 

Backcountry Camping

Backcountry camping and backpacking are the best ways to explore the wilderness of this Canadian national park. However, you must make a prior booking and carry a backcountry permit if you want to spend some days and nights amidst grizzly bears, black bears, wolves, elks, and cougars. 

Further, there are six backcountry camping grounds in the park, five of which are located along the  Rockwall Trail. The  Verdant Creek Trail has the sixth camping ground. 

Random camping is not allowed during summer, as protecting the landscape and vegetation is crucial. This restriction applies from May to October

However, in the winter months, you can do random camping in the designated areas. You will still need a permit for this. As I have mentioned, the Rockwall trail is the most prominent place for backcountry camping in the park. This site is also popular for the presence of various multi-day hiking trails. These trails are:

  • Honeymoon Pass and Verdant Creek
  • Tumbling – Floe
  • The Rockwall 
  • Tumbling – Helmet – Ochre Loop
  • Numa Creek
  • Helmet Creek and Falls
  • Tumbling Creek
  • Helmet – Ochre Junction

In the popular backcountry camping areas, the trails are maintained quite well. Further, there will be amenities like food storage cables, food lockers, picnic tables, and tent pads. 

Living in oTENTik

An oTENTik is a modern fusion of a cabin and a tent. In the park, you will find the oTENTik site on the Redstreak campground’s A loop

If you stay in an oTENTik, you will wake up amidst nature, and taking a bath at the hot springs will be the most rejuvenating experience. Then, you can explore the nearby hiking trails and gorge on traditional meals cooked in the campfire. 

Relaxing At Radium Hot Springs 

Relaxing At Radium Hot Springs

Beneath the colorful Sinclair Canyon mountains lie the most refreshing hot springs. Further, the mineral-rich water of the hot springs does not have any odor, and you can take a bath with your entire family. 

To reach the Radium Hot Springs, you must drive from Banff and Lake Louise for around 1.5 hours. Further, the journey is as interesting as the destination, as you will get to small turquoise lakes, falls, canyons, and bridges over rivers as you drive through the Kootenay National Park. Also, don’t forget to stop at the following locations to make the most of your journey.

  • Continental Divide (The line diving the Pacific and Atlantic watersheds)
  • Marble Canyon Hike
  • Paint Pots Trail
  • Numa Falls
  • Kootenay Valley Viewpoint (It is the place to get the most beautiful view of Vermilion and Mitchell Ranges.)
  •  Olive Lake Trail and Day-Use Area

However, the highlight of the journey, of course, is the Sinclair Canyon, where you will also find big horn sheep roaming. As you hike through the Juniper / Sinclair trail, you will get a “bird’s eye view” of Sinclair Canyon. 

Further, as you enter the Radium Hot Springs village, you will see an iconic steel horn sculpture. The “Bighorns Public Art Sculpture” was officially unveiled on 7th April 2021. Moreover, Clara Reinhardt, the mayor of Radium in 2021, said, 

We chose something that implies a sense of arrival to Radium, the Columbia Valley, and beyond. We captured the undeniable natural beauty of the curved horns through a Fibonacci spiral—the golden ratio in nature and art.

We wanted to create a piece of art that speaks to both the history and the future of bighorn sheep in Radium. We captured the undeniable natural beauty of the curved horns through a Fibonacci spiral—the golden ratio in nature and art.” 
– Adam Meikle (Artist of the Bighorns Public Art Sculpture)

Burgess Shale Fossil Hike 

The Burgess Shale Fossil Hike in the national park will give you access to Mount Stephen and Walcott Quarry. These are UNESCO Restricted Sites. Further, you will get to see some of the oldest fossils in the world here. 

However, in total, you have three routes to explore in the Burgess Shale Fossil Hike. Let’s discuss them in detail. 

Walcott Quarry

Starting Point: Takakkaw Falls

Difficulty Level: Difficult 

Elevation Gain: 825 Meters

Duration: 11 Hours

Return Distance: 22 Kms

Walcott Quarry is a classic example of a fossil hike. Also, the top view of the Emerald Lake from here is amazing. Further, you will find Burgess Shale creatures here, which were found in fossilized conditions at the mountaintop in the Yoho National Park. 


The Burgess Shale organisms lived 508 million years ago in a time period that Geologists call the Cambrian, which began at 541 Ma (million years ago) and ended by 485.4 Ma. The first fossil occurence of most animal lineages (at the phylum and class levels) occur in the Cambrian. As a result of this fact, and because the fossils are well preserved, Paleontologists studying the Burgess Shale fossils can deduce a great deal about the ancestory of animal lineages.”

The Burgess Shale fossils were discovered at the Walcott Quarry site in 1909 by Charles Doolittle Walcott. 1

Mount Stephen

Mount Stephen

Difficulty Level: Difficult 

Elevation Gain: 795 Meters

Duration: 7.5 Hours

Return Distance: 9 Kms

As you hike through the Mount Stephen trilobite beds, you will get to overlook the “town of Field” in British Columbia. Railway workers in the 1880s used to call the town of Field the space of “stone bugs.” 

Further, during this trek, you will see trilobite fossils (now extinct and one of the earliest marine arthropods), and the view of the Kicking Horse River from the trail is amazing. 

Stanley Glacier

Stanley Glacier

Difficulty: Moderate

Return Distance: 10 km

Elevation Gain: 385 m

Duration: 7.5 hours

You will start hiking the Stanley Glacier in a fire-swept forest. The forest has lodgepole pine and wildflowers. Further, along your route, you will get to see a turquoise river, waterfalls, and the best view of the Stanley Glacier.

Moreover, you will get to see the fossils of hyolithids, sponges, trilobites, and sponges here, and they are from the Eldon Formation

Cambroraster, an ancient arthropod, and many other species are found in the quarry near the Stanley Glacier. 
Further, the shell of a Cambroraster looks like the Millennium Falcon spaceship in its shape.

Important Kootenay National Park Data At A Glance 

Before you start for the Kootenay National Park, don’t forget to have a look at the stats.

  • Location: British Columbia, Canada
  • Established: 21st April, 1920
  • Area: 1,406 km²
  • Highest Landscape: Deltaform Mountain (3,102 m)
  • Designation: UNESCO World Heritage Site in 1984 (As Part of the “Canadian Rocky Mountain Parks )
  • Visitor Center: Kootenay National Park Visitor Centre (7556 Main Street East; Radium Hot Springs, B.C.)
  • How to Reach: Via Highway 1 from Banff, AB or Calgary, AB/Via Highway 95 at Radium Hot Springs, BC

Also Read

  1.  The Burgess Shale Geoscience Foundation – Established in 1993, The Burgess Shale Geoscience Foundation is a non-profit organization. It works to educate people about geosciences. ↩︎

Share on Social Media

Sibashree is a travel, culture, and leisure writer who has been writing since the age of 12 and professionally since 2014. With more than a decade of travel writing experience and journeys across India and several parts of the world, she brings a deeply personal and thoughtful perspective to her work. A student of English Literature and Mass Communication, Sibashree has always viewed travel as more than movement — for her, it has been a way of understanding people, cultures, and herself. Her passion for spiritual exploration has also led her to many unusual and meaningful destinations over the years. Outside of writing, Sibashree enjoys watching European cinema, reading about global politics, and reflecting on the stories hidden within everyday places.

Leave a Reply

Your email address will not be published. Required fields are marked *

title-img Related

READ MORE car checks before a long journey

Essential Car Checks Before a Long Journey: Road Trip Ready

BY  Sibashree Jun 5, 2024

Are you planning to go on a long road trip? Then, you might want to start by checking the vehicle you are planning to travel in.  Having the right vehicle can travel long distances and can make your road journey so much easier.  Before you start your road trip, you must first check if your vehicle is in best of condition.  You must check that your tyres have adequate pressure. At the same time, you must look for the point to check the essential components of your vehicle. This can help you manage the long, tiresome road journey with ease. This prevents your car from breaking down and causing delays in your journey.  You also lose money when your car breaks down mid-way on your road trip due to repairs. Simple car checks with a microfibre towel and other cleaning supplies can make a world of difference.  When you have taken adequate preparation and care for your vehicle before your long road trip, you ensure safety. You want to reach your destination on time and safely, especially if you are travelling with your loved ones. his article provides the key inspections to perform on your vehicle before any long-distance trip. These key inspections during car checks before a long journey include examining fluid levels and assessing tyre condition. The inspections also include tread depth, and conducting general maintenance checks for a smooth road trip experience. Inspect and Maintain Fluids Here is how you inspect and maintain fluid changes before embarking on your long journey. These car checks before a long journey ensure you have a worry-free road trip. Check Engine Oil Level and Quality You can start by checking your engine oil level and quality before embarking on your long journey.  Try to locate the dipstick and remove it while the engine is cool. Then, wipe the dipstick with a rag or cloth before reinserting it. After a minute, again, pull out the dipstick to check the oil level. Your dipstick should have an oil level between the minimum and maximum marks for a quality ride. If the oil level is below the minimum, then you will need to top up the recommended oil type.  You will need to follow the vehicle's manual to top up with the recommended oil type and quantity.  Also, inspect the oil's color and consistency of your car and look for golden to light brown color.  These colors indicate your oil is fresh. As your engine oil gets older, it gets darker, signifying degraded oil quality that needs changing. Consider an oil change service to ensure your engine lubrication and performance is smooth during your trip. Check Coolant/Radiator Fluid Level and Condition One key car check before a long journey is to check the level and condition of the cooler and radiator fluid.  The trip may be quite long, and you will have to spend maximum time in your vehicle. In that case, you must ensure the coolant and radiators are working properly. See that they are in perfect condition.  Your coolant or antifreeze are the essential components in your car that control the temperature of your engine. It helps your car function properly during freezing temperatures. You can check your coolant when your car engine is cool. Just check the fluid level against the minimum and maximum markings, similar to an engine oil check. You can top up with a premixed coolant solution if you are traveling to a colder region. Just follow the manufacturer's recommended coolant type and mixture ratio.  Also, inspect the coolant's colour and clarity to ensure your coolant is fresh. Colours bright or light green, while being discoloured, rusty, or opaque, indicate degraded coolant.  So, you will need to consider a coolant flush service to replace the old fluid. This ensures efficient heat transfer during your journey. Check Brake Fluid Level and Condition Among essential car checks before a long journey, maintaining the proper brake fluid level in your car is crucial.  The proper conditions of the brake fluid levels ensure optimum performance of your brakes, which is essential in long journeys. Furthermore, you can check your vehicle's fluid levels to ensure the right condition. You could do this by locating the brake fluid reservoir. You can find this reservoir through the "BRAKE" symbol atop it. Then, you must look for the colour and clarity of the brake fluid.  Do you think your car's brake fluid level is between the minimum and maximum markings? It is an indicator that your brake fluid is in proper condition. You need to change the fluids of your brake and change them if they have turned dark in color.  Darker and opaque brake fluid indicates that the fluid is no longer in the best of conditions. It can hamper brake function.  So replace degraded brake fluid with fresh brake fluid specific to your vehicle's needs. This ensures smooth brake function when you are on long road trips. Check the Power Steering Fluid Level and Condition The next car check before a long journey is checking the power steering fluid and its condition. This ensures that the power steering is in top condition and that any mishaps can be avoided while making the right turn and parking the vehicle. Also, take a close look at the condition of the car's steering.  It is marked with a steering wheel symbol.  Now, look at the fluid levels. It should be between the minimum and maximum markings.  It's the right time to examine the colour of the fluid in the steering wheel. It helps you understand whether the steering wheel is in good condition.  If the fluid's color is reddish or pinkish, it means the steering fluid is in good condition and suitable for longer distances. On the other hand, dark or opaque colour indicates contaminated fluids. It's time to change the fluids.   You can also opt for a professional power fluid flush service to replace the old fluids and upgrade the functionality of the steering.  Check Transmission Fluid Level and Condition You must check the transmission fluid level to see if your vehicle has automatic transmissions.  At the same time, you must go through the vehicle's manual and then take the right reference from the vehicle's manual. This specific procedure of checking the transmission fluid level is effective.  However, you generally need to keep your car engine running and the transmission in a particular gear. Then, you need to check the fluid level and condition of the transmission. Once you have identified the dipstick, look at the level of fluid between the minimum and maximum markings.  At the same time, take a look at the colour and clarity. The colour of the transmission fluid, in optimum condition, should appear reddish or pinkish.  On the other hand, dark fluid colours may point fingers at the degradation or contamination.  If the fluid appears compromised, then you have to consider the decision to transmit fluid flush service to change the fluid immediately.   Remember, the smooth gear shifting during your trip determines the safety and ease of the driver on longer routes. Top Up or Flush Fluids as Needed After inspecting all the critical fluid levels and conditions, top up any low fluids with the recommended types and quantities. Follow the specifications in your vehicle's owner's manual. If you see that the fluids' colours are contaminated, it's an indicator of replacement. Hence, consider using a flush service to replace the old fluid to get the best performance. Please remember that considering the health and condition of the fluids in the vehicle ensures the most optimal vehicle performance.  At the same time, it is an indicator of the safety and longevity of your vehicle, especially during long journeys.  By addressing issues related to fluids in your vehicle you can reduce the risk of component failures or breakdowns. In addition, it can help you enjoy a smooth and reliable driving experience. Check and Replace Tires Consider the points related to tyre conditions, as they are the most important component related to your vehicle's mobility.  Inspect Tire Tread Depth and Condition Ensuring adequate tyre tread depth is the key to maintaining proper traction and safety on the road. It is helpful mainly on long routes.  The minimum depth, which is a must for all cars in Europe in general and the UK in particular, is 1.6mm across three-quarters of the tyre.  However, experts advise that tyres must be replaced when the tread depth reaches around 3mm. Conduct the 20p Test: First, insert a 20p coin into the main tread grooves of your tires. Can see the outer border of the coin? it indicates that the time to replace the tyre is approaching. Or you can say it has already reached the legal minimum tread depth. Secondly, check for Indicators of Tread Wear. Many tires have indicators of tread wear, such as raised bars or groove markings. However, the right approach signifies that the tire has reached the legal tread depth, and now it's time to replace it.  Thirdly, use a Tread Depth Gauge: Invest in a tread depth gauge. It is a specialized tool that measures the depth of individual tread grooves with the utmost accuracy. These gauges provide the most precise readings. Mover, they helps understand the right time for the tyre to be replaced. In addition to tread depth, check your tyre properly for any signs of damage, like bulges, cuts, or uneven wear patterns.  These issues can compromise the integrity of the tires and increase the risk of blowouts or other issues during your journey. Check Tire Air Pressure Properly inflated fuels enhance efficiency. Moreover, it enhances handling, stability, and, finally, overall safety.  You must make an effort to check tire pressure on a regular basis. It is a must, especially when you are embarking on a long journey. Tire Pressure Check Steps1. First, go through the manual of the vehicle's owner or the sticker on the driver's door jamb.  There, you will find the right recommendation on tyre pressure.2. Now, ake use of a tyre pressure gauge of the highest quality.  It helps to measure the pressure of the tyre when they are cold (after at least 3-4 hours of non-driving).3. Press the gauge firmly by removing the valve stem caps from the valve stem. It can help you to obtain the most accurate reading.4. Adjust the pressure of the tyre, either by inflating it with an air compressor or deflating it with a metal pin on the valve stem.5. After you have made the required adjustments with air pressure, recheck the tire pressure to ensure it's within the recommended range.6. Finally, don't forget to have a look and then adjust the tyre's pressure as well. Please keep in mind that maintaining the tire pressure is one of the steps to enhance safety.   Besides, it also contributes to better fuel efficiency and then extends the lifespan of your tyres. Rotate Tires if Due Tire rotation is one key maintenance practice that helps achieve even wear across all four tires.  Tires wear differently depending on their positions. The front tires wear faster because they have to ensure the effect of the additional steering and braking forces. By rotating the tires at the recommended intervals (typically every 5,000 to 8,000 miles or as specified in your vehicle's owner's manual), you can distribute the tire wear more evenly.  Ultimately, this helps attain the extended overall life of your tires and maintain optimal handling and stability. Replace Tires if Needed If your tires are excessively worn or have reached the legal minimum tread depth, it is a clear indication of replacement. This is a must before you start your long journey. Driving with bald or severely worn tires is detrimental and life-threatening. But also, if you are caught on the highways, it will result in hefty fines and potential license penalties. When replacing the old ones, you must consider investing in high-quality, reputable brands that offer superior performance and longer life.  Additionally, you can replace all four tires one at a time, which ensures persistent handling and traction. With these guidelines, you can regularly inspect and maintain your tires, ensuring a safe and enjoyable journey. Also you can easily bring down the risk of breakdowns or accidents caused by tire-related issues. Perform General Maintenance Checks Here are some important points that you need to consider when we discuss the general maintenance checks. Let's review them all here.  Check Brake Pads and Replace if Needed Take a thorough look at your vehicle's brakes, which are in the best of condition. It is one of the key points attached to a safe and secure journey.  So you must take a look at the brake pads and replace them, if necessary when you start a new journey. Here's what you need to do: Park your car on a level surface and engage the parking brake. Also, look at the brake pads through the wheel. You must be able to see them pressing against the brake disc. Thoroughly check the thickness of the material that makes the brake pad. Most manufacturers recommend replacing the brake pads when the friction material is reduced to approximately 3mm or less. Look for any signs of uneven wear and examine the brake pads' cracks closely. It's better to get new brake pads if they appear to be excessively worn out or damaged. Additionally, be attentive to any warning signs that may indicate worn brake pads, such as: A high-pitched screeching or grinding noise when applying the brakes could indicate that the brake pad wear indicator is making contact with the brake disc. Increased brake pedal travel or a "spongy" feeling when pressing the brake pedal which could signify that the brake pads need replacement. However, you may notice any of these warning signs or if the brake pad material is worn down to the recommended replacement level. Hence, it it's crucial to have the brake pads replaced before embarking on your long journey. Inspect and Replace Air Filters (Engine and Cabin) Clean air filters are essential for optimal engine performance and cabin air quality. Before your trip, inspect and replace both the engine air filter and the cabin air filter if necessary. Engine Air Filter: Locate the engine air filter housing, typically a rectangular box near the engine compartment. Open the housing and remove the air filter. Hold the filter up to a light source and check for excessive dirt or clogging. If the filter appears excessively dirty or clogged, replace it with a new one. Cabin Air Filter: Consult your owner's manual to locate the cabin air filter, which is usually behind the glove compartment or under the dashboard. Remove the old cabin air filter and inspect it for dirt, debris, or discolouration. If the cabin air filter appears dirty or clogged, replace it with a new one. Replacing both the engine and cabin air filters can improve fuel efficiency, engine performance, and cabin air quality. Alongside, it also ensures a more comfortable and enjoyable journey. Check Lights (Headlights, Taillights, Turn Signals) One of the most essential components that determines your vehicle's safety is the lights.  They are the ones who are responsible for providing peace of mind and the most comfortable journeys. So, before your trip, perform a thorough check of all exterior lights, including: Headlights: First, turn the vehicle light on. Then, take a walk around the vehicle. This technique ensures that the lights are working properly. Check for cracks in the lights. Also, look for moisture buildup or discoloration of the headlight lenses. Taillights: If you have a friend or an acquaintance, you could ask them to stand behind the vehicle. However, at this point, you could activate the brake pedal to check the lights' functioning properly. Also, check the reverse lights by engaging the reverse gear. Turn Signals: On the turn signals first. Then, take a walk around the vehicle. See if the front and rear turn signal lights are working properly. Is your vehicle's lights blinking rapidly?  The bulbs might have burnt out. Other Lights: Have you thoroughly checked the license plate lights, side marker lights, and other exterior lights of your car?  Replace the malfunctioning or burnt-out bulbs promptly.  It ensures optimal visibility and ultimate compliance with legal requirements. Inspect Belts, Hoses and Replace if Needed Belts and hoses in your vehicle ensure the proper functioning of the cooling system and vehicle's engine.  Hence, these components must be included in the inspection list. You must not compromise on safety and replace them if necessary. Belts: Pinpoint the serpentine belt(s) in your engine compartment. Look for a potential cracking, fraying, or excessive wearing of your belt. Apply moderate pressure to see the tension of the belt. Do it with your finger. The belt should deflect only a little, not much. Belts with wear and tear and improper tension must be replaced. Hoses: Inspect all coolant hoses, including the radiator hose, heater hoses, and any other visible hoses in the engine compartment. Look for signs of leakage, cracks, bulges, or any deterioration. Gently squeeze the hoses. It will enable you to check for any, internal degradation. Soft or spongy areas indicate the problem.  Replace the worn-out hoses immediately. Replacing the hoses and worn belts can stop costly repairs and sudden breakdowns during your journey. Ultimately, you can enjoy a reliable driving experience. Conclusion You have to check the vehicle from every aspect, especially the once-involved long journey. This can be helpful in making an enjoyable trip. Check your vehicle brakes, tires, and lights.  Also, give a look at the maintenance fluids and the critical components that determine the safety of the vehicle. If you are looking to make the long trip a memorable event, then you have to invest your time. Take a microscopic look at the aspects of the vehicle's conditions given above. The steps on the entire preparation on thorough checking of the vehicle can be tedious as it is time-consuming. But at the cost of it, you can ensure your vehicle is in the best of conditions before you embark on a long journey.  With these guidelines and looking at the potential issues in advance, you can enjoy a trip free from worry. This is because you know that your vehicle is ready to tackle the miles ahead with confidence and reliability.

READ MORE Use VPN

How To Use VPN To Book Flights & Hotels Cheaper And Save Money

BY  Arnab Jun 9, 2023

Avid travel enthusiasts know the importance of finding the best flight and hotel deals. Spending profusely on accommodation and flights means you will be left with less money for recreation, fun activities, delicious meals, and shopping. Have you considered using VPN for booking flights and hotels? No? This guide tells you how VPN is ideal for helping you find out the best flight and accommodation deals. You can use this travel hack on your next trip. Doesn’t Incognito Mode Work to Lower the Prices? You may see using incognito mode as the number one travel hack. But, in reality, it is only great for hiding your browsing history from other people on the device. You cannot change the IP address in this mode, which is what most hotel, flight, and travel booking sites track. Therefore, to be completely anonymous, you must use a VPN. How VPN Helps in Lowering Flights & Hotel Prices? Airline ticket and hotel booking prices greatly vary depending on where you are booking from. Travel and airlines booking websites use a dynamic pricing model, which means the prices change according to factors such as your purchase history, IP address, ZIP code, browsing habits, demand as well as supply, the Wi-Fi network you are connected to, etc. You can save hundreds of dollars on your next trip by using VPN. You can switch your IP address using a VPN to an altogether different location, which means the websites may appear at different prices according to that location. By changing the IP address, you can receive a cheaper price on hotels and flights if the new destination consists of lower demands and is a low-income country. Furthermore, you can even avail of special discounts for the country from which you are connecting. Discounts might be offered because of country-specific holidays or for seasonal reasons. The plus point is that you can also optimize VPN to search for lower prices on car rentals. Also, using a VPN is a straightforward process. Simply choose a provider and click VPN software download. Then, follow the instructions. More information on how you can use VPN to lower flights and hotel prices is given below. A Comprehensive Guide to Using a VPN Here’s a bit-by-bit guide to learning how to optimize VPN to get cheaper flights and hotel deals on your upcoming trip. Select a premium VPN provider Choosing a reliable and safe VPN provider is the most significant step in successfully executing this travel hack. However, since they are not built in the same manner, you must be careful during a VPN selection. An ideal VPN offers server locations in several other countries, ensuring fast and stable connections. Also, it offers 256-AES encryption and other security protocols like OpenVPN and Wizard Guard. Other standout features include a no-logs policy and an automatic kill switch. A kill switch is essential as it safeguards users’ information if the VPN connection accidentally drops. A no-logs policy is a clear indication that the VPN operator does not keep records of your activities online. So, there’s no record of the IP addresses used by you or the websites you browse to plan your trip. Another essential feature is knowledgeable and responsive customer support, ready to address all your needs 24/7. Position the VPN program After selecting a premium VPN provider, the initial step is downloading and installing the software on your gadget. After that, you can visit the website of your VPN provider and select the best strategy that meets your needs. Then, follow the download and installation instructions. Most VPN providers offer a 30-day trial period with a money-back guarantee. So, you can try the top VPNs before settling for one. Connect to a server of your chosen country Connecting to a server located in a country of your choice is the next step. This step intimidates a lot of people, but it is incredibly simple. Use your VPN to connect to the server country where you wish to visit just like you are browsing the web. For instance, if you wish to book a flight or hotel while appearing as if you are in the Philippines, you need a VPN to a server located in the Philippines. This will make it seem like you are in the Philippines while you are in another country. With most premium VPN services, all it takes is a single click to connect to a server. Then, you can start browsing and find those amazingly affordable deals for your trip. If you are wondering which is the most affordable country to change your VPN server location to, there’s no firm answer. It will depend on your destination and departure date. But some destinations that have proved to be lucky are India, Argentina, Peru, Mexico, Singapore, Australia, the Philippines, etc. So, you may have to play a little by changing locations and then see what lands you the cheapest hotel and flights. Search for flights and hotels Start searching for your flights or hotels after you have connected to your desired country’s server. First, you can try searching on a travel booking site, as this will provide you with multiple flight and hotel options to choose from. Then, try the airline or hotel website directly, as sometimes the prices may differ when you’re booking through a travel site and directly from an airline or hotel website. If you do not find a reasonable price, change the VPN’s country again. Compare prices before booking After you have searched for hotels or flights, you must compare the prices before booking. It would be best if you compared the prices with other travel booking websites to guarantee you get the best detail. If you find the most affordable deal, book it immediately, as the prices may quickly change. Change the location of the VPN to your home country If you have finished booking your flights and accommodation, change the VPN location back to your country. Or, you can continue browsing, choosing any server you want. The Bottom Line If you are up for saving money, try this travel hack for your next trip.  Read Also: Use These Resources When Planning A Big Trip Kiwi Flights Review – Login, Services, And Travel Experiences The Ultimate Guide To Finding Cheap Flights To Chicago Using Google Flights

READ MORE

Must Pack Business Travel Packing List Along With Tips

BY  Abdul Aziz Aug 24, 2023

As a frequent business traveler, you understand the significance of having an efficient suitcase. From traveling for short meetings to attending lengthy conferences, having essential items can make all the difference in how smoothly everything runs. This blog post offers a complete packing list for business travelers and includes helpful advice to ensure they're fully prepared for their professional adventure. So grab your suitcase and begin packing like an expert! How To Pack For A Business Trip Packing for a business trip requires careful thought to bring everything you need for meetings and presentations while maintaining an attractive appearance. Here is a step-by-step guide to packing efficiently: Make A Checklist: Draft an essential items list that covers clothing, toiletries, electronics, documents and any special items required for meetings. Check The Weather: Research the weather forecast for your destination during your trip. This will help you determine the appropriate clothing to pack. Choose Versatile Clothing: Opt for versatile pieces that can be mixed and matched to create different outfits. Stick to a color palette that coordinates well. Includes business attire like suits, blouses, dress shirts, slacks, skirts, and comfortable shoes. Formal Attire: If you have formal events or meetings, pack appropriate attire such as a formal suit, tie, and polished shoes. Accessories: When accessorizing an outfit, bring along accessories to enhance its style. Ties, scarves, belts, and jewelry can all add the perfect finishing touches and complete their style. Toiletries: When traveling abroad, travel-sized items such as toothbrushes, toothpaste, shampoo/conditioner/soap, deodorant, razor, and any medications required for your trip are essential. Electronics: When traveling for business, always pack all necessary equipment, such as your laptop, chargers, smartphone, and any essential accessories, such as power banks or headphones, that may be needed. Documents: Organize and pack essential documents such as your passport, identification card, boarding pass, travel itinerary, business cards, and meeting materials. If you need fresh business cards for networking, you can easily get a custom business card print with Adobe Express, ensuring a professional look. Additionally, digital tools can help convert text to speech, making it easier to review travel details or meeting notes on the go. Work Essentials: Include a notepad, pens, and any work-related materials needed for meetings or presentations. Shoes: Pack comfortable yet professional shoes that match your outfit. If you're attending formal events, pack appropriate formal shoes. Outerwear: Pack a versatile jacket or blazer that complements your business attire. Also, consider packing an umbrella in case of unexpected weather changes. Gym Gear: If you plan to work out during your trip, pack gym clothes, sneakers, and any necessary accessories. Chargers And Adapters: Ensure you have the right adapters and chargers for the electrical outlets at your destination. Packing Strategy: Use packing cubes or folders to organize clothing and minimize wrinkles. Roll clothes to save space and reduce wrinkles. Check Airline Restrictions: Familiarize yourself with your airline's baggage allowance and restrictions to avoid surprises at the airport. Travel-Size Laundry Supplies: When packing for travel, remember a small bottle of laundry detergent or stain remover in case any laundry needs arise. Medications: In terms of medications, be sure to pack sufficient supplies of medicines necessary for the duration of your journey. Personal Items: Include items like your wallet, keys, and regularly used items. Double-Check Before Leaving: Double-check your checklist to ensure you have everything essential. Pack Light: Try to pack efficiently and avoid overpacking. Focus on the essentials to make your trip more manageable. Business Travel Packing Tips And Tricks Embarking on a business expedition demands more than a suitcase; it requires a masterful symphony of strategy and practicality. These indispensable tips and ingenious hacks will be your guiding stars, ensuring your seamless and stylish journey. Strategic Selection Based On Itinerary: Craft your wardrobe like an artist's palette, with each garment chosen for a purpose. Analyze your Itinerary, from meetings to downtime, and curate outfits that effortlessly transition. Versatility is your ally. Hotel Amenities As Allies: Embrace the luxury of your chosen abode. Leverage hotel amenities like laundry services, hairdryers, and irons. Leave these bulky items behind, freeing up precious space in your luggage. The Art Of Packing Cubes: Unravel the magic of packing cubes. These versatile compartments can transform chaos into order, granting each item its enclave within the suitcase symphony. Prioritize Quality Luggage: Your suitcase is more than storage; it's a partner in your journey. Opt for quality and durability. A well-designed bag can safeguard your belongings and enhance your travel experience. Medicine And Essentials First: Begin your packing symphony by arranging essential medications and personal items. Build from this foundation, securing your well-being before diving into other necessities. Liquid Allowance Awareness: Navigate the labyrinth of liquid restrictions set by airlines. Prioritize travel-sized toiletries or consider solid alternatives to avoid spillage and streamline security checks. Virtual Documents And Backup: Liberate yourself from paper documents. Digitize your essentials – from travel itineraries to business documents. A cloud-based backup ensures access regardless of circumstances. Minimalist Shoe Strategy: Shoes are notorious space-hoggers. Choose a versatile pair for formal events and another for casual strolls. Your feet and luggage will thank you. Clever Clothing Coordination: Opt for a color scheme that allows mix-and-match possibilities. Each garment should complement others, maximizing outfit options while minimizing the number of pieces. Roll, Don't Fold: Tame clothing in bulk with the roll, not fold technique. This minimizes wrinkles and opens up additional space for more necessities. Elegance In Accessories: Elevate your outfit with carefully selected accessories. A statement tie, scarf, or jewelry can transform a simple attire into an impressive ensemble. Power Of Reusable Bags: Pack a collapsible tote bag. It's ideal for unexpected purchases, separating dirty laundry, or accommodating an impromptu excursion. Backup Charging Arsenal: Keep a dedicated charging kit with spare cables, a power bank, and adapters. You won't scramble for power amidst vital engagements. Emergency Clothing Stash: Unexpected spills or mishaps are inevitable. Pack a compact emergency clothing kit, including spare socks, a shirt, and an accessory to freshen up quickly. Tech Armor For Gadgets: Your device is vital. Shield them with protective cases and sleeves to ensure they reach your destination unscathed. Travel Insurance: Non-Negotiable: Protect your journey with comprehensive travel insurance. A safety net is invaluable, whether for trip cancellations or medical emergencies. Decanting For Delicate Liquids: Opt for small, leak-proof containers for cosmetics or toiletries prone to leakage. This ensures your essentials remain intact and your luggage spill-free. Tailored To Tees: Pack clothes that align with your style. Feeling confident in your attire can significantly impact your overall outlook and performance. Digital Detox Deliberation: Reflect on the necessity of every tech gadget. A temporary digital detox can foster mindfulness and enhance your experience. Return With Room: Leave room in your luggage for souvenirs or potential acquisitions. A well-planned packing strategy ensures your journey concludes with a sense of accomplishment. Travel with Travel-Wise! The leisure trend has rapidly gained popularity as an effective way to combine business travel with pleasure. An itinerary that provides both productive work time and leisure activities is critical to maximize the experience of any trip. Travel-Wise provides an intuitive trip planner that makes travel plans tailored to your preferences easier than ever, enabling you to combine productivity with enjoyment for any upcoming business trip seamlessly. With Travel-wise on your side, creating the ideal business trip is now more manageable than ever! Read Also: How To Save Money On A Trip To Abu Dhabi 7 Tips To Make The Most Out Of Your Trip To Gatlinburg