Kootenay National Park Or The Land Of Ice And Fire (Experiencing Nature’s Game Of Contrasts)

Sep 12, 2024

Last Updated on: Sep 1, 2025

Travel Guides

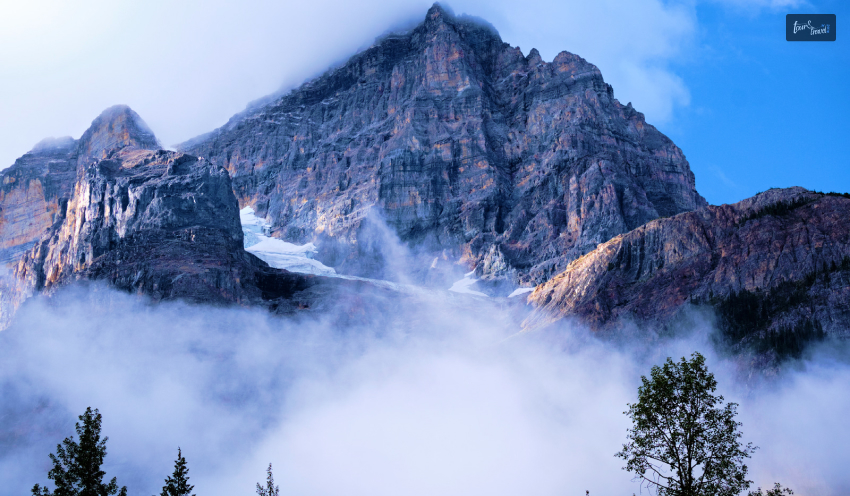
No, it’s not the battle of the Starks, Lannisters, and other houses of Westeros. In Canada lies Kootenay National Park, the actual land of ice and fire. The glacier-made canyons and valleys sing the song of the ice, while the hot springs and grasslands keep the “fire” element alive here. 

Also, the national park is a hub of ancient fossils, encouraging walks through the fossil trails. Moreover, you can take a scenic drive through the park, rich in Indigenous culture, history, architecture, and cultural landscape.  

So, do you want a virtual tour of this Canadian national park? THIS is where your journey begins!

THESE Are The Things You Will Do At Kootenay National Park

Things You Will Do At Kootenay National Park

With no cell service available in Kootenay National Park, you can get lost in the wilderness and explore the most fascinating landscape. However, being respectful to the wildlife is a must for this national park. This August, I came across disturbing news while doing my research on Kootenay National Park. 

I have been in touch with a local from Radium Hot Springs for quite some time now. He told me that a grizzly bear coming out of Kootenay National Park was almost struck by an SUV on 19th August 2024

This incident occurred on a busy highway in southeastern British Columbia, and fortunately, the Kia Sportage SUV made its way to the other side safely. Further, it was a lesson on why following the safety guidelines is crucial while driving in and around the Kootenay National Park.

On the major routes of Kootenay National Park, you will have to maintain a maximum speed of 56 mph.
However, on the minor routes, the highest driving speed limit will be 37 mph. 

Also, around one month before the incident, on 24th July 2024, there was a minor fire in the  Sinclair Canyon slopes (near Radium Hot Springs) of the national park. It was called the Berland Ridge wildfire. This fire was under control thanks to a helicopter bucketing water on it.

However, outside the park’s southern boundary, there was a blazing fire that was brought under control after pain-stricken efforts. 

So, these incidents show how mindful and cautious you need to be while taking part in the following activities. 

Hiking In Kootenay National Park (Hikers’ Favorite Trails)

Hiking In Kootenay National Park (Hikers’ Favorite Trails)

The hiking trails in Kootenay National Park are full of elevation gains and losses. Also, today, the national park has more than 70 hiking trails at easy, moderate, and difficult levels. 

However, I have curated a few hiking trails in the table below. After interacting with a couple of hikers, I found out that these are the ones most preferred.

Name of the Trail Difficulty LevelDistanceLocationHighlights
Marble CanyonEasy1.4 Km with 42 M Elevation Gain Located near Lake Louise, AlbertaHiking, snowshoeing, and running are the favorite activities here.
It is a pet-friendly and kid-friendly trail. 
It is a year-long hiking trail. 
Stanley Glacier Trail Difficult 10.9 Km with 607 M Elevation Gain Located near Lake Louise, AlbertaSnowshoeing, camping, and hiking are popular activities on this trail.
You can take your dog as a company.
June to September is the best time to hike this trail. 
Sinclair Canyon via Juniper Trail Moderate5.8 Km with 291 M Elevation GainIt is close to Radium Hot Springs in British Columbia.You will have to hike through a beautiful cedar fir forest on this trail.
The view of verdant Sinclair Canyon Falls and the Columbia Valley from this trail is breathtaking.
Marble Canyon to Paint PotsModerate2.9 Km with 110 M Elevation GainRadium Hot Springs (Marble Canyon Parking Lot  – 89 km east of Radium Hot Springs, Paint Pots – 86 Km east of Radium Hot Springs).Explore a good mix of mature and burnt forest throughout the trail.
Behold the Vermillion River running parallel to the trail. 
Floe LakeDifficult10.5 Km with 1,110 M Elevation Gain Near Radium Hot Springs (72 Km East)Backpacking and camping are popular activities on this trail. 
The trail leads to the Floe Lake Backcountry campground. 
This popular meadowy trail is known for its views of peaks, glaciers, and the beautiful Floe Lake. 
Numa CreeksModerate 6.3 Km with 385 M Elevation GainThe trailhead is near the Numa Falls, which is 80 Km east of the Radium Hot Springs. It is a forested trail.
The trail leads to heavy avalanche paths in the park. 

The hikers’ words about the trails in this national park are quite encouraging. Let’s find out what they are saying about the mesmerizing hiking trails. 

This is a beautiful, deep canyon hike. The trail crosses the canyon multiple times to view the ferocious Kootenay river below. Hiking boots aren’t necessary since it is a well-traveled trail.” – Deborah Turcotte on the Marble Canyon Trail 

The trail was mostly dry and in very good condition. No snow on the trail, just a few short wet spots. Trek up is mostly sheltered but a bit chilly and windy in the bowl so bring layers as the temp changes quickly when the sun is behind clouds. Still lots of snow in the bowl. Found one rock with fossils. There are a few small waterfalls on Stanley Peak. Lots of boulders at the base of the bowl to sit and enjoy a lunch and 360 views. An easy to moderate 3-4 hour hike with nice views of Stanley Peak, Storm Mtn, and the Kootenay Valley.” – Sue W on the Stanley Glacier Trail 

Kootenay National Park Camping 

Kootenay National Park Camping

Kootenay National Park is a wonderful place for frontcountry and backcountry camping. You can even live in oTENTiks and spend some unforgettable days in the park under the sky. 

Frontcountry Camping

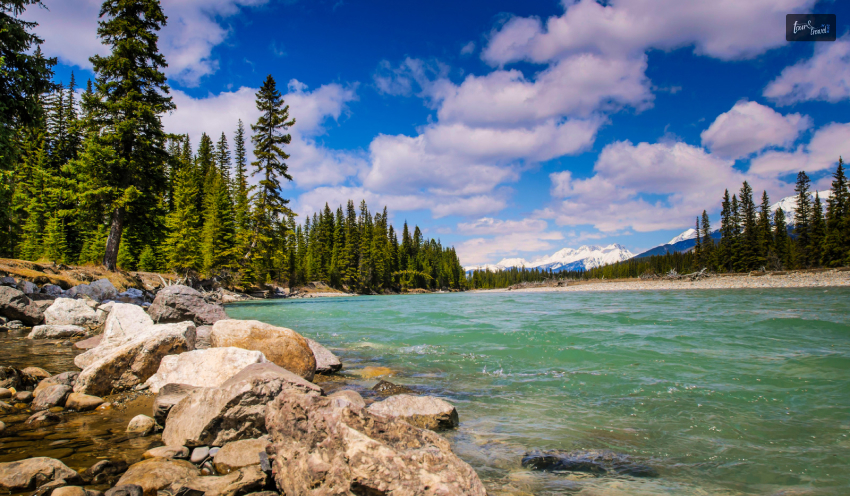
You can camp near the Vermillion, Kootenay, and Simpson rivers. Also, you can find some quiet spots near Radium Hot Springs village

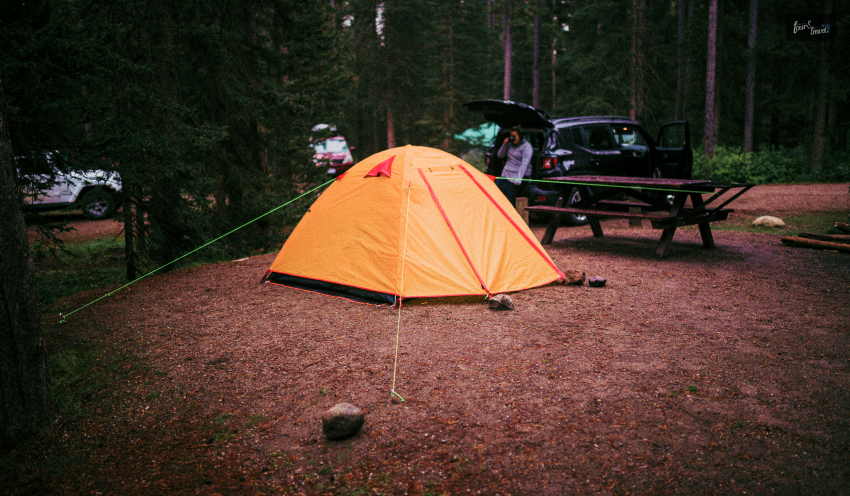
Summer is the best season for front-country camping in the national park. However, the sites remain crowded. So, you must go for a prior booking. 

Further, the daytime temperature in the national park remains between 16-23 degrees centigrade. Still, the temperature at night can drop below 0 degrees centigrade. So, abiding by the camping rules is crucial, and especially, be particular about the things you will have to carry.

Moreover, like camping in any national park, here also you have to ensure that you don’t leave any trace behind as you leave the site. 

Backcountry Camping

Backcountry camping and backpacking are the best ways to explore the wilderness of this Canadian national park. However, you must make a prior booking and carry a backcountry permit if you want to spend some days and nights amidst grizzly bears, black bears, wolves, elks, and cougars. 

Further, there are six backcountry camping grounds in the park, five of which are located along the  Rockwall Trail. The  Verdant Creek Trail has the sixth camping ground. 

Random camping is not allowed during summer, as protecting the landscape and vegetation is crucial. This restriction applies from May to October

However, in the winter months, you can do random camping in the designated areas. You will still need a permit for this. As I have mentioned, the Rockwall trail is the most prominent place for backcountry camping in the park. This site is also popular for the presence of various multi-day hiking trails. These trails are:

  • Honeymoon Pass and Verdant Creek
  • Tumbling – Floe
  • The Rockwall 
  • Tumbling – Helmet – Ochre Loop
  • Numa Creek
  • Helmet Creek and Falls
  • Tumbling Creek
  • Helmet – Ochre Junction

In the popular backcountry camping areas, the trails are maintained quite well. Further, there will be amenities like food storage cables, food lockers, picnic tables, and tent pads. 

Living in oTENTik

An oTENTik is a modern fusion of a cabin and a tent. In the park, you will find the oTENTik site on the Redstreak campground’s A loop

If you stay in an oTENTik, you will wake up amidst nature, and taking a bath at the hot springs will be the most rejuvenating experience. Then, you can explore the nearby hiking trails and gorge on traditional meals cooked in the campfire. 

Relaxing At Radium Hot Springs 

Relaxing At Radium Hot Springs

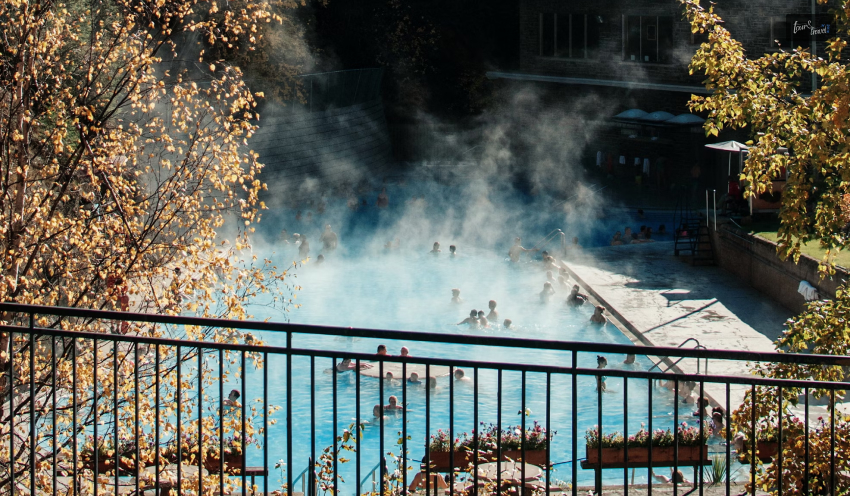
Beneath the colorful Sinclair Canyon mountains lie the most refreshing hot springs. Further, the mineral-rich water of the hot springs does not have any odor, and you can take a bath with your entire family. 

To reach the Radium Hot Springs, you must drive from Banff and Lake Louise for around 1.5 hours. Further, the journey is as interesting as the destination, as you will get to small turquoise lakes, falls, canyons, and bridges over rivers as you drive through the Kootenay National Park. Also, don’t forget to stop at the following locations to make the most of your journey.

  • Continental Divide (The line diving the Pacific and Atlantic watersheds)
  • Marble Canyon Hike
  • Paint Pots Trail
  • Numa Falls
  • Kootenay Valley Viewpoint (It is the place to get the most beautiful view of Vermilion and Mitchell Ranges.)
  •  Olive Lake Trail and Day-Use Area

However, the highlight of the journey, of course, is the Sinclair Canyon, where you will also find big horn sheep roaming. As you hike through the Juniper / Sinclair trail, you will get a “bird’s eye view” of Sinclair Canyon. 

Further, as you enter the Radium Hot Springs village, you will see an iconic steel horn sculpture. The “Bighorns Public Art Sculpture” was officially unveiled on 7th April 2021. Moreover, Clara Reinhardt, the mayor of Radium in 2021, said, 

We chose something that implies a sense of arrival to Radium, the Columbia Valley, and beyond. We captured the undeniable natural beauty of the curved horns through a Fibonacci spiral—the golden ratio in nature and art.

We wanted to create a piece of art that speaks to both the history and the future of bighorn sheep in Radium. We captured the undeniable natural beauty of the curved horns through a Fibonacci spiral—the golden ratio in nature and art.” 
– Adam Meikle (Artist of the Bighorns Public Art Sculpture)

Burgess Shale Fossil Hike 

The Burgess Shale Fossil Hike in the national park will give you access to Mount Stephen and Walcott Quarry. These are UNESCO Restricted Sites. Further, you will get to see some of the oldest fossils in the world here. 

However, in total, you have three routes to explore in the Burgess Shale Fossil Hike. Let’s discuss them in detail. 

Walcott Quarry

Starting Point: Takakkaw Falls

Difficulty Level: Difficult 

Elevation Gain: 825 Meters

Duration: 11 Hours

Return Distance: 22 Kms

Walcott Quarry is a classic example of a fossil hike. Also, the top view of the Emerald Lake from here is amazing. Further, you will find Burgess Shale creatures here, which were found in fossilized conditions at the mountaintop in the Yoho National Park. 


The Burgess Shale organisms lived 508 million years ago in a time period that Geologists call the Cambrian, which began at 541 Ma (million years ago) and ended by 485.4 Ma. The first fossil occurence of most animal lineages (at the phylum and class levels) occur in the Cambrian. As a result of this fact, and because the fossils are well preserved, Paleontologists studying the Burgess Shale fossils can deduce a great deal about the ancestory of animal lineages.”

The Burgess Shale fossils were discovered at the Walcott Quarry site in 1909 by Charles Doolittle Walcott. 1

Mount Stephen

Mount Stephen

Difficulty Level: Difficult 

Elevation Gain: 795 Meters

Duration: 7.5 Hours

Return Distance: 9 Kms

As you hike through the Mount Stephen trilobite beds, you will get to overlook the “town of Field” in British Columbia. Railway workers in the 1880s used to call the town of Field the space of “stone bugs.” 

Further, during this trek, you will see trilobite fossils (now extinct and one of the earliest marine arthropods), and the view of the Kicking Horse River from the trail is amazing. 

Stanley Glacier

Stanley Glacier

Difficulty: Moderate

Return Distance: 10 km

Elevation Gain: 385 m

Duration: 7.5 hours

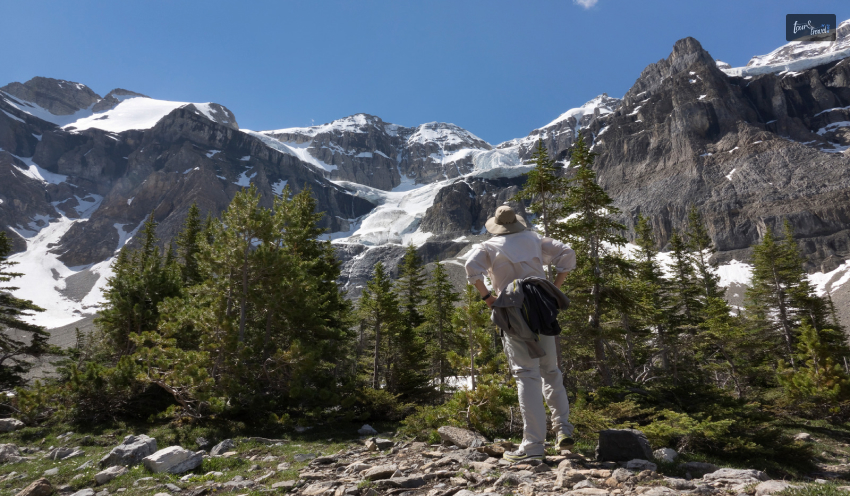
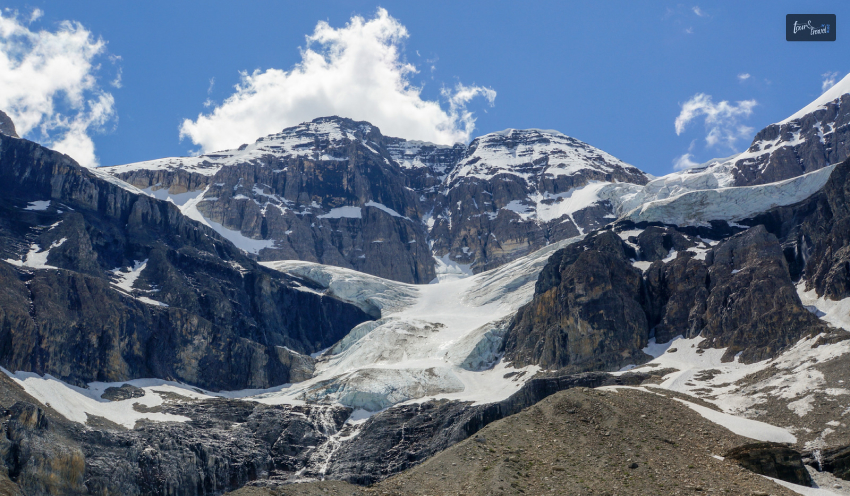
You will start hiking the Stanley Glacier in a fire-swept forest. The forest has lodgepole pine and wildflowers. Further, along your route, you will get to see a turquoise river, waterfalls, and the best view of the Stanley Glacier.

Moreover, you will get to see the fossils of hyolithids, sponges, trilobites, and sponges here, and they are from the Eldon Formation

Cambroraster, an ancient arthropod, and many other species are found in the quarry near the Stanley Glacier. 
Further, the shell of a Cambroraster looks like the Millennium Falcon spaceship in its shape.

Important Kootenay National Park Data At A Glance 

Before you start for the Kootenay National Park, don’t forget to have a look at the stats.

  • Location: British Columbia, Canada
  • Established: 21st April, 1920
  • Area: 1,406 km²
  • Highest Landscape: Deltaform Mountain (3,102 m)
  • Designation: UNESCO World Heritage Site in 1984 (As Part of the “Canadian Rocky Mountain Parks )
  • Visitor Center: Kootenay National Park Visitor Centre (7556 Main Street East; Radium Hot Springs, B.C.)
  • How to Reach: Via Highway 1 from Banff, AB or Calgary, AB/Via Highway 95 at Radium Hot Springs, BC

Also Read

  1.  The Burgess Shale Geoscience Foundation – Established in 1993, The Burgess Shale Geoscience Foundation is a non-profit organization. It works to educate people about geosciences. ↩︎

Share on Social Media

Meet Sibashree Bhattacharya, a travel enthusiast who has a decade-long experience in transcending virtual barriers with her words! Her deep love for travel is apparent from her travel escapades to the mountain, often taking her readers on a journey, her words acting as Portkey! Fun fact: Sibashree loves to dive deep into the history of the places she is about to visit, making her travels even more wholesome. If you were wondering how her articles are not short of time travel, this answers it!

Leave a Reply

Your email address will not be published. Required fields are marked *

title-img Related

READ MORE Rocky Mountain National Park Trails

Rocky Mountain National Park Trails: A Complete Hiking Guide

BY  Sibashree Nov 11, 2024

It’s already fall, and the Rocky Mountain National Park Trails are adorned with the Aspen leaves’ glistening gold. Also, the dark green of the pine trees in the backdrop complements the dark red and orange of Alpine shrubs. Hiking through the park trails is the best way to explore the beauty of the USA National Park to the fullest. Further, the hiking trails come with varying difficulty levels. Some are also great for enjoying a walk with your furry friends.  Moreover, the trails are varied in their destinations. Some trails in the park will take you to beautiful waterfalls, and some will end at breathtaking summits and immersive lakes. Do you also want to hike and experience the park at its best? Here is a brief overview.  Hiking Through The Rocky Mountain National Park Trails: A Rocky Mountain National Park Guide  Rocky Mountain National Park has over 350 miles of hiking trails. Further, you will find a delightful activity in the park irrespective of your abilities.  However, you will need proper traction devices and a Rocky Mountain National Park map to remain safe during hiking. Moreover, you will need proper footwear with a treaded sole as the routes can be snowy and slippery.  With proper safety measures, it’s time for you to hit the waterfalls, summit, and lake trails.  Best Rocky Mountain National Park Trails To Waterfalls Rocky Mountain National Park is home to 31 waterfalls. Do you want to witness water cascading through rocky terrains? Hit any of the following trails in the park.  1. Granite Falls Trail  Trail Head: Green Mountain Trailhead parking area Trail Distance: 5.2 miles one-way Difficulty Level: Moderate You will pass through lush green meadows while hiking to Granite Falls Trail. However, the terrain is marshy here, and you must be careful as you explore the path.  Further, lodgepole pine, aspen, Engelmann spruce, and subalpine fir greet you throughout the trail. The elevation gain is 1,046 feet in the trail, and you must proceed carefully.  2. Chasm Falls Trail Trail Head: Old Fall River Road or Winter Closure Gate Trail Distance: 2 Miles (Round Trip) Difficulty Level: Moderate The Chasm Falls Trail will take you to a cascading beauty. With an elevation of just 640 feet, this trail is moderate to hike. Further, if the hiking trail from Old Fall River Road is closed, you can take the trail from Winter Closure Gate. Then, you will have to walk or bike for 2.2 Miles.  3. Adam Falls Trail  Trail Head: East Inlet Trail Distance: 0.6 Miles round trip Difficulty Level: Easy With an elevation of just 79 feet, the Adam Falls Trail is one of the easiest ones in the park. Adam Falls is small but excels in its quaint beauty.  If you want to be more adventurous, you can walk past the waterfall. A beautiful glacier valley will emerge before your eyes, and you will love the exuberance of wildflowers.  4. Cascade Falls Trail Trail Head: North Inlet Trail Distance: 3.4 Miles one-way Difficulty Level: Moderate to Strenuous (Expect changes in the difficulty level throughout the route) You will love the gurgling sound of the North Inlet stream water, and as it thrashes the pure granite stone, it’s a beauty to behold. This waterfall is 100 feet tall and forms a cascade, as the name rightly suggests.  You will meet the most adorable marmots As you continue your hike and pass through the open meadow. They are frequent to the winding river through the lodgepole pine forest. Further, you can stop here to fish river trout and brown trout.  Best Rocky Mountain National Park Trails To Lakes Great National Park has 156 lakes. Some of these lakes have dense trout populations. Further, areas near these lakes are great for spotting wildlife. So, let’s know about the lake hiking trails that lead us to these beautiful lakes.  1. Bear Lake Trail Trail Head: Bear Lake Trail Distance: 0.7 Mile Difficulty Level: Easy With mountains of the Continental Divide in the backdrop, Bear Lake Trail is one of the best locations in the park for watching the sunset. You will love the beauty of Hallett Peak, Continental Divide, and an Alpine lake here. Bear Lake is the epicenter of many hiking trails. You can start your hike to Alberta Falls, Flattop Mountain, Emerald Lake, and more from here.  2. Sprague Lake Loop Trail Trail Head:  Estes Park Trail Distance: 0.7 Miles round trip Difficulty Level: Easy Sprague Lake Loop Trail is the most accessible trail in the park. Wheelchairs are allowed here. So, patients with disabilities can also explore this trail.  You can stop at the benches and many lookouts throughout the trail to reflect on the beauty of nature. Further, you can see the mountain peaks along the Continental Divide.  Moreover, Sprague Lake is an amazing destination for spotting wildlife.  3. Mills Lake Trail Trail Head: Glacier Gorge Trail Distance - 5 Miles round trip Difficulty Level: Moderate to Strenuous  With a 700-foot elevation, the Mills Lake trail will take you through a gorge carved by glaciers, streambeds, and waterfalls.  The beautiful Mills Lake gets its name from Enos Mills, the founder of the Rocky Mountain National Park. Further, if you want to continue your hiking pursuit, you can walk to Black Lake, and that will be an additional 1.7-mile hike.  4. Gem Lake Trail Trail Head: Lumpy Ridge Trailhead Trail Distance: 3.4 Miles round trip Difficulty Level: Moderate to Strenuous  The expansive field of granite domes houses the Gem Lake. It is indeed a hidden gem and one of the biggest attractions in the area, along with Lumpy Ridge.  Gem Lake is shallow, and it has water of melted snow and rainfall.  5. Dream Lake Trail Trail Head: Bear Lake Trail Distance: 2.2 miles round trip Difficulty Level: Moderate to Strenuous  You must go for a steady ascent from Bear Lake to reach Dream Lake. The trail comes with an elevation change of 830 feet. Don’t miss the following highlights of this hiking route.  Nymph Lake Aspen Groves Ponderosa Pine The Nymph Lake looks most beautiful in summer, with pond lilies in full bloom. Further, you can use Dream Lake as the base and trek to the amazing Emerald Lake or Lake Haiyaha.  Best Rocky Mountain National Park Trails To Summits Despite the elevation gain of around 1000-3000 feet, the hiking trails to summits are very popular among visitors. The wonderful vistas from the mountain tops make the effort worth it.  1. Deer Mountain Trail Trail Head: Deer Ridge Jct Trail Distance: 3.1 miles one-way Difficulty Level: Moderate to Strenuous  The Deer Mountain comes with an elevation of 10,006 feet. Further, as you hike and reach the summit, you will enjoy the most beautiful view of Upper Beaver Meadows, Longs Peak, Estes Park, and Moraine Park. Be careful about the weather forecast before you start your journey on the trail.  2. Flattop Mountain Trail Trail Head: Bear Lake Trailhead Trail Distance: 8.8 miles round trip  Difficulty Level: Moderate to Strenuous  The trail from Bear Lake is the best way to reach Flattop Mountain, and this route is one of the trickiest ones in the park. However, if you cannot access the trail from Bear Lake, you can try the route to Flattop via Tonahutu Trail. Further, as you reach the Flattop Mountain summit, you will enjoy the beauty of Hallet Peak, Dream Lake, and Tyndall Glacier.  3. Chasm Lake And Longs Peak Trail Trail Head: Old Fall River Road or Winter Closure Gate Trail Distance: 4.2 miles one-way Difficulty Level: Strenuous  Chasm Lake, just beneath the Longs Peak, offers a spectacular view. You will come across Tundra meadows and Alpine tundra through the trail. Further, animals like pikas and marmots are common here.  As you reach the Chasm Junction and find an outhouse, you can hike along a wall to see Columbine Falls and Peacock Pool Gorge. After this point, the terrain becomes rocky, and you will need cairns to reach Cirque, the lake's location.  Mistakes You Must Avoid When Hiking Through Trails Of Rocky Mountain National Park Making a rushed trip to the Rocky Mountain National Park is the biggest mistake you can make. You can face severe issues like dehydration and acute mountain sickness here if you don’t allow your body to acclimatize or work on your physical and mental endurance. So, carry enough water or hydrating solutions and start your training under proper guidance at least one month before your Rocky Mountain hike.  Further, don’t think that you will always make it to the trails in your usual track pants or leggings. You have to wear hiking clothes as on many days, you will have no escape from the afternoon rain.  Rocky Mountains National Park At A Glance  Location: Colorado, USA Established: 26 January 1915 Highest Point: Longs Peak Area: 415 Square Miles How to Reach: Take a drive or shuttle from the Denver International Airport.  Also read Why Include Whale Watching In Your LA Itinerary. Traveling On A Budget: Tips For Affordable Adventures. From Cocktails To Kickflips: Must-Try Activities In San Diego.

READ MORE travel ideas

Budget-Friendly Travel Ideas in Australia You Did Not Know About

BY  Mashum Feb 26, 2019

The cost-of-living caps the fantastic landscape and culture that Australia has to offer and explore.  For many tourists and Australians, it is much cheaper to travel abroad and explore other countries. However, traveling around Australia is incredible and can cost you minimal amounts if you are aware of the budget-friendly travel ideas in Australia.  So, before you plan a trip to Australia, learn the art of sticking to a budget. Budget-Friendly Travel Ideas in Australia The cost of traveling should never be a constraint if you want to explore the beautiful land of Australia. Let’s head straight to the most practical and budget-friendly travel ideas in Australia. 1. Stay In Hostels This tip is more relevant to Australia even though it applies to all parts of the world. Most hotels in Australia are costly, mainly if you are operating on a budget. If you wish to have a less luxurious sleep, you will save a lot of money.  2. Camp You can even try camping if you want to be more adventurous. It will help you save a lot of money. The cheapest way to explore Australia is by getting around and camping at different campsites.  There are several free camping spots around Australia, although there will be areas where you will need to pay for your campsite. Even then, the fees may be as little as $5 per person. You will get access to showers and toilets, which aren’t always available on the open road. 3. Prepare Your Meals Even if you decide to eat in a fast-food joint in Australia, it will not give you much change from $10. Besides, you can bring havoc to your body by substituting main meals with fries and burgers.  Make sure that you are getting food that will support healthy living. You can achieve this objective by preparing your food. It is much cheaper than relying on ready-made food.  Most parks in Australia provide public BBQ facilities free of charge. All you need to do is buy some veggies or meat from the local supermarket and get some grilling.  If grilling every day is not your thing, make good use of the available kitchens in the hostels. Use them to prepare your meals. You will realize a significant difference in your bank account.  4. Purchase Your Booze Bottle-O Bottle-O refers to the liquor shop or bottle shop. This store sells alcohol at a lower price than the ordinary bars. You will get affordable liquor deals in this place. Most budget drinkers like to go for the Goon, which is a cheap boxed wine.  5. Use A Private Vehicle to Commute  In Australia, you must get around by car if you want to explore the country. You can do it either by purchasing a vehicle temporarily or hiring a car for your travels. However, these two options can be slightly expensive.  You can use comparison sites such as Car Rental Buddy or Car Hire Choice to find and compare vehicles. Alternatively, you can opt for campervan hire from Camper Champ. You will not fail to get a cheap deal when it comes to commuting in Australia. 6. Travel On Greyhound Bus Most backpackers like to use this option as their preferred means of transport. It is among the cheapest modes of transportation in Australia.  You can get a travel pass for approximately $500. It will allow you to hop off and on as many times as you would like. It is an excellent way to view the fantastic scenery of Australia. The good news is that you will not spend so much on these journeys.  7. Participate In Homestays or Couch Surfing Accommodation in Australia is expensive, even for backpackers. So, if you want to explore Australia cheaply, take advantage of staying at homestays or even Couch-surfing in people’s homes. It will help you get free accommodation in exchange for cultural learning and community interaction. 8. Purchase A Campervan This option is best if you are traveling as a group. It will help you to spit the gas among yourselves. Driving via Australia is exciting, but you can still make your trip more enjoyable.  One way is to purchase a campervan in Cairns and then drive down to Melbourne or the other way around. Even though driving is more expensive than flying, you will stop anywhere you wish. Besides, if you have a big campervan, you can still use it for accommodation.  9. Have Fun by Participating in Active Hobbies Australians (particularly in the north) are known for their outdoor lifestyle. Therefore, you can join them and have a lot of fun outdoors. You will not spend lots of money when you pursue your hobby.  You can try scuba diving, snorkeling, skiing, bungy jumping, and a lot more, thanks to its vivid landscape and coexistence of various geologies. 10. Spend Most of Your Time with Nature Australia has so much when it comes to natural beauty, and this offers a free experience. You can get into the botanical gardens in Melbourne for free. Also, you will not pay anything to visit the beach.  You can also hike via the Royal National Park or Sydney’s Blue Mountains. You will not spend even a single cent when interacting with nature.  11. Hiking  There are several scenic walking trails in Australia that you can explore. Do you want to hike along the Australian coastline and admire the beaches? Or do you want to hike up mountains to get a view of the Australian landscape? You will be able to find an abundance of exciting hiking trails for your adventure. You will get excellent hiking opportunities at no cost in Australia.  12. Check out the Galleries and Museums Unlike the rest of the world, the galleries and museums of Australia are free to get in. Therefore, if you are tired of the outdoor experience and want to get a feel for the culture, museums are your best bet.  The best place to start is the National Gallery of Victoria. You can also try out the Art Gallery of New South Wales. Both locations will give you fantastic opportunities to tour Australia at budget-friendly rates.  13. Cycling In some cities, there are cycling initiatives that you can take advantage of while visiting Australia. In Brisbane, it is possible to cycle for up to half an hour for free using their city hire bike scheme. There are several cycling trails that you can also explore around the city. 14. Swimming At the Beach  Australia boasts thousands of kilometers of coastline where you can go swimming and enjoy yourself at the beach. Whether you decide to stop in a major city like the Gold Coast or head to a quieter town such as Airlie Beach, there will be an option for you. 15. Fishing  If you can get yourself some fishing rods, you can go fishing at a local creek, dam, river, or beach. 16. Barbecues One thing that is unanimous with all Australians is their love for an excellent outdoor grill. Having a barbecue meal with your travel group is also one of the most budget-friendly travel ideas in Australia. You can head to the supermarket and buy a loaf of bread and sausages for a tonner. You will enjoy a barbecue in the company of friends. Conclusion  These are just a few of the budget-friendly travel ideas in Australia. You don’t have to break the bank to have a good time. There are plenty of things to see and do in Australia. You must be open to the different experiences the region has to offer. From Kangaroo Island to the Barossa Valley, Australia has scenic beauty that you can soak in without burning a hole in your pocket. So, make a budget and stick to it to have a happy and hearty journey! Read Also : Travel Tips to Help You Out In Asia 4 Tips for First-time Travelers to Bali

READ MORE Ethiopian restaurants

Top 7 Ethiopian Restaurants In Los Angeles – Complete Guide

BY  Barsha Feb 8, 2023

So you are craving some Ethiopian food. And you are thinking about checking out some Ethiopian restaurants near you. But there the problem arises - if you have never tried out Ethiopian cuisine, then this could prove to be a sad experience if you choose the wrong restaurant. This is exactly why we decided to checkout some of the best Ethiopian restaurants in Los Angeles. And guess what? It was a great day, and we had a fantastic time tasting delicious Ethiopian food. Simply scroll down and checkout all the top places to eat Ethiopian food in Los Angeles! Top 7 Ethiopian Restaurants In Los Angeles - Complete Guide Here we are, ready with the top Ethiopian restaurants in Los Angeles, and you are stills searching for ‘Ethiopian food Los Angeles’ on search engines like you were looking for Peruvian food recently? Stop right now! Instead, just save this article for now and scroll down to find out which are the best places to eat Ethiopian food - so chill out and scroll down! 1. Messob Ethiopian Restaurant: Image Source: images.squarespace-cdn.com Messob is literally LA’s answer to the ‘little Ethiopia restaurant’ search query. The place has great reviews both from their usual guests and even from people who have visited the place to try out Ethiopian cuisine for the first time. Plus, we loved the food here! Review By Mitch Kling: Please, please come here. Getahun is so sweet and welcoming, please don’t let your inexperience scare you. You will be welcomed wholeheartedly with smiles and amazing service. The love and pride this restaurant has for its food and culture are mouth-wateringly palpable in every bite. I am so happy with everything we had. Get the honey wine made in-house. Try some Ethiopian beers. 2. Rosalind's: Image Source: go.sodere.com One of our favorite Ethiopian restaurants in Los Angeles has to be Rosalind’s - the food is delicious, and more importantly, it’s a spacious restaurant. Since we were a group of people, the place was perfect for us - what a beautiful group-friendly restaurant, just like the ones in Vegas! Review By Jackie Martinez: This was my first time trying Ethiopian food, and I loved it! My partner and I got the vegan goodness combo (which comes with collard greens, green beans, and lentils) and one beef dish. It was the perfect shareable portion. The Injera was super tasty and had a nice yeasty sourdough flavor that paired nicely with the meat and veggies. I loved how aromatic, spicy, and tangy the food was. Lots of amazing and bold flavors. 3. Rahel Ethiopian Vegan Cuisine: Image Source: images.ctfassets.net Delicious Ethiopian stews, spongy bread, and tasty vegan combos - that’s exactly the kind of thing we were looking for when we came across Rahel Ethiopian Vegan Cuisine. If you are looking for an Ethiopia restaurant that serves vegan food, then this is your option. Review By Gaya D: If you like delicious healthy food, Rahel cannot be missed! I've been coming here for 8 years, and the quality has remained consistently high. The food is always amazingly tasty and lovingly prepared. The restaurant employees are kind and attentive. I always look forward to my visits here. Make sure to get a platter to share, so you can try everything! 4. Lucy Ethiopian restaurant: Image Source: d1ralsognjng37.cloudfront.net Another one of our favorite Ethiopian restaurants in Los Angeles has to be Lucy Ethiopian restaurant! It’s a simple restaurant serving great Ethiopian food - so delicious and packed with flavors. In short, we loved this restaurant! Review By Linda Torres: Came here for a date night. Unfortunately, they were an hour from closing, but they still served us. They gave us our food in to-go plates conveniently. The tea was delicious, we had the veggie platter and a side of lamb in a red sauce. Wish I had taken pictures and written down the names of the dishes. It was delicious!!! We’ll be returning for the ritual coffee!! Can’t wait!! 5. Buna Ethiopian Restaurant & Market: Image Source: lh3.googleusercontent.com Please don’t type in ‘restaurants Ethiopian’ and end up getting confused about all the search results you will get. Instead, just go to Buna Ethiopian Restaurant & Market. You will find everything here - from imported groceries to traditional Ethiopian food, which you won’t be able to regret. Review By Ash: Found out about this place on Reddit— it’s a small, modest little restaurant in the back of a little Ethiopian store that sells spices and carvings, etc. The food was exceptional— I got the garlic salted trout, and my husband got the vegetable platter. So much flavor and these plates were mild in terms of spicy heat. Would 100% return back. 6. Azla Ethiopian Eatery: Image Source: images.squarespace-cdn.com Come on, you really don’t need to search ‘Ethiopia restaurant near me’ - just go to Azla Ethiopian Eatery, especially if you are in search of vegan options. Also, the restaurant has crazy reviews when you think about it - and we agree too, the food’s great! Review By Jonathan Neal: OMG, I just ate here for the first time. So delicious. I got potato curry, pea curry, sweet potatoes, and rice, all for $10! It’s love at first bite for me! Healthy and tasty and vegan and good-sized portions. Did I say that I’m in love? Wow! I love discoveries like this. I just finished dinner, and I already can’t wait to come back ? 7. Lalibela: Image Source: d1ralsognjng37.cloudfront.net Honestly, we loved Lalibela! Lalibela is one of those Ethiopian restaurants in LA that serve great food, and more importantly, they have this coffee ceremony which is so cool. We are definitely going back to this crazy restaurant - you should check this place out as well! Review By Brandy Duong: My first time trying Ethiopian food. My cousin is a vegetarian, so this was a wonderful meal, but since I mainly tried the veggie utopia, I wished I had ordered a meatier option. The veggie utopia was aesthetically pleasing and also quite tasty, especially their lentils and carrot potatoes. The street gets busy, and parking can be quite hard to find. And It’s A Wrap! And that’s a wrap on all the top Ethiopian places to eat in Los Angeles. So instead of typing out search queries like ‘Ethiopian restaurants near me’ on Google, just save this article. And trust us, you won’t regret it! Also, one last thing before we bid adieu for now - don’t forget to share your thoughts and experiences about these Ethiopian restaurants in the comments below. Read Also: Top 12 Perdido Key Restaurants – Reviews & Budget 10 Best Restaurants On Sanibel Island – Tour And Travel Guide Best Asian Restaurants In Florida – A Must Visit For Food Lovers