


 Related
Top Thredbo Accommodation Options For Every Type Of Traveller
BY Sibashree Jan 23, 2025
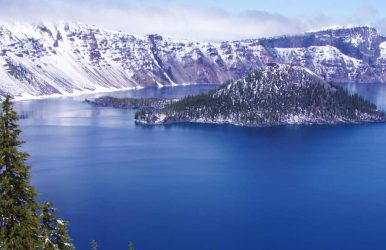
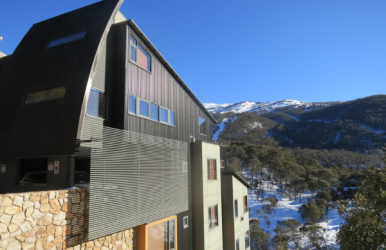
Accommodation in Thredbo ranges from stunning nature escapes to cozy townhouses, state-of-the-art chalets, and convenient apartment suites. No matter what type of traveller you are, there is an option suited to you and how you like to holiday. Keep reading to discover the top Thredbo accommodation options for your next escape. Top Thredbo Accommodation Options A year-round Alpine destination and a premier snow resort in Australia, Thredbo is also the best ski resort in Australia. It has earned the laurel of the best ski resort in Australia for the seventh year at the World Ski Awards. Further, Thredbo has the only Alpine Gondola in Australia. So, choosing the top Thredbo accommodation for your vacation in Australia will open avenues for a lot of snowy fun. Moreover, the top Thredbo accommodation options are diverse, and you can choose from the following options. Bango Townhouse With a range of size options spanning from 2 to 3 bedrooms homes that sleep up to 7 people, various bathroom choices, and parking spots, a townhouse is an idyllic choice for those looking to enjoy all the excitement of Thredbo’s nature and alpine scene with a touch of up-scale cosmopolitan luxury. The mountain-style townhouse accommodation is immersed in everything Thredbo offers, with elevated interiors and comfortable finishes for a restful stay. Close to the alpine village and enhanced with all the amenities you want and need for a perfect holiday, the Bango Townhouse selection is your ultimate vacation destination. Pilot Chalets For a premium, luxurious experience perfectly embodying that dreamy alpine lifestyle so many people journey to Thredbo for, the Pilot Chalet is the one for you. With modern fixtures, lavish amenities, and a front-row view of the striking scenery surrounding you, this is the quintessential example of an elevated travel experience. For those who wish to spend their time on the slopes or in nature, you are right close to every action-packed attraction, and for individuals looking to curl up by their own private fireplace in restful luxury, there’s no better place than the Pilot 1 Chalet. Lhotsky Apartments A sleek and modern selection for travelers of all types, Lhotsky Apartments packs all the comfort and convenience you need for an enjoyable alpine adventure. With a selection of sizing and amenity options, these cozy apartments are located close to the buzz of the village. Still, they are secluded enough for a tranquil experience that allows you to unwind and escape as you should on your hard-earned holiday. A short walk to boutiques, restaurants, and spas, Lhotsky is also closely located to snow public transport options, so you are never far from your next unforgettable experience. Crackenback Castle What could be more comforting and inviting than a freestanding chalet that embodies all the vintage charm of a time gone by? With a picturesque mountain view from every vantage point, you will be saturated in scenic beauty and fine interior design for a perfect vacation. Enhanced with modern amenities and little, luxurious touches, this is a superior choice for those looking to discover Thredbo in maximum style. Relax into the natural surroundings, stroll to the village or head to the snow and get your endorphins rushing – Crackenback Castle is your home for the full Thredbo experience. Explore these top Thredbo accommodation options and more with the expert partners at Alpine Property Collective. River Inn Thredbo River Inn Thredbo is ideal for beginners to mountaineering. It is located at 4 Friday Drive and opposite the Gunbarrel Chairlift. With all the amenities, the River Inn Thredbo will be your ideal haven after a tiring day on the slopes. It offers the following facilities. Ski Room Boot Drying Room Sauna Laundry Restaurant Gin Bar Guest Lounge with Fireplace Beer Garden River Inn Thredbo is the top Thredbo accommodation for traveling with your family or a large group. With various configurations, the rooms at River Inn Thredbo can accommodate two to six people. You can even opt for interconnected rooms. Thredbo Alpine Hotel Are you looking for accommodation near the Thredbo Mountain Bike Park? Do you want to live close to the best mountains in Thredbo? Thredbo Alpine Hotel is the best option for you. It exudes the vibe of a rustic log cabin and is at the Thredbo Village's epicenter. Further, it has the Alpine Bar where you can attend the best live music events. Again, Thredbo's best shops and eateries are close to this accommodation. Moreover, the rooms in Thredbo Alpine Hotel are cozy and ideal for couples. The attentive and knowledgeable staff here also make the experience more enjoyable. In addition, the snack bars and lounge at this top Thredbo accommodation are delightful. The open-plan fireplace is another attraction here, radiating warmth even on the coldest days of the year. The Denman Hotel, Thredbo The Denman Hotel has a relaxed vibe, and in its architecture or vibe, it is more contemporary than other top Thredbo accommodation options. Furthermore, it is an ideal staying place for large groups and families. The lounge bar and the onsite restaurant here are the most happening. So, even the guests in other Thredbo accommodations also gather here and have a good time. If you want some privacy, you can opt for the en suites here. Moreover, every room has a balcony from where you can enjoy the vistas of the surrounding valley and mountains. The rooms have facilities for making tea and coffee and also have bar fridges. Bernti’s Mountain Inn Bernti’s Mountain Inn is more sophisticated than most top Thredbo accommodation options. It houses 30 suites and each of them offers the ultimate luxurious experience. The suites vary in configurations and are ideal for 2-7 guests. So, it does not matter whether you are on a couple holiday and traveling with your family/friends. Bernti’s Mountain Inn can accommodate all. Further, the best thing about Bernti’s Mountain Inn is the ambiance. You will love the soft and warm light radiating from the street-style lanterns. In addition, the Zach’s Grill restaurant here ensures the topmost dining experience in all of Thredbo. Are you tired of a long day at the skiing slopes? It’s time for some rejuvenation at Bernti’s Day Spa. Also read Top 10 Most Popular Paraguay Food That You Must Try. Top 13+ Famous Wonders Of India That You Must Visit. Top Tips For Motorbike Rental In Phuket – A Guide To Exploring The Island On Two Wheels.