


 Related
The Perfect Getaway: Discovering The Closest Beach To Disney World!
BY sagnika Sep 12, 2023
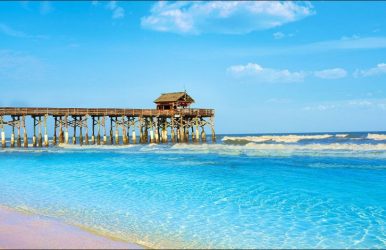
Are you planning to visit Orlando? Did you know that the closest beach to Disney World is a captivating place to stay and do Disney rounds? I get it! If you book your stay in Orlando, you will not have to drive an hour from Cocoa Beach! But guys, wouldn't you want your vacation to be more interesting and filled with fun activities instead of just hustling Orlando's city air? Read this article to learn about Cocoa Beach, the closest to Disney World. I will also list the places you can stay and the things you can do while living in Cocoa Beach. It will make you happy along with your kids, considering only some adults enjoy the parks at Disney World and the Universals. The Perfect Getaway: Discovering The Closest Beach To Disney World! So, you ask what beach is closest to Disney World? Cocoa Beach it is! My idea of staying at Cocoa Beach and traveling to Disney World for your children is a small sacrifice, especially with the host of activities I will suggest in this article. If your children are adventurous and a little bigger than 5 years old, I am sure they will be hooked on the water sports available in Cocoa Beach. Don't forget the Kennedy Space Center if you have a space junkie of a kid! What can be better than giving them a treat of watching a rocket launch? So read more about how you can make the trip more memorable for your kid and you! The closest beach to Walt Disney World is the one we are planning around. Closest Beach To Disney World: Cocoa Beach Cocoa Beach is the closest beach to Disney World, located south of the Kennedy Space Center and Cape Canaveral Air Force Station. It is, therefore, a perfect location to watch rocket launches while enjoying the delicious food at the Cocoa Beach Pier! Cocoa Beach is well known for its surfing sports shops, such as the Cocoa Beach Surf Company and the Ron Jons. There are also several parks close to the beach where you can go with your kids or if you are just a nature lover! The water is shallow enough to wade in, with perfect opportunities to surf! The waves are calm and consistent, and it is one of the safest places worldwide to surf. The beach is accessible daily from 9 a.m. to 4 p.m. for visitors! The weather at the beach is a bit humid! Take advantage of the beauty of the water at Cocoa Beach that glows after the sun goes down due to the brightest dinoflagellate bio-luminescence. The algae are the brightest from July to October, so as visitors, you cannot miss this beauty. The comb jellies glow during November, so you are in for a show when the sun goes down! Things To Do At Cocoa Beach Cocoa Beach is one of the best places to visit if you are in Florida or have plans to go to Disney World. The town has much to offer and is a perfect destination for day trips, water-related activities, family-based activities, and attractions. I will share some of my favorite spots to visit and activities to try out in Cocoa Beach. All amenities are available, such as restrooms, a dog park, a picnic area, service animals, showers, parking, and others. Considering Cocoa beach near Disney World will offer you a variety of activities to perform. Read the article to learn about the best spots and activities you must try if you are staying or visiting Cocoa Beach! 1. Cocoa Beach Pier It is one of Cocoa Beach's iconic places, perfect for tourists, especially with the wide variety of beach activities, shops, and restaurants. From Sunday to Thursday, the pier is open from 11 a.m. to 9 p.m., while on Friday and Saturday, it is open from 11 a.m. to 10 p.m. There is no entrance fee! However, you will need to pay at the shops or the surf stores! There are shops where you can buy clothing items, decor, or toiletries. Further, inside the park, you can go surfing and play volleyball. 2. Ron Jon Surf Shop & Surf School You must visit this beach lifestyle store for anything related to surfing. Ron Jon Surf Shop is a popular surf school that is quite iconic and is one of the best places to visit in Cocoa Beach. There are surfboards, swimsuits, and tourist merchandise across the whole shop! You can participate in surf lessons and camps here too! 3. Historic Cocoa Village This village is pretty close to the beach, and do not get confused with the Barrier Island here! It is some 10 miles inland. When you reach the village, you will realize what a visual treat it is, considering there are colorful buildings across the village, some of the best restaurants, and unique shops. 4. NASA's Kennedy Space Center You have a kid with you who is a space geek; you have to go to the Kennedy Space Center. Even if your child is unaware, this is a good way to introduce them to the concept of space and watch them fall in love. The attraction is home to educational and historical exhibits like the Space Shuttle Atlantis. There is also an IMAX theater for visual content, which is interactive and impressive. Human spaceflight and rocket launches are done here, considering it is a primary site. Check the KSC's launch schedule when you plan to visit Cocoa Beach. You might catch a rocket launch, a cool site for adults and children. Note: Not getting your hopes high or anything for the rocket launches considering the launches get rescheduled or scratched constantly. 5. Eat At A Beach Bar Planning a day at the beach, and you are not going to try out bar food or, for that matter, seafood? Cocoa Beach is among the best places to check out the Floridian beach bars. The most popular bar joint on Cocoa Beach is 'Coconut'! With a menu and full bar, it provides the best location, especially just a step away from Cocoa Beach. If you want a more laid-back vibe, go to the Beach Shack just next door. You will also get live music in the shack. Another significant beach bar is Rikki Tiki Tavern, where you can enjoy the water because it is directly situated on the beach. You also cannot miss the seafood offered in popular restaurants such as Squid Lips, The Fat Snook, Fat Kahuna's, and Florida's Seafood Bar & Grill. Some of the best food dishes are pompano, snook, or speckled sea trout. 6. Take A Kayak Tour You have to take a Kayak tour to enjoy the Banana River Lagoon inside the barrier island, Cocoa Beach. It is a vibrant ecosystem, and the adventure you will have is one of the best, especially with the sightings of dolphins and manatees. 7. Lori Wilson Park Visit Lori Wilson Park, with calm, shallow water and open beach space. The park has free parking with a picturesque beach so that you can click beautiful pictures. There are nature trails, forested areas, and boardwalks inside the park! What can be better than inside the park? There is a dog park where you can take your pets for a walk. 8. Brevard Zoo And Brevard Musuem Of History & Natural Science The zoo has almost 900 animals across this 75-acre area, and they are collected worldwide. The place has hands-on experiences where you can kayak along the expedition Africa exhibit, feed birds and giraffes, and zipline across the trees. Many moments are captured as exhibits across the Brevard Museum of History & Natural Sciences. You can observe Wind-over archaeological artifacts that belong to prehistoric times. The museum is also situated across 22 acres of natural trails. Places To Stay At Cocoa Beach You need to book accommodation when you visit these places and participate in diverse, fun activities. Further, when booking the places, you must evaluate your budget and the accessibility of different places from the place of accommodation. Wakulla Suites The accommodation at Wakulla Suites is all two-bedroom suites with a king-size bed, a double bed, and a twin bed. It is a perfect place to stay, especially if this is a family-based vacation. There is also a living room in the suites. Families can use a full-size refrigerator in the kitchen and an oven at their convenience. There is free Wi-Fi, and the gas BBQ grill is open for guests. There are also options for beach volleyball, a shuffleboard court, a game room, a pool, and a kid's pool. You can also rent beach chairs, kayaks, boogie boards, and umbrellas from the hotel. One suite for a night costs around $267 and is rated 4 out of 5 on TripAdvisor based on 1537 reviews. In case of a supply of toiletries, you can buy diapers or suntan lotions from the online gift store. Royal Mansions Resort The hotel is the most convenient accommodation if you are visiting Florida or, even better, Cocoa Beach, especially because of the mix of convenience, comfort, and value. The Royal Mansions Resort offers a friendly setting where travelers like you can enjoy diverse amenities. The rooms in the hotel offer free Wi-Fi, a refrigerator, air conditioning, and a flat-screen TV. Barbecue facilities and pools are available for you while staying at the resort, along with free parking. If you are craving barbecue dishes, you can book this resort as it is close to Gator's Dockside, Smokehouse Foods, and Graham's Smokehouse. You will be charged $133 for a room in the inn. Take advantage of the exploration tower, which is located pretty close to the resort, considering it is one of the most popular landmarks of Cape Canaveral. Homewood Suites By Hilton The hotel Homewood Suites By Hilton has rooms with theme park features. You can access free Wi-Fi, a fitness center that you can access, free hot breakfast as a part of your booking, and a heated outdoor pool accessed all year round. You can visit the Orange County Convention Center. It is close to the hotel so you can also see it! The hotel has a kitchenette, suites, a coffee machine, and a 50-inch flat-screen cable TV! You need to pay $25 for a room per night, and it is centrally located with theme parks. According to Tripadvisor, the hotel has been rated 4.5 out of 5. A dining area and a sofa bed accompany every room in the hotel. Apart from that, the toiletries are free while each room of the suite has a private bathroom. If you want to visit the theme parks, there is a complimentary shuttle. Courtyard By Marriott Cocoa Beach The hotel by Marriott Cocoa Beach has almost 156 contemporary and spacious rooms, each offering beautiful river and ocean views and a private balcony. You can access free Wi-Fi apart from the streaming digital services accessed from every room on the HD TV. The hotel recently opened a new restaurant called the Courtyard Cabana Bar at the poolside. You can also access evening room service offering healthy food and beverages from their in-house restaurant, The Bistro, which is quite refreshing! Based on the 1331 reviews on Tripadvisor, the hotel has been rated as 4.5 out of 5, charging $275 per room per night! Surf Studio Resort Cocoa Beach Are you planning a romantic getaway with surf, sand, and water? Well, book your rooms at Surf Studio Resort Cocoa Beach! The air-conditioned rooms of the hotel have a kitchenette along with a refrigerator. You will also get free Wi-Fi in this hotel as well. A picnic area, beach chairs, and sun umbrellas are also available in the Surf Studio Resort Cocoa Beach. There is also a pool on the property, which you can enjoy all year! There are also free parking services. The price of the rooms in the hotel charges $205 on a per-day basis. If you are a Chinese food lover, there is a restaurant called Yen Yen Chinese Restaurant close to the resort. Where Do We Stop? You will be pretty busy with all the activities, including surfing, fishing, swimming, wildlife, food, and others! With children, you have to visit the Disney World theme parks and the Universal Studio. What other plans might you have when you visit Orlando considering the beach area is one of the best for fun? You can also access playgrounds and parks, which will help you keep your children in line. Comment below to let us know about your favorite place in Cocoa Beach or the one spot out of the list that you will visit! Read Also: Check Out These Beaches That Are Closest To Tennessee’s Knoxville! Top Fun Things To Do In Nashville TN For Couples – Fun Guide Top 10 Beaches In Gloucester In Massachusetts – Travel Guide Closest Beach To Nashville – Top 10 Beaches You Can Visit