


 Related

Combining Travel Themes with Your Event Invitations
BY Barsha Apr 24, 2024
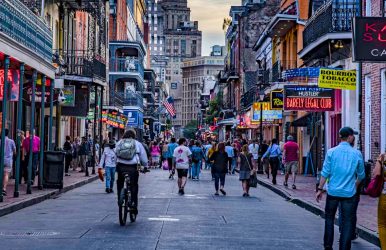
It is a world that prizes unique experiences and personalized touches. Hence, the art of invitation design has evolved from mere information dissemination to an immersive experience that sets the tone for the event itself. Moreover, among the myriad of themes, travel-inspired invitations have emerged as a delightful way to captivate and excite guests. This blog explores how to infuse your event invitations with the essence of travel. It will transform them into gateways to the adventures that lie ahead. Color Me Curious: Using Color To Set The Scene Colors have the power to evoke emotions and set the scene before a word is even read. Bright blues and greens can whisk your guests away to the Caribbean, while earthy tones might suggest an African safari. However, the use of color in your invitation design is a subtle yet powerful way to convey your theme and excite the imagination. Navigating Through Cultural Sensitivities While exploring international themes, it's important to explore cultural representations with respect and sensitivity. Conduct thorough research to ensure that you use the right themes and imagery to honor the cultures from which you're drawing inspiration. Also, try to have a respectful approach throughout the invitation. It will elevate your invitation and the entire experience of the guests in your event. The Passport To Joy: Crafting Your Theme When you embark on the journey to create a travel theme, the initial step will be to select a specific theme. This particular theme should resonate with the entire spirit of your event. It could range from a tropical paradise to an old-world European city. Moreover, it could also be a safari adventure. The event theme will guide the design and overall look and feel of the invitation. It is crucial to select one that speaks volumes about the personality of your event. However, for those interested in incorporating passport elements into their invitations, you might want to browse passport wedding invitations for inspiration. Exploring examples can provide valuable insight into how to effectively intertwine the essence of adventure and the anticipation of shared joy in your design. DIY Vs. Professional Design: Finding The Right Balance The decision to craft your invitations by hand or enlist the help of a professional designer hinges on several factors. It includes your budget, time, and skill level. However, a hybrid approach can offer the best of both worlds, allowing for a personalized touch while ensuring a polished and professional look. Regardless of the route you choose, the focus should always be on creating an invitation that embodies the essence and excitement of travel. Enhancing Connections Through Social Media Adding a social media component to your travel-themed invitations can increase your guests' excitement and anticipation. Additionally, create a hashtag for your event to allow guests to share their preparations and journey experiences. It's a modern way to connect attendees and build up the event's atmosphere even before it starts. Mapping Out the Details When it comes to creating a standout invitation, the devil is truly in the details. For a travel-themed invitation, consider incorporating elements like vintage stamps, map motifs, and even boarding pass or passport formats. However, these details enhance the thematic experience. The travel theme invitation also serves as a teaser for the exciting journey you're inviting your guests to embark upon. Interactive Elements: Moving Beyond Paper Consider incorporating interactive elements into your invitations, such as QR codes that lead to a personalized video message, the event itinerary, or even a virtual destination tour. This heightens the invitation's impact and blends traditional and digital mediums to create a truly engaging experience. Emphasizing Sustainability In the spirit of responsible travel, reflect on the sustainability of your event invitations. Opt for recycled materials or digital invitations to minimize environmental impact. Moreover, communicating a commitment to sustainability can also resonate with guests who share these values. It's like adding an additional layer of significance to your event. A World Of Words: Language And Tone The language and tone of your invitation are equally important in transporting your guests. A playful, adventurous tone might suit a tropical getaway theme, while a formal, script could align with a European adventure. However, the key is to align your wording with your overall theme. It's all about creating a cohesive and immersive experience right from the envelope. Different Types Of Color Themes In this section, we study the different travel themes for the sake of developing further clarity on the subject. Travel Blog Themes The travel blog themes are designed to serve the requirements of the bloggers so that they share their experiences. Moreover, it has some of the most common features like photo galleries, maps, and itinerary planning. This is one of your major travel blog themes. Travel Agency Theme Another travel theme that is mentioned is the travel agency theme. They specifically serve the travel agencies' requirements that showcase the different packages and other services associated with the main offering. Adventure Travel Themes Another major theme that caters to the diverse requirements of stakeholders, especially travel agencies, is the adventure travel theme. With the help of it, they present different packages and services to prospective tourists. Moreover, the theme integrates itself with booking systems and payment gateways. Adventure Travel Themes Another variant that is extensively mentioned in this section is adventure travel themes. These themes serve mainly the requirements of adventure travelers who always seek the most unique experience. Moreover, the theme emphasizes expeditions, outdoor activities, and exploration. Tour Booking Themes The last variant in this list of travel themes is the booking theme. It serves the requirements of businesses that have dedicated tour packages. The variant suits guided tours and excursions. It also includes key features like itinerary management and online bookings. What Makes The Event Invitations A High Success? As discussed above, it is the age of customization, and the stakeholders are leaving no stone unturned to make the invitations ad a real success. However, the invitations must have creative elements. Therefore, in this section, we discuss some of the tips on making the travel theme invitations a grand success. Let's understand it all here for your clarity and convenience. Personalized Greeting When you are sending greetings, besides banking on creativity, you also have to look towards personalization. Of course, you might have all the elements of sophistry; your invitation or email looks the same. Therefore, you have to add an extra amount of care to your email invitations. Ensure that your recipient understands that you really care about them. Value Proposition: Front And Centre Another possible suggestion to make your events special is focusing on the value proposition. Yes, you got it right. The attendees will definitely look out for key information like the time and date of the event. Therefore, you must select the middle portion for the most valuable information. Putting it briefly, you have to keep the value of your invitation at the center. What Makes The Event Different This is the age of choices and while running your own business, you have to showcase, that your event is way different than the others. This could be one of the effective travel theme strategies. Firstly, you can express a sense of urgency through your invitation. However, one of the great ways to create a sense of urgency is by using phrases like, don't miss the opportunity; the countdown begins, and the event is selling out swiftly. Moreover,, you could offer incentives to attendees for attending your events. Also, you could use killer photos of previous events in your invitation to evoke attraction. This is how you could create cohesive communication regarding your brand. Wrap-Up Travel-themed event invitations offer a unique opportunity to begin your event's story with creativity, excitement, and a touch of the exotic. By carefully selecting your theme, paying attention to detail, and approaching the design process with an open and respectful mindset. Also, you can create invitations that are not just pieces of paper but passports to an unforgettable experience. Remember, the journey begins with the invitation—make it a memorable one. Read Also: How To Save Money On A Trip To Abu Dhabi 7 Tips To Make The Most Out Of Your Trip To Gatlinburg How To Use Videos To Drive Conversions In Travel Business