
You Cannot Miss These Unique Things To Do In Indiana | Explore The Hidden Gems To Visit

Dec 17, 2024

Last Updated on: Jul 3, 2025

Travel Blog

Indiana, the home of pop-king Micheal Jackson, is also a popular tourist attraction. Exuding a midwestern charm, Indiana stands out with its diverse landscape and rich cultural history. In addition, Indiana has many manmade and natural marvels, making it ideal for tourists of all types. 

The best time to visit Indiana is between May to August. However, depending on your choices and preferences, Indiana offers year-round attractions. For example, during September and October, you will notice the fall colors filling the environment.

Again, winter in Indiana is the most happening, with the festive spirit of Christmas and New Year in the air. 

Nevertheless, irrespective of the season you visit Indiana, the following hidden gems will never disappoint you. 

Unique Things To Do In Indiana | Hidden Gems You Must Visit In The City Of Michael Jackson

Unique Things To Do In Indiana  Hidden Gems You Must Visit In The City Of Michael Jackson

Indiana is well-connected to the rest of the world and other states, thanks to the Lafayette and  Indianapolis airports. Further,  because of IndyGo, the largest public transport provider in Indiana, you can easily explore the city even without a car.

Moreover, you can control the budget of a trip to Indiana by changing your travel style. The most budget-friendly tour packages in Indiana start from around $212 for each person, inclusive of flight charges and hotel tariffs.

Nevertheless, if you are looking for the best things to do in Indiana, you can visit the following hidden gems in the city.

1. Visit The Benjamin Harrison Presidential Site

Address: 1230 N Delaware St, Indianapolis, IN 46202

Contact No: +1 317-631-1888

Hours Open: Monday – Friday (10 AM to 3:30 PM), Saturday (10 AM to 3 PM), Sunday (12 PM to 3 PM)

“Let those who would die for the flag on the field of battle give a better proof of their patriotism and a higher glory to their country by promoting fraternity and justice.” 

  • Benjamin Harrison

The Benjamin Harrison Presidential Site was once home to this great soul and the 23rd president of America. Every day, the site conducts guided tours throwing on the life of Benjamin Harrison and the entire Harrison family.

Furthermore, it has the best collection of art, sculptures, photographs, and ornaments. It’s time for you to explore all of these. 

2. Explore The Michael Jackson Family Home

Address: 2300 Jackson St, Gary, IN 46407

Though you cannot enter the Michael Jackson Family Home, a drive by this house is nothing short of a thrill for the Michael Jackson fans.

When you are in Indiana, you must stop here for a moment and feel like “he has been here.” 

3. Visit The Studebaker National Museum

Address: 201 Chapin St, South Bend, IN 46601

Contact Number: +1 574-235-9714

Monday – Saturday: 10 AM to 5 PM, Sunday: 12 PM to 5 PM

The  Studebaker National Museum is a great place if you want to know about the local history, especially the automotive progress. You will find around 120 vehicles here, demonstrating the evolution of the transportation process.

You will especially love the U.S. presidential carriages collection here. The collection here is the largest, including the car of Abraham Lincoln in which he was assassinated on his route to the Ford Theatre. 

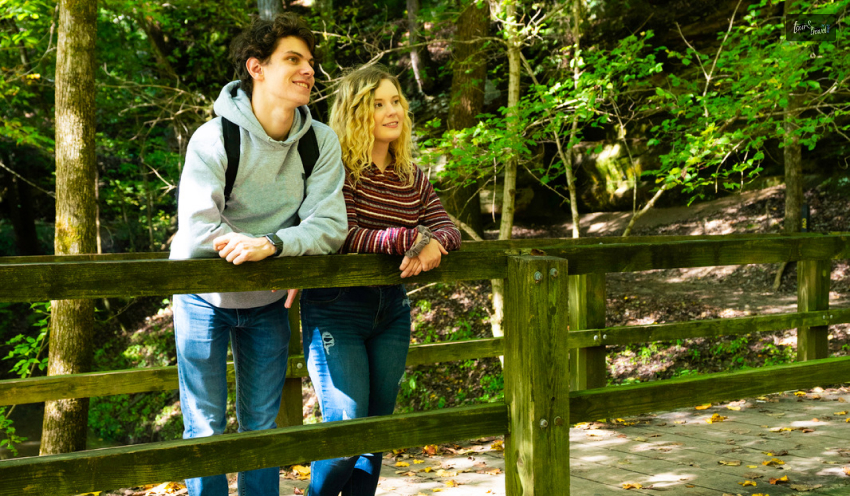
4. Spend Some Time In Nature At The Turkey Run State Park

Spend Some Time In Nature At The Turkey Run State Park

Address: 8121 Park Road, Marshall, IN 47859

Contact Number: +1 765-597-2635

Hours Open: 7 AM to 11 PM

The Turkey Run State Park is famous for its geological wonders, and hiking is the best way to explore the place. You will find here sandstone ravines, views of Sugar Creek, and old forests. 

Furthermore, it has Colonel Richard Lieber’s Cabin as a tribute to his contribution to the state park system of the city. 

Moreover, when at the Turkey Run State Park, you cannot miss a visit to the Nature Center. It has the most informative displays. Further, the exhibits here are interactive, and you will love the interpretive naturalist programs. 

Also, if you are a wildlife lover, you can enjoy the best views from the wildlife-watching room. 

5. Visit The Marengo Cave

Location: 400 East State Road 64, Marengo, IN 47140

Contact Number: +1 812-365-2705

Hours Open: 9 AM to 5 PM

The Marengo Cave in Indiana is a national US heritage site. It is also the most-visited natural attraction in Indiana. Exploring the Marengo Cave is one of the most unique things to do in Indiana. You have to pass through the cave to learn about its natural environment.

Further, you can consider spending a night in the cave. The best part about this activity is that you have to camp underground. 

The “Night In Cave” packages at the Marengo Cave range between $60-95. Camping and glamping are two other fun activities at Marengo Cave. The time for camping here is between 3 PM to 10 AM. 

Camping is allowed here throughout the year, and you will only need to pay $30 (excluding taxes) for the same. 

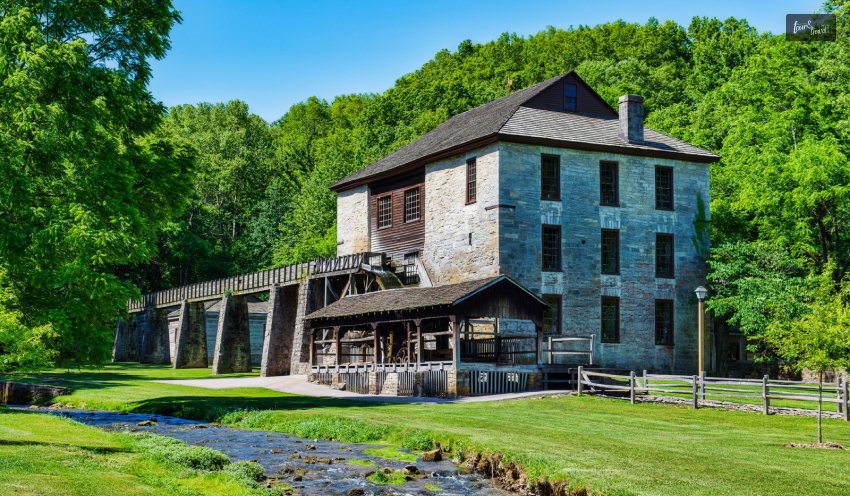
6. Experience Nature At Spring Mill State Park

Experience Nature At Spring Mill State Park

Address: 3333 IN-60 E, Mitchell, IN 47446

Contact Number:  +1 812-849-3534

The Spring Mill State Park offers you endless opportunities for recreation. You can take part in the following activities here.

  • Mountain biking
  • Boating
  • Swimming
  • Cave tours
  • Hiking

However, to explore Spring Mill State Park, you need to spend a day or two here. Go camping in a tent or RV. The park also has many lodging options. 

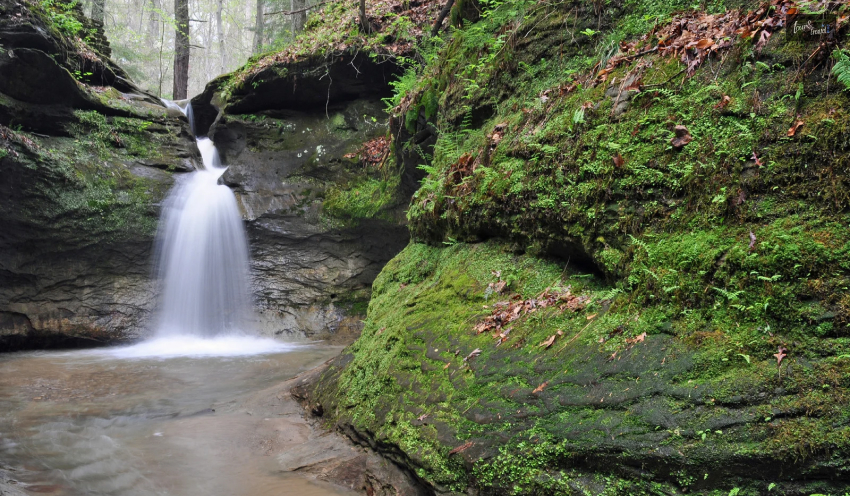
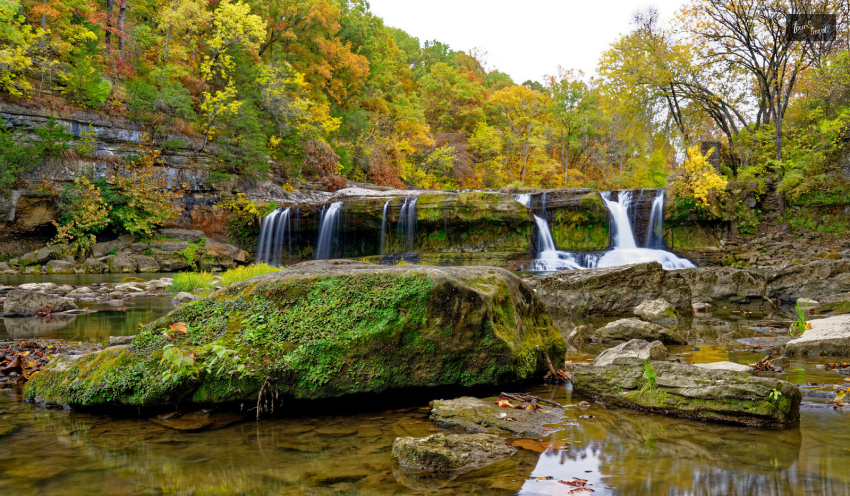
7. Enjoy The Tranquility Of Beautiful Upper Cataract Falls | Unique Things To Do In Indiana 

Enjoy The Tranquility Of Beautiful Upper Cataract Falls  Unique Things To Do In Indiana

Location: Lieber State Recreation Area

Height: Around 45 Feet

The Upper Cataract Fall and the Lower Cataract Fall make the Cataract Falls the most voluminous one in Indiana. These waterfalls on Mill Creek are located at a distance of 1 mile from each other. 

Further, these mighty waterfalls come from the pre-glacial bedrock ridges. These ridges are now beneath the lake sediments from the Illinoisan glacial period. 

Moreover, visiting the Upper Cataract Falls is like being transported to the 1700s. Tribes like Potawatomi, Miami or Native Americans used to reside here. 

Other places of attraction near the Upper Cataract Falls are Cagles Mill Lake and Aquatic Center. You can even have some outdoor fun at the hiking trails and volleyball courts. 

Also read

Share on Social Media

Sibashree is a travel, culture, and leisure writer who has been writing since the age of 12 and professionally since 2014. With more than a decade of travel writing experience and journeys across India and several parts of the world, she brings a deeply personal and thoughtful perspective to her work. A student of English Literature and Mass Communication, Sibashree has always viewed travel as more than movement — for her, it has been a way of understanding people, cultures, and herself. Her passion for spiritual exploration has also led her to many unusual and meaningful destinations over the years. Outside of writing, Sibashree enjoys watching European cinema, reading about global politics, and reflecting on the stories hidden within everyday places.

Leave a Reply

Your email address will not be published. Required fields are marked *

title-img Related

READ MORE Zion National Park

Hiking And Camping In Zion National Park Utah: An Adventure Travel Guide

BY  Sibashree Oct 28, 2024

Do you know where the name of Zion National Park came from? The name comes from the Bible, as the Old Testament calls the City of Jerusalem Zion. Do you know where the name of the Zion National Park came from? The name has come from the Bible, as the Old Testament calls the City of Jerusalem Zion.  This national park has the most diverse landscape, with plateaus, forests, and deserts. Further, it is home to over 800 plant species and 290 bird varieties.  “A visit to a river, a canyon rim, and a pine forest will give you a chance to see plenty of different birds. Birds are very active at dawn and dusk. They sing more at these times, making them easier to locate than midday. Nocturnal birds like owls are also active at dawn and dusk, making them easier to locate than at night.” - Ally O’Rullian, Ranger, Zion National Park. Hiking is the best activity in the park to enjoy a close encounter with the wildlife and geology of the park. Also, camping here and living under the stars will be an amazing experience. So, let’s be familiar with the hiking trails and campgrounds.  View this post on Instagram A post shared by Zion National Park (@zionnps) Hiking In Zion National Park, Utah View this post on Instagram A post shared by Zion National Park (@zionnps) Hiking is the most popular outdoor activity in Zion National Park, and kids also love the flat riverside walks. Moreover, trails like the one to the Emerald Pool are family-friendly.  Further, the park has more than 90 miles of hiking trails, and the number of trails is more than 100., I have curated some popular day hiking and backpacking trails for you here.  Hiking In Zion National Park The short day hikes in Zion National Park will take you to the wonderful views southwest of the park. Some hiking trails can be completed within one hour, and some will take an entire day. Further, these trails will take you through lush valleys and meadows and make you visit rugged mountains and deserts.  So, let’s explore the trails. 1. Watchman Trail Difficulty Level: Moderate Distance: 2.7 Miles Trekking Time: 2 Hours Pet-Friendly: No Trailhead: Zion Canyon Visitor Center Watchman Trail is one of my favorites in Zion National Park because it is peaceful. Also, it is a kid and family-friendly hiking trail with a beautiful view of the lower Zion Canyon.  You will further enjoy the view of the Towers of the Virgin and the town of Springdale from this trail.  Moreover, this trail is a great path to learn about the desert plantation in the park.  2. Lower Emerald Pool Trail  Difficulty Level: Easy Distance: 1.2 Miles Trekking Time: 1 Hour Pet-Friendly: No Trailhead: Zion Lodge The Lower Emerald Pool Trail is one of the easiest trails in the park, and you can explore the route with your family thanks to the gentle terrain.  Further, walking through the woods of pinyon and juniper is comfortable for children. Moreover, the hike ends with a refreshing view of the Lower Emerald Pool and waterfalls. These waterfalls are ephemeral.  However, if you want to explore more challenging trails, you can try the connecting Upper Emerald Pool and Kayenta trails.  3. Observation Point Difficulty Level: Difficult Distance: 8 Mile Trekking Time: 7 Hours Pet-Friendly: No Trailhead: Weeping Rock The Observation Point trek through the East Rim Trail stands out because it offers the best view of the nearby attractions. Further, you will especially love the view of Zion Canyon’s lower end.  However, this trekking route comes with 2200 feet of steep elevation. So, ensure that you have the right physical endurance and proper hydration.  4. Pa’Rus Trail Difficulty Level: Easy Distance: 3.5 Miles Trekking Time: 1 Hour Pet-Friendly: Yes Trailhead: Visitor Center If you want to watch the best sunset in Zion National Park and capture beautiful landscape views, Pa’Rus Trail is the best hiking route for you. Further, it is the only national park trail allowing dogs and pets.  It is an easy trek. You can explore it with your kids and family. You will begin the trek listening to the serene sounds of the Virgin River. Then, as you advance, you will get the best view of the Watchman.  Backpacking Hikes In Zion National Park Overnight hiking or backpacking trips are very popular in Zion National Park. Despite being strenuous hikes, these trails offer the most scenic views.  If you are willing to explore any of the following backpacking trails, you must have proper food, water, and supplement arrangements.  La Verkin Creek Trail Trail Distance: 14.4 Miles Trail Head: Lee Pass Difficulty Level: Challenging The La Verking Creek Trail takes you to the Kalob Arch. It is one of the biggest free-standing arches in the world.  As you start the trek from Lee Pass, you will walk through open canyons, and the route along Timber Creek will offer you the best cliff views.  If you want to extend your hiking trip further, you can continue your walk to the Bear Trap Canyon or the Willis Canyon. Summer and fall are the best seasons for backpacking trips to the La Verkin Creek Trail.  The Narrows View this post on Instagram A post shared by Zion National Park (@zionnps) Trail Distance: 16 Miles Hike Start: The Temple of Sinawava Difficulty Level: Easy to Moderate (Based on the River Volume) Despite having an easy-to-moderate difficulty level, The Narrows is one of the most challenging hikes in this national park.  The meandering trekking route will take you through various canyons. However, you must first walk through the Virgin River as there is no alternative loop.  Here, you must note that the water level in the Virgin River keeps fluctuating. Based on the amount of rainfall and snowfall, the varying water levels of the Virgin River will pose challenges. The table below gives you a clear picture of the probable difficulties.  Water Level of Virgin RiverChallenges/Consequences Below 70 cubic feet per second (CFS)Moderately difficult walkingKnee-deep waterSlippery terrain Above 70 CFSChallenging walkingMid-thigh deep waterWater in some pools can be chest-deepAbove 150 CFSThe Virgin River and The Narrows are close for hiking.  The Narrows remain closed even when there is an announcement for Flash Floods. So, check with the park authority about the “present water current level” and announcements.  West Rim Trail Trail Distance: 14.2 Miles  Trail Head: Lava Point  Difficulty Level: Strenuous  The West Rim Trail is one of the most challenging treks in Zion National Park. The elevation change here is close to 3500 feet, and you must make a steep ascent toward the Wildcat Canyon rims. Then, you will make a descent.  In addition, the West Rim Trail offers the best views of the Phantom Valley. If you are in for a backpacking trip to the West Rim Trail, late spring, summer, and fall will be the best seasons. Shuttle System, Permits, And The Best Time To Hike Zion Before you lace up your boots for the Watchman Trail or plan an overnight on the West Rim, there are two practical things that will make or break your Zion trip.  The shuttle and the permits.   I learned the hard way on my first visit that Zion Canyon isn't a drive-yourself kind of park for most of the year, so here's what you actually need to know.  The Mandatory Zion Canyon Shuttle  For the 2026 season, the free shuttle runs from March 7 through November 28.  Also, it runs during a short holiday window from December 26 to January 2.   During this stretch, Zion Canyon Scenic Drive is closed to private vehicles, and the shuttle is the only way to reach trailheads like Zion Lodge, Weeping Rock, and the Temple of Sinawava.   Buses start around 7 AM and run every 5 to 10 minutes through the canyon.   Riding is free once you have paid the park entrance fee, but there's no reservation system.  So, arrive early.   Outside the shuttle season, mainly the depths of winter, you can drive the Scenic Drive yourself, and this is honestly one of the most underrated times to visit the park.  Wilderness Permits: What Needs One And What Doesn't  Here is the part that trips up a lot of first-time hikers.   You don't need a permit for day hikes on any of the trails I mentioned above, including the bottom-up route into The Narrows from the Temple of Sinawava.   However, a wilderness permit is required for the top-down Narrows through-hike from Chamberlain's Ranch, any overnight backpacking trip (including the La Verkin Creek and West Rim trails if you're camping overnight), the Left Fork/Subway route, and canyoneering.   As of 2026, permits are booked through Recreation.gov, and fees run around $6 plus $10 per person for a top-down Narrows day permit.  Also, the fees are $20 plus $7 per person per night for overnight wilderness permits (Source: NPS Zion Wilderness Permits).   Permits must be picked up in person at the Wilderness Desk unless you've got a Zion Express Membership.  Best Time To Hike, Based On What You Want To See  Summer brings the biggest crowds and temperatures that regularly cross 100°F in the canyon bottom.  Furthermore, monsoon season runs from July through September, which can shut down The Narrows with a flash flood warning even under clear skies.   If your heart is set on The Narrows or the backpacking trails, aim for late spring through October instead.   Winter, on the other hand, is my pick for the quiet, contemplative version of Zion.  Enjoy the cooler air, thinner crowds, and the rare chance to drive the Scenic Drive yourself.  However, you will want microspikes for icy sections on trails like Observation Point.  Camping In Zion National Park, Utah Though 2023 saw a dip in visitors to Zion National Park, it is still one of the most visited parks in the USA. In 2023, the park had less than 4.65 million visitors compared to 4.69 million visitors in 2022.  The red rock formations and canyons carved by water are some of the biggest attractions in this US national park, and camping is surely the best way to get to know the park better.  Zion National Park has three campgrounds, but the South Campground is closed for a long-term rehabilitation project. So, here I will discuss the Watchman Campground and Lava Point Campground.  Watchman Campground https://www.instagram.com/p/C84eLoOtJP8 This campground is very close to the Zion Canyon Visitor Center, and if you are entering the park from the  South Entrance in Springdale, you will have to go only ¼ miles to find this campground.  Each campsite in the campground has a picnic table, a place for a tent or RV, and fire ring access. Further, here is a detailed picture of the amenities and fees at the camping ground.  Amenities and FeesAvailable/Details Cell Phone NetworkYesInternet ConnectivityNoCamp StoreNoIce for SaleNoLaundryNoAmphitheater SeasonalFirewood for Sale NoTrash CollectionYesDump StationYesPotable WaterAvailableFood Storage LockerYesStaff on SiteYesShower TypeNot AvailableFlush ToiletYesFeesElectric Campsites: $45Non-Electric Tent Only Campsites: $35Group Campsites - $90-130 per personAccessible Sites: According to the Price of a Particular Site with Special Discounts for Access Pass Holders Watchman Campground sites are available on a reservation basis. You can book six months before your trip to secure a preferred spot.  Lava Point Campground It is a seasonal campground, operating only from May to September. Further, located at a 7890-foot height, this campground is closest to Kolob Terrace Road.  Also, if you enter the park from its southern entrance, you must drive for one hour and 20 minutes to reach this campground.  However, with 6 primitive camping sites, Lava Point Campground does not have most of the amenities of the Watchman Campground. Therefore, you will only get the following facilities here. Pit toilets Trash cans Seasonal trash collection Staff on site on a seasonal basis Moreover, you will have to pay a fee of $25 to reserve a spot in this campground. Further, it cannot accommodate vehicles longer than 19 feet.  Zion National Park At A Glance  Zion National Park Location: Utah, The USA Area: 232 Square Miles Visitor Centers: Zion Canyon and Kolob Canyons Entry Fee: Standard Entrance Passes Highest Point: Horse Ranch Mountain Established: 19th November 1919 So, it’s fall here, and Zion National Park is gearing up for winter. When are you planning a visit?  Also read Why Include Whale Watching In Your LA Itinerary. Traveling On A Budget: Tips For Affordable Adventures. From Cocktails To Kickflips: Must-Try Activities In San Diego.

READ MORE Canada Trip Insurance

Coverage For Special Occasions: Travel Insurance For Canadian Festivals And Events

BY  Sibashree Nov 19, 2025

Canada is bursting at the seams with festivals, wild celebrations, and lively events. You blink, and there’s probably something going on in every corner of the country. Whether you’re catching the Montreal Jazz Festival’s energy or braving Quebec’s famous icy parties, these gatherings are honestly the stuff of bucket lists. But, you know, any trip, especially the fun, hectic kind, can bring chaos you just didn’t see coming. And that’s exactly when having decent Canada trip insurance jumps from “optional” to “pretty necessary.”  It’s your safeguard for all those “Hope that doesn’t happen, but if it does…” moments. Let’s break down why travel insurance Canada should be high on your checklist, what it actually covers, and—since it’s 2025—how to buy it without ever leaving your couch. What Is The Significance Of A Canada Trip Insurance? Honestly, the festivals and weirdly joyful events are half the reason people come here. However, let’s get real! They’re not stress-free. Big crowds and moody weather aren’t just “quirky” perks. They can flip your trip from amazing to “why did I even get on the plane?” really fast. A few solid reasons make having travel insurance for attending the festivals and events in Canada a must. 1. Medical Emergencies You never plan for a medical emergency, but all that running around, dancing, and squeezing through crowds. Yeah, accidents happen. The right policy grabs your back with coverage for surprise hospital visits, unexpected illness, and even wild scenarios (think: evacuations). That means if things go sideways, you’re not left frantically Googling “nearest clinic open now.” You get the treatment you need, fast. 2. Unpredictable Weather It can rain when it’s supposed to be sunny, or it can snow in June. The weather in Canada loves to throw curveballs at festival plans. Storms mess up flights, force cancellations, and generally make you question your packing skills. Travel insurance gives you a fallback, so changes in the forecast don’t wreck your whole trip. 3. Delayed Flights Missed connections, endless airport coffee, or racing to an event that started without you! Delays are a special kind of festival pain. Canada trip Insurance can at least help soften the sting with reimbursement for lost time (and sometimes lost money). 4. Lost Or Stolen Luggage Are there jam-packed crowds at the airport, bus stations, or the festival venue? It is Awesome for energy, but not great for keeping track of your backpack. If your stuff disappears or gets snatched, insurance can cover what you lost, saving you from the “how do I survive without my essentials?” panic. While choosing Canada trip insurance, make sure that you compare various policies. You have to be specific about your budget, needs, and coverage limits. Furthermore, you have to read the “exclusion” section carefully. Suppose you want to do rafting in Canada, and the policy you have chosen does not cover any injury that happens during that particular activity. You cannot claim compensation if such happens. In addition, pick a policy that covers the pre-existing conditions. How To Purchase Travel Insurance For Canada Online? The days of slouching through long lines at insurance offices? Gone, luckily. Getting a travel insurance plan in Canada is basically a breeze—here’s the “pain-free” approach: Step 1: Jump onto your insurance company’s website and poke around for the travel insurance section. Step 2: Toss in some basic details (they’ll ask… it’s always something), and pick the type of coverage you want. Step 3: Find Canada in the list—there’s always a dropdown. Add your departure and return dates, plus your phone number (they need it for confirmation, not for spam… supposedly). Step 4: Click whatever version of “view plans” pops up. Now, you’ll be asked for traveler info. Step 5: Hit “Next.” Browse through a few plan options, tweak the coverage amount for your stuff, and throw in any extras that seem smart. Step 6: Another round of “Next” and fill out health details, whatever else they want, and you’re basically done. Step 7: Pay up, sit back, and wait for your new insurance details—both an email and a shiny online document should show. Tips For A Smooth Festival Experience With Canada Trip Insurance If you want your Canadian festival trip to be something you’ll brag about (and not just complain about), make sure your travel insurance really covers the possible drama. There are a handful of other little tricks for making the whole journey actually enjoyable. 1. Plan Ahead Don’t just show up and read up on the festival, double-check where it’s happening, and figure out your route. Sorting tickets and booking places to stay, way before the rush, saves future headaches when everyone else is panicking. 2. Stay Informed Keep checking the weather (surprises are the default here), and watch for updates about the event. A last-minute change can throw off everything, unless you’re already in the loop. 3. Keep Records Make copies of the stuff you don’t want to lose: your insurance info, tickets, ID, passport—that sort of thing. Having backups makes it way easier if you need to file a claim (or just find your way home). 4. Carry A First-Aid Box Pack meds you actually use and a tiny first-aid kit, just in case. Minor emergency? You’ll thank yourself for thinking ahead. Travel Insurance Canada Gives You The Coverage To Enjoy Your Trip In the end, travel insurance isn’t just paperwork. It’s peace of mind. You get to throw yourself into the fun, knowing you can handle whatever hiccups the universe throws your way. Go for coverage that fits your trip: delays, lost documents, and last-minute changes. That way, you’re not stuck worrying; you’re actually enjoying the festival (and maybe even finding a new favorite one). Thinking about travel insurance for Canada right now? Give Niva Bupa Travel Insurance a look. They’ve got a huge network (10,000+ hospitals) and claim to process things in under 30 minutes. One crore customers vouch for them, which honestly calms a lot of nerves. If you want to skip stress and just focus on the adventure, it’s worth checking their plans. Read Also: Ultimate Guide to Stress-Free Holiday Travel Top 8 Travel Medical Insurance Trends to Consider The Overlooked Connection Between Safe Travel And Strong Networks

READ MORE Travel with an Electric Bike

Travelling With Your E-Bike: How To Prepare For A Trip Or A Flight

BY  Sibashree Aug 28, 2025

Taking your e-bike on a trip sounds awesome, right? Whether you’re heading off on a cycling holiday, taking your electric bike to explore new trails, or simply bringing it along for a weekend away, travelling with your ride can open up exciting possibilities. Travellers love to travel. However, ironically, travelling causes carbon emissions. Therefore, people should ensure that they travel without harming nature. Nature lovers often stay in this dichotomy while travelling. They often fear that the toll of their travel will fall on nature. However, when you travel with an electric bike, you stay confident that no matter what happens, you will not be emitting carbon.  But, yeah… there’s a catch. Traveling with one can be a bit of a headache. Batteries, packing, weight limits, all that stuff. Still, if you plan ahead just a little, it’s not so bad.  Moreover, your bike will get there in one piece, and you’ll be ready to ride without drama. Let’s go over what actually matters. Understand The Rules Before You Go First thing—rules. Every airline, ferry, train company, you name it—they’ve all got their own take on e-bikes, especially the batteries. Lithium packs are where the real limits are. Some places want them off the bike, others only allow certain sizes.  And here’s the kicker: it changes country to country. Something fine in Spain might be banned in Canada. The only safe bet? Ask your carrier before you go. Better yet, get their answer in writing.  Saves you from awkward moments at check-in where they suddenly say “nope.” The cargo companies and other subjects subject Lithium batteries to scrutiny and regulation, as there is always a chance of these battery packs catching fire. Hence, the travellers should get everything checked in the first place, as it will prevent any sudden problems while shipping. Thus, travellers should get everything on paper while they travel with an Electric Bike. 1. Preparing Your E-Bike for Travel Think of this as a quick health check. Brakes—good? Tyres inflated? Chain oiled? Electronics behaving? If something feels off, fix it now, not halfway through your holiday. For the battery, don’t leave it full or empty—half-ish charged (30–60%) is the sweet spot. Most travel rules want it removed anyway. Moreover, strip off extras like mirrors, lights, bells… anything that sticks out. And honestly, give the bike a quick clean. Dirt might seem harmless, but some countries are strict on biosecurity. Moreover, the last thing you want is customs giving you grief over a muddy tyre. Plan out the spots for charging and halts while you travel on your bike. 2. Packing Your E-Bike Safely How you pack decides how your bike comes out on the other end. Hard-shell case? Best protection, but heavier. Soft padded bag? Lighter and easier to stash, just not quite as bombproof.  Moreover, inside, pad everything. Wrap delicate bits, lock down the bars, pedals, and wheels so nothing shifts. Tape or foam is your friend here. Don’t forget to tag it with your name and number, maybe toss on a “Fragile” sticker. Won’t guarantee gentle handling, but hey—it’s worth trying. Gentle handling at the airport has always been a super myth. However, people should ensure that they get plenty of padding to prevent their bikes from getting unnecessarily damaged.  3. Tips For Travelling By Car Or Train Road and rail are a bit easier. For cars, you’ll need a rack strong enough for e-bike weight (don’t assume a cheap one will do). If it’s exposed, cover it.  Rain, dust, and even little stones from the road can mess things up. Inside a car? Strap it down so it doesn’t bounce around. Trains… well, they’re hit or miss.  Moreover, some have bike spots, some don’t. Check before you get to the station—it’s no fun trying to squeeze an e-bike into a crowded carriage last minute. Cover your e-bike when it is exposed to a car. Moreover, you should not depend on the weather.  4. Flying With Your E-Bike Flying’s the tricky part. Airlines are strict about batteries. Big ones often aren’t allowed in checked luggage.  Sometimes you can carry it separately, sometimes you need to ship it. Either way, don’t wing it—talk to the airline weeks ahead, not days.  Pack the bike in a proper travel case, keep it under their weight limits, and protect every part. Once you land, take your time putting it back together.  Better to double-check than to find out a brake cable snapped on your first ride. 5. Extra Gear To Bring Along A few small tools can save your trip. Toss in a multitool, tyre levers, mini pump, maybe a spare tube or two.  Charger’s a must, plus an adapter if you’re heading abroad (easy to forget). A little cleaning cloth or kit helps too, especially after rainy rides.  Nothing fancy—just enough to keep things running smoothly. Moreover, ensure that the entire thing remains in control so that your trip does not get ruined just because of a missing spare. Travelling with an electric bike always demands carrying extra spares with you to ensure proper safety. 6. Common Mistakes To Avoid The stuff people forget is usually simple. Don’t leave your battery fully charged before storing—it wears it out faster.  Watch those weight limits; e-bikes aren’t light. Skip insurance? Big mistake. And honestly, the worst habit is last-minute packing.  Moreover, you rush, something gets left behind, or worse, you break something trying to jam it in. Seen it happen more than once. Remember This Before You Travel With An E-Bike  Bringing your e-bike along is worth it—you get to explore new places on your own wheels. Yeah, it takes some planning, but once you’ve done it, it feels easy.  Moreover, a bit of prep now means a smooth trip later, and you’ll roll off ready to ride instead of stressing about what survived the journey. However, travelling with an e-bike is cost-effective. Hence, the travellers leverage the liberty to go anywhere at any point in time. People should understand that they get some of the best results while travelling. Read Also: 8 Things You Need To Know About Using E-Bikes For Your Hunting Adventures Maximizing Thrill: Expert Advice On Off-Road Motorcycle Rentals