


The Ultimate Guide to Visiting the Skagit Valley Tulip Festival

Mar 27, 2025

Last Updated on: Feb 24, 2026

Travel Blog

A few flowers can capture the overall essence of spring, and tulips are one of them. The vibrant colors, elegant shapes, and rich history make tulips the ultimate symbol of renewal and beauty. 

Even though the tulip mania significantly contributed to the 17th—17th-century Dutch economic bubble, the Skagit Valley Tulip Festival is the prime example that the mania is still alive. 

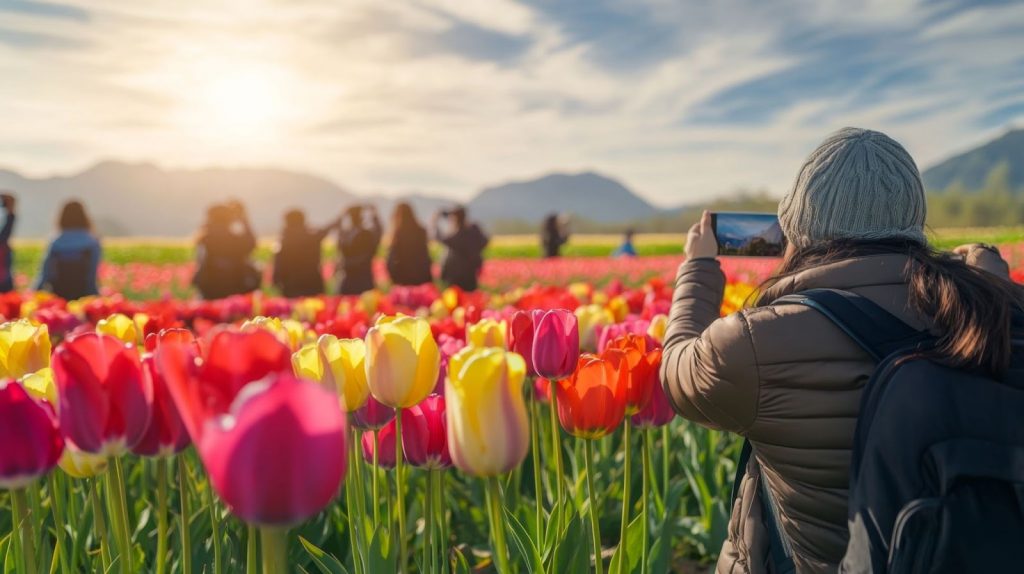
Imagine this: You are walking through an endless field filled with red, purple, yellow, and pink tulips! The fields stretch as far as your eyes can see! That’s the feel!  

This is a dream come true for photographers, a paradise for nature lovers, and a perfect place to breathe some fresh air. 

So, as you start your journey, you must read this guide to the 2025 Skagit Valley Tulip Festival. In this guide, we will talk about the best time to visit the Skagit Valley Tulip Festival, where you can find the tulip gardens and enjoy your trip as much as possible. 

Here’s The Guide To The Skagit Valley Tulip Festival 

The Skagit Valley Tulip Festival is the ultimate way to celebrate spring. Want to enjoy it to the fullest? Check out the following guide to experience the beauty of tulip gardens with friends and family. 

Pick the Right Time to Visit

It is always necessary to choose the travel time, no matter where you go. Regardless of the dependency on the weather, the Skagit Valley Tulip Festival runs for the entire month of April. 

In the earlier month of April, you may catch a few daffodils. The tulips start to bloom somewhere between mid to late April. 

Thus, you must check the blooming status to avoid disappointment once you go there! This will help you plan your trip accordingly, especially when the colorful flowers are at their best! 

Also, I would suggest you visit the Skagit Valley Tulip Festival on the weekdays since the weekends are very busy and crowded. You should see the field early in the morning. This way, you will be able to experience a quieter and relaxed landscape. 

Dress for the Weather

In the Pacific Northwest, spring weather can change quickly. One moment, it’s warm and sunny; the next, it could turn cool and rainy. 

That’s why I think wearing layers would be a smart move. This way, you can add or remove clothing based on the temperature shift. 

Next, you must think about your shoes. The fields often get muddy, especially if it rains. So, waterproof shoes or boots keep your feet dry and help you walk comfortably. In contrast, flip-flops and dress shoes make moving hard and can easily get ruined.

Choose Your Tulip Farms

The festival is spread across several tulip farms throughout the valley. Each farm has its charm. Thus, you must explore more than one because it gives you a fuller experience.

Before you head out, check each farm’s website for hours and ticket details. Some locations, especially on busy weekends, require advance tickets.

Here’s a breakdown of the key farms and gardens 

  • Roozengaarde: This is famous for its 50-acre display with numerous tulips and a huge variety of tulips. Roozengaarde is the ultimate destination for spring lovers. 
  • Tulip town: This specifically features various tulips across 5 acres of fields. 
  • Tulip Valley Farms: The only U-pick tulip farm located in Skagit Valley. You can have a great time there with your friends and family. 
  • Garden Rosalyn: This 7-acre garden of tulips also includes ponds with ducks and geese, making it more attractive. 
  • Skagit Acres: A new addition to the Skagit Valley Tulip Festival in 2025. The field will include 3-acre tulip fields. 

Enjoy Local Food and Shops

The nearby towns add even more to your visit. You can visit places like Mount Vernon, La Conner, and Burlington. These places are excellent places to dine in the Pacific Northwest. 

Moreover, you’ll find local spots serving fresh meals, sweet treats, and unique finds. You’ll also see food vendors set up near the Tulip Valley farm. You can visit there, between farm visits. 

So, you can grab a warm drink or a quick bite while you take a break! Some stands even offer tulip-themed gifts or fresh bouquets, which are probably great souvenirs to take home.

Plan for Traffic and Parking

The roads around Mount Vernon can be crowded during the Skagit Valley Tulip Festival, which happens more often on weekends and when the weather is nice. On top of that, many roads near the farms are narrow. So getting where you’re going can take longer.

I suggest you give yourself extra time to stay on track. Moreover, you might face poor network challenges. Before your trip, you can download maps and directions. 

Once you get there, you can try to look for signs or volunteers to guide you. Most farms have free parking, but a few might charge a small fee.

Bring Your Camera, But Be Respectful

Bring Your Camera, But Be Respectful

The Tulip fields are perfect for photos. Whether you use your phone or a camera, you’ll find many great spots to capture the view.

When you are exploring, you must stay on the marked paths. If you step into the rows, you can damage the flowers and spoil the experience for others.

It’s also crucial to protect the work of the farmers. Treat the fields with care so everyone can enjoy their beauty.

If you plan on using a drone, check the rules first. Most farms don’t allow them, so it’s better to know before you go.

Bring Your Family

The festival is a fun outing for all ages, making it one of the best places to travel with kids. Still, you might face a few challenges if you’re bringing little ones, 

Strollers can be hard to push through muddy ground. A baby carrier often works better in the fields of tulips.

You’ll likely be outside for a while, so pack snacks, drinks, and a few wipes for comfort. Many farms also offer things for kids to enjoy, like play zones or tractor rides, which makes the experience even better for them.

The Best Way To Plan Your Visit: Here’s How You Can Purchase The Tickets

So, are you ready to experience the beauty of the Skagit Valley Tulip Festival from up close? In the following section, I will provide you with all the details about the tickets for the tulip gardens. Read on…

RoozenGaarde

The ticket price for RoozenGaarde from Monday to Thursday is $16. The same ticket price from Friday to Sunday is $20. 

Further, it remains open from 9 AM to 7 PM from Monday to Friday. The visiting hours on Saturday and Sunday are 9 AM to 7 PM. 

Tulip Valley Farms

The ticket prices for entry to Tulip Valley Farms vary based on your age and the group you belong to. 

For example, the ticket price for children aged 3 to 15 is $10. For adults (16+), it is $16 from Monday to Thursday and $18 from Friday to Sunday. 

Again, for seniors and military persons (with IDs), the ticket price is $15 from Monday to Thursday and $17 from Friday to Sunday. 

Tulip Valley Farms opened on 1 April 2025 and will remain open until 30 April 2025. During the season, it is open from 9 AM to 5 PM, 7 days a week. 

Tulip Town

The online ticket prices for visitors aged above 12 are $18. You can also make an in-person booking for $20. 

Further, Tulip Town will remain open from 1st to 30th April 2025, seven days a week during the spring season. 

The hours of operation are Monday through Thursday, 10 AM to 6 PM, and Friday through Sunday, 9 AM to 7 PM. 

Garden Rosalyn

You can book the tickets for Garden Rosalyn in person and online at $17. It will remain open from 1st to 30th April 2025 on all days of the week. 

Skagit Acres

Skagit Acres offers online and in-person booking facilities. The ticket prices for children aged 6 to 12 are $10, and for adults, they are $18. 

Seniors above 65 years and Military persons will get tickets at $15. 

Further, the garden center of Skagit Acres remains open year-round. However, the tulip field is only open from the 1st to the 30th of April. 

Booking tickets for the Skagit Valley Tulip Festival is pretty straightforward! Visit https://tulipfestival.org/garden-tickets/  and select the garden according to your preferences. The site also provides the location and directions for the garden. 

Ways to Reach the Skagit Valley Tulip Festival 

There are multiple ways to visit the Skagit Tulip Festival. However, walking is not recommended.

By Bike

The valley roads are pretty flat. So, travelling by bike can be much easier for you to access the tulip fields, events, and attractions. 

However, you must stay prepared for rainy and windy weather conditions. Before traveling, you can check out self-guided bike tours to learn the do’s and don’ts. 

By Car 

If you decide to drive a four-wheeler, then you must take state route 20 to enter the tulip area. You can find plenty of free parking at RoozenGaarde, Tulip Valley Farms, Garden Rosalyn, and Tulip Town.

Roadside parking is pretty limited due to weather conditions and traffic safety. Law enforcement might issue a ticket for parking in the no-parking zone, so stay aware of it! 

By Bus

Skagit Valley transient services have several routes across the valley. If you arrive in Mount Vernon, you can ride the Skagit Transit Route 615 to visit the tulip fields. All of the transports depart from the Skagit Valley Station. 

By Train 

Amtrak Cascades travels to Mount Vernon. However, there is no shuttle available from the station. You just have to make reservations, as the trains are small and fill up pretty quickly.  

Conclusion

The Skagit Valley Tulip Festival is a springtime experience like no other. If you can make the right planning, the right gear, and a flexible mindset, you can enjoy a day surrounded by endless color and beauty. 

Whether you’re snapping photos, walking hand-in-hand with a loved one, or watching your kids run through the vibrant tulips, the memories you make here will last long after the flowers fade. 

So grab your boots, charge your camera, and prepare for one of Washington’s most beautiful tulip garden adventures!

Share on Social Media

Pijus Maity is an SEO Associate with an engineering background, combining technical expertise with a passion for digital marketing. He specializes in optimizing websites for better search engine performance, leveraging data-driven strategies to enhance user experience and drive results.

Leave a Reply

Your email address will not be published. Required fields are marked *

title-img Related

READ MORE Cruise Docks At Civitavecchia

How To Maximize Your Shore Time When Your Cruise Docks At Civitavecchia

BY  Sibashree Jan 20, 2026

I was about to land at Civitavecchia. I was already missing Rome. And let me be honest! I messed it up in Rome.  I think it is a common problem. The hours are limited and there are so many things to see in Rome!  Furthermore, your actual sightseeing window shrinks dramatically depending on your transportation choices. However, this is how you can enjoy the Rome day trips from Civitavecchia to the fullest. Also, know about how to choose the best TransfersRome. The Shore Time Equation Civitavecchia sits approximately 80 kilometers from Rome's city center. While that distance seems manageable, the real question isn't how far—it's how long. And that answer varies wildly based on how you travel. Public transport enthusiasts often point to the regional train as a budget-friendly option. The reality?  You'll need a taxi or shuttle from the cruise terminal to Civitavecchia station, wait for the next departure, endure a 60-80 minute ride, then navigate from Roma Termini to your actual destination.  Round-trip, you're looking at 4-5 hours just in transit. For cruise passengers, those lost hours translate directly into missed experiences. That's one less museum, one fewer piazza, one gelato you didn't have time to enjoy. Why Experienced Cruisers Choose Private Transfers Seasoned Mediterranean cruisers have figured out the math. A private express transfer from Civitavecchia to Rome typically takes 60-75 minutes door-to-door—and that's total travel time, not just the driving portion. The difference comes down to three factors: no waiting, no connections, and direct routing. Your driver meets you at the gangway when you disembark, your luggage goes straight into the vehicle, and you're delivered to wherever you want to start your Roman adventure. What Are The Places To Visit In Civitavecchia?  Around 70 km away from Rome, Civitavecchia has many nearby attractions. The archaeological sites and historical attractions here speak to the diverse cultures and civilizations.  Initially, it was an Etruscan village. However, during the time of the emperor Trajan and due to its proximity to Rome, it rose in importance and became a crucial strategic point.  Furthermore, in the Middle Ages, various popes led to the construction of different historical buildings in Civitavecchia.  Also, when you visit Civitavecchia today, you see a medieval center, a beautiful port, the thermal baths, and the cultural attractions such as the National Archaeological Museum of Civitavecchia.  Furthermore, the La Frasca Pine Forest is a beautiful place on the coastal stretch for nature lovers. It is located at a distance of around 9 km from the Civitavecchia Port and offers shelter in the scorching heat.  Planning Your Perfect Civitavecchia Day Smart shore excursion planning starts with understanding what's realistic. With a private transfer, a typical cruise day might look like this: 8:00 AM - Ship docks, meet your driver at the terminal 9:15 AM - Arrive at Vatican City (beat the tour bus crowds) 12:30 PM - Lunch in Trastevere 2:00 PM - Colosseum and Roman Forum 4:00 PM - Depart Rome for Civitavecchia 5:15 PM - Back at the cruise terminal with time to spare What Is The Best Time For Rome Day Trips From Civitavecchia? There are two aspects of the best time for Rome day trips from Civitavecchia. In a day, 11 AM to 1 PM is the best time for Rome day trips or transfers.  Let’s find out the reasons.  Transfer TimingsWhy These Are Ideal 11 AMGeneral embarkation does not begin before 11 AM. Waiting on the pier is frustrating. Frequent options are available after 11 AM.1 PMCruise lines follow stringent “all aboard” deadlines. Being at the dock after 1 PM can lead to rushed or missed embarkation.  Overall, when you maintain this timeframe in a day, all the following elements are taken care of.  Easy start to the cruise No or little waiting for the cruise Timely check-in Easy boarding and time to settle down What Is The Best Month For Rome Day Trips From Civitavecchia? April, May, or the spring season, and September to October, or the autumn season, are the ideal months for Rome day trips from Civitavecchia.  1. Why Is Spring The Ideal Time For Rome Day Trips From Civitavecchia? The blooming flowers and comfortable weather conditions make these months ideal for day trips.  You can walk through the gardens, which are in full bloom during spring.  2. Why Is Autumn The Ideal Time For Rome Day Trips From Civitavecchia? The days are mild and nights are cooler in the autumn months. Furthermore, from late September, places such as Villa Borghese start getting decked out with fall colors. However, toward the end of the fall season, from late November, there can be heavy rainfall. So, the colder months become more uncomfortable when the days get wet.  Here is a detailed breakdown of the best time to plan Rome day trips from Civitavecchia. (Source: National Oceanic and Atmospheric Administration, NOAA).  Months Highest TemperatureLowest TemperatureDays of Rainfall January1387February1487March16107April18125May22165June26192July28221August29222September26194October22166November18129December1598 What To Look For In A Civitavecchia Transfer Service? When booking, prioritize companies that offer: Real-time ship tracking  Meet-and-greet service at the actual terminal Furthermore, the vehicles have to be large enough for cruise luggage. Mercedes vehicles with professional English-speaking drivers have become the standard for luxury transfers in this region. Fixed pricing matters too. The last thing you want is a meter running while stuck in Roman traffic. In addition, you must be realistic in your expectations. Delays can happen and that is why the tracking system plays such an important role.  Calculate The Sightseeing Hours To Maximize Your Shore Time Your cruise vacation represents a significant investment. Spending a quarter of your Rome day on trains and transfers diminishes that investment. The small premium for private transport pays dividends in experiences gained and stress avoided. And the trick?  You have to calculate the actual sightseeing hours. You cannot only factor in the ticket prices. 

READ MORE Denali National Park

This Is What It Takes To Climb Denali in Denali National Park 

BY  Sibashree Jul 18, 2024

Is it your dream to climb Denali in Denali National Park? Standing at 6,190 meters height from sea level, the highest peak of North America is surely going to give you a tough time. However, the toughest routes in the world are the most alluring for travelers. So, its remote location and the deadliest terrains attract mountain lovers across the globe. As the monumental centerpiece, Denali adds to the popularity of Denali National Park.  Are you also planning a climb on Denali or Mount McKinley? Here are the things you must know before you make an attempt. Many people talk about the magnificence of the peak and its beauty. I will primarily discuss how you will prepare and conduct yourself for the pain-stricken journey and sail through it.  Climbing Denali in Denali National Park (How You Will Prepare Yourself) Many people find climbing Denali in Alaska’s Denali National Park more difficult than climbing Mount Everest. Extreme weather conditions, steep terrains, and fixed lines make this exotic peak one of the deadliest in the world.  So, we must be particular about our preparations, and these are the areas where we need to prepare ourselves.  Physical Preparedness And Endurance Physical preparedness and endurance are the most crucial things while climbing Denali. Your training activities will include the following.  Fitness Test  VOâ‚‚ Max Test Carrying Packs Weighing around 55lbs Hike Training at Sea Level Strength Building While attending a training session for physical strength and endurance, take a step-by-step approach to success.  Working On Team Dynamics And Preparations Traveling solo is not a great idea when it comes to conquering Denali. Maintain clear communication, mutual respect, trust, and a supportive environment within the team. Trust me! Denali will challenge you in every possible way. You don’t want to add to it by having a discord within the team.  Make Sure To Have The Correct Mental Training Reaching the Denali summit is going to be tough. The weather conditions and the routes will throw endless challenges. So, you have to be mentally resolute to keep at it. Train yourself mentally and learn to push limits during your physical training sessions for the Denali trek. Staying positive and being persistent is very crucial in your journey.  Work On Your Technical Proficiency Climbing Denali in Denali National Park is a demanding task. Things are not going to be as easy as visiting Biscayne National Park,  Everglades National Park, or any other national park.  You can attend courses on the following prior to joining a trip to Denali. Ice and snow travel Crevasse rescue Self-rescue Fixed line climbing Self-arrest techniques These technical climbing skills will prepare you for adverse conditions.  Be Particular About Food And Hydration  Planning food and nutrition before and during climbing Denali has two aspects. You have to eat healthy and nutritious food that keeps you in shape. If you are on a guided tour, you will have a proper diet and nutrition plan that you need to follow.  At the same time, having good food is crucial when it comes to climbing a height. You may face appetite issues at a higher altitude. However, you must ensure that you finish your meal properly. There will be no scope for overpacking snacks.  Further, nutrition is different for each person. So, your primary diet will be rich in healthy fats and high protein. However, for the instant energy kick, you must also carry some energy food items and chocolate bars.  The “Diet, Supplementation and Nutritional Habits of Climbers in High Mountain Conditions” report featured in the National Library of Medicine shows the food choices of climbers. Check the table below.  Food Choices Of Climbers Canned Meat3.6%Fruit Mousses7.1%Canned Fish7.1%Halvah7.1%Dry Smoked Pork Sausage10.7%Sandwiches10.7%Dried Fruits10.7%Nuts 10.7%Instant Dishes10.7%Dried Meat28.6%Salty Snacks32.1%Jelly Beans35.7%Energy Gels39.3%Chocolate71%Freeze-dried Dishes86.8%Bars100% Data Source: Diet, Supplementation and Nutritional Habits of Climbers in High Mountain Conditions This study was conducted on 28 men, and the average age group was “33.12 ± 5.96 years.” Take Care Of Hydration  Your body needs more hydration as you climb up the mountain. Water boosts the efficiency of our red blood corpuscles, which collect oxygen in the lungs. So, for proper breathing at a high altitude like Denali, you will have to keep drinking water.   You also need water to stay away from body aches and injuries and preserve your energy level. Water further helps in digesting your food.  Moreover, as you climb up, the air starts getting dry, and rapid breathing and an increased heartbeat promote faster loss of water from our bodies.  Along with drinking 3-4 liters of water every day, you will need to take multivitamins, electrolytes, and hyperhydration solutions available in sachets.  Work On Gear Selection And Preparation Pick and prepare your gear right for climbing Denali in Denali National Park. You will need to pack layered clothing, insulated boots, sleeping bags (-20 F), and mountaineering jackets. Further, if you are on a guided tour, you will be handed over a detailed kit list. Be particular about procuring the following items. Climbing helmet Balaclava Glacier glasses  Goggles Crampons Ice axe Harness Climbing rope Carabiners, etc. These gears ensure that you can navigate through the hard terrain comfortably and remain connected to your team.  Acclimatize With The Condition  With Denali, you are going to make a trek on harsh terrains under extreme weather conditions. So, you cannot plan a successful trip to Denali without devoting some time to acclimatization.  Join a group or guided expeditions that have acclimatization built into their itineraries.   Did You Know?  Mount Denali was renamed Mount McKinley on 28th August 2015.  Denali is the third-highest peak among the Seven Summits or the tallest peaks in seven continents. Denali means “the tall one,” and its name is derived from a Native Alaskan language, Koyukon.  Harry Karstens, Hudson Stuck, and their team of climbers first conquered Mount Denali in 1913.  Galen Johnston became the youngest climber to Mount Denali in 2001. He was 11 years old, and he climbed the peak with his parents.  Final Words  Climbing Denali in Denali National Park is going to be a one-of-a-kind experience. Reaching the summit can be the ultimate reward for your years of training and preparations.  Also, when your road leads to the highest peak in North America, you have to be physically and mentally fit and proficient in technical skills related to mountaineering.  In addition, respect the wonder of nature and be humble so that the wonder of nature embraces you with open arms and paves your way to the summit. Have you ever been a part of a climbing team to Denali? Do you have plans to make a trip to this steep mountain soon? What do you think is most important to prepare yourself for this arduous trek? Don’t forget to share your insights with us!  Denali National Park FAQs How Difficult Is Denali To Climb?  Climbing Denali in Denali National Park is a serious affair. You will at least need intermediate-level expertise or advanced expertise to climb the highest peak in North America.  If you are a serious climber and want to climb Denali, you must get your preparations right and acclimatize to difficult situations with some prior ventures. For preparations, you can climb the Cascades of Washington or the European Alps before your attempts to climb Denali. Further, you need to have the fitness and the agility to survive at all altitudes. You also need to be experienced in knots and hitches, rope work, and fixed-line climbing. In addition, you have to know about glacier travel, crampon techniques, and crevasse rescue.  What Is The Cost Of Climbing To Denali? The cost of climbing Denali for each person will be around $400 per day. Overall, the cost of climbing Denali will be around $12000. In addition, you will have to pay the NPS climbing registration fee. The National Park Service offers a detailed breakdown of the expenses you will need to bear when climbing Denali.  The expenditure includes guides, meals, and transportation costs to reach the kick-off point.  What Is The Hardest Part About Climbing Denali? Climbing the north face of Denali is the hardest, as there will be encounters with avalanches at Wickersham Wall. The Wickersham Wall extends 4,572 m upward from the glacier to the northern peak of Denali.  Another deadliest route for climbing Denali is the West Buttress route. Since the 1980s, there have been reports of at least 14 people dying on this route. (Source) What Is The Best Time To Climb Denali? Late April to mid-July is the best Denali climbing season. However, if you want to experience a milder temperature, you must visit the mountain in June and July. The weather is also less windy in June and July.  Traveling in late July is not a great idea, though, as the snow bridges over the crevasses will start melting. Further, it will be difficult for you to reach the base camp by airplane.  Climbing Denali in any season is not going to be a cakewalk for you. So, daily weather observations are crucial in determining the right time to climb the highest peak in North America. Also, it is always to be a part of guided expeditions to avoid fatal consequences and casualties.  Can I Die While Climbing Denali?  It would be harsh to say that you will die while climbing Denali. However, climbing the highest peak in North America is an arduous journey. You at least need an intermediate-level skill and glacier experience for the trek.  However, a solo climber to Denali died recently, just as the summer climb season this year kickstarted. The body of the deceased climber was found on 20th May 2024. (Source) So, commit to the climb only if you have the desired mental and physical fitness, have the expertise and experience, and have proper safety measures in place. Also read From Hiking To Stargazing: The Top 10 National Parks In Utah! 7 Fun Things To Do In The Great Smoky Mountains National Park. Plan A Day Trip To Dry Tortugas National Park: This Is How You Will Do It.

READ MORE card-img

Military-Style Winter Tents With Wood Stove: Dependable Comfort For Cold-Weather Camping

BY  Sibashree Nov 18, 2025

When temperatures drop and the snow keeps falling, a military-style winter tent with a wood stove becomes more than shelter—it’s the difference between enduring the cold and enjoying it.  Built for stability and warmth, these tents combine rugged fabrics, reinforced frames, and heat-safe stove jacks for reliable protection in harsh conditions. Today’s designs take that proven military strength and merge it with modern engineering.  An inflatable camping tent sets up fast without heavy poles, keeping your camp efficient and warm.  For longer expeditions, choosing the right winter tent ensures a safe balance between insulation and ventilation.  Moreover,  when your trip turns into true winter tent camping, a well-built hot tent lets you rest, dry gear, and cook inside while snow piles outside. Proper harsh cold-weather camping requires adequate gear. Thus, it is important to ensure that people do not suffer from a shivering cold. What Defines A True Military-Grade Hot Tent & How Does It Help In Cold-Weather Camping A military-grade hot tent is built to perform where the cold is relentless and the wind never stops.  Its strength begins with the fabric—dense, tear-resistant, and coated to block moisture while allowing controlled airflow.  Seams are double-stitched and heat-sealed to prevent leaks, and tension points are reinforced to hold shape under snow load.  Inside, an integrated stove jack made of fire-resistant material allows safe operation of a wood stove without damaging the canopy. Beyond materials, structure matters. The frame or inflatable skeleton must handle repeated freezing cycles without cracking or warping. Moreover,  the doors and vents are positioned for cross-ventilation to minimize condensation while maintaining interior warmth.  Moreover, this balance of durability, insulation, and controlled ventilation distinguishes an ordinary camping shelter from a genuine army tent with stove capability. The army tent is designed to keep crews safe and operational through winter extremes. 1. Stove Jack And Safety In Extreme Cold Start with fit and materials. The stove jack must be fire-resistant and matched to the pipe’s outside diameter so the collar seals without crushing the flue.  Add a heat shield or jack boot and use a short double-wall section near the exit to tame radiant heat.  Keep the chimney as straight and tall as practical, cap it with a spark arrestor, and confirm a steady draft before loading the firebox. Manage heat at the source. Set the stove on a fireproof mat, maintain clearances from walls and gear, and route guy lines where no one can bump hot pipe. Burn seasoned wood. Thus, wet or resinous fuel increases the risk of smoke, creosote, and CO. Vent with intent. Crack a low intake and a high exhaust vent to create cross-flow that controls condensation and carbon monoxide. Run a compact CO alarm. Operate with discipline. Gloves for pipe handling, daily ash removal, regular creosote checks, and no unattended flame. If no fire watch is planned, extinguish before sleep. 2. Why Inflatable Tents Fit Military-Style Needs Today Inflatable architecture replaces rigid poles with airbeams that keep even tension across the canopy, improving wind stability and snow-load handling. Setup is predictable: connect the pump, inflate to spec, and fine-tune guy lines without wrestling frozen joints or seized fittings.  With fewer metal bridges from inside to outside, an inflatable hot tent loses less heat to conduction and stays quieter in gusts. Cold-weather reliability improves, too. Multi-chamber designs add redundancy, and small punctures are field-repairable with a basic kit.  Curved geometry reduces flapping, helps shed spindrift, and preserves a clean stove clearance zone.  Packability is strong for the floor area—rolled beams ride securely on a sled or ATV, and the weight distribution is easier on long approaches. For teams that work in real winter, an inflatable winter tent delivers military-style discipline—fast deployment, controlled ventilation, and stable heat—without excess bulk.  RBM Outdoors focuses on this balance of durability and comfort, giving crews a 4-season shelter that performs when temperatures plunge. Thus, this acts as the ideal gear for cold-weather camping 3. Layout And Capacity For Winter Teams: Cold-Weather Camping Plan the space around heat and traffic. Start with a clear stove zone—an open buffer for safe clearances and wood handling—then set sleeping areas along the walls, keeping a center aisle free for movement.  Near-vertical walls and tall doors make cots practical; leave a small gap behind each cot for airflow and to keep fabric off hot gear.  Use a vestibule or annex for firewood, wet boots, and sled bags so the living space stays dry. For four people, aim for one dedicated drying line and a compact table; for six to eight, add a second line and a gear rack to keep gloves and layers rotating.  Suppose the tent has a divider, split “quiet sleep” and “task” sides to control light and noise.  Place a low intake vent opposite a high vent near the stove to move moisture out without dumping heat. 4. Set Up And Field Maintenance  Of Gear And Tents For Cold-Weather Camping Prep the site first: stamp a flat pad, face the door leeward, and mark a safe stove zone. Lay the footprint, clip or zip the floor, then inflate to spec using a gauge; set primary guy lines before tensioning secondaries.  In sugar snow, bury deadman anchors or use long snow stakes. Dry-fit the chimney, keep it as vertical as possible, add a spark arrestor, and place a fireproof mat under the stove. During use, clear spindrift from ridgelines, crack low and high vents, and re-tension lines after temperature drops.  Empty ash cold, check for creosote, and inspect the jack for heat glaze. Top up the airbeam pressure in deep cold and patch small punctures immediately.  For packout, cool, dry, vent, then roll toward open valves and lash low for transport. 5. Care And Storage Tips After The Trip Dry first, store second. After shutdown, crack the low and high vents to purge steam; brush off frost so meltwater doesn’t soak into the seams.  Let the liner reach room-dry before rolling. Empty ash cold, wipe the firebox, and knock creosote from pipe sections; a clean flue protects the jack and restores draft next trip. Inspect the jack panel for glazing or scorching, and replace it if it is fatigued. Protect fabrics and hardware. Rinse grit from zippers, treat sliders lightly, and check guy lines, stake loops, and tie-outs for fray.  Reproof high-wear zones if water no longer beads. For inflatable beams, equalize pressure at room temp, clear valves of ice, and store loosely—avoid long-term compression. Stash the tent in a cool, dry place off concrete, with a small desiccant pouch in the bag. Things To Remember About Cold-Weather Camping Tents  A military-style winter tent with a wood stove should deliver three things every time: safety, steady heat, and fast deployment.  Prioritize a fire-resistant jack, disciplined ventilation, and a layout that protects people and gear.  Inflatable designs add speed and stability in deep cold, while RBM Outdoors’ focus on durable materials and practical details keeps the shelter reliable through long winters.