


 Related
How To Save Money On Your Next Trip
BY Barsha Sep 18, 2023
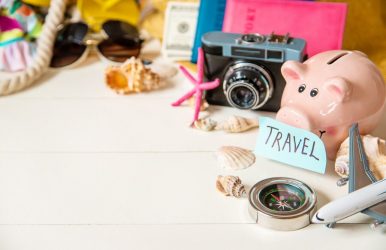
Saving money with your trips can be your plan for the last five years, but you may have missed the opportunity all the time. Well, this might not be true for your condition but sure you have tension with travel costs for your next trip. Don't worry! We have got you covered this time! While booking flight tickets comes with crazy costs, we have the craziest deal for you. Black Friday is no longer a secret for the world; this time, you can grab the best vpn black friday deals online. Why is it important? Your search history and cache may increase flight costs every time, and you need to use a VPN. A secure VPN that you may have this black Friday can be your main saving partner. Use it while booking tickets and ensure that the price is low. We love to travel, and no doubt we want it as much as possible. Unfortunately, we do not get many long leaves in a singular calendar year. However, work is permanent, and we cannot skip it. Thinking of skipping work is dangerous as it may lead to mental frustration and a lack of dignity. By considering your skills and expertise, it's better to be agile with your working process. We cannot skip our working process and daily boring life, but we can take a break from it. How? Traveling to your favorite places by taking leaves once or twice a year can be a fundamental choice for your professional career without stress. Here, we will focus on your savings while traveling and have already considered one trick for you. Best Ways To Save Money On Your Trip Traveling can be expensive, but it doesn't have to be. With the right planning and a few simple tricks, you can save money on your trip without sacrificing fun or comfort. Whether you are a budget traveler or simply looking to cut costs, there are plenty of ways to save on everything from flights and accommodations to food and activities. Here, we will try to explore some of the best ways to save money during your trip and make the most of your travel budget. Save Money On Flight Booking Though we have already shared this idea with you earlier, let's explore it in detail. So, you have to plan ahead for your trip no matter how busy you are with your work. The more you plan, the better you can manage things on your budget. Well, if you are still not decided on your budget, consider it right now. We know that no one can ensure any particular budget right now, but at least you can go with the estimation. You must consider the advance deal if you want to go for a perfect trip without any headaches. However, it's crucial to prioritize safety alongside saving money. Opt for reputable airlines that prioritize passenger safety through investment in aircraft maintenance, whether it is by purchasing equipment like aircraft jacks or investing in rigorous maintenance schedules and procedures. Additionally, consider flight timings, layovers, and the airline's reputation to ensure a smooth and secure travel experience. While saving money on flight bookings is beneficial, it shouldn't come at the expense of compromising safety and comfort. Go For Rental Cars If you want to save money on your next trip, renting a car might be a good option. It can be more cost-effective than taking taxis or ride-sharing services and gives you more flexibility and freedom to explore your destination at your own pace. With a rental car, you can avoid the hassle of public transportation and the costs associated with parking in big cities. Additionally, you can make spontaneous stops and detours whenever you want without worrying about schedules or routes. So, if you are planning a trip soon, consider renting a car to make the most of your experience while keeping your budget in check. Avoid Hotels And Consider Airbnb Yes! You have heard it right. Hotels will give you rooms on the count, but if you get the whole house of a person? What about that? Well, Airbnb offers better houses at almost the same price as hotels. Apart from that, you will also get a caretaker while you are there at the house. How did it become possible? Well, people who often get out of their homes try to consider Airbnb for their house on rent while they are not home for a long time. This will allow you to search for a better property to stay within and also enjoy a home-like interior and care. It will save you money because you are paying for the whole house with rooms depending on the size, and that will fit all your members in the travel group. Travel During Off-Peak Seasons It is a no-brainer to understand that off-peak seasons come with cost-less visits. The more you pick these seasons, the better you can do more on a budget. Everything will be cheaper than you have imagined, from hotel prices to transport. Plan ahead and plan for the off-season tours. The more you try to indulge yourself in planning in advance, the better you can ensure budget-friendly trips. Don’t Be Afraid To Haggle When planning a trip, it's important to keep costs in mind. One way to save money is by haggling with vendors for a better price. Don't be afraid to negotiate, as it's a common practice in many countries. You may be surprised at how much you can save simply by asking for a lower price. Just be respectful and polite in your approach, and you may end up with a great deal on your trip expenses. Stay Off The Beaten Path When planning a trip, most people tend to stick to popular tourist destinations, which can often come with a high price tag. However, if you are looking to save money on your next adventure, it may be worth considering straying from the beaten path. By exploring lesser-known destinations, you not only have the opportunity to experience a more authentic and unique trip, but you may also find that prices for accommodations, activities, and food are significantly lower. Plus, you will likely encounter fewer crowds and have a more peaceful and relaxing vacation. To find these hidden gems, research online or ask locals for recommendations. Consider traveling during the off-peak season, as prices for flights and accommodations tend to be lower. And don't be afraid to step out of your comfort zone and explore areas that may not be as well-known. You never know what amazing experiences you may discover. Overall, staying off the beaten path can be an excellent way to save money and have a more memorable travel experience. So why not give it a try on your next trip? Read Also: Top 10 Best Travel Apps To Use In 2019 6 Expert Packing Tips That Will Make Your Trips More Fun Top Places To Visit In Italy On Your Next Travel Escapade