

Best Dark Tourism In Canada: It Cannot Get Gloomier Than This

Sep 30, 2024

Last Updated on: Aug 29, 2025

Travel Guides

Even if you don’t believe it, Canada has many locations and abandoned sites with ghostly stories and a dark history. 

Haunted places like the Fort Edmonton Park and Princess Theatre in Edmonton or the Disaster-struck Alberta Frank Slide are a few examples of how dark tourism in Canada offers a vivid experience. 

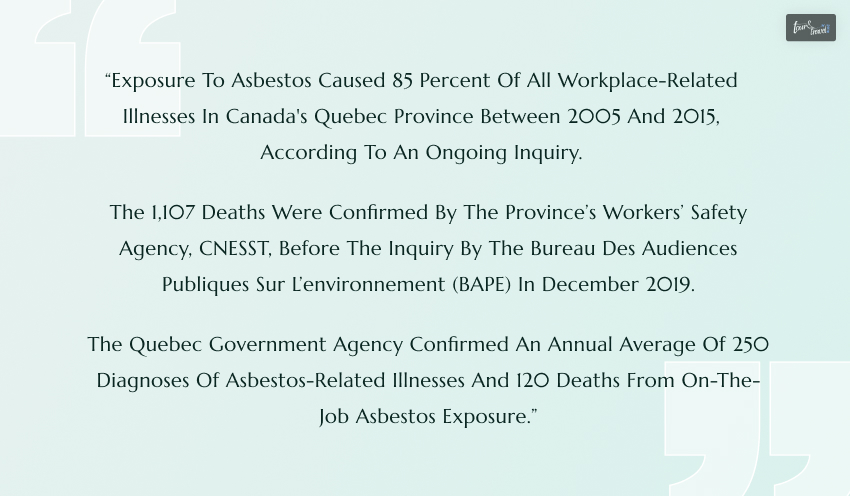
Further, sites like Asbestos (now Val-des-Sources) show how mining asbestos has caused long-term health hazards to Canadian people and victims beyond borders. Also, there is Halifax, where an explosion took the lives of around 2000 people in 1917.

So, let’s explore the sites that are scary and unusual. 

THESE Are The Best Sites For Dark Tourism In Canada 

Best Sites For Dark Tourism In Canada

In 2020, the small town of Asbestos changed its name to Val-des-Sources or the Valley of the Springs. However, the name change could not wipe off the history of diseases and suffering as it once had the largest asbestos mine in the world. 

So, like the nuclear plantations that pushed numerous human lives to death, Asbestos in Canada was also a town of breathing poison. Today, it is one of the most prominent destinations for dark tourism in Canada. 

Regarding dark tourism, Canada has many sites that tell the tale of human tragedy or are infamous for spooky experiences. Let me share brief accounts on these sites If you want to walk into the shadows. 

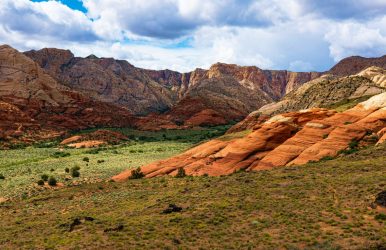
Asbestos 

Asbestos, a town in southern Quebec, once epitomized health-hazard horrors. Asbestos mining is not done here today, but breathing problems and other hazards caused by that “magic or miracle mineral” persist in the town. 

The town had an open-pit mine for mining chrysotile asbestos, and it boomed for a century. However, in 2011, the mine stopped its operations.  

Unfortunately, the use of asbestos became huge by the mid-20th century. It was a chosen material for roofing, insulation, and fireproofing. Slowly, it was discovered to cause many health hazards for people working in the industry or residing near an asbestos plant or mine. 

Asbestos

Despite the drop in global demand and many other countries banning the use, import, and export of asbestos, Canada kept at it until 2018. Justin Trudeau, the Canadian Prime Minister, banned the use, sale, import, and export of asbestos in 2016, and the ban came into effect in 2018. 

Nevertheless, today, the town of Asbestos, or Val-des-Sources, is a popular dark tourism site with an abandoned mine. The mine now looks like a gigantic playground.

Halifax 

Halifax 

In June 2016, the Canadian Government designated the Halifax explosion as a “national historic event.” Halifax was a busy port for the loading and unloading of food, aid, relief, and other essentials during World War I.

On an unfortunate day, 6 December 1917, the French ship SS Mont-Blanc and SS Imo, a Norwegian ship, collided. Both were carrying explosives, and the collision caused a major explosion. Almost 2000 people died, and many were injured, registering it as the biggest manmade explosion before the atomic bomb disaster

This human tragedy, however, was a milestone in changing the medical scenario of Halifax. The improvement in pediatric surgeries and the establishment of the Canadian National Institute for the Blind were the two most prominent examples in this regard.

Today, the Fort Needham Memorial Park is a prominent site for dark tourism in Canada. The commemorative plaque there gives you a brief account of the incident. Also, the Halifax Explosion Memorial Bell Tower here has an annual memorial service for the explosion on 6th December.

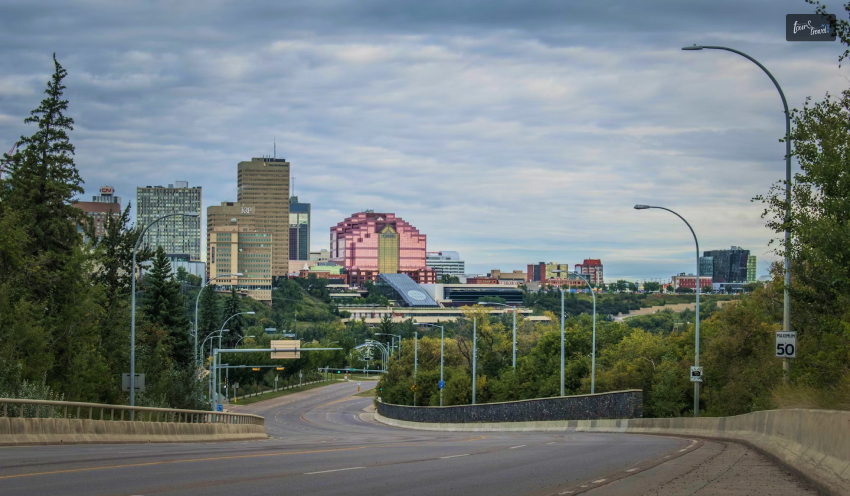
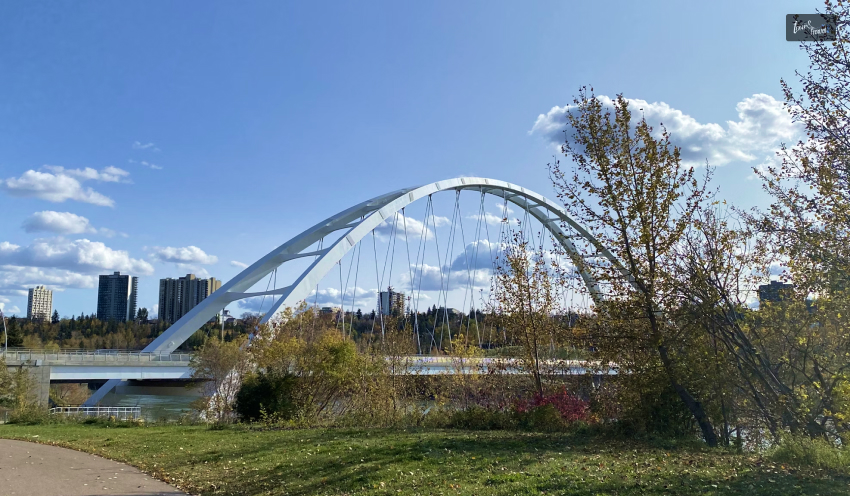
Edmonton: The Hub Of Dark Tourism In Canada 

Hub Of Dark Tourism In Canada

Edmonton has many destinations for paranormal encounters, and Fort Edmonton Park is one of them. At the paranormal tours here, you can explore many paranormal equipment and encounter many experts for some otherworldly experience.

You can also visit the haunted buildings of Edmonton. The stories of these buildings will scare you to the bit. Also, you never know when an unknown entity gets close to you, and you can feel the breath. 

Princess Theater: The Most Haunted Place In Edmonton

Another important haunted landmark here is the Princess Theater. In the 1920s, the theater was about to have an additional rental space. A bride-to-be rented that space, but her fiance left her on their wedding day. 

So, she committed suicide by hanging by the neck. When the staff of the hotel found her, her body was swinging from the rope. 

She was wearing a beautiful wedding gown. Legends have it that her ghostly figure is still seen at the theater. She is seen climbing down the stairs, wandering the theater halls, and moving around the projection room. 

Historic Mackay Avenue School Archives & Museum: Meet The Restless Spirit

Moreover, when in Edmonton to experience haunted activities,  Historic Mackay Avenue School Archives & Museum should be your destination. Many people have experienced a sense of choking, being grabbed, or disturbed at this place.

It is said that a construction worker called Peter fell from a third-floor window during renovation work in 1912. His restless spirit still lives here, and many informal investigations have captured strange silhouettes and erratic electromagnetic fields recorded here, which also vouch for paranormal activities here. 

The Museum of Fear and Wonder

It is unusual to find a rural museum of horror in the Southern Alberta rural valleys. It is eerie to the bone with Ouija boards and ventriloquist dummies. 

The little jack o’lantern dollhouse, Kiddo, leather doll, and the haunted doll, Robertina, are the most prominent collectibles here. Also, the artificial human body parts and life-like human bodywork made of wax are the creepiest things you will come across. 

All the collectibles in the museum are carefully placed to create a sense of fear. The aim is to show how people emotionally react to certain things. Also, Brendan, one of the founders of the museum, does not believe that things can be haunted or they can be related to paranormal activities. 

According to him, things, at the most, can cause a sense of uneasiness. Thus, all the items in the museum provoke discussion about the psychological impacts of different objects on different people. For example, an adorable doll can be an object of fear or discomfort for a person who has suffered childhood trauma. 

Even dolls or toys can get old and develop an eerie appearance through wear and tear. They can look messy or dirty, creating repulsive feelings.

Thus, the Museum of Fear and Wonder is not about paranormal experiences or activities. It is a place to understand the human psychology behind fear and wonder. 

Saskatchewan Ghost Towns – Insinger

Saskatchewan Ghost Towns Insinger

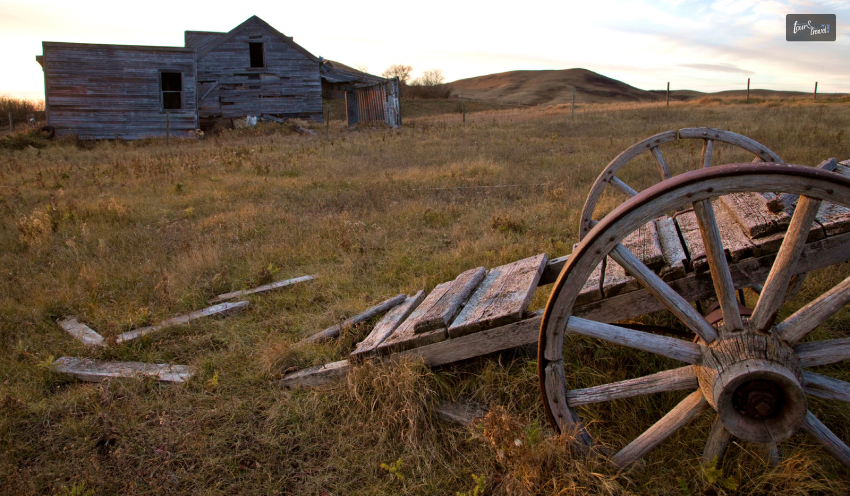
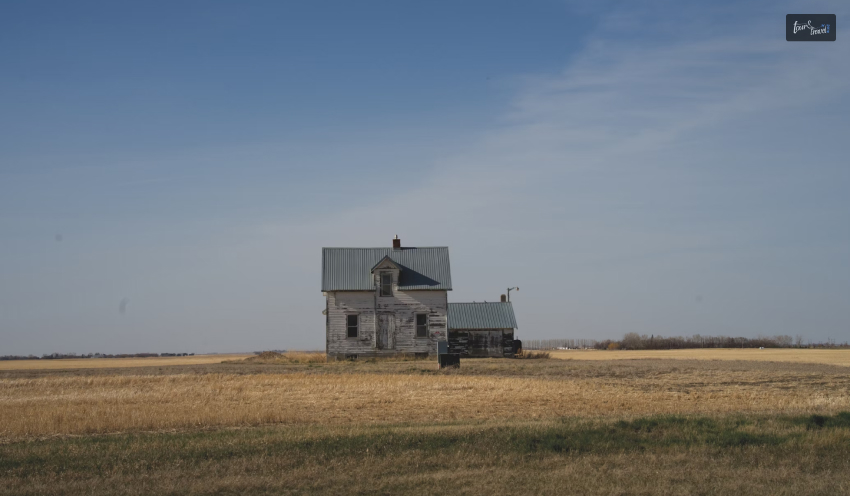
As India has Kuldhara, Canada has Saskatchewan, where time stands still, and the deserted town lives in the shadow of the past. Unbearable winter in the Prairie region made the residents desert the place.

In the 1800s, many European people came to Canada and got free land to set up a working farm within a year. Thus, this prairie became a bustling residence of farmers and their families.

Visiting Saskatchewan And Its Many Wonders

Visiting Saskatchewan And Its Many Wonders

In Saskatchewan, you will notice a Ukrainian Orthodox Church. The old church with a domed roof stands as a witness to the bygone era.

Do you know that Saskatchewan has so many ghost towns (more than 30) that there is a “Ghost Town Trail” here? You can drive around the route to explore the towns individually.

As you walk through the ghost towns of Saskatchewan, you will never feel alone. There is a constant feeling of someone following or walking with you.

Even looking at the most dilapidated structure, you will feel like someone will come out of it any moment.

I had plans to get inside some of the structures. However, a knotty feeling in my stomach stopped me. As hours passed, I started feeling anxious and left the place.

The Ghost Towns of Alberta – Rowley

Ghost Towns of Alberta Rowley

If I were to decide, I would name Alberta the capital of dark tourism in Canada. If the haunted places of Edmonton are not enough, you can explore Rowley.  

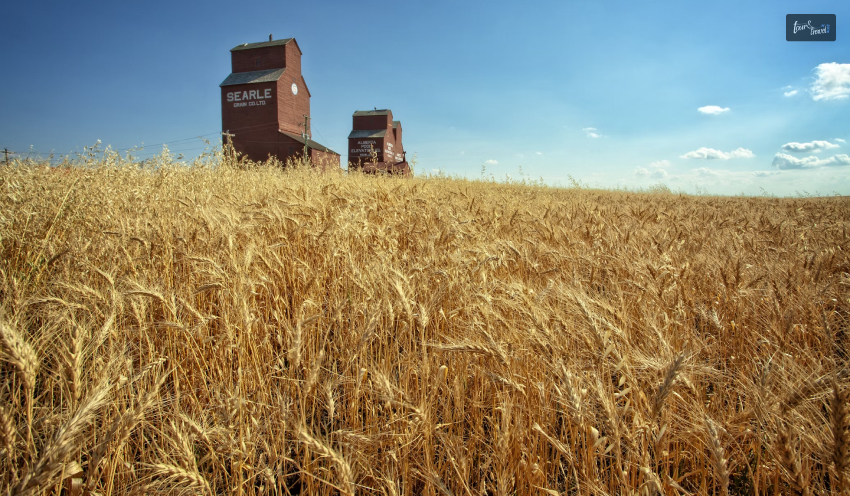
The small hamlet of Rowley in Alberta has deserted railway cars and buildings. However, it also tells some inspiring stories.

Rowley used to be a town with 500 inhabitants in the 1920s. The Great Depression hit the place, making the residents leave. A lack of rain led to the drying up of the crops.
Moreover, a fire destroyed many of the small buildings.
However, only eight surviving residents of Rowley did a commendable job of transforming Rowley into a heritage site in the 1980s. They transformed some of the buildings. 

Very few people know that movies like Bye Bye Blues or Legends of the Fall have some of these buildings as their locations.

Visit Rowley in the summer, as it offers free tours in the season. Also, the pizza parties here on the last Saturday of every month are fun! These pizza parties are fundraisers for restoring the buildings and preserving history here. 

THESE Are The Places You Can’t Miss At Rowley

The historical buildings to visit in the ghost town of Rowley are:

  • Rowley Trading Post (Built in the 1920s)
  • A Printing Press
  • A School
  • Now Abandoned Former Hospital
  • Abandoned Railway Tracks
  • A Saloon with Swinging Doors (Dedicated to the memory of a previous owner)
  • Municipality of Starland Office
  • Canada National Telegraphs Building

Along with these historical structures, you will also find a building labeled Funeral Home and Embalming. Going inside, you will find paraphernalia and historical artifacts used in Bye Bye Blues.

The only thing I find creepy about Rowley is the mannequins. The residents have used mannequins in many places to recreate the scenarios of the 1920s. 

So, if you have a faint heart, avoid peeping through the glass windows of the historical buildings. It is not very pleasant to find a mannequin looking back at you. 

However, overall, the experience was like being at the location of a classic Western movie. 

Alberta Frank Slide 

Alberta Frank Slide 

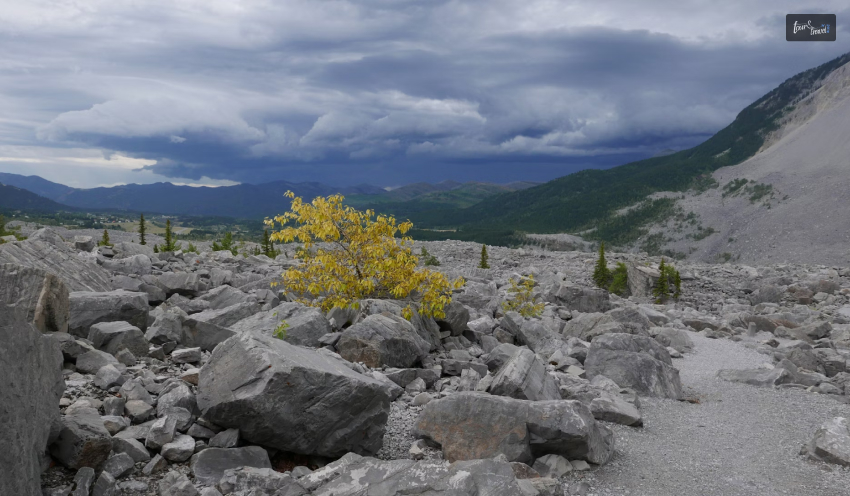
Alberta Frank Slide is one of the most tragic spots for dark tourism in Canada. 121 years ago, this place witnessed the deadliest slide in Canada. The tragic incident took the lives of 100 people.

What Happened At Alberta Frank Slide?

It was 4:10 am on 29th April 1903. The 600 people in the mining community were still asleep as Mount Turtle crumbled down and released 110 million metric tonnes of rock. This incident took the lives of around 100 people. 

Even today, if you pass through Highway 3 of Alberta or visit Frank Slide, you will find bodies and various belongings still buried under rocks. 

It was loud enough they could hear it up by the town of Cochrane, 200 kilometers away,” said Joey Ambrosi, the facility supervisor of the Alberta Frank Slide Interpretive Center. This interpretive center, built in 1985, tells the true stories of human tragedy and dismisses the myths around it. 

However, the intrigue around this biggest slide does not end here. The mountain moves a few kilometers from each other, and scientists suspect it will come down again. 

Having said that, there is still time for such an incident, and it will not be as deadly as the one that happened in 1903. 

When at Alberta Frank Slide, don’t forget to visit The Crowsnest Pass. A landslide and a mine explosion in 1910 badly hit the area. Again, at a stone’s throw away is the Hillcrest town where 189 miners died of a coal-dust explosion on 19th June 1914. 

Also read

Share on Social Media

Sibashree is a travel, culture, and leisure writer who has been writing since the age of 12 and professionally since 2014. With more than a decade of travel writing experience and journeys across India and several parts of the world, she brings a deeply personal and thoughtful perspective to her work. A student of English Literature and Mass Communication, Sibashree has always viewed travel as more than movement — for her, it has been a way of understanding people, cultures, and herself. Her passion for spiritual exploration has also led her to many unusual and meaningful destinations over the years. Outside of writing, Sibashree enjoys watching European cinema, reading about global politics, and reflecting on the stories hidden within everyday places.

Leave a Reply

Your email address will not be published. Required fields are marked *

title-img Related

READ MORE Multi-Day Hiking Trip

How To Prepare For A Multi-Day Hiking Trip

BY  Arnab Feb 16, 2023

Hiking has been a phenomenon for hundreds of adventure lovers. Well, it was invented during the eighteenth century for spiritual purposes. At that time, people used to walk long distances to mitigate their spiritual thirst.  But the concept changed a lot over time, and the word became more popular with adventure lovers. Now it's only to experience the beauty of our world. No matter where you plan to go, make sure you are firm with the plans. Planning a multi-day hike will be hard.  Well, these days, travel agents are fixing all the itineraries for adventure lovers. But if you have decided to explore some routes where people still don't go now and then, you must follow some DIY instances.  If you are taking responsibility, you have to take it properly. Undoubtedly, you will enjoy the whole trail, but hiking is mostly on foot, so you need to take care of your health as well.  From choosing the locations wisely to keeping all the gears, you need a wholesome plan to manage the whole adventure without difficulty. Be Prepared For Your Multi-Day Hiking Trip. If you are preparing for a multi-day hiking trip, ensure that you have managed to take care of all these below-mentioned hiking essentials.  These will help you to get rid of falling into difficult situations. Going on an adventure is simple but planning before it is difficult. If you miss the planning part, it's sure that you are going to be in trouble every now and then.  Remember, it's not a one-day trek, but it's a multi-day hike. Time is important, and when you have more than one day to follow your trail, you also have better planning chances. 1. Decide The Location Wisely It's not a one-day trail that you can easily go by listening to your friends. If you are going to multi-day hiking, make sure that you like the location. It's not about one location, but hiking is more about the adventure than the destination.  So, after taking suggestions, it's your time to sit and search through the internet to decide the whole path of hiking. Do not just stick to a particular place or area; you can decide to go through water and mud on the same trail. Don't let your soul put its finger on your face after you come back from the trail, not being satisfied fully. 2. Test Your Gears Multi-day hiking is not the purpose of using new gear. In fact, it's time to use gears that are tried and tested properly. For instance, if you are carrying a new stove and on the first day, you see that the stove is not lit, it's simply the end of your adventure.  It's not the time to use a new smartwatch that you have not unpacked yet. In the morning, when the trial is going to start, if you see that the watch is not working properly, there will be no chance to replace it immediately, and that might make you more upset than using an old smartwatch. The only solution is to keep all the gears that you have used properly in practical situations. Well, you might not have some gear that you might need to buy for this trail but make sure that you buy it in advance and use it before bringing it to the hiking. 3. Keep Lightweight Gears This is an essential part of your hiking. When you are going on a multi-day trip, it's clear that you have to carry more things than a usual small adventure.  On the other hand, you don't want to miss the adventure part due to the lack of itineraries. In a multi-day trip, people usually consider a location with lakes beside the mountains.  Coming back without sailing to the lake can be dissatisfying. On the other hand, sometimes, you may need to cross small rivers to continue to a beautiful hiking trail.  So what’s the solution? Well, you can simply go with inflatable sailboats, which are lightweight, and you can keep them by breaking them into small parts when not in need.  If you are confused about where you will find such inflatable boats, you can have a look at some inflatable sailboats for sale.  They bring the best quality with the particular product you want. So, it will not be a problem for you to find the particular inflatable boat to bring life to your multi-day hiking adventure. 4. Make Plans For Staying Hydrated This is a crucial step to take. Taking care of your health is a prominent step, and you need to take care with proper planning. Make sure that you are planning for a healthy diet, including minerals.  Keep fruits, water, and electrolyte with you all through the trail. When you are walking, you lose more energy, and you need constant delivery of water and things that can help you be hydrated. It's time to take care of your health if you want to complete the multi-day hiking with ease.  5. Keep Reliable Navigation  Keeping reliable navigation materials with you is necessary.  So, don't forget to keep such gears that will help you to navigate through the areas. You are going to a lone trail, and you were not on that road before. So, the only help you get is from the internet.  But when the internet will not work, what will you do?  Well, the navigators might help you to be on track when you are out of the internet. This is a particular step that will save you from getting lost. Being on dangerous roads or situations is not uncommon for hikers, and thus, they always keep navigators with them.  6. Pack All Weather Last but not least, you need to keep all-weather dresses. For instance, track pants, waterproof dresses, hiking boots, waterproof shoes, puffer jackets, and so on.  It's time to keep everything you can with you. Do not try to be a hero without any cause, and be responsible and safe.  All the best for your multi-day hiking trip. Stay healthy, stay fit. Read Also: Things To Do In Rocky Mountains National Park Tips For Vacationing In Gatlinburg Five Best Things To Do In Nepal

READ MORE card-img

The Best Great Barrier Island Camping Tips: Ultimate Guide To The Best Camping Spots On Great Barrier Island, New Zealand 

BY  Sibashree Nov 17, 2025

Spotting the burrows of the black petrels at Glenfern Sanctuary and the hillside was like magic! The burrows had eggs in a cream shade with tan freckles. They almost looked like the eggs of a hen, though slightly larger. Also, some chicks were chirping their hearts out inside the burrows. They looked like those squishy dog toys. Now, spotting birds is one of the most fulfilling activities when you are camping on Great Barrier Island, New Zealand. Furthermore, if days were about hiking and spotting the birds, the nights were about indulging in the surreal beauty of the celestial bodies at this designated Dark Sky Sanctuary. Moreover, camping in Great Barrier Island is a true off-grid and remote experience. No Streetlight!  No Public Rubbish Bins!  And, No Powered Camping Sites!  It’s just you, the camping tent, and the rugged beauty of New Zealand’s Hauraki Gulf. Hi, in today’s blog, I will talk about the Great Barrier Island camping tips. Here, you will learn about the must-book DOC sites, the non-negotiable biosecurity rules, and everything else you need to plan your adventure.  Camping In Aotea, Great Barrier Island: Setting The Right Mindset For Biosecurity And Sustainability View this post on Instagram A post shared by Department of Conservation (@docgovtnz) Aotea isn't a place that just hands you its beauty. It's a place that makes you earn it. It's a true adventure that rewards you for being self-sufficient.  It's the thrill of waking up to the raucous call of a Kākā parrot, not an alarm clock. It's the magic of watching the Milky Way rise over the dunes at Medlands Beach, and the peace of having a rugged, white-sand cove all to yourself.  Also, it is one of the rare islands that serve as sanctuaries, and with 60% of its area protected by the Department of Conservation, Great Barrier Island demands the utmost care for biosecurity and the adoption of sustainable practices. So, before you want to explore the best camping spots on Great Barrier Island New Zealand, you have to build your mindset. This is your invitation to join a small community of travellers who value wild, authentic, and responsible adventure.  1. Offering The True Off-Grid Experience  The campsites of the Great Barrier Island are exactly what the island is. They are not powered, and they have basic amenities. Furthermore, open fire is not allowed in these campsites. So, you will have to bring fuel-powered or gas cookers. Furthemore, the Department of Conservation camping sites have only a specific number of tents. So, you need to make the booking well in advance. Contact the Department of Conservation (DoC) at 0800 275 362. 2. The Golden Rule: "Pack In, Pack Out”  Zero waste and recycling are important for the sustainability and environmentally friendly practices of the Great Barrier Island. However, the island does not have public rubbish bins. So, whatever you carry to the island, you will have to take it back. You must use the official Orange Council bags with stickers for trash disposal. 3. Biosecurity Is Most Important  Protecting the Kauri trees from the infamous “Kauri Dieback disease” and the island's endemic animals requires a high level of biosecurity. So, when you leave for the Great Barrier Island from Auckland, you will have to check for ants and rats. Also, when you leave Great Barrier Island, check the tents and packs for skinks. In addition, the Phytophthora Agathidicida attack on the kauri trees has been a serious concern. Stopping the soil movement is crucial to stopping the attack of this dieback disease. Soil movement can happen through pigs, footwear, and vehicles. Therefore, the Department of Conservation (DoC) cleaning stations play an important role in cleaning and removing soil from your gear and footwear before entering a kauri forest on Great Barrier Island, New Zealand. In addition, you have to stick to the marked routes when hiking through the best Great Barrier Island hiking trails. 4. How To Book The Camping Sites: DOC Vs. Private  If you are camping in any of the DoC sites, you have to make the booking online well in advance. Private camping sites can be booked directly. Here is the step-by-step guide for booking a DoC Campsite on the Great Barrier Island. First, visit the Department of Conservation site for the particular campsite. For example, let’s talk about the Akapoua Bay Campsite. On the dedicated Akapoua Bay Campsite page, you will get to know about the campsite and the fees. The fees for the Akapoua Bay Campsite are $18 per night for adults, $9 per night for children ages 5 to 17, and $0 per night for infants ages 0 to 4. In addition, you can book a campsite pass from the Department of Conservation of New Zealand. It will give you access to all the bookable and non-bookable campsites in the country. If you need any assistance in booking the campsite pass, you can avail of that at a service tax of $10. For adults, the camping pass will cost $295.00 (365 nights), and for children between 5 and 17 years, the pass will cost $147.50. Moreover, for children below 5 years, the camping pass is free. If you need any assistance regarding the booking of the 1-year campsite pass or a pass for any specific site, you can contact Whakatū/Nelson Visitor Centre at +64 3 546 9339 or email them at nelsonvc@doc.govt.nz. The Kauaeranga Visitor Centre (+64 7 867 9080/kauaerangavc@doc.govt.nz) also offers the same assistance. What Are The Best Camping Spots On Great Barrier Island New Zealand?  View this post on Instagram A post shared by Department of Conservation (@docgovtnz) Digital detox has been a trending thing these days, and if you want to truly experience that and shut all the noise in your head, the camping spots on the Great Barrier Island will be the best for you. Further, the real magic of camping on Aotea starts after sunset. You haven't lived until you've watched the Milky Way rise over your tent from the dunes at Medlands. However, along with the Medlands Beach, there are 5 other DoC campsites in the Great Barrier Island, New Zealand. Here are the details. 1. Akapoua Bay Campsite  The sheltered waters of Port FitzRoy have a beautiful camping ground, which is like a gateway to the many walking tracks of the Great Barrier Island, New Zealand. From waking up with a 60-second dash of a cold shower to exploring the paths graced by the pohutukawa trees, the Akapoua Bay Campsite will offer you a peaceful and off-the-grid experience. The maximum number of campers on this site can be 75. Moreover, the camp is hosted from Christmas to the end of January. 2. Harataonga Campsite  This campground is very close to Harataonga Beach. So, it is an ideal camping site for swimmers and snorkeling enthusiasts. It can accommodate 120 campers, and this campsite is surrounded by bush and farmland. and camping takes place between Christmas and mid-February. Harataonga is for the romantic escape. 3. Awana Beach Campsite  The Awana Beach Campsite is a surfer’s dream. It has beautiful dunes and farmlands around. It can accommodate 120 campers, and the campground remains open from Christmas to the end of January. The only problem with this camping site is mosquitoes. So, you have to carry mosquito repellents. 4. Medlands Beach Campsite  The sound of the waves at Medlands. This is the music you will listen to when you go to sleep or wake up at the Medlands Beach Campsite. Medlands is like an all-rounder. It is ideal for families and surfers alike. The campsite remains open from Christmas to mid-February, and it can accommodate 120 campers. 5. The Green Campsite  You can boat in or walk in the Green Campsite, which remains open from 1st December to the end of February. With a capacity of accommodating only 30 campers, this campsite has a rich history associated with whaling, kauri logging, and timber milling. The waters of the Whangaparapara Harbour make it an idyllic retreat, and it is also the base of the Aotea Track. 6. Whangapoua Campsite  The Whangapoua Campsite is a surfer’s paradise, and it is located on the edge of the Whangapoua estuary. It is also a favorite camping site for fishing. With an accommodation capacity of 150 people, this campsite remains open from Christmas to the end of February. However, the biggest highlight of this camping site is the views of Rakitu Island and Mount Hirakimata. A Comparison Summary Table Of The DoC Camping Sites On The Great Barrier Island, New Zealand  DoC Campsite Access Landscape Facilities Activities Dog Access Fees Akapoua Bay Campsite Campervan, Car and Caravan Coastal Boat Launching, Cooking Shelter, Cold Shower, Non-Flush Toilets for Men and Women Boating, Fishing, Walking, and Tramping No Adults: $18 per night, Children of 5-17 years, $9 per night, and Children below 5 years: free Harataonga Beach Campervan, Car and Caravan Coastal Cooking Shelter, Cold Shower, Non-Flush Toilets for Men and Women Swimming, Snorkeling, Fishing No Adults: $18 per night, Children of 5-17 years, $9 per night, and Children below 5 years: free Awana Beach Campsite Campervan, Car and Caravan Coastal Cooking Shelter, Cold Shower, Non-Flush Toilets for Men and Women Kayaking and Canoeing No Adults: $18 per night, Children of 5-17 years, $9 per night, and Children below 5 years: free Medlands Beach Campsite Campervan, Car and Caravan Coastal Boat Launching, Cooking Shelter, Cold Shower, Non-Flush Toilets for Men and Women Fishing, Surfing, Swimming No Adults: $18 per night, Children of 5-17 years, $9 per night, and Children below 5 years: free The Green Campsite Boat, Foot Coastal Cooking Shelter, Non-Flush Toilets for Men and WomenHiking, Boating No Adults: $18 per night, Children of 5-17 years, $9 per night, and Children below 5 years: free Whangapoua campsite Campervan, Car and Caravan Coastal Cooking Shelter, Cold Shower, Non-Flush Toilets for Men and WomenFishing, Surfing No Adults: $18 per night, Children of 5-17 years, $9 per night, and Children below 5 years: free  Insider Tips For Camping At DoC Campsites On The Great Barrier Island If you are camping in a caravan or campervan, remember that the gravel roads leading to the camping sites, especially the Harataonga Campsite, are steep and winding. Also, the sites are off-the-grid. Furthermore, the campervans are not usually allowed on the beaches. The Best Private & Unique Camping Options On The Great Barrier Island View this post on Instagram A post shared by Department of Conservation (@docgovtnz) 1. Great Barrier Island Campground  The Great Barrier Island Campground, spanning over an area of 12 square acres, is an ideal camping ground for access to different beach activities. The camping site is located at a distance of just 200 meters from the beach. The camping fee at the Great Barrier Island Campground is $10 per person per night. You can contact them at 021 298 8905 for booking. 2. Mickeys Place  The O'Shea Family farm in Awana houses the Mickey's Place camping ground. It is a family-friendly camping site with the following facilities. A Communal Cooking Area  Flush Toilets  Showers  Patrick, Sean, and Mickey are the hosts of this campsite, and you can contact them at 09 4290 140. 3. Stray Possum  Stary Possum in Tryphena is an ideal camping site for backpackers. If you are camping here, you will have access to the kitchen, toilets, and showers of the adjacent Stray Possum Lodge. This camping site has 14 tents, and you can call 09 4290 109 for booking details. 21 Essential Great Barrier Island Camping Tips  I promised you tips, and here they are. Do not go to Great Barrier Island without reading this checklist.  • Packing And Food  1. Bringing a Gas Cooker  Open fires are banned in the Camping sites of the Great Barrier Island. So, you will have to bring a gas burner for preparing your food. 2. Packing Your Food  Groceries are not available everywhere, and they are even very expensive. So, it is better to collect and pack the groceries you will need before leaving Auckland. 3. Bringing a Good Chilly Bin  You will need this insulated chest for storing warm and cold food items. 4. Bringing a Red-Light Torch  The island is a Dark Sky Sanctuary. A red torch lets you stargaze without ruining your night vision.  5. Bringing Cash  EFTPOS (debit) is unreliable, and many camping sites only accept cash. 6. Packing Warm Clothes  The weather can suddenly become cold, even on summer days. So, you will have to pack layered clothes.  7. Carrying Mosquito and Insect Repellent  Sandflies and mosquitoes are notorious on Great Barrier Island. So, you will have to carry an insect repellent.  • On-Site & Facilities  8. Cold Showers  Most shower stations on the Great Barrier Island are cold water shower stations. This is great as the dash of cold water in the morning, literally works as the eye opener. 9. Long-Drop Toilets  The long-drop toilets are basic and waterless. Using these pit toilets can be challenging for some campers. 10. Drinking Water  The tap water available at these sites is not ideal for drinking unless it is purified or boiled. 11. Pet-Friendly  The DoC camping grounds are not accessible to dogs. This is crucial for the protection of wildlife, the safety of the pets, and soil movement, causing the resurrection of pets and parasites affecting the local flora and fauna. 12. Booking  The slots for camping sites such as Medlands, Akapoua get sold more than 6 months in advance for the Christmas and New Year periods. So, it is indeed a year-long planning. 13. Alcohol Rules  The consumption of alcohol can be banned in various camping sites, especially during the peak seasons. So, check with the camping site authority. • Transport & Logistics  14. Having a Vehicle  Having a vehicle is a must for moving around the rugged and large Great Barrier Island. You cannot walk between the sites.  15. Renting a 4WD (or 4WD-Capable)  The roads to various campsites are challenging. The road to Harataonga, especially, is very difficult. So, you will have to rent a 4WD-capable vehicle. 16. The Motorhome/Campervan Reality  The gravel roads are narrow, steep, and winding, and if you are planning to camp in a large RV, you will definitely struggle. 17. The Dump Station Nightmare  There is only one dump station in Claris, and it is only for black water or toilet waste. You will have to carry your grey water or sink with you. 18. Freedom Camping  Freedom camping on the Great Barrier Island, New Zealand, is a fascinating idea. However, the reality is quite different. It is heavily restricted, and sticking to the DoC sites is the best option.  • Safety & Etiquette  19. Using a Paper Map  Mobile network and GPS will not function in various parts of the Great Barrier Island. So, you will have to carry a paper map. 20. Tell Someone Your Plans  If you are hiking on the Great Barrier Island, you have to keep someone informed. The wilderness and remote locations of the hiking trails can throw many challenges, despite having an easy to moderately difficult level.  21. Being a Good Neighbour  You must respect the quiet, off-grid, and nature-first vibe of the Great Barrier Island. So, you have to keep the noise level down. How To Reach The Aotea Great Barrier Island With Your Camping Gear? For campers, especially the ones with campervans, traveling by the ferry from SeaLink is the best option. It is the only mode of transportation in which passengers and cars are both transported. It is a 4.5-hour picturesque journey from Auckland. Your Great Barrier Island Camping Adventure Is Calling Camping on the Great Barrier Island, New Zealand, is the right mix of adventure, soaking in nature, and cherishing the off-the-grid living of the island. However, it’s not going to be easy with the amenities at the campsites being basic, and even the gravel roads posing challenges for the big RVs and campervans. Also, you will have to take care of biosecurity and all the sustainability guidelines to ensure that the island, a sanctuary of wildlife, does not get impacted negatively. Conservation as a pristine sanctuary is the reason why camping in the Great Barrier Island allowed us to see a billion more stars and birds than I have ever seen in my life.

READ MORE Managing Utility Bills And Services During Moves And Extended Travel

Managing Utility Bills And Services During Moves And Extended Travel

BY  Mashum Feb 13, 2024

Before packing your first box, make sure to notify your utility and service providers of your move date and new address. This includes essential services like gas, electricity, water, internet, phone, and cable or satellite TV. Notifying them in advance ensures you receive a final bill for service at your old address so you can pay any remaining balance. Provide the exact date the service should stop and your new address where the service should start. Also give them a forwarding address for the final bill, which may come later. Taking these proactive notification steps alleviates headaches from missed bills or payments during a busy move. Avoid Bill Surprises While On The Go Constantly traveling or relocating for extended periods can make paying and keeping track of utility bills a real headache. Set your accounts for automatic and paperless billing to avoid missing payments or getting hit with late fees. Have electric, gas, cable, internet, phone, and other bills set to autopay directly from your bank account every month while you are away, and make sure you have enough funds available to cover those payments? Also, set up your accounts so that bills can be viewed and managed electronically online through each provider's website. Retail expert movers recommend routing all bills and statements to a trusted relative or P.O. box that will forward your mail to wherever you end up. With a few preparatory steps before locking up and heading out, you can travel worry-free knowing vital services won't be disconnected. Forward Important Mail During Transitions Whether you're moving across town or traveling overseas for months at a time, don't let lapses in mail service leave you in the dark on important communications. Before an upcoming move, submit a change of address to the post office so mail gets routed to your new residence or a trusted contact. This ensures you receive mail from utility companies, banks, insurance providers, and other services during the transition process. If taking an extended trip, have the post office hold your mail until you return or forward it to a friend or family member who can scan and email you anything urgent. This way bills, legal documents, and other correspondence don't pile up unchecked at your empty house while you're gone for weeks or months. Staying up-to-date on mail prevents unexpected issues. Read Also: Corporate Travel Redefined: The Power Of Taxi Amsterdam For Business Rides Streamline Services While Away When you're preparing for an extended time away from home, look at temporarily suspending non-vital home services to save money. Cable TV and internet packages often tack on fees, so you end up paying for services never used. Before an extended trip or during slow relocation periods: Put cable TV services on seasonal hold - once reactivated, retain your previous channel package without added fees Suspend internet if wireless access is not essential during your time away Stop newspaper delivery which will pile up unread Place gym memberships on hold status so monthly fees aren't wasted Disable alarm monitoring systems with the assurance of quick reactivation Pausing unnecessary utilities and home services over weeks or months gives savings that add up. Most providers let you conveniently pick up where you left off for seamless transitions. As the Federal Communications Commission notes, be aware of any terms or conditions associated with temporarily discontinuing services. With some advanced planning, you can streamline the services you actually need and forego the rest while you’re away. Get Seasonal Utility Rates For Long Trips When planning for an extended trip spanning multiple seasons, take advantage of many utility providers' seasonal service plans to maximize savings. Call your gas, electric, and water companies to inquire if they offer special rates for customers who will be away for months at a stretch–common for snowbird travelers and those holding up somewhere warm for the frigid winter months. Oftentimes providers give breaks on standard bills when they know in advance you won't actually be occupying the home to use services for a fixed duration. Find out what options are readily available for putting gas, electric, water, and even cable on hold status just until your return, even if you come back at a different time annually. Checking on special cost-saving programs specific to extended seasonal gaps in service can pay off. This allows flexible travelers focused on warm weather destinations to save a little more towards their next adventure on the road. Reconnect Services Upon Returning Home Don't come home to a property full of shut-off notices! Be proactive by scheduling and confirming the reactivation of utility and home services shortly before your return. A few days ahead: Call the cable company to reopen service on your scheduled move-in date - this prevents lagging connections. Have the power company resume electrical service by your designated date to avoid dark, warm apartments. Reactivate your home internet modem and wireless router to get back online for work and entertainment needs as soon as you arrive. Resume your garbage pickup on the day you move back to prevent waste pile-ups. As cautioned by USA.gov's household services guidance, don't assume providers will automatically switch your accounts back on. After lengthy absences, directly request all services be transferred or started at your location effective on the precise date of your arrival to avoid any lapses. Scheduling ahead alleviates having to reboot utilities one by one after coming home tired from travel. Instead, enjoy seamless access to functioning appliances, climate control, and amenities. Planning Ahead Minimizes Headaches Whether you're frequently on the go or planning an extended getaway, don't let utility billing and services fall by the wayside. With some advance preparation before transitions, you can redirect mail, suspend non-essential accounts, take advantage of seasonal rates, and seamlessly reconnect everything upon returning home. Staying actively informed and visible to providers while away reduces the chances of penalties, confusion, or disruptions down the road. A few simple proactive tasks like automating payments or consolidating bills to one trusted advisor can alleviate countless headaches. Embrace solutions that simplify managing obligations from afar. The little time invested upfront in organizing your affairs makes for smooth travels every step of the journey. Read Also: Sands Of Splendor: Luxurious Desert Safari Experiences In Dubai 20 Of The Best Places To Travel In Africa In 2024 6 Best Destinations For A Safari In Kenya