


Is Phe Phe Falls Worth Visiting? 

Mar 26, 2025

Last Updated on: Nov 24, 2025

Travel Blog

If you are planning to visit a place in the monsoon, Phe Phe Falls is your destination to go. In Meghalaya, among the lush green forests and bridges, the waterfalls will stun you into speechlessness. Furthermore, there are possibilities of visiting other equally amazing places quite close to the falls.  

The state of India is quite a paradise when it comes to natural beauty, elements, and other inspiring factors. You will enjoy the place apart from doing things like swimming, trekking and others. Read the blog to learn more about one of the most exotic places to travel.  

Is Phe Phe Falls Worth Visiting?  

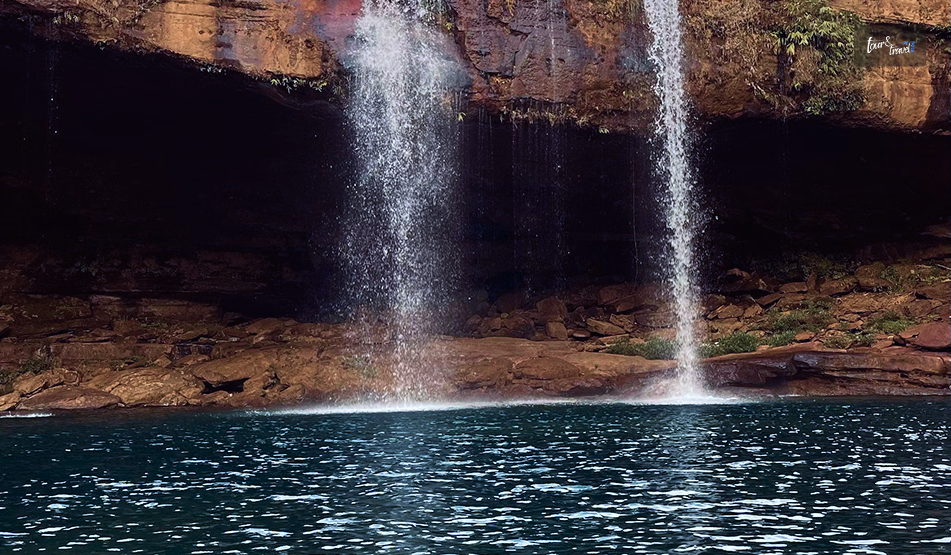
The water of the Phe Phe Falls is cold, transparent like the sky with blue in its depth. The transparent water gives an essence of diversity, beauty, and unique charm. Let me share with you the meaning of the name, the things to do and what are the places around the fall to visit.  

Additionally, you can immerse your feet in the chilling waters and a sense of another worldly feel. It will fill your heart with happiness as you see the beauty all around and inside of you, experiencing a different kind of peace.  

In this blog, I will share with you what I think of the place, why you must visit it additionally, what is the best time to visit. You can plan this place when planning your solo trip in India.  

Meghalaya  

Meghalaya

Meghalaya offers you various elements, its natural beauty, the culture, folklore, lifestyle and music of the people. When you visit the place, you realize the natural beauty is further enhanced with the human touch!  

The paradise of the North-Eastern corner of India, Meghalaya is a nature lover’s retreat to exploration, self-love and adventure. Amongst the beautiful valleys and waterfalls, one such fall is Phe Phe Falls in Shkentalang village.  

The fall is located in the West Jaintia Hills district, and you must visit it to experience a mix of beauty, mystery and grandeur. Let us explore further things to do along with other places to visit around the falls.  

Best Time to Visit Phe Phe Falls  

Best Time to Visit Phe Phe Falls

If you are wondering about the best time to visit Phe Phe falls in Meghalaya, I would say monsoon season is the best. Starting from the month of June to September, you will find Meghalaya at its best. The Phe Phe falls is at its fullest during this time.  

You will be thoroughly impressed with its beauty, the fall cascading down with abundant water amidst the green surroundings, in the lush and green forests. However, I would suggest you need to check the local weather conditions regularly when you are visiting.  

It is important because there are always chances of heavy rainfall during this time which ultimately has the power to impact the visibility and your travel plans. However, if you are not a huge fan of monsoons, you can go post monsoon, between October to November or even during March to May, which is prior to the monsoon seasons.  

These times are relatively stable as compared to the monsoon seasons when it comes to heavy rainfall. The lush green surroundings were quite persistent during these times as well but with a limit to the sudden downpours.  

About Phe Phe Falls – Meaning  

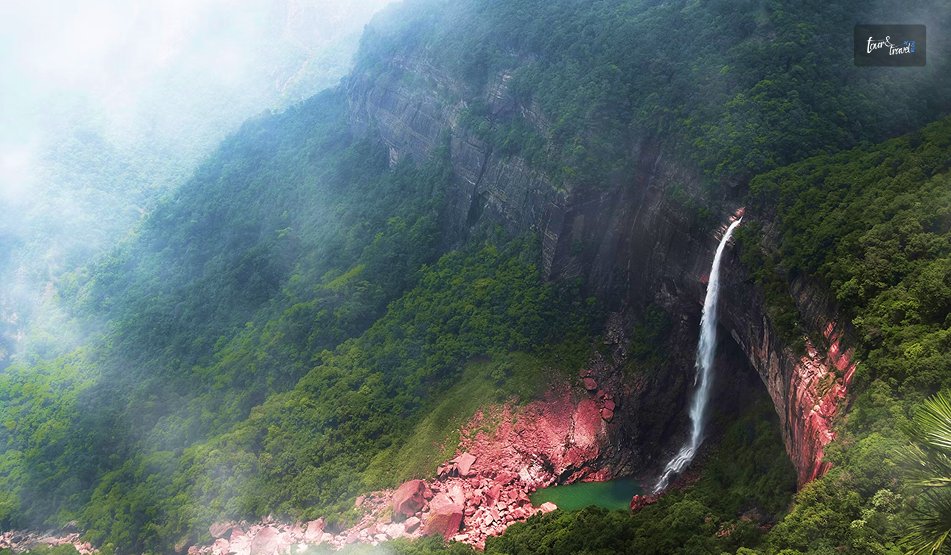
The Jaintia word, Phe Phe can be translated into meaning paradise, which is also the name of one of the major ethnic groups in Meghalaya. A two-tier waterfall, the Phe Phe fall is more thrilling compared to other waterfalls because of the steep hill which you can see through the shrub bamboo plants.  

With the backdrop of the blue sky, the sight of the waterfall will steal your breath away. There are range of hills which are layered with shadow and light on the opposite side. When you visit the place, you will feel that you have entered a different, more beautiful world.  

Things to Do in Phe Phe Falls  

Things to Do in Phe Phe Falls

Meghalaya is a must-visit destination and there, the Phe Phe falls is a perfect place for you to enjoy the serene surroundings. Additionally, there are some things to do here so, let me share with you what else you can do in this tranquil atmosphere with breathtaking views.  

Trekking  

This is a must if you are an adventure traveler especially because Phe Phe offers you the best experiences of trekking in Meghalaya. You will go through lush green forests across the surrounding hills which offer stunning views.  

If you are a nature lover, you should trek checking out the different types of animals and plants, thus adding excitement to your overall journey. The trek is quite average, suitable for both experienced and beginner-level trekkers.  

Swimming  

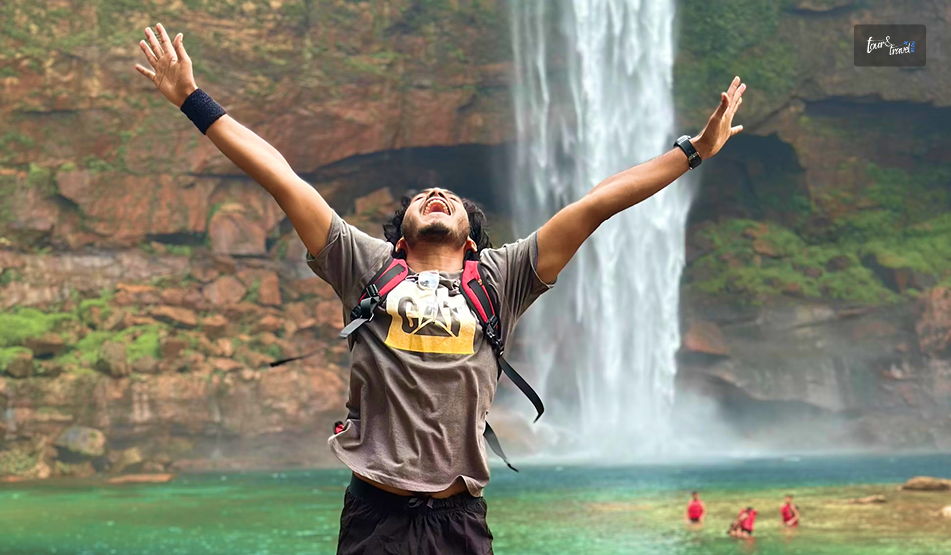
The act of swimming is a relaxing one and when you go swimming in the Phe Phe waterfall in Meghalaya, you find peace. There is a natural pool which is at the base of the waterfall, and you can easily take a dip in the pool.  

You can also enjoy the scenery around the Phe Phe falls in Meghalaya once you are done swimming! The water is invigorating and clear, providing as beautiful surrounding to soak and relax. So, if you are still wondering what are the places to visit in Meghalaya, I am sure I have convinced you!  

Additionally, the tranquility in nature will create a perfect place for you to relax and yet enjoy. It is a perfect place to cool off after you come down from your rock climbing or trekking.  

Camping  

In Meghalaya, the Phe Phe Falls offers you a beautiful and perfect experience when camping out! It is only possible for those who are ingrained nature lovers to enjoy the lush greenery, falling water, and picturesque sunsets and sunrises.  

Living under the stars, camping near the Phe Phe falls is a perfect example of enjoying a peaceful night close to nature. Let’s not forget that it gives you an opportunity to connect with nature and make several memories.  

Rock Climbing  

A thrilling and exciting activity, rock climbing is perfect for adventure enthusiasts. The activity is thrilling, and the waterfall is the perfect background as it presents rock climbers with a unique challenge to experience beautiful locations and adventure, all at once.  

You need to be trained in this activity along with possessing immense physical strength. Once you reach the top, the view is simply beautiful. This way you can check your capacity and your skills to perfectly climb to the top.  

Nearby Attractions of Phe Phe Falls  

There are several attractions near the Phe Phe Falls which offer you the further natural beauty of Meghalaya. The picturesque scenes show stunning beauty, allowing you to enjoy the location, thus, offering the perfect weekend retreat.  

Dawki River  

Dawki River

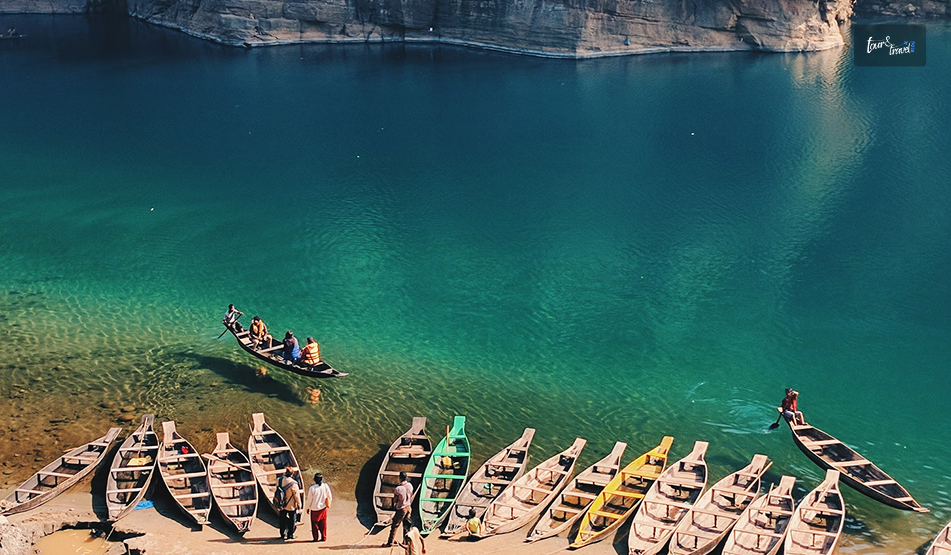
Known for its boat rides, the river also offers opportunities for fishing. It is one of the top places located quite close to Phe Phe falls. The transparent water will let you see deep into the riverbed and fish swim quite easily.  

You can visit from 9 am to 4 pm! Apart from boat rides and fishing, you can also set up a picnic to experience the scenic views. Further, you can also set up your camp along the river.  

Krang Suri Falls  

Krang Suri Falls

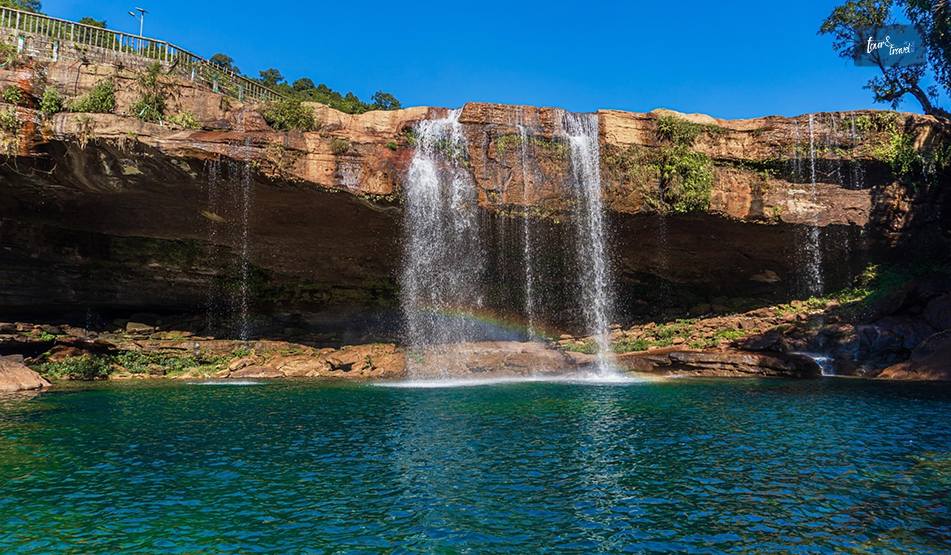
Another of the falls, Krang Suri falls is quite close to Phe Phe in Meghalaya. The turquoise pool just below the waterfall creates a mesmerizing sight for visitors. You can do rock climbing, enjoy the peaceful ambience and swim across the clear waters.  

Thadlaskein Lake  

You can visit the lake from 9 am to 5 pm, which is perfect to enjoy your vacation. There are several things to do in this lake such as boating, fishing, picnicking, and photography. Additionally, you can also visit the boat house and enjoy the sunset at the end of the day painting the sun red.  

Shnongpdeng Village  

The village offers an escape from the hustle and bustle of the city! The village is perfect for its natural beauty as it is situated just beside the Umngot River. If you are a foodie, this is the place for you as they prepare the most delicious dishes in Meghalaya.  

They have their local produce and as they are surrounded by nature, you will have a lot of relaxing time along with good food and good company.  

Pack Your Bags…  

In conclusion, the natural beauty of Meghalaya is worth traveling to! Phe Phe Falls is one such place in Meghalaya that showcases all its beauty with lush greens and cascading water. The natural wonder is all in its glory in the monsoon season and will take your breath away.  

Comment below about when do you decide to visit the Phe Phe falls! Let’s explore the beautiful place, if you are seeking tranquility in the natural beauty of Northeast India. 

Also read

Share on Social Media

Leave a Reply

Your email address will not be published. Required fields are marked *

title-img Related

READ MORE card-img

Three Of The Best Must-See Attractions During Your Time On The Thai Island Of Phuket

BY  Sibashree Jul 17, 2025

Alright, so—Phuket, the Thai Island. Man, where do I even start? I went in with zero expectations. Like, I thought it’d just be a beach-and-smoothie kind of trip.  You know, chill, maybe burn a little under the sun, hit up a night market or two, then call it a win. But wow, did this place surprise me! Seriously, you could spend a whole week there and still feel like you missed stuff. And I don’t mean just tourist traps—I mean real gems, the kind of places that make you stop and go, “Wait... how is this even real?”  But if I had to pick just three, the ones that still pop into my head while I’m spacing out on the subway or standing in line somewhere? It’s these. Trust me, you don’t wanna skip ‘em. Here’s the shortlist of the best things to see on Phuket Island, broken down with the same chaotic energy I had while stumbling across them. What Are The Best Things To See On Phuket Island?  From the natural beauty of Phang Nga Bay to the Big Buddha statue and the unique charm of the Old Phuket Town, the best things to see on Phuket Island are many.  Here goes my journal of what I saw and what I experienced.  Also, you can plan a stay in the best hotel in Patong Beach to make your holiday more enjoyable.  1. Phang Nga Bay Okay, so this one?  Total accident. I wasn’t even planning on going. I was half-asleep at breakfast, eavesdropping on some German backpackers at the hostel talking about this boat tour, and I kinda just nodded along and joined last-minute. Best decision I didn’t even really make. Next thing I know, I’m on this longtail boat, wind blasting my face, trying not to drop my phone overboard. And then—bam—these giant limestone cliffs just rise up out of the water like something straight out of a dream.  It’s wild. Like, you see photos online and assume they’ve been touched up or filtered or something. But nope. That emerald-green water? Totally real. And almost too perfect. Ended up in a kayak somehow. Not sure how that happened—someone handed me a paddle and I just went with it. And let me tell you, drifting through caves and into these hidden lagoons where it suddenly goes dead silent?  Genuinely eerie. In the best way. It was just me, water, and birds doing their thing. No Wi-Fi, no distractions. I didn’t even take a photo in that moment, which says a lot ‘cause I take photos of everything. I just kind of sat there, floating, trying to process how this was real life. Also, I overheard someone mention that those rock formations are millions of years old. Which, I guess, makes sense... but also doesn’t, because that kind of time is hard to wrap your brain around when you’re wearing flip-flops and sunscreen that’s already stopped working. Moral of the story: if someone mentions Phang Nga Bay, just go. Don’t overthink it. 2. Big Buddha Statue: One Of The Iconic Things To See On Phuket Island Alright, so this one is on every “Top 10 Phuket” list, and at first I kinda rolled my eyes like, “Okay yeah, giant Buddha, got it.”  But listen—it’s worth it. Especially if you like places that mess with your sense of scale and give you a weird kind of peace you weren’t expecting. You can spot the statue from, like, miles away. It’s perched way up on this hill and looks kinda unreal when the sun hits it just right.  Getting there involves a bit of a drive (note to self: don’t trust Google Maps when it says 15 minutes), and the road?  Twisty and wild. At one point, I had to dodge a monkey that was just hanging out in the middle of the road like it paid rent there. Once you're at the top though—wow. The breeze, the views, the statue itself... it all just sort of hits you at once.  There were people praying, people meditating, some guy just playing with his shoelaces like he was in his own little world.  I ended up sitting on this shaded bench, not really thinking, just existing. It’s hard to explain, but everything felt... still like time slowed down a little. Even if you’re not spiritual or religious or whatever, there’s something about that spot that feels special. It’s quiet, but not in a lonely way. Just peaceful. Solid recommendation. 3. Phuket Town So, confession time: I almost skipped this entirely. “The Old Town of Phuket”? Sounded kinda boring, honestly. But someone at dinner said the food there was fire, and I was like, “Alright, I’ll go for the noodles.” Ended up staying all day. This part of the island has its own vibe. Totally different from the beachy postcard stuff. It’s loud, colorful, and full of character.  Buildings in faded yellows, pinks, blues—all with peeling paint and crooked shutters that somehow make it even better. It’s got this lived-in charm. Like nothing’s trying too hard, and that makes it cool. I wandered aimlessly for hours. Got lost, found a little bookstore with more cats than books, and accidentally bought a t-shirt I’ll probably never wear.  I ate noodles that made me do the involuntary “eyes wide, nod slowly” thing because they were just that good. Oh—and there was this old guy selling postcards with weird hand-drawn cartoons. I bought five. It’s not glamorous. It’s not curated. But it’s real. And for me, that’s what made it so good. Things To See In Phuket Island: Where Nature And Grandeur Meet So yeah, those three places? Absolute standouts. Not secret spots by any means—plenty of people go. But they’re memorable in that “I can’t believe this is real” kind of way. Nature that humbles you. A statue that quiets your brain. A town that feels like someone’s messy scrapbook of life. And hey, pack light but bring snacks. I got way too hungry way too fast and regretted not having anything on hand but gum. Anyway, that’s it. If you end up in Phuket, don’t miss these. Or do. But you’d be missing out.

READ MORE one week San Diego itinerary

San Diego In One Week: The Perfect Holiday Itinerary

BY  Sibashree Sep 26, 2025

San Diego’s funny, and it feels like two vacations in one. You can be lazy by the beach and still find yourself hiking or grabbing tacos in some little neighborhood later.  The city’s chill, but not boring, which is kind of rare. If you’ve got a week, you can hit a mix of spots without running yourself ragged. And yeah, there’s always that random “Oh wow, I didn’t plan this, but it’s awesome” moment. So here’s a one week San Diego. It’s beaches, food, history, and a bit of hiking! All of these await you.  You don’t need to follow a very strict plan. However, having a basic plan always helps. What Is The Best One Week San Diego Itinerary?  Terminal 1 of the San Diego International Airport has just undergone a rejuvenation. The transformation has cost a whopping 3 billion US dollars, and the improvements show how the city is committed to serving its guests better. It perfectly blends smart designs, comfort, and technology.  Naturally, the current rejuvenation of Terminal 1 will be a milestone in boosting tourism to the city, which is otherwise fighting a downturn in the tourism sector in 2025. We can see the echo of the same in the words of Kerri Kapich, the COO of the San Diego Tourism Authority.  Kerri’s statement issued in May 2025 stated, “We are starting to see a slowdown. That is obviously a concern to all of us working in travel and tourism since we are the second-largest traded economy here in San Diego." Nevertheless, despite the not-so-great numbers, San Diego will never disappoint you with its beautiful beaches and marine life.  So, here is the one week San Diego itinerary for you.  Day 1: Beaches And The Waterfront The beaches and oceanfront are, of course, at the epicenter of the tourism scene of San Diego. Furthermore, these beaches are crucial for the city to adhere to sustainable and green tourism practices.  La Jolla Cove – Sea lions everywhere (they’re loud and hilarious). The water’s clear, cliffs are super photogenic, and if you’ve got snorkel gear, bring it. Sometimes they rope off parts during sea lion season, but you can still get close enough for a look.  The mornings here are calm, and it usually gets busy in the afternoon.  Mission Beach + Boardwalk – Classic scene. Long stretch of sand, bikes, rollerbladers, dudes juggling, all of it. It’s noisy in a good way. Sunset Cliffs – Come here at the end of the day. The cliffs are dramatic, like movie-scene dramatic. If the tide’s low, you can mess around in tide pools. Local tip: Parking near La Jolla can be a headache. So, reach early.  Day 2: Balboa Park And Downtown Energy Balboa Park is like San Diego showing off with its gardens, museums, and old Spanish-style buildings. Gardens – Some are free (always nice). The Botanical Building has plants everywhere, and the Alcazar Garden feels like a tiled postcard. Museums – Pick your flavor. Art, science, natural history! There are literally 17 of them. You won’t see it all, and that’s fine. Gaslamp Quarter – At night, the downtown buzz kicks in. Rooftop bars, restaurants, live music.  Local tip: Many museums offer free entry on Tuesdays. So, explore the official museum websites.  Day 3: Old Town And Classic Mexican Flavors If you want history with tacos (and who doesn’t), Old Town’s the move. Historic Park – Adobe houses, blacksmith demos, street performers! It’s half museum, half fair. Café Coyote – Fresh tortillas, large plates, and a fun vibe make Café Coyote a must-visit. Shops – Skip fridge magnets and choose handmade pottery, woven stuff, and jewelry, instead. Local tip: Late afternoon is the mariachi time, and it is super festive.  Day 4: Hiking And Outdoor Escapes Beaches are cool, but don’t skip the trails. San Diego has legit nature spots. Torrey Pines – Wild trees, epic ocean views, trails that make you stop mid-step just to gawk. Check closures before you go. Cowles Mountain – Moderate climb, great views from the top. You’ll feel like you earned your tacos. Mission Trails Park – Huge, less touristy. Lots of trails, chill atmosphere. Old Mission Dam is a simple stroll. Local tip: Sunrise hikes. Cooler, quieter, better. Day 5: San Diego Bay And A Boat Tour Different vibe today—see the city from the water. USS Midway – Enormous. Even just standing outside, you’ll be like, wow. Seaport Village – Cute, a little touristy, but good for wandering and snacks. San Diego Boat Tour – A harbor cruise is an affordable way to see the city from the water. You will pass under the Coronado Bridge, glide by the naval base, and take in the skyline from a fresh angle.  Some tours even spot dolphins along the way. If you want a more relaxing San Diego Bay tour with a fun island vibe, Tiki Time Bay Tours is one of the best choices. Their tiki-style boats create a laid-back atmosphere that is perfect for unwinding on the water. Local tip: Evening cruises can be cheaper. Plus, lights on the water are underrated. Day 6: Neighborhoods And Local Life This day’s all about vibes. Little Italy – You will find food everywhere, including good coffee, murals, and a farmers' market if you’re lucky. North Park – The North Park is artsy with craft beer and the vintage shops being the main attractions. Explore North Park in the afternoon. Ocean Beach – It is very chill and exudes a hippie-surfer energy. End with tacos by the pier. Day 7: Scenic Drives And A Relaxed Farewell Enjoy the last day of your trip in San Diego. You don’t need to do too much planning.  Pacific Coast Highway – Drive north, stop whenever the view makes you. (It’ll be often.) Coronado Island – Wide beach, fancy hotel, little cafes! It’s postcard-perfect but relaxed. Sunset Picnic – Grab snacks and sit on a blanket at Sunset Cliffs or Coronado. End the trip slowly and soak in the moments. Local tip: Locals picnic at the beach all the time. Join in. Wrapping Up Your San Diego Week Seven days later, you get why people rave about this place. You’ve seen beaches, trails, food spots, historic stuff, and neighborhoods, all with that laid-back SoCal vibe.  And the thing is that you didn’t even cover it all. Which just means that there’s more waiting when you come back. Read Also: What Is South Of France? What Will Be The Perfect South Of France Itinerary? What Are The Unique Things To Do In Santo Domingo, Dominican Republic? Unique Things To Do In Tuscany: What Is A Must-See In Tuscany?

READ MORE What are some of the coolest snowboarding trick names and the lore behind them

What Are The Coolest Snowboarding Trick Names And The Lore Behind Them? 

BY  Sibashree Jun 12, 2026

Freestyle is the main foundation of snowboarding. However, every rider has to learn the basic snowboarding tricks, from grinds to spins and grabs to butters.   Furthermore, you need a roadmap for becoming a park-ready snowboarder.  Also, you have to maintain your style equally before and after the drop. So, along with knowing the tricks, you need to choose snowboard jackets and snowboard pants that ensure superior performance with freestyle readiness.  What Are The Coolest Snowboarding Tricks?  You can divide the snowboarding tricks into four categories, and these are: Flips Spins Grabs Butters Flips mean rotating around the horizontal axis. On the other hand, spins are ideal for showcasing rotational tricks centering around the vertical axis.  Furthermore, in the grabs technique, you can grab the board in more than one position.  Moreover, butters means placing the board on the ground and using presses and spins for rails and jumps.  However, Ollie is the basic or main trick behind snowboarding.  The Ollie: The Basic Snowboarding Tricks From corked 10s to butters, you will find the simple Ollie trick. However, this is a trick that can only be perfected with practice.  Furthermore, this trick involves four stages: You have to energize the board. Then, you have to center the balance backward.  Next, you have to drive off the back.  Finally, you have to tuck the nose to square up. Now, here are the four tricks a snowboarder needs to master. However, before getting into the details of the tricks, I want to define what a switch is. What Does Switch Mean?  As a rider, you will have a natural leading foot.  Left Foot Forward is Regular. Right Foot Forward is Goofy. Also, riding “switch” means riding with your non-dominant foot forward, essentially riding your board backward from how you normally would. Many advanced tricks either require a switch landing or start from a switch stance, which is why you'll see it mentioned constantly in trick names and descriptions.  A switch is not an optional detail. It changes the difficulty of the trick fundamentally. 1. Butter Tricks  If you have to learn about the basic tricks of Nollies and Ollies, rotation, and board awareness, butter tricks are the best.  Tail Press You can initiate the tail press with the shift of your weight toward the board’s tail. You have to ride straight and lift the nose out of the snow.  Ollie And Nollie  Ollie is the foundation, and Nollie is the same in the opposite direction. In Ollie, you shift the pressure backward, and Nollie is the trick where you need to shift the pressure forward.  Then, you will have to press down on the nose for spring.  Nose Press  Nose Press is the inverse of Tail Press. Here, your weight has to be over the nose of the board. Thus, the tail remains free of the snow.  Tail Drag  You have to start a nose roll or a tail drag. Furthermore, once you get the first pop, you have to keep the board straight.  Here, you will not spin to get back to your natural spin. This is also called the “Nose-Roll to Pretzel.” Nose-Roll 180 Begin a toe or heelside turn. Once your edge engages, lift the tail while keeping the nose down, then spin 180 into a switch. Tripod When you are riding straight, you have to look behind. Then, you can start a heavy tail press.  Next, you need to go down and touch the snow with your hands. Thus, you will use your arms and tail to form the tripod.  Tail-Drag 180 You have to start a heelside or toe turn and do ollying. Thus, you can keep the tail on the snow.  Then, you can drag the board and land the switch.  Nose-Roll 360  The start for Nose-Roll 360 is very similar to the Nose-Roll 180. However, here the rotational force is greater, and the pop is harder.  In this trick, when your board is at an angle of 90 degrees to the direction you are riding.  Then, you can lift your nose from the snow and go for an airborne spin until it becomes a complete 360 degree.  Tail-Drag 360 Here, the start is the same as the Tail-Drag 180, and here, you need to drag the tail to perpendicular and pop harder.  Then, you will lift the board from the snow to finish a complete rotation of 360 degrees.  2. Grabs Tricks  Grabbing the snowboard in the middle of a flight is the space where freestyle was created. This is a stylish trick for snowboarding.  Indy Reach down with your back hand and grip the toe edge between your feet. Stalefish  In this grab trick, your back hand reaches past your back knee to grab the heel edge between the bindings. Tail  Here, you can use your trailing hand and grab the tail of the board right at the tip. This grab will not be on the sides.  Melon  Grab the heel edge between your feet using your front hand, reaching outside your lead knee. Weddle  Earlier, the Weddle trick was known as Mute Grab. It got its name from Chris Weddle, who invented the trick and tried for the first time in 1981.  The change of name happened in 2021, and as The Guardian reported,  “For almost 40 years, the “mute grab” has been part of a skateboarder’s bag of tricks: the lead hand grabs the toe side of the board between their feet. Now, the trick is being renamed to better honour its inventor, Chris Weddle, a deaf skater who was never actually mute in the first place.” In this trick, you will have to use your lead hand and grab your toe edge between the bindings.  Method If you want to master a more stylish move than Melon, you can try the Method trick. In this move, you have to stretch your legs from the Melon Grab stance, and thus the shape of your body will be like a scorpion tail.  Then, you will have to use your trailing hand before you aim high. The beauty of the method is that in this, everyone can try a different version.  In snowboarding, Method Grab has one of the most fascinating stories of origin.  The most amazing part is that it was not discovered on a mountain.   Rider Neil Blender started on a skateboard vert ramp in 1985. He was then taking part a highest-air contest.  The rules were to measure the air height from the lowest point of the body of the rider on board.  So, to squeeze out extra height, Blender arched his back and pulled the board up. He called it his best “method” for winning.  Thus, the method trick got its name and became very popular by the late 1980s. Even today, it is one of the most recognizable moves of snowboarding. Nose  In this trick, you will have to use your leading hand to grab the nose of your board. Roast Beef  Skateboarder Jeff Grosso invented this trick, and he called it the worst maneuver in skateboarding.  He admitted that he only started grabbing there because it was easier for him than a stalefish. However, today, it is one of the easiest “through-the-legs” grabs to learn.  In this trick, your rear hand reaches between your legs and grabs the heel edge of the board between the bindings, with your rear leg boned (straightened) for style. Chicken Salad  Because of the same through-the-legs motion, Roast Beef is often seen as the same as the Chicken Salad trick.  However, this trick is different because here you will grab the heel edge with your rear hand while your front leg is boned and your wrist rotates inward. So, you will reach between the legs with the rear hand to grab the heel edge while keeping the front leg extended. Many snowboarders also casually call the variations of the Chicken Salad Chicken Wing on the mountain.  However, in standard competitions, Chicken Salad remains the standard name. 3. Spins, Flips, And Corks  The tricks based on rotations are called spins, and as you try spins on the horizontal axis, you will land in a switch or natural position.  Spins happen in 180-degree increments. Furthermore, the following variations will offer you a switch landing. 180 540 800 1260 1620 On the other hand, the following spins will ensure a natural landing.  360 720 1080 1440 1800 Moreover, corks and flips are rotations on the vertical axis. However, they are very different from spins, and each of the variations has a distinct name.  Here are the tricks you are going to try.  Wildcat   Wildcat is a backflip trick. Here, you will have to keep the board in a parallel position to the riding line.  Thus, you will do a side slip but will not use the momentum. Tamedog Tamedog is the exact opposite of Wildcat. It is a frontflip trick, and here also the board remains parallel to the riding line.  However, you will also use the hard Nollie trick so that the nose becomes your springboard and you start rotating.  Backflip  In the backflip trick, the board will create a 90-degree angle to the snow. In this, you will flip the board backwards directly.  Thus, the board will have a straight landing.  Frontflip  Frotflip has many similarities with Tamedog. Here, you will have to do a Nollie and a nose-press to initiate the lip.  Then, you will use both hands and reach forward to start the somersault. You will also shift the board back into the landing place.  Rodeo It is a frontflip but with a difference. Launch a frontside turn off the lip, pop from your toe edge, and pull a frontflip 180 to a switch landing. It has become such a building block that riders now stack difficulty onto it. A “Backside Rodeo 540” is a genuine flex in the competition.  Backside Rodeo It is just the reverse of Rodeo. Start a backside turn at the lip, pop off your heel edge, and execute a backflip with a 180 to land switch.  Moreover, if you want to showcase the maximum style, you must try a Backside Rodeo 540.  Corked Spin  A corked spin is a simple addition of a backflip or a frontflip to a flat spin. It is a popular trick in competitive settings.  In these tricks, professionals “Cab Triple Cork 14s” or “Double Corked 10s.”  However, like the Rodeos, you can make any spin corked.  Rails And Boxes: Some Tricks For The Street Riders On A Mountain Encounter If you don’t want to try flatland and air tricks, or if you are a street rider, you surely love your rails and boxes.  Here are the common grinds you can try while snowboarding on the mountain.  Trick NameApproach DirectionBoard PositionTakeoff/Pop StyleLeading Edge/Feature Placement 50-50Straight OnParallel (Straight)Standard Pop Flat Base on the Rail or BoxFrontside BoardslideRail on the Front SidePerpendicular (Sideways)Nose Rising Over the RailHeel Edge Leads with Backward SlidingFrontside LipslideRail on the Front SidePerpendicular (Sideways)Tail Rising Over the RailCentred between the BindingsBackside BoardslideRail on the Back SidePerpendicular (Sideways)Nose Rising Over the RailCentred between the BindingsBackside LipslideRail on the Back SidePerpendicular (Sideways)Tail Rising Over the RailHeel Edge LeadsTailpressStraight OnParallel (Straight)Shift Weight BackwardFlat Base with Tail Pressed DownNosepressStraight OnParallel (Straight)Shift Weight BackwardFlat Base with Nose Pressed DownBluntslideWill Vary Based on the EntryPerpendicular (Sideways)Ollie or High PopRail Sits Directly Under One Binding Know The Glossary Of The Coolest Snowboarding Trick Names If you want to know what are some of the coolest snowboarding trick names and the lore behind them, you can begin with the glossary I shared.  However, you can also master these tricks.  1. Switch McTwist Switch McTwist was originally a skateboard trick. Skater Mike McGill first landed the move.  It was a combination of a front flip and a 540-degree rotation on a halfpipe in 1984. His teammate, Rodney Mullen, named the trick in his honor.  He took “Mc” from MacGill’s name and combined it with “twist.”  This trick came into snowboarding when Shaun White performed in the Vancouver Olympics in 2010, defending his title.  In a Switch McTwist, the same flipping 540 is required, and you need to perform it from a switch or a backward-leading stance.  So, it is a much harder variation, combining an already-difficult invert with reversed footing. 2. Double Crippler  You can perform a double crippler on the frontside wall of a halfpipe and not on the backside wall, which is a more common option.  So, it is disorienting, and you can't spot your landing the same way. Add a second flip, and you get the Double Crippler, a very difficult trick.  Maddie Mastro became the first woman to land it, at 18 years old, during her 2019 Burton U.S. Open win. No matter which trick you try, learn and practice it properly from professional trainers and wear the helmet to stay safe during the real adventure. Learning The Basics And Building On It The snowboarding tricks and the lore behind them can feel overwhelming at first.  However, if you want, you can build your vocabulary logically. Start with the Ollie and butter tricks to build board awareness.  Then, move into basic grabs like Indy and Melon once you're comfortable in the air, and only chase spins, corks, and flips once those fundamentals are second nature. Furthermore, most of today’s iconic tricks, the Method, the McTwist, and the Roast Beef started as one rider's happy accident or stubborn experiment. So, learn the basics properly, and eventually you might invent something worth naming yourself. Read Also: How Is It Possible For Ski Jumpers To Stay In The Air Long And How To They Train For That? Minus 40°C Or Minus 40°F: What To Know Before Planning Your Next Mountain Escapade? Ski And Snowboard Ride: A Journey Into The Heart Of Winter Adventure