


 Related

How To Choose The Right Luxury Hotel In Singapore: A Traveller’s Guide
BY Sibashree Aug 1, 2025
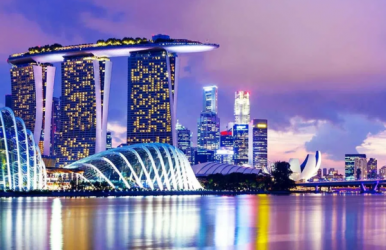
Singapore is a place you won't forget because it has a mix of modernity, rich culture, and a famous skyline. Okay, so—Singapore. If you’ve been there, you probably get it. And if not, just trust me—it’s one of those places that stays with you. It’s shiny and modern, but at the same time, you turn a corner and there’s a temple that looks like it’s from another century. The food? Ridiculous. The views? Even more so. But here's the thing nobody tells you upfront: your hotel? It's not just somewhere to crash. It's a huge part of the whole vibe, especially if you're going all-in on the luxury experience. But, how to choose luxury hotel in Singapore? That can feel... kinda overwhelming. Let me walk you through how I usually figure it out. How To Choose Luxury Hotel In Singapore? Choosing the place where you are going to stay for your vacation is always exciting. But how to choose luxury hotel in Singapore? You have to consider a lot of things while choosing it. 1. Pick The Best Place For You So first off, you gotta ask yourself, “Why am I even here?” I mean, what are you really in Singapore for? Want to shop? Go somewhere close to Orchard Road—it’s like shopping overload in the best way. More into history and temples and that sort of thing? You’ll probably want Chinatown or Kampong Glam. Travelling with kids or just want some beachy downtime? Sentosa's the move. And if you’re in town for work stuff, or want those crazy Marina Bay views? Then yeah—stay near Marina Bay. Also, and I can’t say this enough, be near an MRT stop. It’s cheap, clean, and insanely efficient. You’ll save yourself so much walking and taxi money. 2. Make Sure The Amenities Fit Your Lifestyle Okay, here’s where it gets personal. Like—what does “luxury” mean to you? Is it a spa that melts your stress away in five minutes flat? Or a rooftop bar where they remember your name and your drink after one night? Or maybe you just need solid Wi-Fi and a quiet room so you can finish that Zoom call and then go disappear into the pool. Some places go really extra with the service—private butlers, curated city tours, chefs who’ll adjust the menu to your dietary thing... all that. But don’t just fall for the photos. Look at what actually matters to you, not what sounds fancy in a brochure. 3. Think About Different Themes And Designs Okay, not everyone cares about this. But I do. I mean, you could stay in some super clean, all-white, glass-everywhere kind of hotel, and that’s fine. Or you could stay in a place that feels like Singapore, like it actually tells you a story. There are hotels with old-school colonial architecture and crazy modern interiors. Or ones where you walk in and it's just this mix of bold colours, funky shapes, and stuff that kinda feels like an art exhibit. There’s something cool about being in a place that doesn’t feel cookie-cutter, y’know? 4. Get Ideas From Real Guest Reviews Alright. Quick tip: don’t trust only the perfect pics and big influencer posts. Some of those are basically paid ads with filters. Instead, scroll through the messy, ranty, or surprisingly detailed reviews. If ten people say the breakfast is amazing? It probably is. If three folks mention mould in the bathroom, even if everything else looks nice? Yeah, that’s a red flag. I always try to find reviews from someone who travelled the way I am—like solo, or with a partner, or for work. You’ll get a much better read on what your own stay might feel like. 5. Think About How Private And Exclusive It Is Okay, this one’s kinda underrated. Some hotels—especially the bigger chain types—are just... crowded. Even if they’re five-star, it can feel like a luxury version of a mall. But the smaller boutique hotels? Totally different energy. Quieter, slower, more personal. You might not get the giant buffet breakfast, but you will get a front desk person who actually remembers your room number and maybe even your name. If you’re on a honeymoon, anniversary trip, or just don’t wanna deal with tour groups and loud lobby music, go small and classy. Trust me. 6. Look At The Loyalty Benefits And Packages Side By Side Quick money-saving trick: don’t ignore those loyalty programs. Even if you’re only gonna use it once a year, the perks can be solid, like surprise upgrades or free late checkout (a lifesaver if your flight’s in the evening). Also, check if the hotel’s running any random packages. Sometimes it’s stuff like airport transfers, spa credits, or a private dinner for two. It doesn’t always save you cash, but it can make your stay feel a lot more... taken care of. 7. Put Safety And Cleanliness First Yeah, I know. Not the fun part. But since the whole pandemic thing, this matters more than it used to. Most top-tier hotels say they’re clean, but still, dig a little deeper. There are various luxury boutique hotels in Singapore to choose from. Look for stuff like contactless check-in, solid air filtration (it’s a thing now), and what guests actually say about how well-kept everything is. If the place is sparkling and the staff is on top of things? It’s one less thing to stress about. How To Choose Luxury Hotel In Singapore: Think Of Ypur Priority If you are wondering how to choose luxury hotel in Singapore, you need to think about what matters most to you, like the design, location, privacy, and amenities. At the end of the day, there’s no “best” hotel—just the one that hits all your buttons. It might be the place with the jaw-dropping skyline views. Or the one with a bathtub bigger than your entire apartment. Or maybe just somewhere that’s quiet, clean, and has ridiculously good room service. Whatever it is, when you find that spot that just gets it right, it becomes more than a hotel. It becomes part of the trip. Read Also: What to Expect When Hiring an Meeting Space in Singapore Dark Tourism In Singapore | 5+ Must Visits In The Lion City