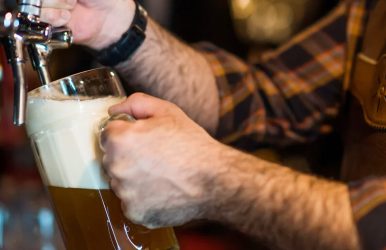
Personalizing Outdoor Experiences: The Power of Customization in Elevating Events

Mar 2, 2024

Last Updated on: Sep 18, 2024

Travel Blog

Outdoor events play a unique role in our lives as they allow us to feel the presence of nature. Besides, they help enjoy scenic backdrops and create meaningful moments, which in turn stay in our memories forever. It does not matter whether it is a wedding, corporate event, or family event. The outcome of outdoor experiences depends on the creation of a specific and unforgettable experience by the attendees. 

It is here that the role of customization hits the mark perfectly, giving organizers a chance to adjust everything about the event to match their vision and brand. For example, the E-Z UP tent that is custom is a tailor-made solution, which is great because of its versatility, branding options, and practicality for enhancing outdoor events.

Elevating Outdoor Experiences Using E-Z UP Tents!

Elevating Outdoor Experiences Using E-Z UP Tents

Here are all the ways E-Z UP tents can help elevate your outdoor events:

1. We Turn Spaces into Experiences by using Custom E-Z UP Tents

The core aspect of any outdoor event is the need for shelter and protection from the elements. E-Z UP custom tents are a multipurpose approach that allows organizers to turn an outdoor premise into a usable and visually attractive space. The tents can be tailored in a different number of sizes, shapes, and conversions are available.  Therefore they can meet the event requirements on any layout.

2. Brand Visibility and Recognition Creation at Height.

There is no denying that branding is a powerful tool to help organizations succeed in outdoor events. E-Z UP custom tents act as an efficient marketing tool that allows organizers to make their brands visibility by clearly having their logo, slogans, and colors on the tent canopies and walls.

With this increased level of brand visibility, which goes beyond the reach of event attendees, company image and brand messages gain more credibility.

3. Building Brand Experience as a seamless one.

Consistency has the potential to create a flawless brand experience at all touch points, including outside festivals. E-Z UP tents allow organizers to link all the branding elements of their event, such as marketing materials, signage, and promotional items, together to create a brand environment with a coherent look.

A hospitality tent gives a great outdoor experiences for all occasions, including a corporate event, product launch, or trade show booth, to enhance and communicate brand messaging.

4. Enhancing Guest Comfort and Engagement

Branding is not the only thing that an E-Z UP custom canopy does for people invited to an outdoor event but it also helps their comfort and engagement. The climate here is the real challenge as tents need shelter from the sun, wind, and rain, and with these tents, we have created cozy spaces where the guests can relax, socialize, and participate in the event activities.

Additional branding or informational content can be indicated through sidewalls that can be customized which also supports privacy and airflow control.

5. Customizing Solutions as Per Even Needs

One of the many strong points of the E-Z Up custom tents is the fact that they can be adjusted and matched to certain event needs and goals. Depending on what is required, VIP lounges, registration areas, vendor booths, and hospitality suites will all come in useful for event organizers.

These configurations of outdoor experiences are flexible, and they allow event organizers to turn their ideas into reality. In terms of small get-togethers and big shows, custom tents can easily be modified to provide for the exclusive needs of any outdoor parties.

Other Ways To Elevate Your Outdoor Experiences

Other Ways To Elevate Your Outdoor Experiences

Using the E-Z UP tent is a great idea when planning a grand or small gathering. How it helps elevate the experience is well understood with the information so far. We’ll look at all the other ways you can upgrade your outdoor experience: 

1. Have a plan of how you want the event to look. 

Having a plan helps you decide the activities that will suit your guests. For example, if the outdoor event is of the formal kind, you can rely on decorating the venue with a traditional touch. On the contrary, if the outdoor event is for a birthday party, you can add many activities! 

2. Choose the right venue. 

This goes hand-in-hand with the first tip. When you have the event requirements in mind, you are more likely to choose the venue easily. The proper venue makes all the difference, helping to elevate experiences further.

A corporate event in a lavish location is sure to distract people from the main agenda. However, it will be much more impactful when the exact location is chosen for a corporate lunch or to celebrate a milestone. Thus, choosing the right venue makes all the difference, especially in outdoor events. Some examples of perfect venues for your event needs: 

  • Countryside venue 
  • Park or field
  • Sports club
  • Beach
  • Arena or stadium 

Depending on the requirements, any of the abovementioned venues can be an excellent pick for your event. 

3. Select the perfect theme. 

Now that there’s a proper plan in place, this is the perfect time to select the theme that will welcome your guests. A theme elevates the outdoor event from a boring one to an exciting one. The theme of your event will make the experience all the more exciting and give you ideas to decorate the space accordingly.

There are hundreds of themes one can choose for their outdoor event. If you have yet to gain prior experience, getting help from an event planner can be helpful. 

4. Check for accessibility. 

This is a great tip when choosing the venue for your outdoor event. The venue should be easy to reach for everyone on your guest list. If your guests cannot attend the event, all your planning can drain. This also includes checking the venue for wheelchair accessibility, such as having a ramp and pathways with gentle sloping. Parking spots for differently-abled people, along with the presence of food stations that are at a good height for all attendees. 

A first aid station is also essential for outdoor events for safety purposes, as the event’s nature and location can lead to a medical emergency. 

Bonus tips for your outdoor event: 

  • Live performance. A versatile activity that can fit into any outdoor event, live performance can keep your audience engaged. Book an artist or a band, and change the vibe of your event. 
  • Photo booths. These act as a nice souvenir that your guests can take home. Photo booths let your event be immortalized in everyone’s memories. 
  • Food and beverage tastings. This is another fun idea that has elevated so many events from being a buzzkill. You should choose the food and beverage per the guest list, making it age-appropriate. Or, you can also mix it up and make each activity for two different age groups – it all depends on your audience. 

Conclusion

Customization is a mainstay in rendering a great impact and making events successful. Custom E-Z UP tents provide organizers with a highly flexible and functional tool to turn outdoor venues into vibrant event scenes, showcase branding and message to the audience, create a unique brand experience, and make the guest experience more engaging.

Through the use of their capability to be tailored to the particular needs and objectives of an event, custom tents offer an opportunity for the organizer to develop a noteworthy and unforgettable outdoor experience that will make a powerful impact on participants. Whether it is a corporate event, wedding, festival, or trade show it is highlighted by a virtue of customization in the world of outdoor events.

More Resources:

Share on Social Media

Ankita Tripathy loves to write about food and the Hallyu Wave in particular. During her free time, she enjoys looking at the sky or reading books while sipping a cup of hot coffee. Her favourite niches are food, music, lifestyle, travel, and Korean Pop music and drama.

Leave a Reply

Your email address will not be published. Required fields are marked *

title-img Related

READ MORE London Music Trip Travel Guide

The London Music Lover’s Travel Itinerary: Venues, Vinyl & Vibes

BY  Sibashree Aug 18, 2025

For those who travel by sound as much as sight. London doesn’t just host music, it holds it. It moves through the brickwork, hums beneath your morning coffee, and shows up when you least expect it.  If you're flying in with rhythm on your mind, don't waste time chasing tourist noise. Here’s a curated London music trip travel guide for music lovers who want to feel the city, not just see it. Your Ultimate London Music Trip Travel Guide: Follow This Itinerary You came for music in London, and if you did it right, you didn’t just watch it—you walked through it.  In London, every borough speaks its own tempo. The key is listening closely, not just for the big nights, but for the quiet tracks in between. Nevertheless, here is a standard London music trip travel guide for four days.  Day 1: Arrival & Warm-Up Walks Start with the echoes. Land, check in, and resist the urge to overschedule. Instead, walk. London’s music history isn’t just locked up in venues—it’s in the corners of Soho, the secondhand shops of Camden, and the quiet plaques on buildings that once held chaos and brilliance. Head to Denmark Street, once known as Tin Pan Alley. You don’t need a guitar to appreciate it—just time and a bit of reverence. Nearby, walk past the former Astoria (now long gone, but not forgotten), then duck into Sounds of the Universe in Soho. The vinyl is deep-cut, globally sourced, and fiercely curated. Grab a late bite nearby and keep it lowkey. You’re just getting started. Day 2: Vinyl Crates & Iconic Stages Go digging, then go big. Start the day in Notting Hill with a stop at Honest Jon’s Records. It’s been around since the '70s and the staff have that rare, quiet encyclopedic knowledge that reminds you music people don’t need to shout. Flip through dub, jazz, garage, and everything in between. Then cross town and hit Rough Trade East in Brick Lane. Even if you're not buying, the energy is unmistakable. There’s usually a live session or interview playing somewhere in the background. You feel part of something—even as an observer. As the evening rolls in, book a Cirque Le Soir table before you head to The O2 Arena. Yes, The O2 is huge. But some nights deserve scale. Whether it’s a legacy tour or a one-night-only show from an artist on the brink, this is where spectacle meets sound.  The acoustics are sharp, the production is heavy, and if you’re lucky, you’ll leave changed. Now, why the table? After a concert, artists love to celebrate. And where do they go? The table will make sure you have access. Day 3: The Cultural Cut Where sound meets soul. Dedicate the day to Southbank. Start with the Southbank Centre. Between Royal Festival Hall, Queen Elizabeth Hall, and the Purcell Room, you’ll catch everything from full-scale orchestras to left-field jazz sets to spoken word that leaves the room quiet in the best way. The best part? The space itself. Brutalist buildings softened by river light, steps where kids blast drill next to older couples sipping rosé, and that unspoken code that says, we all came for something real. After, stop into BFI Southbank or one of the nearby cafés. There’s a quiet, creative current in this stretch of the city. Lean into it. Day 4: A Goodbye With Texture Leave on the right note. Spend your final morning in Camden. Walk along the canal. Listen for the street musicians who don’t just perform—they pour. Visit the Jazz Café if it lines up, or just stop by outside and take in the marquee. A lot of names you know started here when no one else did. Before heading to the airport, swing by Flashback Records or Sister Ray. One last flip through the bins. One last moment to chase something unexpected. That’s what music travel is really about—not the big plans, but the small finds that find you. Day 5: Visit The Victoria & Albert Museum The Victoria & Albert Museum is the place where history meets music. The rarest and exclusive musical collections are often on display at the museum.  Here, you will find the works of Freddie Mercury, David Bowie, and many other musical geniuses representing genres such as opera, rock n roll, and others.  Also, the museum stands out with its unique collection of musical instruments. In fact, the collection of musical instruments here is the biggest in the world.  Day 6: Visit Abbey Road Are you a Beatles fan? You surely know what to visit in London. Abbey Road Crossing is the place where the Beatles' album was shot.  Furthermore, the crossing is close to Abbey Road Studios, where the Beatles recorded many of their iconic songs. The studio is still active as a recording facility, and you can also reserve a guided tour of the studio to learn about the history of music in London.  Day 7: Pay A Visit To The 100 Club The 100 Club in London was known as the Feldman Jazz Club from 1942 to 1964. In 1964, the club was renamed “The 100 Club” and since then, it has been a popular venue for live music shows and events.  Furthermore, throughout decades of its operation, The 100 Club has been hosting iconic performances such as Sex Pistols, BB King, Muddy Waters, Eddie Grant, and the list goes on! Moreover, located at 100 Oxford Street, 100 Club London is the oldest individual setup in the world.  Day 8: Watch A Performance At Royal Albert Hall Our London music trip travel guide will be incomplete without attending a live performance at the Royal Albert Hall.  Located at the northern edge of South Kensington, the Royal Albert Hall can accommodate 5272 visitors.  Queen Victoria opened the hall in 1871, and since then, it has been graced by all the prominent musicians and artists from around the world.  Furthermore, the hall has a distinct Italian architecture, and the first British Marathon was run at the Royal Albert Hall in 1909. 

READ MORE certified translation for immigration

How to Navigate Visa & Immigration Translations When You Travel Long-Term

BY  Sibashree Oct 22, 2025

Traveling long-term or moving abroad is an exciting adventure. But if your journey involves applying for visas, immigration permits, or residency, you’ll quickly discover that documentation is one of the biggest hurdles. Among the most common requirements are visa translation services and certified translations of official documents. Whether you are applying for a student visa, a work permit, or reuniting with family overseas, presenting correctly translated documents can make or break your application. Authorities want clear, accurate, and verifiable translations, and failure to meet those standards often leads to delays or even rejections. This guide explains everything you need to know about visa and immigration translations, including why certified translations are required, what documents usually need them, and how to avoid common pitfalls. Why Visa Translations Are Crucial When immigration officers review applications, they must be able to fully understand the documents submitted. If your birth certificate, marriage certificate, or bank statement is in another language, it must be translated into the official language of the country you are applying to. Here’s why translations are necessary: Legal clarity: Immigration authorities cannot legally assess documents they don’t understand. Consistency: Translations ensure names, dates, and details match across multiple documents. Compliance: Many countries require certified translations to confirm that translations are accurate and complete. What Are Certified Translations? Not all translations are equal. For immigration, you need certified translations. A certified translation includes: A complete and accurate translation of the original document. A signed statement (certificate of accuracy) by the translator or translation company confirming the translation’s authenticity. Contact details of the translation provider for verification if needed. This certificate is essential because it gives immigration officers confidence that the document is trustworthy and complies with their standards. Common Documents That Require Certified Translations When applying for visas or residency, the following documents are often requested in translated form: Birth certificates Marriage or divorce certificates Death certificates (in cases of dependent claims) Passports and ID cards Academic transcripts and diplomas Criminal record checks Medical records or vaccination certificates Bank statements and tax returns Employment contracts or pay slips Before submitting your application, carefully check the requirements of the immigration authority you are applying to, as these can vary from country to country. How to Handle Certified Translations for Visa Applications If you are preparing for long-term travel or immigration, here’s how to approach the translation process: Identify which documents need translationReview the checklist from the immigration authority. Don’t assume that only personal records need translation—financial and academic documents are often required too. Choose a reliable certified translation providerLook for services that are recognized by immigration authorities. For example, Certling offers certified translations accepted by USCIS in the U.S., UKVI in the U.K., and IRCC in Canada. Submit clear scans or photos of your documentsHigh-quality images prevent errors and ensure no details are missed in the translation. Check turnaround timesVisa applications often have strict deadlines. Many providers offer standard and express delivery options—use express services if you’re short on time. Verify acceptance guaranteesEnsure the translation provider guarantees compliance with immigration authorities. This gives peace of mind if your documents are ever questioned. Innovation in Visa Translations The translation industry has modernized significantly. Companies like Certling use AI and machine vision to analyze documents, count words instantly, and provide transparent per-word pricing. This innovation eliminates overcharging based on per-page pricing models and saves applicants money. Other key advancements include: Selective translation tools: Applicants can exclude unnecessary sections of documents, such as logos or stamps, lowering costs. Secure file handling: Professional providers use encrypted systems and delete documents after delivery to protect your data. Instant online quotes: You can now upload documents and get pricing within seconds, reducing guesswork. FAQs on Visa & Certified Translations Do I always need certified translations for visa applications? Yes, in most cases. Immigration authorities typically require certified translations of any foreign-language documents. Can I translate the documents myself? No. Self-translations are not accepted. Certified translations must come from a qualified translator or company. How long does the process take? This depends on the provider. Standard services may take a few days, while express options can deliver certified translations within 24 hours. What happens if immigration rejects my translation? Reputable companies often provide corrections or revisions free of charge if authorities raise issues. Certling, for example, includes this as part of their service. Are digital copies of certified translations acceptable? Yes, many immigration authorities now accept certified translations in PDF form. However, some may request physical copies, so confirm with your local authority. The Role of Certified Translation Services in Your Journey Securing a visa or residency isn’t just about submitting the right forms. It’s about presenting complete, clear, and compliant documentation. Certified translation is a critical part of this process. Providers like Certling specialize in certified translations for immigration and visa applications. They offer word-based pricing, fast turnaround, and acceptance guarantees for major authorities across the U.S., U.K., Ireland, and Canada. While your focus may be on the exciting parts of long-term travel, taking care of certified translations early ensures your journey won’t be delayed by paperwork. Final Thoughts Navigating the visa application process can be overwhelming, especially when traveling long-term or moving abroad. Certified translations are not just a formality—they are a legal requirement that can significantly affect your success. By understanding what certified translations are, why they matter, and how to get them done correctly, you’ll be better prepared to handle the complexities of immigration paperwork..

READ MORE How to Build a Memorable Travel Brand

How to Build a Memorable Travel Brand (Even If You’re Just Starting Out)

BY  Barsha Jul 17, 2025

Starting out in travel? Yeah, it’s a bit wild out there. Travel blogs, vloggers, Instagram feeds… feels like everyone’s already doing it, right? So, how do you even begin to stand out? The truth is, your brand matters. A lot. Like, way more than you think. It’s not just a logo or a color scheme—it’s the feeling people get when they land on your page.  The little things they remember when they’re scrolling late at night. But how to build a travel brand? What are the things you should focus on when building the website? And don’t freak out—you don’t need to be some design wizard to make this work. Seriously. You can just hop on and create logos with Adobe Express, mess around with ideas, and boom… you’ve got something that actually looks good. No graphic design degree required. How to Build a Travel Brand: Why Branding Matters in the Travel Industry Let’s not sugarcoat it—travel’s massive right now. Stats say global tourism might hit $9.5 trillion this year. Yeah, trillion with a T. Which sounds great, sure, but it also means… loads of people are doing what you’re trying to do. And people don’t wait around. If someone stumbles across your Instagram or blog, you’ve got, what, maybe three seconds? They’re gonna decide right then if you’re worth their time. That’s where branding jumps in. A strong logo, some color choices that actually feel like you, a tone that doesn’t sound like every other account… it all adds up. It makes you stick. Makes folks trust you. Maybe even follow you. 1. Visual Consistency Builds Recognition You know that moment when you see a post and immediately know who made it—without even looking at the name? That’s branding done right. It’s not magic. It’s just being consistent. Same colors, same kind of vibe, font choices that don’t change every week… it tells people, “Hey, this is me. You know me.” Quick ideas to help that happen: Pick 2 or 3 colors. Use ’em everywhere. Choose one or two fonts. No more. Drop your logo on stuff. Doesn’t have to scream, just be there. Your tone? Stick with it. Are you chill? Fancy? Rough-around-the-edges? Own it. You’re not aiming for perfect—you’re aiming for recognizable. 2. Your Logo: The Stamp on Your Travel Passport How to build a travel brand without a logo? Think of your logo like this: it’s your stamp. Your mark. The thing people see and go, “Oh yeah, that’s them.” Does it have to be mind-blowing? Nope. Just needs to feel like you. Whether you’re into high-end hotels or hiking in sandals, that logo should match your energy. And hey, don’t stress trying to get it perfect. Play around. With create logos with Adobe Express, you can test stuff fast. Try a font, swap an icon, change a color—repeat until it clicks. It’ll come together, trust me. 3. Figure Out Your Brand Voice When you communicate with others, your personality and attitude need to shine through. This should also apply to your business activities. Every message you write, whether it is online or offline, should reflect the mission and characteristics of your travel company.  A clear brand voice needs to be in line with itself in the market and work well with the target audience. However, ensure that this voice is the same everywhere. You can’t be sassy when you are posting something on social media, and then be helpful in your blogs. This will confuse the audience and will not reflect a clear picture of the company. However, you can interchange the tone of voice to reflect your mood. The motive is to have an emotional impact on the audience in the context of the message.  4. Give The Travel Brand A Makeover Think of the tone and mission of the brand and then put together something entirely new that will reflect your idea.  Make a remarkable logo, use a unique font for the content, and make the brand shine and leave an impression when they visit the site for the first time.  Visual elements contribute to your brand recognition. For instance, when people hear Google, their striking colors pop into their minds. So, what are the elements that you need to focus on when you are redesigning the brand? Logo Typography Image Colour palette 5. Build Consistency This is the place where everything comes together. The website is the face of the brand, and not just a digital storefront. Online visitors will look for information on your website about your previous tours and what you are willing to offer them. They will want to see a clear picture of how you conduct business. This is why it is important that you maintain consistency throughout the brand. Everyone should look like a copy of one another. The voice, look, and feel should be the same. Here are some of the things that you need to focus on: Create an amazing about us page and put all the necessary information about your brand there. When you have an idea about your target audience, figure out what they are looking for, and try to answer their queries and use relevant keywords. Make sure you do not divert from your brand voice. The content you write and the posts you make should give a similar feel. This will strengthen the brand. When you have built a brand identity, you need to focus on the booking page as well. People should not have to leave the website when they want to book a trip.  Plan Your Website Like You Plan A Trip Travel’s about movement, right? Moments. Snapshots. But your brand—that’s the thing that sticks. The anchor in the chaos. Now that you have an idea about how to build a travel brand, you can focus on other areas that are important.  If you care even a little about growing an audience, building trust, or just looking like you didn’t slap your feed together last night… take a little time to shape your look. A real logo. A clear voice. It makes a difference. And once it’s done? You’ve got a home base. A vibe. A brand that people remember even after they close the tab. So yeah—go make it happen. Not next week. Now.