

The Best Great Barrier Island Camping Tips: Ultimate Guide To The Best Camping Spots On Great Barrier Island, New Zealand 

Nov 17, 2025

Last Updated on: May 19, 2026

Travel Guides

Spotting the burrows of the black petrels at Glenfern Sanctuary and the hillside was like magic! The burrows had eggs in a cream shade with tan freckles. They almost looked like the eggs of a hen, though slightly larger.

Also, some chicks were chirping their hearts out inside the burrows. They looked like those squishy dog toys. Now, spotting birds is one of the most fulfilling activities when you are camping on Great Barrier Island, New Zealand.

Furthermore, if days were about hiking and spotting the birds, the nights were about indulging in the surreal beauty of the celestial bodies at this designated Dark Sky Sanctuary.

Moreover, camping in Great Barrier Island is a true off-grid and remote experience.

No Streetlight! 

No Public Rubbish Bins! 

And, No Powered Camping Sites! 

It’s just you, the camping tent, and the rugged beauty of New Zealand’s Hauraki Gulf.

Hi, in today’s blog, I will talk about the Great Barrier Island camping tips. Here, you will learn about the must-book DOC sites, the non-negotiable biosecurity rules, and everything else you need to plan your adventure. 

Camping In Aotea, Great Barrier Island: Setting The Right Mindset For Biosecurity And Sustainability

Aotea isn’t a place that just hands you its beauty. It’s a place that makes you earn it. It’s a true adventure that rewards you for being self-sufficient. 

It’s the thrill of waking up to the raucous call of a Kākā parrot, not an alarm clock. It’s the magic of watching the Milky Way rise over the dunes at Medlands Beach, and the peace of having a rugged, white-sand cove all to yourself. 

Also, it is one of the rare islands that serve as sanctuaries, and with 60% of its area protected by the Department of Conservation, Great Barrier Island demands the utmost care for biosecurity and the adoption of sustainable practices.

So, before you want to explore the best camping spots on Great Barrier Island New Zealand, you have to build your mindset.

This is your invitation to join a small community of travellers who value wild, authentic, and responsible adventure. 

1. Offering The True Off-Grid Experience 

The campsites of the Great Barrier Island are exactly what the island is. They are not powered, and they have basic amenities. Furthermore, open fire is not allowed in these campsites.

So, you will have to bring fuel-powered or gas cookers. Furthemore, the Department of Conservation camping sites have only a specific number of tents. So, you need to make the booking well in advance. Contact the Department of Conservation (DoC) at 0800 275 362.

2. The Golden Rule: “Pack In, Pack Out” 

Zero waste and recycling are important for the sustainability and environmentally friendly practices of the Great Barrier Island. However, the island does not have public rubbish bins.

So, whatever you carry to the island, you will have to take it back. You must use the official Orange Council bags with stickers for trash disposal.

3. Biosecurity Is Most Important 

Protecting the Kauri trees from the infamous “Kauri Dieback disease” and the island’s endemic animals requires a high level of biosecurity.

So, when you leave for the Great Barrier Island from Auckland, you will have to check for ants and rats. Also, when you leave Great Barrier Island, check the tents and packs for skinks.

In addition, the Phytophthora Agathidicida attack on the kauri trees has been a serious concern. Stopping the soil movement is crucial to stopping the attack of this dieback disease. Soil movement can happen through pigs, footwear, and vehicles.

Therefore, the Department of Conservation (DoC) cleaning stations play an important role in cleaning and removing soil from your gear and footwear before entering a kauri forest on Great Barrier Island, New Zealand.

In addition, you have to stick to the marked routes when hiking through the best Great Barrier Island hiking trails.

4. How To Book The Camping Sites: DOC Vs. Private 

If you are camping in any of the DoC sites, you have to make the booking online well in advance. Private camping sites can be booked directly.

Here is the step-by-step guide for booking a DoC Campsite on the Great Barrier Island.

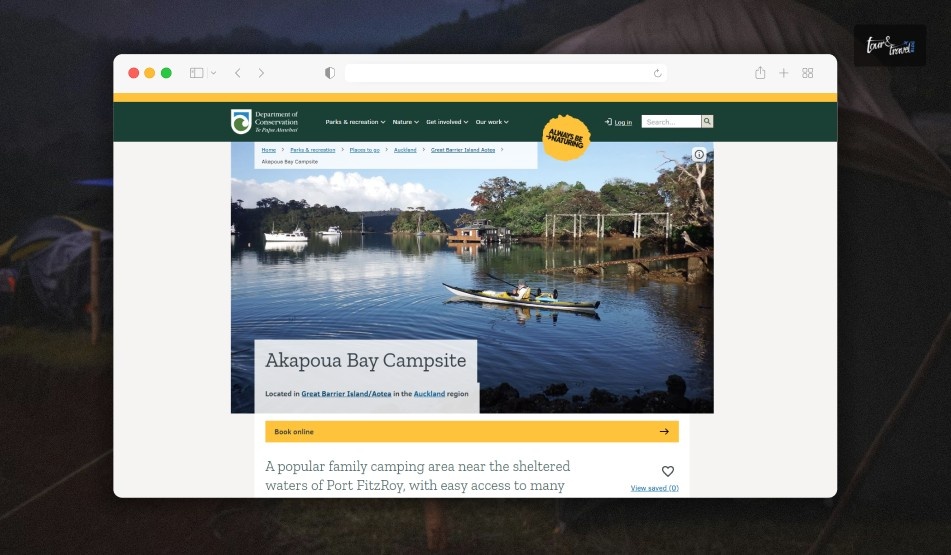
  1. First, visit the Department of Conservation site for the particular campsite. For example, let’s talk about the Akapoua Bay Campsite.
  1. On the dedicated Akapoua Bay Campsite page, you will get to know about the campsite and the fees.
  1. The fees for the Akapoua Bay Campsite are $18 per night for adults, $9 per night for children ages 5 to 17, and $0 per night for infants ages 0 to 4.
  1. In addition, you can book a campsite pass from the Department of Conservation of New Zealand. It will give you access to all the bookable and non-bookable campsites in the country.

If you need any assistance in booking the campsite pass, you can avail of that at a service tax of $10. For adults, the camping pass will cost $295.00 (365 nights), and for children between 5 and 17 years, the pass will cost $147.50.

Moreover, for children below 5 years, the camping pass is free.

If you need any assistance regarding the booking of the 1-year campsite pass or a pass for any specific site, you can contact Whakatū/Nelson Visitor Centre at +64 3 546 9339 or email them at nelsonvc@doc.govt.nz.

The Kauaeranga Visitor Centre (+64 7 867 9080/kauaerangavc@doc.govt.nz) also offers the same assistance.

What Are The Best Camping Spots On Great Barrier Island New Zealand? 

Digital detox has been a trending thing these days, and if you want to truly experience that and shut all the noise in your head, the camping spots on the Great Barrier Island will be the best for you.

Further, the real magic of camping on Aotea starts after sunset. You haven’t lived until you’ve watched the Milky Way rise over your tent from the dunes at Medlands.

However, along with the Medlands Beach, there are 5 other DoC campsites in the Great Barrier Island, New Zealand. Here are the details.

1. Akapoua Bay Campsite 

Akapoua Bay Campsit

The sheltered waters of Port FitzRoy have a beautiful camping ground, which is like a gateway to the many walking tracks of the Great Barrier Island, New Zealand.

From waking up with a 60-second dash of a cold shower to exploring the paths graced by the pohutukawa trees, the Akapoua Bay Campsite will offer you a peaceful and off-the-grid experience.

The maximum number of campers on this site can be 75. Moreover, the camp is hosted from Christmas to the end of January.

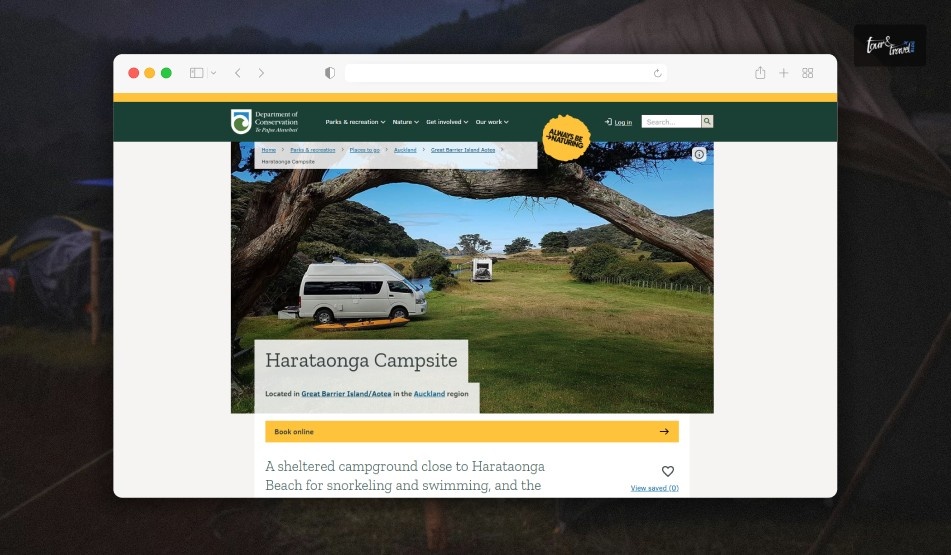
2. Harataonga Campsite 

Harataonga Campsite

This campground is very close to Harataonga Beach. So, it is an ideal camping site for swimmers and snorkeling enthusiasts.

It can accommodate 120 campers, and this campsite is surrounded by bush and farmland. and camping takes place between Christmas and mid-February. Harataonga is for the romantic escape.

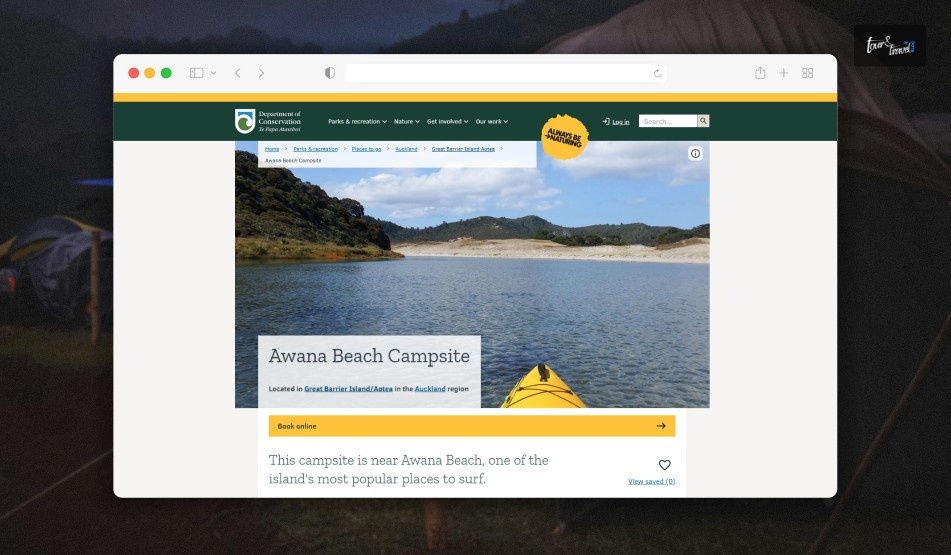
3. Awana Beach Campsite 

Awana Beach Campsite

The Awana Beach Campsite is a surfer’s dream. It has beautiful dunes and farmlands around. It can accommodate 120 campers, and the campground remains open from Christmas to the end of January.

The only problem with this camping site is mosquitoes. So, you have to carry mosquito repellents.

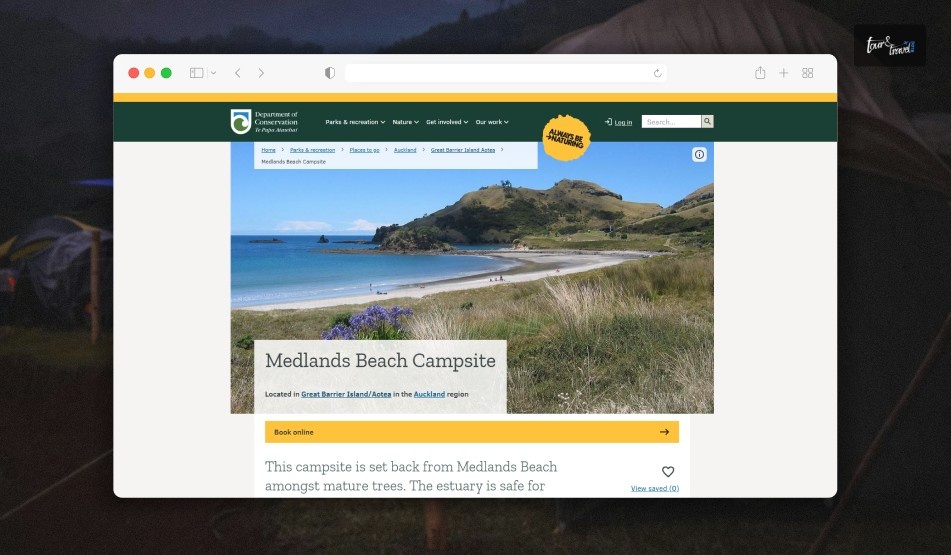
4. Medlands Beach Campsite 

Medlands Beach Campsite

The sound of the waves at Medlands. This is the music you will listen to when you go to sleep or wake up at the Medlands Beach Campsite.

Medlands is like an all-rounder. It is ideal for families and surfers alike. The campsite remains open from Christmas to mid-February, and it can accommodate 120 campers.

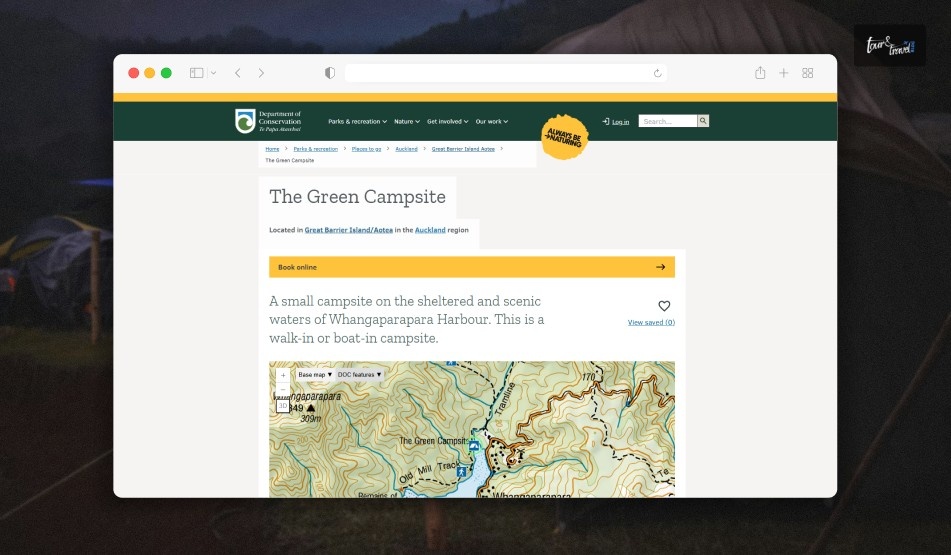
5. The Green Campsite 

The Green Campsite

You can boat in or walk in the Green Campsite, which remains open from 1st December to the end of February. With a capacity of accommodating only 30 campers, this campsite has a rich history associated with whaling, kauri logging, and timber milling.

The waters of the Whangaparapara Harbour make it an idyllic retreat, and it is also the base of the Aotea Track.

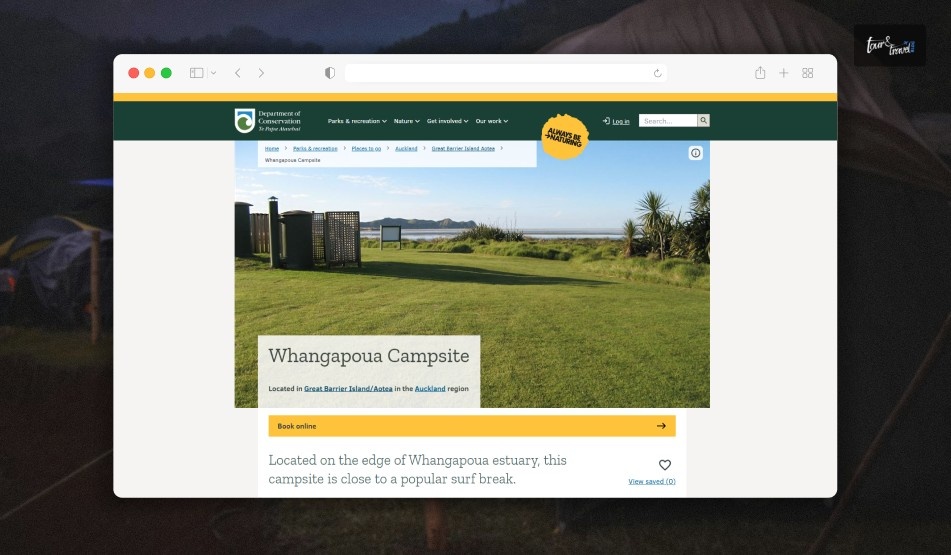
6. Whangapoua Campsite 

Whangapoua Campsite

The Whangapoua Campsite is a surfer’s paradise, and it is located on the edge of the Whangapoua estuary. It is also a favorite camping site for fishing.

With an accommodation capacity of 150 people, this campsite remains open from Christmas to the end of February. However, the biggest highlight of this camping site is the views of Rakitu Island and Mount Hirakimata.

A Comparison Summary Table Of The DoC Camping Sites On The Great Barrier Island, New Zealand 

DoC Campsite Access Landscape Facilities Activities Dog Access Fees 
Akapoua Bay Campsite Campervan, Car and Caravan Coastal Boat Launching, Cooking Shelter, Cold Shower, Non-Flush Toilets for Men and Women Boating, Fishing, Walking, and Tramping No Adults: $18 per night, Children of 5-17 years, $9 per night, and Children below 5 years: free 
Harataonga Beach Campervan, Car and Caravan Coastal Cooking Shelter, Cold Shower, Non-Flush Toilets for Men and Women Swimming, Snorkeling, Fishing No Adults: $18 per night, Children of 5-17 years, $9 per night, and Children below 5 years: free 
Awana Beach Campsite Campervan, Car and Caravan Coastal Cooking Shelter, Cold Shower, Non-Flush Toilets for Men and Women Kayaking and Canoeing No Adults: $18 per night, Children of 5-17 years, $9 per night, and Children below 5 years: free 
Medlands Beach Campsite Campervan, Car and Caravan Coastal Boat Launching, Cooking Shelter, Cold Shower, Non-Flush Toilets for Men and Women Fishing, Surfing, Swimming No Adults: $18 per night, Children of 5-17 years, $9 per night, and Children below 5 years: free 
The Green Campsite Boat, Foot Coastal Cooking Shelter, Non-Flush Toilets for Men and WomenHiking, Boating No Adults: $18 per night, Children of 5-17 years, $9 per night, and Children below 5 years: free 
Whangapoua campsite Campervan, Car and Caravan Coastal Cooking Shelter, Cold Shower, Non-Flush Toilets for Men and WomenFishing, Surfing No Adults: $18 per night, Children of 5-17 years, $9 per night, and Children below 5 years: free 

Insider Tips For Camping At DoC Campsites On The Great Barrier Island

If you are camping in a caravan or campervan, remember that the gravel roads leading to the camping sites, especially the Harataonga Campsite, are steep and winding. Also, the sites are off-the-grid.

Furthermore, the campervans are not usually allowed on the beaches.

The Best Private & Unique Camping Options On The Great Barrier Island

1. Great Barrier Island Campground 

The Great Barrier Island Campground, spanning over an area of 12 square acres, is an ideal camping ground for access to different beach activities.

The camping site is located at a distance of just 200 meters from the beach. The camping fee at the Great Barrier Island Campground is $10 per person per night. You can contact them at 021 298 8905 for booking.

2. Mickeys Place 

The O’Shea Family farm in Awana houses the Mickey’s Place camping ground. It is a family-friendly camping site with the following facilities.

  • A Communal Cooking Area 
  • Flush Toilets 
  • Showers 

Patrick, Sean, and Mickey are the hosts of this campsite, and you can contact them at 09 4290 140.

3. Stray Possum 

Stary Possum in Tryphena is an ideal camping site for backpackers. If you are camping here, you will have access to the kitchen, toilets, and showers of the adjacent Stray Possum Lodge.

This camping site has 14 tents, and you can call 09 4290 109 for booking details.

21 Essential Great Barrier Island Camping Tips 

21 Essential Great Barrier Island Camping Tip

I promised you tips, and here they are. Do not go to Great Barrier Island without reading this checklist. 

• Packing And Food 

1. Bringing a Gas Cooker 

Open fires are banned in the Camping sites of the Great Barrier Island. So, you will have to bring a gas burner for preparing your food.

2. Packing Your Food 

Groceries are not available everywhere, and they are even very expensive. So, it is better to collect and pack the groceries you will need before leaving Auckland.

3. Bringing a Good Chilly Bin 

You will need this insulated chest for storing warm and cold food items.

4. Bringing a Red-Light Torch 

The island is a Dark Sky Sanctuary. A red torch lets you stargaze without ruining your night vision. 

5. Bringing Cash 

EFTPOS (debit) is unreliable, and many camping sites only accept cash.

6. Packing Warm Clothes 

The weather can suddenly become cold, even on summer days. So, you will have to pack layered clothes. 

7. Carrying Mosquito and Insect Repellent 

Sandflies and mosquitoes are notorious on Great Barrier Island. So, you will have to carry an insect repellent. 

• On-Site & Facilities 

8. Cold Showers 

Most shower stations on the Great Barrier Island are cold water shower stations. This is great as the dash of cold water in the morning, literally works as the eye opener.

9. Long-Drop Toilets 

The long-drop toilets are basic and waterless. Using these pit toilets can be challenging for some campers.

10. Drinking Water 

The tap water available at these sites is not ideal for drinking unless it is purified or boiled.

11. Pet-Friendly 

The DoC camping grounds are not accessible to dogs. This is crucial for the protection of wildlife, the safety of the pets, and soil movement, causing the resurrection of pets and parasites affecting the local flora and fauna.

12. Booking 

The slots for camping sites such as Medlands, Akapoua get sold more than 6 months in advance for the Christmas and New Year periods. So, it is indeed a year-long planning.

13. Alcohol Rules 

The consumption of alcohol can be banned in various camping sites, especially during the peak seasons. So, check with the camping site authority.

• Transport & Logistics 

14. Having a Vehicle 

Having a vehicle is a must for moving around the rugged and large Great Barrier Island. You cannot walk between the sites. 

15. Renting a 4WD (or 4WD-Capable) 

The roads to various campsites are challenging. The road to Harataonga, especially, is very difficult. So, you will have to rent a 4WD-capable vehicle.

16. The Motorhome/Campervan Reality 

The gravel roads are narrow, steep, and winding, and if you are planning to camp in a large RV, you will definitely struggle.

17. The Dump Station Nightmare 

There is only one dump station in Claris, and it is only for black water or toilet waste. You will have to carry your grey water or sink with you.

18. Freedom Camping 

Freedom camping on the Great Barrier Island, New Zealand, is a fascinating idea. However, the reality is quite different. It is heavily restricted, and sticking to the DoC sites is the best option. 

• Safety & Etiquette 

19. Using a Paper Map 

Mobile network and GPS will not function in various parts of the Great Barrier Island. So, you will have to carry a paper map.

20. Tell Someone Your Plans 

If you are hiking on the Great Barrier Island, you have to keep someone informed. The wilderness and remote locations of the hiking trails can throw many challenges, despite having an easy to moderately difficult level. 

21. Being a Good Neighbour 

You must respect the quiet, off-grid, and nature-first vibe of the Great Barrier Island. So, you have to keep the noise level down.

How To Reach The Aotea Great Barrier Island With Your Camping Gear?

For campers, especially the ones with campervans, traveling by the ferry from SeaLink is the best option. It is the only mode of transportation in which passengers and cars are both transported.

It is a 4.5-hour picturesque journey from Auckland.

Your Great Barrier Island Camping Adventure Is Calling

Camping on the Great Barrier Island, New Zealand, is the right mix of adventure, soaking in nature, and cherishing the off-the-grid living of the island. However, it’s not going to be easy with the amenities at the campsites being basic, and even the gravel roads posing challenges for the big RVs and campervans.

Also, you will have to take care of biosecurity and all the sustainability guidelines to ensure that the island, a sanctuary of wildlife, does not get impacted negatively. Conservation as a pristine sanctuary is the reason why camping in the Great Barrier Island allowed us to see a billion more stars and birds than I have ever seen in my life.

Share on Social Media

Sibashree is a travel, culture, and leisure writer who has been writing since the age of 12 and professionally since 2014. With more than a decade of travel writing experience and journeys across India and several parts of the world, she brings a deeply personal and thoughtful perspective to her work. A student of English Literature and Mass Communication, Sibashree has always viewed travel as more than movement — for her, it has been a way of understanding people, cultures, and herself. Her passion for spiritual exploration has also led her to many unusual and meaningful destinations over the years. Outside of writing, Sibashree enjoys watching European cinema, reading about global politics, and reflecting on the stories hidden within everyday places.

Leave a Reply

Your email address will not be published. Required fields are marked *

title-img Related

READ MORE Modes of Transportation Analyzed for traveling

7 Modes of Transportation Analyzed: What is the Most Cost-Effective Way to Reach the Airport?

BY  Abdul Aziz Jun 24, 2024

If you are planning to fly out of an airport this travel season, you need to spend a little time thinking about how you will get there. Transportation to an airport can quickly get expensive, and perhaps you do not have a whole lot of extra cash at the moment, especially if you’ve spent a lot on tickets, hotel accommodations, etc. Finding a more reasonably priced option means you can save money that will likely come in handy at another point during your trip. Maybe you need to save cash for a Los Angeles van rental or for getting into museums and other attractions once you arrive at your destination. In these circumstances, keeping as much money in your pocket as possible when heading to the airport is often crucial. We will discuss seven modes of transportation that are worth your consideration in the following article. Most Cost-Effective Way to Reach the Airport Read this article till the end to know which is the most cost-effective ride to the airport. You Can Walk Is it possible to walk to an airport? Sometimes it is, but that would have to mean you would already have to be pretty close to it. The most practical time to walk to an airport is if you stayed at a hotel adjacent to it the previous night. Most other times, it is not possible or practical. Whenever you can manage it, though, you will presumably pay nothing. It really does not get much better than that if you are attempting to conserve your money. You will even get some exercise by walking, which is nice. If you can walk to the airport, make sure to watch out for traffic and only use roads with sidewalks. Using airport access roads or ones only intended for cars is dangerous. Saving money is great, but not if it comes at the possible price of being hit by a taxi or airport shuttle. You Can Consider Hiring an Uber or Lyft In the past decade, hiring an Uber or Lyft has become a piece of common knowledge in the urban scene. You can book a ride on these rental cars within seconds with the help of apps on your phone. If you are not a very tech-savvy person, you can still get the Lyft or Uber app, order a vehicle for yourself, and ride to the airport with someone else handling the driving duties. The real drawback with either Uber or Lyft is the expense. During surge hours pricing can become quite expensive in the case of these rental cars. At certain hours when the demand for these rental cars increases, Uber or Lyft increases their pricing as well. Hiring a rideshare vehicle off hours is almost always cheaper. You Can Hire a Taxi The option of hiring a taxi can be efficient and expensive. For example, if you book a cab from Midtown Manhattan to JFK it will easily cost you $50 or more. This cost varies based on the demand of the cab, city or state, and other circumstances affecting the booking prices. If you are in a smaller city with a less busy airport, getting a taxi may not break the bank. If you are considering this option but have a tight budget, it never hurts to go online and do a little research before you flag down the nearest taxi on the street. Take a Hotel Shuttle Hotel shuttles are usually free if you are staying at that hotel, so getting to the airport that way is certainly an attractive prospect. Hotel shuttles are usually clean and well-maintained. They are also generally air-conditioned, which is nice. You should have at least a couple of dollars to tip the driver if you go this route. $5 for a tip is usually the expected amount, but the driver will likely be happy if you give them anything, since not all travelers do. Get a Public Bus or Train Cities that have public buses and trains you can take to the airport are another one of the cheaper options in most instances. These choices can save money, but they often take much longer to get to the airport because they make many stops. If you decide to grab a train or bus, make sure to leave yourself plenty of time for this reason. Rent a Town Car You might also rent a town car if you have enough money. A town car offers a VIP feeling, meaning you get a ride to the airport in style. Then this experience comes at a high cost so you will try this only when you feel like treating yourself.  Again, if you can afford the cost of renting a town car then that is a great advantage. Your advantage is that you get to enjoy the ride alone without sharing it with anyone. It will also most likely be air-conditioned and comfortable. The only danger if you decide on this option is a chatty driver. If you do not mind making small talk, though, that might not be a significant source of concern for you.   Take an Airport Shuttle Many airports operate shuttles that will pick you up throughout the city. Generally, you can find the operating routes of these airport shuttles through the airport’s website and choose the shuttle accordingly.  On the other hand, a hotel shuttle is free, unlike an airport shuttle which can be expensive. Conclusion To recap, walking is usually your only free option. Taking public transportation can keep the price down while getting a hotel shuttle is generally free.  Other options can be expensive for you such as Lyft, Uber, or hiring a taxi or town car. Then again this expense comes with an advantage of not sharing the ride with anyone. If these options don’t work for you, then just ask a family member or a friend to drive to the airport if they are available. This is only an option in cities where you know someone, though. If someone you know is willing to give you a lift, you might be obliged to buy them breakfast or something along those lines as a way of saying thank you.   Know More: How To Stay Safe In New Orleans: A Traveler’s Guide Is San Francisco Safe? THIS Is What You Should Know! Is Savannah Safe? What You Need To Know Before Visiting!

READ MORE Tucumán nature guide

Tucumán Nature Guide: Exploring The Yungas Rainforest And High Andes

BY  Sibashree Jan 14, 2026

You think of the nature resorts, the famous wine tours, hiking, and birdwatching when we talk about exploring Tucumán. However, Tucumán has recently also emerged as an astrotourism hotspot.  The Ampimpa Astronomical Observatory in the Calchaquí Valleys of Tucumán is at the epicenter of this happening astrotourism scenario.  Now, this is an added feather to the crown of Tucumán, the smallest province of Argentina. It offers a vertical journey from the jungle to the desert in 50 kms.  Also, the nickname of Tucumán is not just a fancy phrase. It means a biological reality and refers to the historical event of Argentina’s independence from Spain in 1816.  Furthermore, El Jardín de la República, or the Garden of the Republic moniker, goes well with its subtropical climate and the lush landscape.   You guessed it right, as today, this Tucumán nature guide will take you to the Yungas Rainforest and the highlands of the Andes. Also, if you are planning a road trip, you must go through our Tucuman Argentina, itinerary. The Yungas Rainforest (The Green Belt) The Yungas Rainforest is known as the Green Belt, as it is an ecodiverse region. Home to a diverse flora and fauna, the Yungas Rainforest hosts a variety of bromeliads, orchids, and ferns.  Furthermore, among the animals here, you will find tapirs, wild cats, and panthers. You will even spot species such as Yungas Guan while birdwatching in Yungas, Argentina.  Also, it is home to the Campo Los Alisos in Tucumán, which helps to preserve the threatened ecosystem of the Yungas Rainforest region.  Moreover, containing around 50% of the biodiversity of Argentina, parts of the Yungas Rainforest are also marked as UNESCO Biosphere Reserves.  1. Parque Sierra De San Javier View this post on Instagram A post shared by Parque Sierra de San Javier (@parquesierradesanjavierunt) Parque Sierra de San Javier, or the San Javier Mountain Range Park, was established in 1974, and now the National University of Tucumán (UNT) maintains it.  It is one of the top nature reserves in Tucumán, Argentina.  The home to various flora and fauna of Argentina, this park also functions as the green lung by cleaning the air, protecting the watersheds for the city, and regulating the climate.  This park, furthermore, has many beautiful trails. You can enjoy an easy 30-minute jungle walk through the Cascada del Río Noque trail. If you are seeking silence while hiking in San Javier, Tucumán, you can opt for the Sendero Anta Yacu trek.  It is around 25 km west of Tucumán. If you are a budget traveler like me, you can take the Bus No 340 to reach the park.  2. Reserva Experimental Horco Molle View this post on Instagram A post shared by Asociación de Prestadores de Turismo Activo de Tucumán (@aptattucuman) This small but compact nature park is ideal for families. It is home to the tapir and condor rescue projects. It covers 600 acres and is just 15 km from the capital.  Also, it has picnic areas, barbecue areas, and play areas for children.  3. Aconquija National Park: The Untouched Wilderness View this post on Instagram A post shared by Parque Nacional Aconquija (@parquenacionalaconquija) Aconquija National Park, with over 600 species of endemic animals and birds, is the jewel of North America.  Taruca deer, puma, and ocelot are some of the endemic animals living here. In addition, you will find several Incan ruins scattered through the park. The Incan Highway remains, and the “Ciudacita” ruins are part of the UNESCO World Sites.  The Campo de los Aliso near Alpachiri is the main Aconquija National Park entrance. Furthermore, Cochuna is the wilder southern entrance of the Aconquija National Park.  Furthermore, the Mythical Trek of La Ciudacita, the Inca Ruins at 4400 meters, is the main highlight of this national park.   The High Andes & Puna (Tafí del Valle & Beyond) The harsh, cold conditions and a rich wildlife with the presence of vicuñas, flamingos are the highlighting features of the High Andes and Puna, at an altitude of 3000 meters.  This region has critical water resources that support livelihoods such as alpaca and llama. Let’s find out about the major nature reserves of this region.  1. Quebrada De Los Sosa Nature Reserve Take a drive up through Route 307 to find the Quebrada De Los Sosa Nature Reserve, where the jungle meets the clouds.  It is a 30 km-long gorge carved by the Los Sosa River, and it is home to more than 100 bird species.  With a winding pathway, it is also home to the Tafí del Valle. 2. Los Núñorcos & Reserva La Angostura Los Núñorcos, or the Cerro Núñorco mountain and Parque provincial Los Ñuñorcos are the prominent locations for hiking in Tucuman, Argentina.  As you explore the challenging trails here, you will enjoy a beautiful view of the Dique la Angostura lake and the Tafí del Valle. Tafí del Valle also has the Bald Mountain, or the Cerro El Pelao. You can start the trek near the Tafí del Valle center. It is a 1.5-hour-long trek.    Wildlife Watching Calendar In Tucuman, Argentina  Tucuman in Argentina is ideal for wildlife sightings throughout the year. Tafí del Valle and areas around Route 307, especially the best areas for wildlife spotting in Tucumán.  Check out the wildlife watching calendar in Tucuman below. Year-Round Sightings• Mammals: Capybaras, Some Foxes, and South American Sea Lions• Birds: Doves, Hummingbirds, and Toucans Spring (September to November) • Birds: Doves and Hummingbirds • Flowers: Pink Trumpets and Jacaranda treesSummer (December to February) • Mammals: Elephant Seals and Sea Lions• Birds: Penguins in Patagonia and Burrowing ParrotsAutumn (March to May)• Mammals: The Red Deer Rut• Birds: PigeonsWinter (June to August) • Reptiles: Yellow Anacondas• Birds: Waterfowl  What Are The Expert Tips For Hiking In Tucumán?  An entry to the Aconquija National Park is free. However, do you know that you have to register at the ranger station at least 48 hours in advance? It is crucial for the safety of the hikers. For more such insider knowledge, these expert tips will be very handy. 1. Bus #118 Is Your Friend  You don’t have to hire a car to see the jungle and the nature reserves. You can take the 118 bus from San Miguel de Tucumán directly to the foot of the San Javier trails.  The ticket price is even less than $1.  2. Watch The Fog (Neblina) The Fin del Mundo" statue area on route 307 is often the zero-visibility zone. There is dense fog in this area even at around 4 PM. You have to drive the car carefully, and there must be low beams to defeat the fog.  3. Ticks Exist In The Yungas  The lush greenery of the Yungas is ideal for picnics and nature exploration. However, there are ticks. So, you must check your ankles after a hike or use a blanket.  4. Hire A Guide For "La Ciudadacita" Are you planning a 4-day trek to La Ciudacita or the Inca Ruins? You must have a guide because the high altitude path, at an elevation of over 4000 meters, is unmarked. You need technical assistance for the navigation. Moreover, you must contact the Asociación Argentina de Guías de Montaña to hire a guide.  5. The "El Indio" Stop You will find the best dried meat or Charqui at the vendor stalls at the El Indio monument on Route 307. These stalls also have the best local honey.  Stop by these stalls and have the dried meat and honey for a great start to your hike.  6. The Waterfalls In Tucuman Are Seasonal  No Instagram reel will tell you that the waterfalls in Tucuman are seasonal. March to May, or the end of the rainy season, is ideal for visiting these waterfalls.  7. Beware Of The "Mala Mala" Local folklore speaks of the "Mala Mala" spirit in the mountains. Whether you believe it or not, respecting silence in nature is a huge part of the local culture. 8. No Cell Signal Once you pass the "El Indio" monument or enter Aconquija Park, your cell signal dies. Download offline maps (Maps.me or Google Maps) before leaving the city. 9. Condors Fly At Noon If you want to spot Andean Condors, look up between 11 AM and 1 PM when the thermal currents are strongest. They rarely fly early in the morning. Tucumán Nature Guide: Listen To The Authority Voices  Asociación Argentina de Guías de Montaña (AAGM): The Aconquija range is "one of the most undervalued trekking destinations in Argentina," offering Himalayas-like isolation without the crowds. Birding Ecotours (Global Operator) Rio Los Sosa is a prime spot for seeing the "Torrent Duck" (Pato de Torrente), a bird that can swim upstream in raging rapids. La Ruta Natural (Argentine Tourism Ministry) "Ruta de las Yungas" is a key scenic drive, highlighting the importance of driving slowly to spot the crossing fauna like the Corzuela (small deer). Tucumán Nature Guide: Frequently Asked Questions (FAQs) Here are the frequently asked questions and answers about the Tucumán Nature Guide.  1. What Is The Best Time Of Year For Hiking In Tucumán? April to September, or the dry season, is ideal for hiking in Tucuman. The cool temperature is ideal for outdoor exploration. On the other hand, heavy summer rains make the trekking trails here dangerous and muddy.  2. Do I Need To Pay To Enter The Nature Reserves? The entry fee to the national parks depends on the specific administrative and management authority. For example, you don’t need to pay any entry fee for the Aconquija National Park. However, prior registration is crucial. Further, for Reserva Horco Molle, you will have to pay an entry fee of $2.  3. Is It Safe To Hike Alone? Yes, it is safe to hike alone on the well-marked trails of Tucuman, such as the Rio Noque or Funicular. However, if you are going to high-altitude summits or jungle treks, you will need a guide. It is more crucial because of the presence of the fog and the absence of signage.  4. Are There Snakes In The Yungas? Yes, the Yungas have pit vipers or Yarará. So, you wear long trousers and watch your steps. Furthermore, you must follow the trail marks properly to not disturb the habitats of the snakes or other wildlife.  5. How Do I Get To Aconquija National Park Without A car? It is difficult to reach the Aconquija National Park without a car. You have to first take a bus to Concepción and then a local bus to Alpachiri. From Alpachiri, it is another 10 km taxi ride to the park entrance.  6. Can I Camp In The Reserves Of Tucuman? Yes, Aconquija National Park has designated wild camping zones (like Puesto La Mesada). However, Sierra de San Javier does not allow camping. So, it is for day use only. 7. What Is The "Yungas"? The Yungas, or a cloud forest in Tucuman, Argentina, is a mountain rainforest. It functions as a connector between the Andes and the Amazon.It has ferns, moss, and high humidity.  8. Can I See Toucans In Tucuman? Yes, you can see toucans in Tucumán. In recent years, toucans have made a comeback in this region.You can spot them in the trees around San Javier and Horco Molle. 9. What Is Hiking Altitude In Tucuman?  Hiking in Tucumán covers a wide altitude range, from the lows of San Javier (around 600 to 1200 meters) to the moderate Tafí del Valle (2000m). Furthermore, the Aconquija high summits reach more than 5000 meters. 10. Is The Water In The Streams Safe To Drink In Tucuman? No, the water in the Tucuman streams is not drinkable even with a clear view. Cattle graze in the higher areas and thus make the water unsuitable for drinking. So, you have to use purification tablets or a filter for purified drinking water. 

READ MORE Portland to Seattle

What Is The Portland To Seattle Distance? How To Travel By Road, Train, Tram, And Air? 

BY  Sibashree Mar 23, 2026

Are you planning a road trip in the Pacific Northwest? The Portland to Seattle journey, covering a distance of more than 170 miles, is one of my favorites in the region.  I love this route simply because of its diversity. You will find state parks, downtowns, and a beautiful coastline on the way.  So, in this blog, I will talk about a beautiful road trip from Portland to Seattle, the other modes of travel, and the main attractions on the way.  What Is The Portland To Seattle Distance?  The distance between Portland and Seattle is around 174 miles or 280 km. Furthermore, the travel time between two destinations is around 2 hours and 45 minutes.  Also, the main route to travel from Portland to Seattle is via Interstate 5 (I-5).  However, the travel time between Portland and Seattle will depend on the mode of transport you choose.  So, here is a quick summary.  Portland to Seattle Modes of TransportTravel Time By Car2 Hours and 45 MinutesBy Bus3 to 4 Hours and 30 MinutesBy TrainAbout 3 Hours and 30 MinutesBy Rideshare About 3 to 4 HoursBy Air53 Minutes Furthermore, the Portland International Airport is around 12 miles away from the city. Also, the Seattle-Tacoma International Airport is about 14 miles away from Seattle.  So, consider the travel time to and from these airports by road.  On the other hand, the Portland Union Station is 1 mile away from the city, and the King Street Station serves the Seattle area. From the train station, the Downtown and other main attractions are within walking distance.  How To Travel From Portland To Seattle?  The fastest way to travel from Portland to Seattle is to take a flight. However, if you love TheLowDownUnder Travel philosophy and want a more local experience, you can also plan a road trip by car or take a ride share.  Buses and train services are also available between these two destinations. So, here are the details. 1. How To Travel From Portland To Seattle By Car?  Traveling the Portland to Seattle distance of 174 miles by car takes around 2.5 hours. The route through I-5 North is quite straightforward, and some important stops on the way are Washington, Olympia, and Tacoma.  Furthermore, you start the ride early in the morning, before 7 AM. 7 AM to 9 AM and 4 PM to 6 PM are the busiest times on the route. Also, there is an alternative route via US-101, which passes through Astoria to the coast.  Nevertheless, based on the route you take and the vehicle you choose, the car rental price will be around $34 to $50. 2. How To Travel From Portland To Seattle By Bus? Flixbus and Greyhound are the main bus services from Portland to Seattle. The bus services start from as early as 7 AM, and the last bus leaves Portland at 10 PM.  The bus leaving at 10 PM is also the fastest, completing the journey in just 2 hours and 50 minutes.  Furthermore, the buses leave from the Portland Curbside Bus Stop, and the popular drop stations are the Seattle Tacoma International Airport, Seattle Bus Station, and Seattle 6th Avenue S and S Lane Street.  Moreover, the ticket price starts from 30.48 Euros. 3. How To Travel From Portland To Seattle By Train? Amtrak runs seven daily from Portland to Seattle. Furthermore, the ticket price starts from $27.  Also, check out the timings of the train from the Portland Union Station to the King Street Station in Seattle in the table below.  DepartureArrival 6:45 AM10:10 AM8:30 AM11:50 AM10:40 AM2:05 PM2:10 PM5:37 PM3:56 PM7:51 PM5:55 PM9:20 PM7:25 PM10:50 PM 4. How To Travel From Portland To Seattle By Flights? As I have mentioned, the flights from Portland International Airport (PDX) to Seattle-Tacoma International Airport (SEA) take around 55 minutes.  American Airlines and Delta Airlines are some of the popular services on this route. Furthermore, the ticket price will be around $350.  Moreover, the travel time by road from Portland to the Portland International Airport (PDX) and the Seattle-Tacoma International Airport (SEA) is around 20 minutes. 5. Portland To Seattle Rideshare Or Taxi Shuttle services such as Portland Express, Uber, and Lyft are other ways to travel from Portland to Seattle.  Uber and Lyft services are a little expensive, costing around $60 for the ride.  On the other hand, a ride on the Portland Express from Portland to Seattle will be around $50-$70 based on the vehicle and the group size.  What Are The Important Stops From Portland To Seattle?  Portland is one of the best family vacation spots, and Seattle is one of the safest places for women solo travelers.  Furthermore, on the way, it has some wonderful attractions such as the Columbia River Gorge, the Oregon Coast, Mount St. Helens, Mount Rainier, and Tacoma.  Also, throughout the journey, you will find small but wonderful cafes. Don’t forget to spend some time understanding the local vibes at these cafes. Portland To Seattle: Frequently Asked Questions (FAQs)  Here are the frequently asked questions and answers about the Portland to Seattle distance. 1. How Much Is A Train Ride From Portland To Seattle? A train ride from Portland to Seattle starts from $27 and goes up to $68 for standard coaches. Furthermore, the ticket price for business coaches costs around $80 to $90. Moreover, the private room amenities come at $182.  2. Is It Worth Driving From Seattle To Portland? Yes, the Portland to Seattle journey is every bit worth it. It is an easy and quick journey, However, the short route offers the best experiences with various culinary stops, mountain views, and the beauty of the Pacific Northwest.  3. Can You Do A Day Trip From Portland To Seattle? Yes, you can easily plan a day trip from Portland to Seattle. The travel time by road is around 3 hours to 4 hours and 30 minutes. So, you can easily complete the ride, explore the attractions en route, and come back by evening. However, you have to start really early to avoid the traffic.