Related
Everglades National Park: The UNESCO Heritage Site With Its Quiet Beauty
BY Sibashree Jul 12, 2024
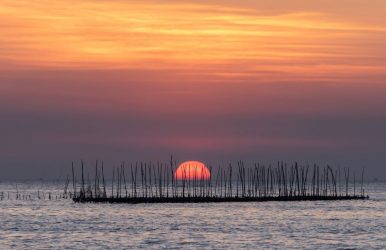
“A river of grass flowing imperceptibly from the hinterland into the sea.” That’s Everglades National Park, a paradise exuding the most pristine and tranquil vibe. You know, you always don’t need something out-of-the-box to have an ever-lasting impression. The spiritual ones know that being present in the moment and soaking the energy can be the most fulfilling experience. Similarly, Everglades National Park does not need snowclad mountains or glaciers to draw millions of visitors annually. A diverse ecosystem and the conservation of natural lives here thrive amidst the National Park’s quiet hub. President Harry S Truman rightly pointed out, "Here is land, tranquil in its quiet beauty, serving not as the source of water, but as the last receiver of it. To its natural abundance we owe the spectacular plant and animal life that distinguishes this place from all others in our country." (Source) So, if you are heading to Florida and want the most immersive experience, plan a trip to Everglades National Park, a swampland just outside Miami. You will have sea turtles, alligators, manatees, Roseate spoonbills, and fish to welcome you. Everglades National Park: Know The UNESCO World Heritage Site In the Brief Synthesis of Everglades National Park and its outstanding universal value, the UNESCO World Heritage Convention says, “Everglades National Park is the largest designated sub-tropical wilderness reserve on the North American continent. Its juncture at the interface of temperate and sub-tropical America, fresh and brackish water, shallow bays and deeper coastal waters creates a complex of habitats supporting a high diversity of flora and fauna. It contains the largest mangrove ecosystem in the Western Hemisphere, the largest continuous stand of sawgrass prairie and the most significant breeding ground for wading birds in North America.” There are many other interesting factors adding to the outstanding value of this place. Let’s have a look at them. The Everglades has limestone substrate, which is one of the most active modern carbonate sedimentation areas. It is home to more than 400 species of birds. It is a major migration corridor for birds. Around 20 threatened, endangered, or rare species live in the Everglades. The Everglades was inscribed as a UNESCO World Heritage Site in 1979. Today, various federal, global, local, and tribal governments manage the Everglades, and they work in agreement to restore the sanctity of the place. An Encounter With The Most Fascinating Wildlife At Everglades National Park Spanning across 1.5 million acres over Florida’s southern part, Everglades National Park attracted 1,155,193 visitors in 2022 and 810,189 in 2023. Diverse wildlife is the major crowd-puller for this park. About the Everglades, the UNESCO World Heritage Convention says, “The mixture of subtropical and temperate wildlife species is found nowhere else in the United States.” Animals You Will Encounter At Everglades National Park AmphibiansSouthern leopard frogFlorida cricket frogEastern narrow-mouth toadPig frogBirdsRoseate spoonbillBlack-bellied whistling-duckEurasian WigeonAmerican WigeonInsectsArachnidsMosquitoesBiting fliesCentipedesReptilesLizardsSnakesAmerican alligatorsAmerican crocodilesMammalsShort-finned pilot whale Atlantic bottlenosed dolphin White-tailed deerWest Indian manatees The biodiversity of the Everglades is very crucial for Flordia’s ecological benefits. The Comprehensive Everglades Restoration Plan has been there since 2000 to restore the ecosystem of the National Park. ** The table does not furnish exhaustive details of the animals found in the Everglades. Only a few species are mentioned. What’s More At Everglades National Park? Along with having an encounter with the most diverse wildlife, you can take part in boating, camping, and guided tours at the Everglades. Let’s make the most of it. Enjoy Guided Tours & Other Services You cannot help falling in love with the following guided tours at the Everglades. Shark Valley Tram Tour Everglades Institue Tours Permitted Tour Guides You can also take airboat tours to Coopertown, Everglades Safari Park, and Gator Park. Are you in for boating tours? Go for Backcountry boat tours, Florida Bay boat tours, and Ten Thousand Islands boat tours. Glamping Everglades Style You cannot just miss “glamping Everglades style” if you visit the National Park between November and April. Enjoy the best of wildlife with modern comfort during your stay in these tents equipped with fans, electricity, and other amenities. Did you know that the Flamingo Eco-tents of Everglades National Park, Florida, was featured on the list of Best Glamping Spot of 2022, published by USA Today? Glamping service here begins at $109 per night. Enjoy A Serene Boating Experience Being in the water at the Everglades will offer you the most versatile experience. As you paddle through the water, you will also meet amazing birds and fish. Further, when you pass through narrow channels of mud and seagrass cut through the long banks, you will surely catch a whiff of adventure. In addition, once you reach Ten Thousand Islands, you will be at a loss for words meeting the oyster reefs and sandbars. If you are a fan of boating and aquatic pursuits, you can also visit other National Parks in Florida, including Dry Tortugas National Park and Biscayne National Park. Stay Safe At Everglades National Park Everglades National Park has well-chalked safety guidelines, including encounters with wildlife, managing your pets and children, and risks related to mosquitoes and poisonous plants. Don’t forget to check the National Park Service website to know and address safety concerns. Further, the park provides detailed safety guidelines regarding your visit to the park in dry and wet seasons. Staying Safe In Wet Season Afternoon downpours and heavy thunderstorms are common Mosquito bites and the attacks of flying bees will be more Weather will be hot (>100-degree F) and humid (over 90%) Wear loose-fitting, full-sleeved/full-length clothes and remain hydrated to beat uncomfortable heat and humidity. Also, use mosquito nets or repellents to avoid mosquito and insect bites. Staying Safe In Dry Season The temperature in the dry season is around 53-77 degrees F. Freezing conditions may occur occasionally. Biting flies and mosquitoes will still be present in some parts of the park. Bring a warm jacket, head nets, bug jackets, or mosquito repellents to avoid mosquito and insect bites. Also, wear lightweight and comfortable clothes to explore the place freely during the daytime. Are You In? Everglades National Park, the largest subtropical wilderness, is also a UNESCO World Heritage Site. It stretches over a massive two million acres across central and south Florida. It’s a paradise for wildlife enthusiasts, with various species coexisting there and contributing to biodiversity. It is also a “noteworthy example of viable biological processes.” In addition, as one of the oldest national parks in America, it was designated in 1934 by the U.S. Congress. So, are you ready to surf through miles of water and witness how a tranquil wetland can emerge as the goldmine of natural vegetation and wildlife ecstasy? Pack your bag and count me in! Everglades National Park FAQs Why Is Everglades National Park So Famous? Everglades National Park is known for its extraordinary wildlife. It is the hub of rare birds, reptiles, amphibians, mammals, sea turtles, and other aquatic animals. It also has Florida Panthers, one of the most endangered mammals. Further, you will meet the endangered West Indian manatee and the most adorable bottlenose dolphin. The place even has a diversity of vegetation. You will get to see sawgrass, cypress, mangrove trees, and orchids. Why Is It Called Everglades National Park? The Everglades had vast, grassy fields or glades. If you decipher the name, you will find it to be a combination of two words, “Ever” and “Glades.” Together, these two words mean open grass fields. What Is The Best Month To Visit Everglades National Park? November to April, or the dry season, is the best or the safest time to visit the Everglades. The temperature at this place remains moderate in this season, and there are fewer attacks by insects and mosquitoes. Thanks to the lack of rainfall in Florida during this season, you can also explore the wildlife better during this period. Who Found The Everglades? John Gerard de Brahm, a British surveyor, found the Everglades while mapping the Florida coasts in 1773. He called them River Glades, and it was 1823 when the name “Everglades” first appeared on the map. From 1851, everyone started calling it “Ever Glades.” Is The Everglades Salt Water? You will have fresh water and saltwater at Everglades National Park. Once you surf through the fresh water for hundreds of miles, you will reach salt water. Earlier, this meeting of saltwater and freshwater used to form coastal bodies with partial enclosures. These places were dynamic and had the most productive environments. What To Wear In The Everglades? You have to pick your outfits and shoes based on the season in which you are visiting the Everglades. If you are at the National Park during summer or the rainy season, you must wear full-length pants and full-sleeve shirts to avoid mosquito bites and contact with poisonous plants. Don’t forget your rain jacket and shoes or boots you wear during rainy seasons. In winter, you will need warm jackets, closed-toe shoes and full-length trousers. Also read Pet-Friendly Destinations Worldwide. Beginner Tips For Your First Camino De Santiago. Guide To Visiting Hegra (Madain Saleh) And The Al Ula Valley.