


 Related
Witness The Beauty Of Chilko Lake In British Columbia – Travel Guide
BY Mashum Jan 11, 2023
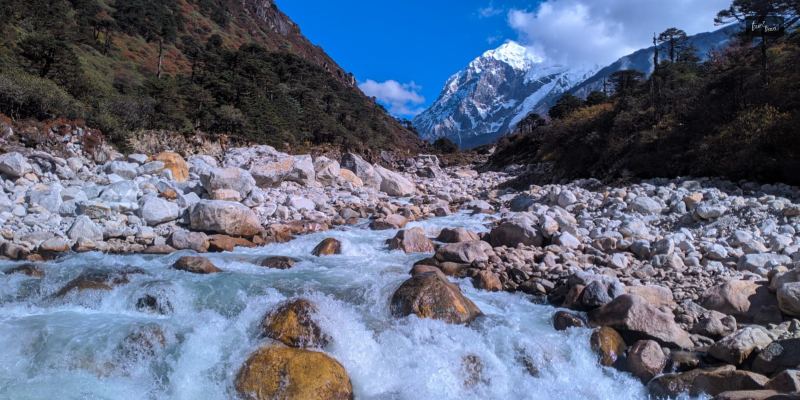
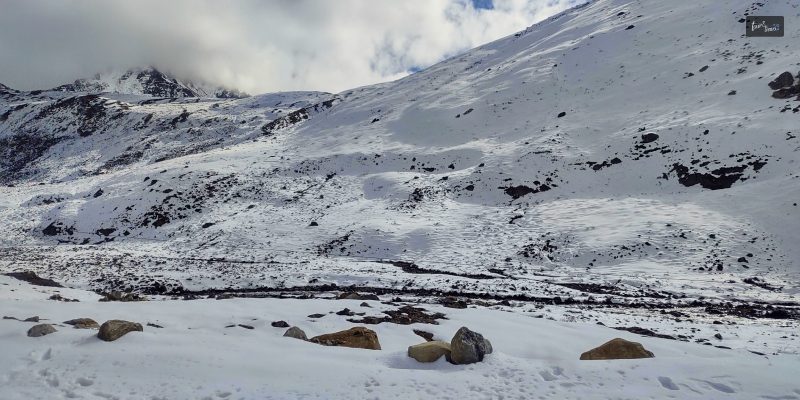
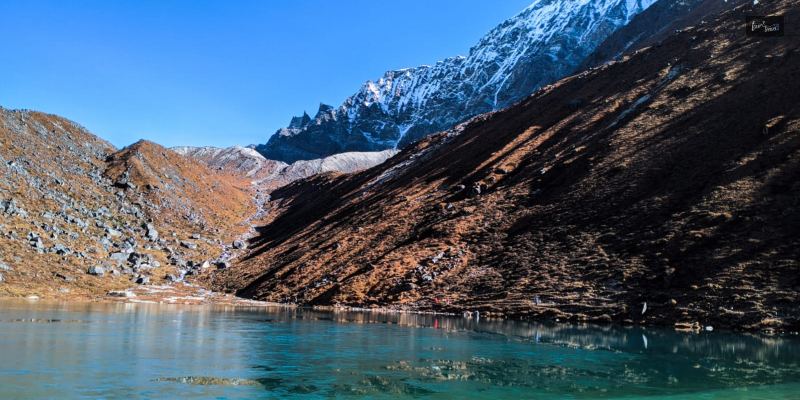
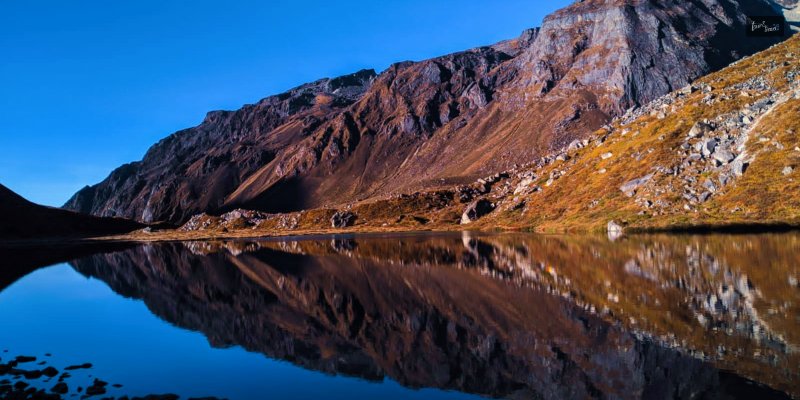
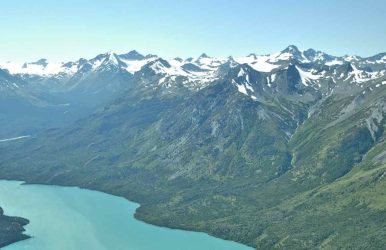
If you are planning a vacation soon, then let me tell you about a wonderful destination for you to visit, which is British Columbia, Canada. This wonderful stretch of crystal clear blue, glacier-fed, water that is about fifty miles or 80 km long, is called Chilko Lake. The meaning behind name Chilko is derived from an Indian term called Chilcotin, which means ochre river. The lake is situated in the Ts’yl-os Provincial Park, with a lot of natural diversity of both flora and fauna present around. So now that you seem quite interested in Chilko Lake, then let’s know a bit more about it, and maybe then you can decide whether you are going or not. Overview Of Chilko Lake Image Source: www.uniqhotels.com If you are dreaming of a peaceful getaway from the noise of the city, then that way you can take a tour along the 65km long Chilko Lake British Columbia. The peaceful and mesmerizing atmosphere is the reason why it is one of the most beautiful places in Canada, if not the World. This stunning visually appealing stretch of water, located in the wilderness of British Columbia, is the best place for you to visit. The lake is surrounded by beautifully colored volcanic mountains, jagged peaks, vast ice fields, and wide alpine meadows. The beautiful blue color of the crystal clear water of Chilko Lake and the stunning greenery that is surrounding the beautiful Chilko Lake. Things To Do Here In Chilko Lake You might think that there won’t be much to do in Chilko Lake, but that is where you are wrong, there is a lot to do here. So if you are planning to visit Chilko Lake then keep on scrolling down below. Fishing Image Source: www.tsylos.com If you are an avid fisherman, then Chilko Lake is the best place for you to just sit down and go fishing for hours, who knows you might be able to catch 70cm of Bull Trout. So if you are really excited about a day in the lake for fishing, then if you wanna test your hand at fishing then you are about to have a great time. Paddle Sports Image Source: images.squarespace-cdn.com One of the best activity you can do here in Chilko Lake was different types of boating. On the clear blue crystal water, it is quite peaceful and tranquilizing to silently row around the Chilko Lake. Boating, canoeing, and kayaking are one of the best ways you can row peacefully, this way you are going to have the perfect family outing. Viewing Grizzly Bear Throwing Image Source: images.squarespace-cdn.com To gaze upon the true beauty of nature, the viewing of wildlife like grizzly bears in the wild. Here at Chilko Lake, you will be able to see these beautiful wild creatures, of course from a safe distance. The Chilko River side estuary is a beautiful place where there is no barrier, platform, or viewpoint, but just nature and wildlife. Hike Image Source: landwithoutlimits.com People who are very much into hiking, are going to love walking along the trails of Chilko Lake and walking around the pine forest, Chilko river, and beautiful mountain tops. The walking trails are beautiful to just sit down and even have a beautiful picnic out in the open. There you can have a grand time just spending quality time with your partner. ATV Riding Image Source: stevesatvrentals.com With just the extra power of 420CC ATVs, you can have all the thrill-seeking adventure days you want. You can spend your whole day exploring the backwood trails of Chilko Lake and view some of the amazing viewpoints along the trails. But something you should be counting on is having dirty and muddy clothes and a high adrenal rush. Horseback Riding Image Source: images.squarespace-cdn.com To get the full cowboy experience you just cannot miss out on Horseback riding. With the optimum climate, if you are lucky, you are going to have a great time horseback riding up the trails with a wonderful view of the beautiful Tatlayoko valley. Archery Image Source: www.outdoorlife.com There is no way in the city where you can really learn archery and actually enjoy it. But here at Lake Chilko, you can easily learn and even brush up your skills in archery. There are full ranges, with instructors available here. Mediation + Yoga Image Source: images.squarespace-cdn.com While there are a lot of options here for an adrenaline junky if you just wanna relax and calm yourself and your nerves down. Then the best activity for you will be to sit down and meditate and do a bit of yoga. Wrapping Up! So now that you are well aware of the beautiful surroundings of the Chilko Lake in British Columbia. The rigged wilderness, the lush greenery, and the sterling blue crystal blue water are just beautiful. So if you wanna know more about the beautiful Chilko Lake, then give us a like and comment down below to know more about the lake. Read Also: How To Plan A Best One Day Trip To Atlanta With Family? What Is Most Likely To Cause Someone To Fall Overboard? Top 10 Scenic Snowflake Cities In The U.S. To Travel To This Winter