The Best Mountain Getaways in Washington: Where to Stay, What to Do, and How to Relax

Feb 17, 2024

Last Updated on: Nov 10, 2025

Travel Blog

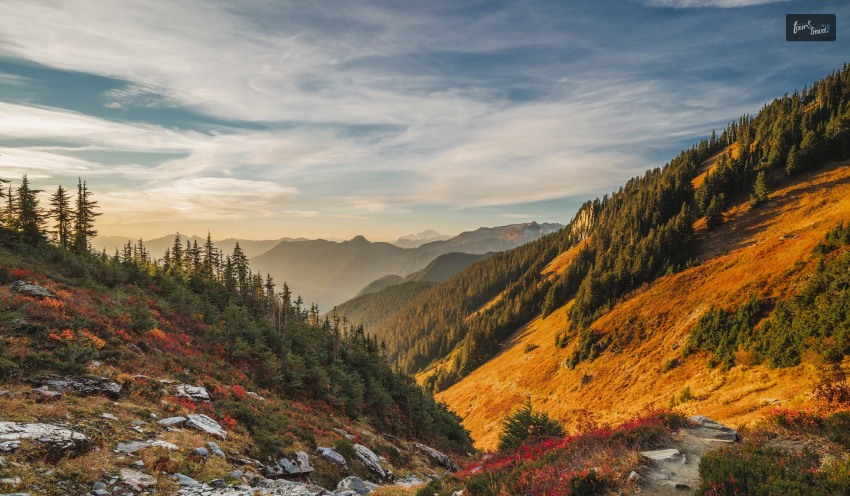
Washington State’s mountains are renowned for their splendor. Washington has some of the tallest mountains in the lower 48 states and some of the most breathtaking. The Cascade Mountains are the most well-known mountain range in Washington. The Cascade Mountains include Mount Rainier, Washington’s tallest and most famous mountain. Because some of the Washington mountains are so high up, hiking and climbing them is not always simple. However, the vistas from the snow-covered peaks are just breathtaking.

Tallest Mountains in Washington

Tallest Mountains in Washington

If you are looking for the tallest climbs around Washington, the state will not disappoint. The vantage points, as well as the natural grandeur of the mountains in Washington, are simply mesmerizing. Here are all the mountains in Washington that you must check out.

  • Mount Rainier
  • Glacier Peak
  • Mount Adams
  • Bonanza Peak
  • Mount Stuart
  • Mount Fernow
  • Goode Mountain
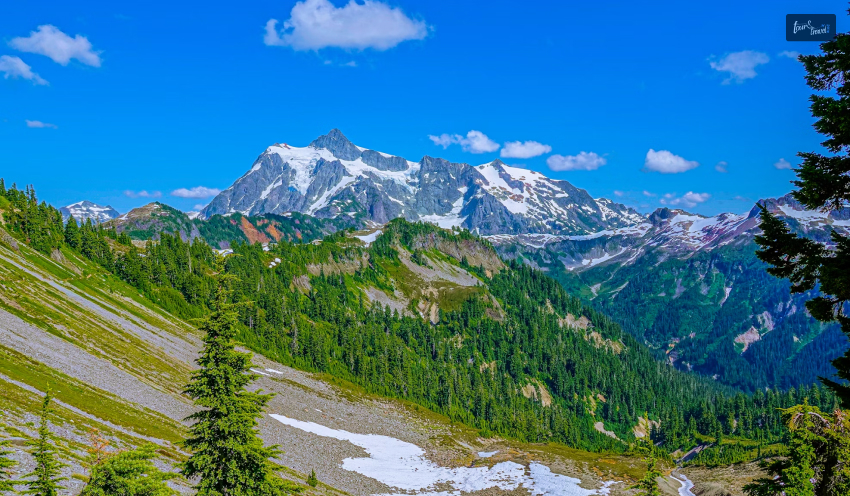
  • Mount Shuksan
  • Buckner Mountain
  • Mount Baker

Mountains In Washington

Washington Mountain

Several of the tallest mountains in Washington map are in the Cascade Mountain Range. You may have heard of them before. The others will be instantly recognizable from pictures you may have seen in books or on the internet. Despite your familiarity with their name or their looks, a trip to these inclines will give you something to remember for a lifetime. Here are the top mountains in Washington.

Mount Rainier

Mount Rainier

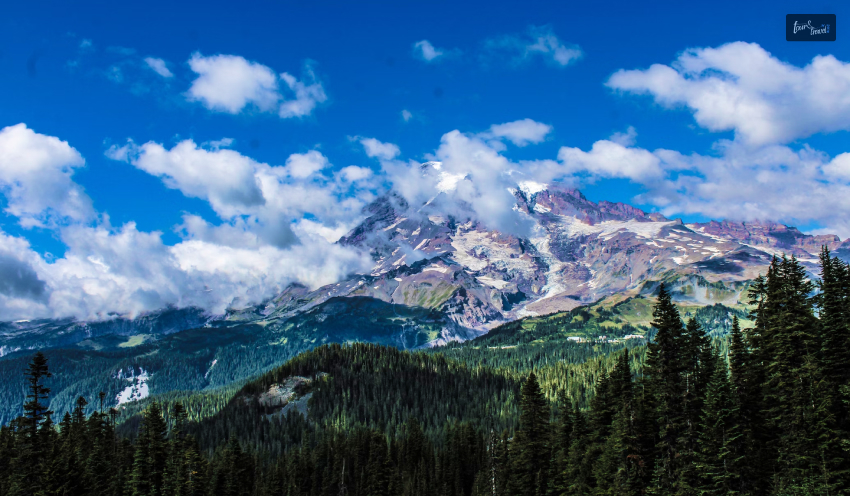
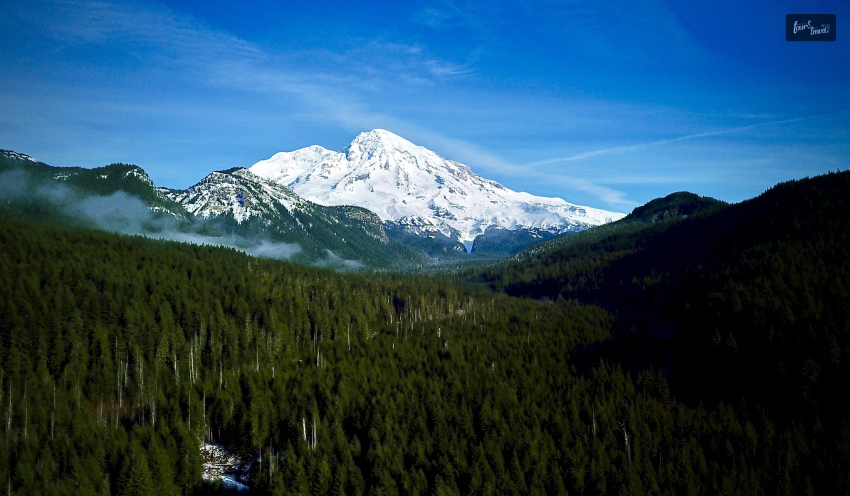
Among the most well-known mountains in the US is Mount Rainier. Standing at one of the most breathtaking locations in the nation, this active volcano dominates the surrounding landscape. Situated at the center of Mount Rainier State Park, the park offers year-round outdoor activities such as hiking, trail running, and camping that are truly amazing. There are many hiking trails but few paved roads because the park was not intended to be visited by large numbers of people. Nonetheless, there is something for everyone, as many of the trails are suitable for beginning hikers.

Climbing to the peak of Mount Rainier presents a distinct experience. Mount Rainier is the highest peak in Washington and has the steepest incline of all the mountains. Those who wish to try to reach the summit will have to hike more than ten miles, with a significant portion of that distance being nearly vertical ascent. Hikers must be in excellent physical shape. They will also require rock climbing abilities as well as an understanding of glacial rope safety. Before attempting to hike to the summit of Mount Rainier, it is a good idea to get some experience at lower elevations.

Mount St. Helens

Mount St. Helens

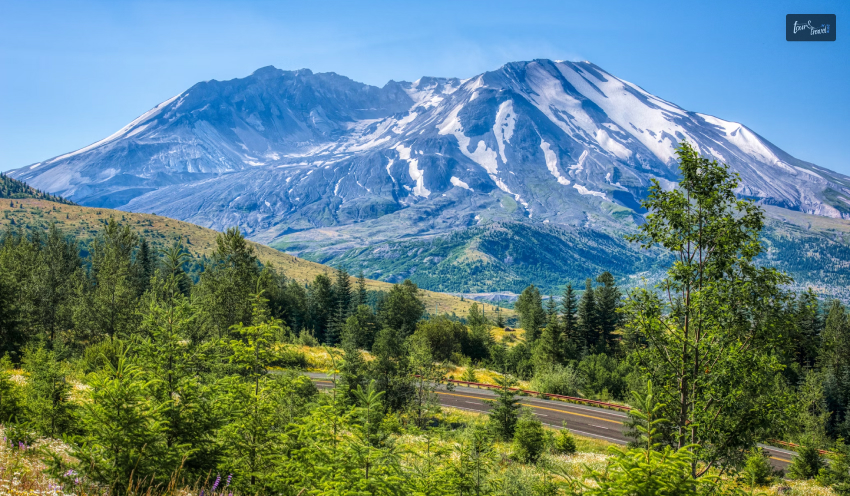
Another active volcano is Mount St. Helens. In 1980, Mount St. Helens erupted with a massive explosion that resulted in the largest landslide in American history, making it the most famous eruption of all time. Although experts warn that such a massive and deadly eruption could occur, it has never happened before. The United States’ most active volcano is still Mount St. Helens.

At Mount St. Helens, a sizable Visitor’s Center serves as the entrance to the mountain itself. There is a ton of information about the volcano at the Visitor’s Center. Moreover, children adore viewing the interactive exhibits about the volcano’s eruption. Convenience stores, trail maps, as well as camping and hiking supplies are available on the premises.

Any licenses or permits required for activities like hiking, fishing, camping, as well as other pursuits are also available. Numerous trails wind around the mountain, beginning at the Visitor’s Center. There is something for everyone on these trails, which range in difficulty from beginner to expert. However, hiking to the summit should only be attempted by the most skilled hikers.

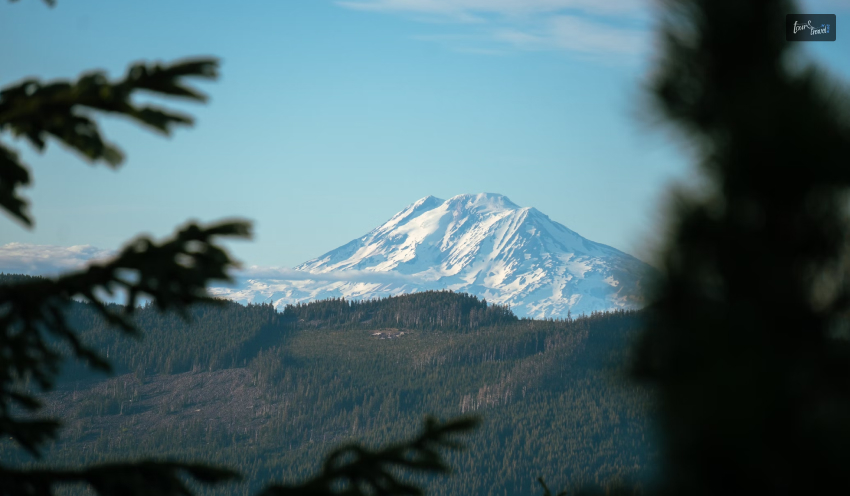
Mount Adams

Mount Adams

While part of Mount Adams is on the Yakima Indian Reservation, the majority of the mountain is located in the Gifford Pinchot National Forest. Among the Cascade Mountains’ older peaks is Mount Adams. On Mount Adams, volcanic activity is thought to have started more than 900,000 years ago.

Mount Adams is an outdoor enthusiast’s paradise in the surrounding protected area. In addition to many other activities, visitors can ride 4-wheelers and ATVs, hike, camp, ride horses, swim, kayak, fish, and much more. The Mount Adams South Climb trail is an option if you have the courage to try hiking to the summit of Mount Adams. You need to be at least an intermediate hiker to tackle this difficult trail. But after you finish this 13-mile hike, the views from the summit will astound you.

Mount Baker

Mount Baker

Mount Baker is a volcano, just like most of the Cascade Mountains in Washington, albeit relatively young in geology. Its glacier cover is also the second-heaviest. Snow is what makes Mount Baker truly famous. It has a massive amount of snow. Moreover, it’s among the world’s snowiest locations. When the Mount Baker Ski Area received nearly 100 feet of snow in a single season in 1999, it broke the previous record for snowfall.

Winter sports, skiing, and skating are the main reasons visitors come to Mount Baker. However, Mount Baker can also be hiked thanks to its hiking trails and brave hikers who are well-versed in snow as well as cold weather conditions. A few hikers use Mount Baker as a practice run for the Alaskan mountains covered in snow. Alternatively, they use Mount Baker’s winter hiking to hone their extreme weather hiking and rock climbing techniques.

Even if Mount Baker is a steep mountain, it does not snow here all the time. In addition to hiking the challenging paths in the summer, visitors can enjoy other local attractions, like dining at the well-known Heather Meadows Café, which is located at the foot of Mount Baker and offers breathtaking views.

Read More: Top 9 Edition: Exploring The Wonders Of Washington’s National Parks

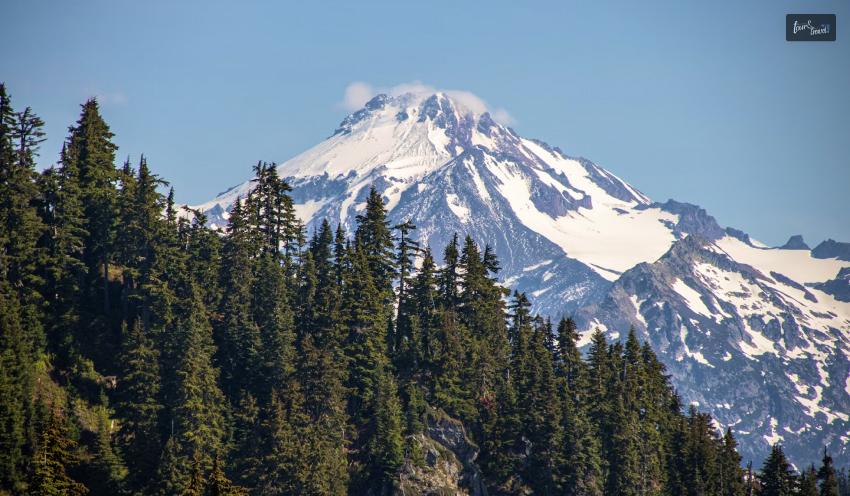
Glacier Peak

Glacier Peak

The most remote peak in Washington’s Cascade Mountains is Glacier Peak. There aren’t any facilities like in other well-known mountains. However, the experience at Glacier Peak is well worth the journey if you decide to go there. Discover intriguing geological artifacts and ancient lava deposits if you can climb to the summit. The views from the summit of Glacier Peak are also quite amazing.

However, as with other mountains in this range, climbing to the summit can be difficult. The name “Glacier Peak” comes from the more than thirty glacial peaks that encircle the summit. To complete this trek, you must have prior experience hiking on glaciers and enduring the cold and snow.

There are over 19 trails in the lower portions of the mountain that are rated for hikers of all skill levels, so even if climbing to the summit isn’t your thing, you can still enjoy the breathtaking natural beauty of the area. All year long, you can go horseback riding, biking, camping, hiking, and running in the stunning Glacier Peak Wilderness Area.

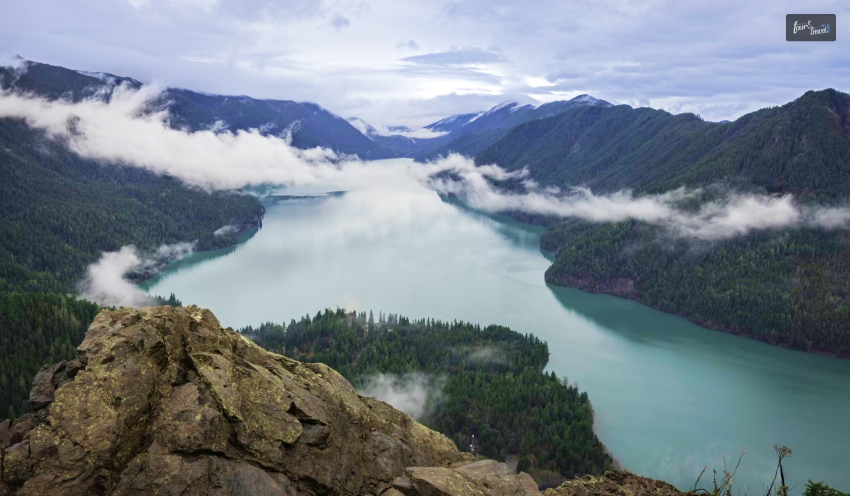
Mount Storm King

Mount Storm King

One of the hardest mountains in Washington state for hiking is Mount Storm King. It’s still a difficult climb even though it’s not as high as some of the Cascade Mountains. The trail to the summit is almost entirely on a steep incline. Actually, after completing the ascent from the base, you’ll need to use a number of ropes to pull yourself up to the summit. Don’t skip leg day if you want to try this hike. To get the last few feet to the summit, you’ll need strong legs.

A short stroll from the Storm King Ranger Station will get you started on the summit trail. There is a detour leading to Marymere Falls. It’s a good warm-up before attempting the summit ascent, and it’s a mile loop. The summit trail’s final three miles are an almost straight incline, but the first two miles are not too tough. You will be climbing and rock scrambling almost the entire way. You’ll be rewarded with a breathtaking view of Crescent Lake below if you can reach the summit.

Wrapping Up

This was a list of some of the most incredible hiking trails and mountains in Washington, D.C. for the outdoor enthusiast. Climbing these picturesque mountains offers the opportunity to take in even more picturesque vistas. There is a variety of trails, most of which are easy. Pack our bags, plan your trip to Washington, and set out to explore the natural beauty of the nation’s capital.

If you have thoughts to share or questions to ask, please leave a comment below. We would love to hear from you!

Read Also:

Share on Social Media

Abdul Aziz Mondol is a professional blogger who is having a colossal interest in writing blogs and other jones of calligraphies. In terms of his professional commitments, he loves to share content related to business, finance, technology, and the gaming niche.

Leave a Reply

Your email address will not be published. Required fields are marked *

title-img Related

READ MORE Car Service from Attleboro to Logan Airport

How Weather Impacts Your Car Service from Attleboro to Logan Airport

BY  Sibashree Jul 30, 2025

An Attleboro to Logan Airport Car Service is a convenient way to make it to your flight promptly. Nonetheless, the weather can influence your journey in multiple ways.  Rain Snow Fog Blistering Heat  All these can complicate your ride. Knowing how weather affects your Attleboro to Boston Logan Airport Car Service can help you make better plans, save you time, and prevent potential accidents on the day of your journey.  In this Tour and Travel blog, we will discuss how the weather impacts the Attleboro to Logan Airport journey by car.  Common Weather Impacts On The Attleboro To Logan Airport Journey  Weather can heavily influence the quality of your Attleboro to Boston Logan Airport Car Service. Whether it’s rain, snow, fog, heat, or just too many planes that have flown that day, many things can delay a flight.  So, what will you do to avoid these complications?  You will take a few extra minutes to check the weather and book your airport car service should all help contribute to a stress-free trip to Logan Airport.  Opt for a reliable Attleboro to Boston Logan Airport Car Service to stay safe and to get to the destination on time, regardless of the weather.  Nevertheless, here are the common weather problems faced during the Attleboro to Logan Airport Journey. 1. Rain And Wet Roads  Massachusetts has its share of rain, and it makes roads slick. Wet roads can lead to accidents, so drivers of your Attleboro to Logan Car Service might be driving slower than they would otherwise be to stay safe.  This may add time to your journey. For instance, a journey that typically takes 45 minutes might take more than an hour when it’s pouring.  It does not hurt to order your Attleboro to Boston Logan Airport Car Service in somewhat excessive time when it’s raining to stay safe and not miss your flight.  2. Snow And Ice  Winters in Attleboro mean snow and ice are always a concern because they make driving dangerous for every driver. Roads can be covered with snow, making travel difficult.  The roadway becomes all the more dangerous with layers of ice. Your Attleboro to Boston Logan Airport Car Service driver must drive cautiously, so the journey could take longer than expected.  Some roads may even be closed in heavy snow, requiring drivers to detour. Check the weather when booking your Attleboro to Boston Logan Airport Car Service and leave extra time in winter.  3. Fog And Low Visibility Like the sun, low visibility, such as fog, can also disadvantage your Attleboro to Boston Logan Airport Car Service. Thick fog restricts visibility, and drivers cannot see far before them; they must drive slower to prevent accidents.  This can mean you take longer to get to the airport. When you have a flight in the morning, if it is foggy, schedule your car service.   If it’s going to be cloudy, plan your car service accordingly. You don’t want to prepare for Logan Airport with fog in mind. Your driver will be more inclined to be cautious, which could result in a slower ride.  4. Excessive Heat  Summer heat waves can also impact your Attleboro to Boston Logan Airport Car Service. Car engines can get hot enough to burn you, particularly if traffic stops and starts.  If your car service’s vehicle breaks down, expect delays. Moreover, road building typically takes place in summer months, which can disrupt traffic.  To prevent issues, request that your car service company provide well-kept vehicles, and schedule your arrival at the airport early in hot weather.  How To Prepare For Weather-Related Delays? Always check the weather forecast before your flight to ensure that your Attleboro to Boston Logan Airport Car Service is flawless. If you anticipate bad weather, schedule your car service earlier than usual.  For instance, give yourself an extra 30 minutes to an hour to travel if snow or rain is in the forecast. Also, pick a reputable car service with experienced drivers who can handle rough weather.  Talk to your driver if you have any worries, and ensure your flight details are on hand if you need to update your travel plans. Do you want to know more about how to prepare for weather-related delays while traveling from Attleboro to Logan Airport? Here is a step-by-step guide.  1. Monitor Flight Status This is an absolute must if you want to avoid weather-related impacts while traveling from Attleboro to Logan Airport.  However, you just need to be a little alert to follow this trick. The airline you are flying with will keep informing you about the schedule or rescheduling of your flight through real-time updates on their websites or mobile apps.  Some airlines even inform you through SMS.  2. Always Choose Early Morning Tickets  This is another golden rule if you don’t want to miss your flights for weather impacts during your Attleboro to Logan Airport car journey.  Early morning flights are usually scheduled on time because aircraft traffic is less during these hours.  Also, flights in the later parts of the day are likely to be more impacted by the weather conditions developed in the later parts of the day.  Moreover, the traffic on the road is smoother in the early morning compared to other parts of the day.  3. Schedule Your Car Service Right  We all, who travel frequently, know that reaching the airport on time or a little before time always helps. The buffer time allows you to make up for any delay caused by weather impacts on the Attleboro to Logan Airport car journey.  Furthermore, when you reach the airport early and if there are any changes in the flight schedules, you can always look for alternative modes of transportation or book another flight. 

READ MORE Backpack

How To Choose A Backpack? Tips You Just Can’t Miss For Your Next Travel

BY  Sharmita Apr 12, 2019

How to choose a backpack? If this is the question on your mind, this is a guide for you.   There is no single model that is right for everyone because it depends on how you will be using it. Also, bags come in a variety of shapes, colors, and materials.  So, it’s also about your preference.  The other determining factor is the amount of stuff that you need to carry. The backpack that you choose should fit perfectly, and the suspension system should be able to handle the weight you will carry. Do you want a more detailed insight? Let’s discuss How To Choose A Backpack? Smart Tour And Travel Tips You Will Love Backpacking trips in the USA are ideal for exploring the vast landscapes, wildlife, and nature of the country. However, backpacking trips need proper planning, and it all begins with finding out how to choose a backpack and the right gear.  Choosing the right backpack is a lot about customization. You also need to understand the particular trip you are going to take and the specific conditions of a destination. Nevertheless, to begin with, you can consider the following points on how to choose a backpack.  1. Selecting The Right Volume You will get different sizes of backpacks on the market. These sizes range from small, to medium and even large sizes. You need to determine whether the amount of space that your backpack has can accommodate the stuff you will be carrying.  Most backpack manufacturers state the volume of these products in liters. For instance, the capacity of an overnight backpack can range somewhere between 30 to 50 liters. It depends on whether you are a more traditional or minimalist backpacker. How To Choose A Backpack? The Minimalist Vs. Traditional Backpacker Minimalist backpackers choose light and compact gear and will sacrifice some stuff that other people will consider to be necessary during the travel.  On the contrary, traditional backpackers will choose a big backpack because they will need to carry nearly everything they want to use while in transit.  You will also need a larger backpack during winter for carrying additional clothing. If you are coming with your kids, you may want to carry an even bigger backpack.  You can further convert the volume from liters to square inches. Any method can work, and most manufacturers will provide you with both so that you can choose the one that works well.  You will need more fuel and food if you will be staying out for an extended period. The nature of the trip will also determine the size of the backpack. In case you get wet, you will be required to change your clothes.  You may also be required to carry along a stove, sleeping pad, sleeping bag, and a tent when you are camping. Therefore, the volume plays a critical role in how to choose a backpack. 2. Determine the Right Torso Size The backpack that you choose should match your individual torso length.  To determine the right size, reach to the behind of your neck, bend the head forward, and then find the C7 vertebra. It is the bone that sticks out the most on the upper spine.  The next step is locating your iliac crest. Let someone measure the distance between your C7 vertebra to the point of the neck that is at the same level as the iliac crest hip. This distance represents your torso length. The backpack will fit well when the distance that lies from the top of the shoulder strap to the belt hip can accommodate the length of the torso.  However, most backpacks have adjustable torso length, and hence, you can shorten or lengthen the distance between the hip belt and shoulder straps accordingly.  3. Choose The Right Suspension By now, you have determined the right torso size and volume on your backpack.  The next step is to make sure that you will be comfortable while wearing weight. The primary determinant for this feature is the suspension of the backpack.  For example, if you will be carrying thirty pounds of weight in your backpack using a flimsy hip belt, all this weight will fall on your shoulders and this may be painful after some time.  Several components will help you in choosing the right suspension for your backpack. These include hip belts, hip belt fit, molded hip belts, shoulder straps, strap fit, load-lifter straps, sternum straps, back panel, frame components, and frame sheet.  In case you have a heavy load, you will be required to have a substantial suspension. Make sure you confirm whether the suspension can accommodate your weight. Most manufacturers are kind enough to include these details on the backpack. 4. Adjusting The Fit This feature is critical when you want some guidance on how to choose a backpack.  It is so uncomfortable to wear a backpack that does not fit correctly. It is like wearing boots that do not fit you well.  These products may not be useful to you if they don’t fit well. The backpack that you choose should conform to your body well so that you can carry the weight on your hips and not your shoulders.  The torso length of your body has to be within the torso range of the backpack. The shoulder strap should also conform to your shoulder’s back.  The load filter straps of the bag must come up off at an angle of 45 degrees. The hip belt needs to cover your hip bones’ top (iliac crest).  Lastly, the hip belt should have the capacity to support most of the weight in the backpack. Make sure you can adjust your backpack to meet all these specifications. 5. Pockets And Components Of the Backpack Backpacks provide several sleeves, pockets, and compartments. Some people prefer a simple and streamlined backpack, while others want a product that has one major compartment.  You may want multiple compartments to place your water bottle, food, phone, and other small items. It is good to look for a backpack that has the main component and sleeping bag component.  The other pockets and components include the top lid, front pockets, side pockets and sleeves, and hip belt pockets.   The choice that you make exclusively depends on your lifestyle. The way you position different items in your backpack will determine the level of comfort.  Heavy items like fuel, stoves, food, and water should be at the vertical midpoint or even higher. You can carry the light items away from your body. The other important elements to consider are the shape of the backpack and the fabric.  The shape determines the freedom of motion and stability, while the fabric is a clear indication of the durability of the backpack.  The other things to look at include external frame parks, hydration compatibility, compressor straps, ski/board compatibility, spindrift collar, attachment points, and rain cover.  The Best Backpacking Trips In The USA For You The national parks of the USA are excellent for backpacking trips. Further, most of these national parks are ideal for the cheapest vacations in the US. 1. Grand Teton National Park Grand Teton National Park in Wyoming is one of the best backpacking travel destinations in the USA, thanks to its well-connectivity to various other parts of the country. Further, it is near the Jackson Hole Airport, making it more accessible for tourists. The park offers you the most amazing view of the Teton Range. You will also love its unique geology as you explore the hiking trails.  However, the Teton Range in the park is beyond mountains or unique geological formations. It has been the witness to human lives thriving here for over 11000 years. So, as you enjoy a backpacking trip in the Grand Teton National Park, you will learn stories of human connections.  2. Yosemite National Park Yosemite National Park is a UNESCO World Heritage Site. It is most popular among Americans for stargazing and trekking activities.  Further, hiking is a popular outdoor activity here, allowing you to explore trails like the Mirror Lake Loop, Upper Yosemite Falls Trail, and Lower Yosemite Falls Trail.  Moreover, Yosemite National Park is home to many beautiful lakes and waterfalls. In addition, the granite domes and glacier features make this national park stand out.  Read Also: Your Business Trip and Your Diet Expert Tips for Earning Frequent Flyer Points for Travelling in Business Class Flights Helpful Tips On How You Can Save Money On A Yacht Charter Top 5 Mistakes To Avoid When Choosing A Catering Service For Your Event

READ MORE

Maximizing Thrill: Expert Advice On Off-Road Motorcycle Rentals

BY  Sibashree Aug 28, 2025

Choose wrong, and the trail will chew you up. Engine displacement decides your punch out of corners, suspension travel keeps you pinned to the dirt instead of bouncing like a tourist on a rental horse, and weight balance determines whether you thread through technical switchbacks or tip over like a barstool.  A novice who dives straight onto a 450cc desert racer will burn out faster than the clutch. Conversely, an expert on a 250cc trail bike will spend the day wringing its neck for speed it cannot deliver. Match your machine to terrain as much as to skill. Rocky trails reward nimble frames with predictable throttle response. Sandy dunes are the playground for torque-heavy engines and long-travel suspension.  Among reliable all-rounders are dual-sport singles with sturdy frames and enduro setups tuned for abuse.  Pure motocross models are overkill for mixed terrain. Adventure-focused variants bridge road comfort and off-road muscle for those not afraid to carry their camp with them. In this Tour and Travel Blog, we have taken a step forward, and we have discussed the tips for choosing the right rental motorcycle and the essential equipment for a perfect road trip.  Tips For Choosing The Right Rental Motorcycle Equipment And Essentials  It can be a day trip on a rental bike or a multi-day trail expedition.  Poor planning will end your trip before the first sunset. Map your route with backups in mind. Know how far you can go in a day without crawling into camp at midnight.  A fuel stop missed by thirty miles can turn into a long, dry walk. Carry the tools for self-recovery, but have the number for roadside assistance that actually answers.  Your shelter should fit in a pannier and set up faster than a rain squall rolls in. For reliable gear support and flexible booking, explore our top-rated adventure bike rental partners before finalizing your route. Nevertheless, these are the essentials you must carry when you are going on a rented bike trip.  1. Equipping Yourself: Safety And Comfort for Adventure Rides You do not skimp on armor. CE-rated impact protection in a jacket that fits properly is your first filter between skin and earth.  Dual-sport helmets with vent systems keep your brain cool when the sun tries to cook it. Boots should survive being slammed against a rock without splintering.  Comfort matters too, because misery breeds mistakes. Moisture-wicking base layers prevent the swamp inside your gear, and modular knee guards give protection without turning your legs into stovepipes.  Before you twist the throttle, run a rapid-fire check: helmet, gloves, boots, armor, hydration, tools. No excuses for forgetting the basics. 2. On-Trail Maintenance Essentials You carry your lifeline in a small pouch. Chain breaker, multi-bit driver, and a tire plug kit do not take up much space, yet can make the difference between riding out and pushing.  A flat tire gets stripped, plugged, and inflated in minutes if you know the motions. Chains stretch; tension them before they start skipping teeth.  If you still run a carb, know how to tweak it when elevation changes choke your engine. Treat maintenance like brushing your teeth: quick, daily, and preventative.  Shake out your air filter. Glance at your brake pads. The trail does not care if you forget. It just punishes you for it. Tips For Choosing The Right Rental Motorcycle  A rental motorcycle can make your life easier as a traveler, especially when you are on a budget trip and you want to explore the new place at your own pace.  Here are the top tips you need to follow to choose the right rental motorcycle.  1. Define Your Trip First  You have to first decide the type of trip you will be going on. Are you going for a ride on a highway? Are you planning a road trip through rocky and windy routes?  How much distance will you cover? Are there enough fuel stations on the route? Ask all these questions before choosing a rental motorcycle.  2. Mark The Route And Ensure Absolute Control Are you planning to explore the surroundings of a city? Or, are you going on a cross-country trip?  For the first type of trip, you can take a regular scooter. However, for the second type of trip, you will need a powerful one with better resistance and grip.  3. Know The Type Of Road And Terrain  Are you climbing mountains with a bike? Is your road trip around the plains? You will need different types of bikes for these two instances.  Furthermore, when you are going on a trip to windy or hilly areas, you must seek advice from motorcycle experts or bike trip veterans.  Share your plans with them, and they will explain the pros and cons of choosing a particular bike model, and then you can check the availability of models for rent.  Getting The Best Value With Flexible Rental Packages The smartest riders know their numbers. Daily rates look cheap until the miles pile on and you hit a cap that drops a hammer on your budget.  Weekly rates spread the cost better for actual use. Seasonal rentals reward regulars with the best per-day rates and the least paperwork.  Watch for the small gifts: free model upgrades, insurance layers included instead of tacked on, and no-deposit offers if you have a history with the shop.  Ask for what you want. GPS units, luggage racks, extra fuel canisters, or even an hour of pre-ride setup can all land on your invoice for less if you push back. Charting Your Next Off-Road Challenge If your next ride feels easy, you aimed too low. Seek elevation where the air thins and your lungs protest.  Pick lines through rock gardens that demand balance and nerve. Cross rivers that will fight you every inch. Prep with the right tech: offline trail maps that survive dead zones, navigation apps built for grit not gloss, and group ride tools to keep your spread-out crew in sync.  Then book it. Every day you wait, the trail gets a little wilder without you.