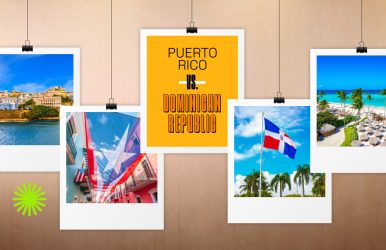
5 Leading Golden Visa Programs For Wealthy Investors

Feb 26, 2024

Last Updated on: Nov 4, 2025

Travel Guides

For movement to selected countries without any problems and to stay there for a certain period, it is necessary to have a particular authorization document. These are so-called visas, which are ordinary and VIP. The latter are good because they have great power and give the holders a huge range of privileges. The Golden Visa for wealthy investors is one of them. It can be issued in the EU by anyone who wants to, but the main requirement is that you do not have European citizenship. It is necessary to familiarize yourself with all the conditions and peculiarities in detail to avoid problems later in the procedure.

Golden Visa Programs Overview

First, it should be noted that they represent the issuance of a residence permit with subsequent granting of permanent residence status to the country’s migration program participant on improved conditions. The holder is entitled to many advantages and privileges that his family members can use later. The status can be obtained with the help of the following:

  • acquisition of immovable property;
  • buying back government bonds;
  • opening a deposit account;
  • registering your own business;
  • other contributions to development funds.

You should understand that the Golden Visa programs is a kind of pass that gives the right to obtain a residence permit in a particular country. Such a card can be obtained if you buy a house in the chosen location, make a large investment, or donate a significant amount of money. It also allows access to education in top European universities. Moreover, it is allowed to move freely around Europe. Furthermore, it is an opportunity to live legally in a civilized society with a high standard of living.

The document is issued in several countries, which we will discuss in detail below. Each state has developed its requirements for programs to get the status. It is necessary to familiarize yourself with them more closely, especially if you are planning to move soon, being an investor, and fulfill the critical condition for issuing the card.

Malta

Leading Golden Visa Programs for Malta

Malta is one of the countries with Golden visas. It is famous for its unrivaled beaches, warm climate, and hospitable locals. It is a top-rated tourist destination and a good choice for those who wish to change their residency. The program looks very attractive for those obtaining a residence permit to contribute to the state’s economy. There are several ways – to invest in some property or contribute to the country’s budget.

This country is a member of the European Union and Schengen zone and unites in itself:

Under the respective program, the decision on the application for a residence permit is often made in a short period – within 4 to 6 months. Once approved, the person is granted the requested one for 5 years with the possibility of an extension. It is worth emphasizing that this can be a pathway to citizenship for the principal applicant and his immediate family as long as all requirements are met.

Cyprus

It is the so-called “Pearl of the Mediterranean”. It pleases with its hospitable residents, Adelaide weather, clean, attractive beaches, and stunning scenery. According to the Immigrant Invest Vladlena Baranova expert, candidates with dependent family members can travel to different European corners, live, work, and study wherever they want. Moreover, permanent residence in a given country is not a prerequisite.

Greece

Greece

Greece stands out among other EU Golden visa programs. After receiving the card, living anywhere in the country to come on holiday whenever you want becomes realistic. First, it is worth understanding that this is a tourist country, so you can get income from investments by renting out the bought flat or house. Moreover, you can choose, buy an object, draw up documents, and submit them remotely.

Spain

By participating in this program and getting what you want, you can move to the country with your relatives. There is a high quality of life in Spain, a low crime rate, and a good attitude toward foreigners. It is also possible to realize visa-free trips to Schengen countries. In this case, there is no need to obtain a work permit. You can open branches and set up a new company without fears and risks.

Italy

Italy

To participate in this program, you must invest the required amount, i.e., 250 thousand euros. It must be invested in strategic economic sectors, e.g., government bonds and charity funds.

Read Also: Which Is The Best Time To Visit Auli? – Travel Guide

Temporarily Unavailable Programs

It became known that the Prime Minister of Portugal announced the end of his country’s program. Portugal has indeed decided to eliminate the possibility of obtaining a residence permit through a financial contribution to real estate. However, he still allows foreigners to get it on condition of investing 500,000 euros in local companies or funds not related to real estate. We recommend that you seek help from specialists to avoid problems and misunderstandings while resolving issues.

Read Also:

Share on Social Media

Abdul Aziz Mondol is a professional blogger who is having a colossal interest in writing blogs and other jones of calligraphies. In terms of his professional commitments, he loves to share content related to business, finance, technology, and the gaming niche.

Leave a Reply

Your email address will not be published. Required fields are marked *

title-img Related

READ MORE Rocky Mountain National Park Trails

Rocky Mountain National Park Trails: A Complete Hiking Guide

BY  Sibashree Nov 11, 2024

It’s already fall, and the Rocky Mountain National Park Trails are adorned with the Aspen leaves’ glistening gold. Also, the dark green of the pine trees in the backdrop complements the dark red and orange of Alpine shrubs. Hiking through the park trails is the best way to explore the beauty of the USA National Park to the fullest. Further, the hiking trails come with varying difficulty levels. Some are also great for enjoying a walk with your furry friends.  Moreover, the trails are varied in their destinations. Some trails in the park will take you to beautiful waterfalls, and some will end at breathtaking summits and immersive lakes. Do you also want to hike and experience the park at its best? Here is a brief overview.  Hiking Through The Rocky Mountain National Park Trails: A Rocky Mountain National Park Guide  Rocky Mountain National Park has over 350 miles of hiking trails. Further, you will find a delightful activity in the park irrespective of your abilities.  However, you will need proper traction devices and a Rocky Mountain National Park map to remain safe during hiking. Moreover, you will need proper footwear with a treaded sole as the routes can be snowy and slippery.  With proper safety measures, it’s time for you to hit the waterfalls, summit, and lake trails.  Best Rocky Mountain National Park Trails To Waterfalls Rocky Mountain National Park is home to 31 waterfalls. Do you want to witness water cascading through rocky terrains? Hit any of the following trails in the park.  1. Granite Falls Trail  Trail Head: Green Mountain Trailhead parking area Trail Distance: 5.2 miles one-way Difficulty Level: Moderate You will pass through lush green meadows while hiking to Granite Falls Trail. However, the terrain is marshy here, and you must be careful as you explore the path.  Further, lodgepole pine, aspen, Engelmann spruce, and subalpine fir greet you throughout the trail. The elevation gain is 1,046 feet in the trail, and you must proceed carefully.  2. Chasm Falls Trail Trail Head: Old Fall River Road or Winter Closure Gate Trail Distance: 2 Miles (Round Trip) Difficulty Level: Moderate The Chasm Falls Trail will take you to a cascading beauty. With an elevation of just 640 feet, this trail is moderate to hike. Further, if the hiking trail from Old Fall River Road is closed, you can take the trail from Winter Closure Gate. Then, you will have to walk or bike for 2.2 Miles.  3. Adam Falls Trail  Trail Head: East Inlet Trail Distance: 0.6 Miles round trip Difficulty Level: Easy With an elevation of just 79 feet, the Adam Falls Trail is one of the easiest ones in the park. Adam Falls is small but excels in its quaint beauty.  If you want to be more adventurous, you can walk past the waterfall. A beautiful glacier valley will emerge before your eyes, and you will love the exuberance of wildflowers.  4. Cascade Falls Trail Trail Head: North Inlet Trail Distance: 3.4 Miles one-way Difficulty Level: Moderate to Strenuous (Expect changes in the difficulty level throughout the route) You will love the gurgling sound of the North Inlet stream water, and as it thrashes the pure granite stone, it’s a beauty to behold. This waterfall is 100 feet tall and forms a cascade, as the name rightly suggests.  You will meet the most adorable marmots As you continue your hike and pass through the open meadow. They are frequent to the winding river through the lodgepole pine forest. Further, you can stop here to fish river trout and brown trout.  Best Rocky Mountain National Park Trails To Lakes Great National Park has 156 lakes. Some of these lakes have dense trout populations. Further, areas near these lakes are great for spotting wildlife. So, let’s know about the lake hiking trails that lead us to these beautiful lakes.  1. Bear Lake Trail Trail Head: Bear Lake Trail Distance: 0.7 Mile Difficulty Level: Easy With mountains of the Continental Divide in the backdrop, Bear Lake Trail is one of the best locations in the park for watching the sunset. You will love the beauty of Hallett Peak, Continental Divide, and an Alpine lake here. Bear Lake is the epicenter of many hiking trails. You can start your hike to Alberta Falls, Flattop Mountain, Emerald Lake, and more from here.  2. Sprague Lake Loop Trail Trail Head:  Estes Park Trail Distance: 0.7 Miles round trip Difficulty Level: Easy Sprague Lake Loop Trail is the most accessible trail in the park. Wheelchairs are allowed here. So, patients with disabilities can also explore this trail.  You can stop at the benches and many lookouts throughout the trail to reflect on the beauty of nature. Further, you can see the mountain peaks along the Continental Divide.  Moreover, Sprague Lake is an amazing destination for spotting wildlife.  3. Mills Lake Trail Trail Head: Glacier Gorge Trail Distance - 5 Miles round trip Difficulty Level: Moderate to Strenuous  With a 700-foot elevation, the Mills Lake trail will take you through a gorge carved by glaciers, streambeds, and waterfalls.  The beautiful Mills Lake gets its name from Enos Mills, the founder of the Rocky Mountain National Park. Further, if you want to continue your hiking pursuit, you can walk to Black Lake, and that will be an additional 1.7-mile hike.  4. Gem Lake Trail Trail Head: Lumpy Ridge Trailhead Trail Distance: 3.4 Miles round trip Difficulty Level: Moderate to Strenuous  The expansive field of granite domes houses the Gem Lake. It is indeed a hidden gem and one of the biggest attractions in the area, along with Lumpy Ridge.  Gem Lake is shallow, and it has water of melted snow and rainfall.  5. Dream Lake Trail Trail Head: Bear Lake Trail Distance: 2.2 miles round trip Difficulty Level: Moderate to Strenuous  You must go for a steady ascent from Bear Lake to reach Dream Lake. The trail comes with an elevation change of 830 feet. Don’t miss the following highlights of this hiking route.  Nymph Lake Aspen Groves Ponderosa Pine The Nymph Lake looks most beautiful in summer, with pond lilies in full bloom. Further, you can use Dream Lake as the base and trek to the amazing Emerald Lake or Lake Haiyaha.  Best Rocky Mountain National Park Trails To Summits Despite the elevation gain of around 1000-3000 feet, the hiking trails to summits are very popular among visitors. The wonderful vistas from the mountain tops make the effort worth it.  1. Deer Mountain Trail Trail Head: Deer Ridge Jct Trail Distance: 3.1 miles one-way Difficulty Level: Moderate to Strenuous  The Deer Mountain comes with an elevation of 10,006 feet. Further, as you hike and reach the summit, you will enjoy the most beautiful view of Upper Beaver Meadows, Longs Peak, Estes Park, and Moraine Park. Be careful about the weather forecast before you start your journey on the trail.  2. Flattop Mountain Trail Trail Head: Bear Lake Trailhead Trail Distance: 8.8 miles round trip  Difficulty Level: Moderate to Strenuous  The trail from Bear Lake is the best way to reach Flattop Mountain, and this route is one of the trickiest ones in the park. However, if you cannot access the trail from Bear Lake, you can try the route to Flattop via Tonahutu Trail. Further, as you reach the Flattop Mountain summit, you will enjoy the beauty of Hallet Peak, Dream Lake, and Tyndall Glacier.  3. Chasm Lake And Longs Peak Trail Trail Head: Old Fall River Road or Winter Closure Gate Trail Distance: 4.2 miles one-way Difficulty Level: Strenuous  Chasm Lake, just beneath the Longs Peak, offers a spectacular view. You will come across Tundra meadows and Alpine tundra through the trail. Further, animals like pikas and marmots are common here.  As you reach the Chasm Junction and find an outhouse, you can hike along a wall to see Columbine Falls and Peacock Pool Gorge. After this point, the terrain becomes rocky, and you will need cairns to reach Cirque, the lake's location.  Mistakes You Must Avoid When Hiking Through Trails Of Rocky Mountain National Park Making a rushed trip to the Rocky Mountain National Park is the biggest mistake you can make. You can face severe issues like dehydration and acute mountain sickness here if you don’t allow your body to acclimatize or work on your physical and mental endurance. So, carry enough water or hydrating solutions and start your training under proper guidance at least one month before your Rocky Mountain hike.  Further, don’t think that you will always make it to the trails in your usual track pants or leggings. You have to wear hiking clothes as on many days, you will have no escape from the afternoon rain.  Rocky Mountains National Park At A Glance  Location: Colorado, USA Established: 26 January 1915 Highest Point: Longs Peak Area: 415 Square Miles How to Reach: Take a drive or shuttle from the Denver International Airport.  Also read Why Include Whale Watching In Your LA Itinerary. Traveling On A Budget: Tips For Affordable Adventures. From Cocktails To Kickflips: Must-Try Activities In San Diego.

READ MORE container shipment in Hawaii

What You Need to Know About Regulations for Container Shipping to Hawaii

BY  Sibashree Feb 22, 2025

Shipping goods to Hawaii is a rather complicated process that requires understanding state and federal regulations. This article covers all bases on container shipping to Hawaii-whether from the shipping basics to regulations to factors affecting cost.  Understanding the Basics of Container Shipping to Hawaii  Container shipping to Hawaii of goods from the beginning to the end involves sea transportation in large shipping containers. As an island chain, Hawaii is more dependent on sea freight transport than most U.S. states, as shipping lines regularly run between the mainland and Hawaii.   Goods are usually loaded into a container at the port of origin, transported across the Pacific Ocean, and unloaded at a port in Hawaii.  To ensure your shipment is properly handled, it is important to understand the preparation and what to expect from the shipping situation.   There are regulations to be observed beyond selecting a shipping provider; should any of these regulations not be followed, your shipment might encounter delays and penalties.   Laws Affecting Shipping Containers, Permits, and Building Code Requirements in Hawaii  Shipping containers in Hawaii give rise to a different set of zoning laws, permits, or building code requirements, which can be very limited if one is interested in retrofitting or dairy goods in containers on the islands.   Good knowledge of these laws is essential because they are meant to maintain the state's safety, aesthetics, and environmental balance.  Zoning Laws  The zoning law in Hawaii would regulate the areas for placement of containers in residential, commercial, or industrial properties. Some places restrict the use of shipping containers for storage or habitation.   Local zoning ordinances differ from one county to another, and thus, it is very important for you to check on what sites have requirements for where you intend to ship or store your containers. Violating zoning law could cause you to be fined or have your containers removed.   Permits  In many instances, shipping containers need to be permitted before use on private property, specifically for commercial or construction purposes, as we have maintained.   For example, a building permit will almost certainly be necessary if containers are to be used for storage or adapted for habitation.   It is best to establish that your shipping containers require permits for usage and to be prepared to submit plans for approval with the local authority.   Building Code Requirements  Hawaii’s building codes are in place to ensure safety and guarantee that structures conform to specified environmental standards.   Shipping containers turned into living quarters and/or workplaces must abide by these codes.   Areas covered include structural integrity, ventilation, electrical wiring, plumbing, and insulation. Fines or dismantlement may come consequently if building code laws are violated.   State and Federal Regulations  Besides local regulations regarding container shipping to Hawaii, state and federal regulations govern the smooth coordination of shipping containers. They include:  USDA and APHIS Regulations  The U.S. Department of Agriculture and Animal and Plant Health Inspection Service enforces standards for preventing the introduction of invasive species. Upon entering any container in Hawaii, inspection for pests and dirt will be mandatory.   Customs and Border Protection (CBP)  The Customs and Border Protection (CBP) will be able to inspect containers to ascertain whether they fit the federal import requirements.   Goods into Hawaii from any foreign country must comply with U.S. Customs. Ignoring these regulations can lead to serious legal consequences and shipment rejections.  Environmental Considerations  Hawaii is home to some of the most delicate ecosystems. Because of environmental protection laws, certain items may be prohibited from shipping here.   Tips for Compliance with Hawaii's Regulations  Additional value is given to these tips to put the shippers at ease while bypassing costly delays and fines:   Contact the Local Authorities  Interrogating the local authorities regarding arrival or intended container placement in Hawaii is also wise; it could be the county building department or the zoning office that can assist with the permits and inspections needed and requirements for shipping container use.  Prepare your Documentation  Good documentation will rule the waves. Your bill of lading, inspection records, shipping receipts, and permits should be assembled before the shipment so that no unexpected delays or issues arise on arrival.   Work with Licensed Contractors  Work with licensed contractors knowledgeable of Hawaii's building codes if you intend to convert a container into a structure, such as a house or office, to help ensure that your project follows the law and has all relevant documentation.   Factors Determining Cost of Shipping  Several factors determine the cost of shipping containers to Hawaii. An understanding of these factors would ensure proper budgeting on your part.  Origin of Shipment  The origin location of your container shipment may influence pricing. Moving cargo from the mainland United States is less expensive than moving cargo from foreign countries; this is due to distance, as well as customs necessities.  Moving/ Shipping Services Taken  The services you select, including door-to-door delivery or terminal-to-terminal shipping, will also affect the price. If you need additional services such as unpacking or installation, be ready to pay more.   Accessibility of Sites  Shipping costs may increase if your destination is in a more remote area in Hawaii or parts of the state with limited port access due to transport challenges.   Containers may need to be moved off the freight ship onto smaller vessels or trucks for delivery to the destination.  Weight of Shipment  A heavier shipment means it will be more expensive to ship. So, watch out for the weight of your container and try to minimize it by packing wisely.  Shipping Item Types  Some items may require special handling and/or permits, such as hazmat shipping and heavy-moving machinery, which costs extra. Always check restricted categories for your items.  Things You Cannot Ship in Your Container to Hawaii  Hawaii has very strict prohibitions under their regulations on certain things for environmental, health, and safety reasons. Some of the things you cannot ship:   Soils and plants: They are very strict about any invasive species; therefore, soil, plants, and plant products are strictly restricted.   Pests and insects: All the containers must be inspected for pests, and any of those that have carried insects or any other harmful organism will be refused entry.  Fresh Produce: Some fresh fruits and vegetables can also be banned because pests are introduced.  Animals and animal products: Certain animals or animal products can be very strict when imported into Hawaii.   Final Thoughts  Shipping to Hawaii involves a thorough understanding of local and federal regulations. You can smooth your shipment and any associated projects by following all zoning laws, obtaining relevant permits, and adhering to building codes.   Always seek local authorities’ assistance, prepare required documentation, and work with licensed professionals as necessary.   Remember, shipment origin, weight, and type of service will cause your costs to fluctuate, so it is wise to plan. Knowing what you can and cannot ship will help you avoid unnecessary hold-ups so your container shipment to Hawaii can go as planned. READ MORE: 7 Benefits Of Staying At A Beach Hotel The Stairway To Heaven Hawaii: Hiking Adventure’s Hidden Gem Nurturing Young Explorers: The Benefits Of Beach Camps In Nurturing Curiosity And Resilience

READ MORE White Water Rafting

8 Tips For A Fun And Memorable White Water Rafting Experience

BY  Arnab Dec 27, 2023

White water rafting delivers a thrilling experience, balancing stunning natural vistas with adrenaline-fueled excitement. If you're new to this adventure, you likely have queries and considerations regarding what to expect and how to prepare for maximizing your thrill.It might surprise you, but white-water rafting can be equally thrilling for beginners and experienced adventurers, provided you choose the right location and know what to expect. Here Are Eight Prime Ideas For A Fun And Memorable White Water Rafting Experience In this blog post, we'll provide eight essential tips and insights to ensure your first expedition is both enjoyable and safe, leaving a memorable impact. 1. Choose the Right Attire Staying in your boat for the entire duration of the outdoor adventure won’t stop you from getting wet. Anticipate getting wet on your journey, and don waterproof and anti-chafing garments that can serve as a barrier between you and the raft. Fabrics such as cotton and wool take an extended period to dry and draw heat away from your body, potentially leaving you feeling cold. Ideally, you want to go for synthetic materials that dry quickly and don’t absorb a lot of water. When picking shoes, choose those that have laces. Flip flops and sandals can easily get lost if you happen to lose balance or fall into the water. Depending on the weather forecast and expected temperatures, you can wear a wetsuit. It will offer extra buoyancy and protect you from temperature drops that characterize the colder months. 2. Always Bring a Helmet Safety is of key concern whenever you go on an outdoor adventure and rafting is not an exception. Make sure you have all your safety equipment, including a helmet. White water rafting rivers often have rocks, branches, and logs lining the bottom and you may not notice them from your sitting position in the boat. If you happen to fall into the water, hitting your head against one of these could leave you with severe injuries that you want to avoid. Always keep your helmet on to stay on the safe side. 3. Know What to Do if You Fall Out of the Raft You may take every precautionary measure but even your guide may not stop you from falling into the water. In the eventuality of it occurring, your subsequent actions could carry significant weight. Upon entering the raft, ensure to don your life vest and maintain its presence until disembarking from the boat. If you fall into the water, stay calm swim towards the vessel, and grab the outside safety line. Call out to the guide or rafting mates and wait for someone to pull you back in. If you can’t swim towards the raft, call out to a rafting mate and they will toss you the throw bag and a paddle that you can hold onto. If neither of these is possible, lie in the whitewater swimming position and wait for a guide to reach you. 4. Listen to Your Guide White water rafting guides are experienced in handling the wilderness and river terrain. Whether you're a first-timer or an experienced rafter, it's crucial to heed instructions attentively when they are given. These directives will provide essential information for navigating challenging waters, including what to avoid, where to swim, and when to paddle. They may seem like simple instructions but they dictate the speed, direction, and weight balance of your vessel. 5. Master the T-Grip The T-grip is an important aspect of white water rafting as it is the only way to ensure that the paddle does not slip out of your hands. The T-grip is the end part of the paddle-shaped like a “T” and is made of hard plastic. Most white water rafting guides will always show you the T-grip before you set out. Essentially, you need to keep one hand at the base of the paddle on the shaft while the other holds firmly over the T-grip. This ensures that you have control of the paddle and cushion any blows to you or your rafting mates in case of anything. 6. Practice Your Swimming Like we said before, you cannot stop yourself from falling into the water when you go white water rafting. Understanding the different swimming techniques such as aggressive and defensive swimming can be a lifesaver if you find yourself in the water. Rivers meant for white water rafting have high currents so you need to be sure with what you are doing. If you choose to swim to the banks, make sure you only go for the banks and avoid standing still in the water even if you need time to think. Standing still or walking in the river could cause foot entrapment which could be dangerous. 7. Research Your Destination Different rafting sites offer different experiences. You could find a beautiful river headed up by a dam that allows for scheduled water releases like the Pigeon River. A Yellowstone whitewater rafting day trip, on the other hand, will bring with it the excitement of Class II and Class III white water rapids allowing you to relax and enjoy the pristine wilderness. Taking time to familiarize yourself with the destination allows you to prepare in terms of choosing attire and packing guides. You want to go with a guide who has sailed the same waters for a while. 8. Avoid Carrying Electronics White water rafting is nothing like riding in a fishing boat or a yacht. The waves will constantly toss you around in the raft and some water will definitely get in potentially damaging your electronics. At the very worst, your device could fall into the water and get lost in case of an accident. Even then, white water rafting is not one of those adventures where you can pull out your phone to snap a quick photo. It is an activity that requires you to stay fully engaged and attentive to the paddling patterns and commands from your guides. Some companies will provide you with photographers so they can capture every memorable moment. Endnote You will definitely have lots of fun when you go rafting so make sure you do it with a group of people you are close to. The adrenaline rush will be a source of new memories you will cherish. However, make sure you follow your guide’s instructions to stay safe especially if it is your first time. Read Also: 10 Best Things To Do In Prague Five Tips for First Time Traveler to India