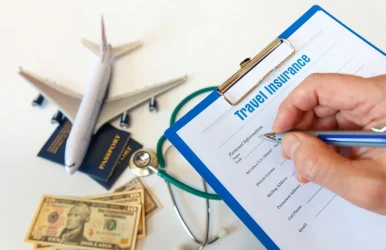
Is San Francisco Safe? THIS is What You Should Know!

Dec 21, 2023

Last Updated on: Aug 27, 2025

Travel Guides

Overall Crime Rate54 per 1,000 (high)
Most Common CrimePetty theft
Worst NeighborhoodTenderloin
Safety TipDon’t go out at night or walk alone

Is San Francisco safe? With over 14.8 million visitors in 2021, San Francisco is one of the most popular tourist destinations in the country. As they explore the city’s landmarks and neighborhoods, tourists may find themselves overcome by the beauty, history, and attractions of the city.

The city’s language, culture, topography, and steep hills can make it somewhat difficult to get around on your own. This is all the information one should have before visiting San Francisco for the first time.

For example, San Francisco’s Mission District is one of the best neighborhoods. Another location that is suggested to visitors is North Beach.

Although San Francisco is a lovely and friendly city, first-time visitors should be cautious and aware of their surroundings. There are a few important things travelers should know before departing for San Francisco. They are the safest neighborhoods for first-time visitors.

Is San Francisco Safe?

Is San Francisco Safe or not

So, is San Francisco safe? In comparison to other large metropolitan areas, San Francisco is generally a safer city due to its low rate of violent crime.

Having said that, it’s crucial to exercise caution always and pay attention to your surroundings, particularly when traveling through unknown territory.

Petty crime is the main threat in San Francisco, so if you want to be as safe as possible, you should stay away from some parts of the city. But you can simply avoid any dangerous areas if you have a basic understanding of the city and its neighborhoods.

Mission District

Mission District

One of the most fantastic place to begin your exploration of San Francisco is the Mission District. It’s conveniently located and teeming with art, culture, mouthwatering cuisine, and amiable locals. Travelers should always be mindful of their possessions because pick-pocketing can occur in busy places.

North Beach

North Beach

Another fantastic neighborhood with lots to offer is North Beach. Due to its proximity to Fisherman’s Wharf and the Golden Gate Bridge, tourists particularly visit this area. Once again, visitors should be aware of their belongings in crowded areas, and they should be fine.

The Haight-Ashbury neighborhood is well-known for its hippie history, but it’s also a great place to find unique shops, cafés, and bars. Visitors should just use common sense when visiting this area as it can get more crowded than others, and they should be fine.

Nob Hill

Nob Hill

Another charming neighborhood with breathtaking city views is Nob Hill. Although the hilly streets are generally safe, visitors should exercise caution when walking on them in the rain. It is advised to stay in these neighborhoods because they are conveniently located near public transportation and in the heart of the city.

On the other hand, tourists seeking a more suburban atmosphere can find it in Nob Hill. While there is much to see and do in San Francisco, a visitor can get a good idea of where to begin with this list.

Crimes In San Francisco

Crimes In San Francisco

Most often, when people ask, “is San Francisco safe?” the issue is with thieves. Robbery and theft are the most common crimes in San Francisco. Due to the perception that they are more likely to carry cash and valuables, tourists are frequently the target of harassment.

Pickpocketing and other small-time theft are prevalent in crowded places like marketplaces, public transportation, and tourist attractions.

Additionally, robberies may happen, particularly in places where tourists are known to congregate. Always be mindful of your surroundings and make sure your possessions are safe.

The likelihood of having your car broken into has also gone up in San Francisco over the last few years. When valuables are left in plain sight in the trunk or on car seats, this happens more frequently.

Read More: Is Cabo San Lucas Safe? – Let’s Find Out!

Things To Avoid In San Francisco

Things To Avoid In San Francisco

Steer clear of the city at night when you’re alone. It is not advisable for visitors to visit convenience stores and ATMs late at night.

Although San Francisco is a beautiful and distinctive city, there are risks involved. Here are some things you should not do when in San Francisco.

Visitors should use caution when strolling through some neighborhoods after dark. San Francisco is safe as long as you stay alert.

While it’s safe to stroll around most of San Francisco after dark, there are certain areas you should avoid. These include portions of the Mission district and the Tenderloin district. It is essential to seek guidance from locals or hotel staff if you are unsure about a particular area.

Additionally, extreme caution should be exercised when using public transit late at night. While San Francisco’s public transit system is excellent during the day, it can be dangerous at night. It is safer to stay in well-lit areas and avoid traveling alone whenever possible if one must use public transportation late at night.

In general, especially after dark, ATMs and convenience stores are not safe locations to visit in San Francisco. It is advisable to arrange ahead of time and take out cash during the day.

Because there are many hills and stairs in San Francisco, jogging can be an excellent exercise. Joggers should, however, always be conscious of their surroundings, particularly if they are going alone.

To stay alert, they must stay in well-lit areas and refrain from wearing headphones.

Best Time To Visit San Francisco

Best Time To Visit San Francisco

The best time of year for most visitors to San Francisco is between September and November. Fall and winter are safer seasons in the city because there are fewer homeless people living there.

The months of September through November are the greatest times to visit San Francisco. Cooler weather generally results in fewer homeless people being visible on the streets, making it a safer time of year for tourists.

Nevertheless, San Francisco is a popular vacation spot in the spring and summer because of the pleasant weather in comparison to other Southern California cities.

But it’s important to keep in mind that San Francisco has a Mediterranean climate, with a rainy season that runs from November through March. The early spring is when it will rain the most, which can make for a wetter and colder vacation.

Still, the city is breathtaking every single day of the year. You might want to think about taking this day trip to Yosemite from San Francisco.

Wrapping Up

Is San Francisco safe? Short answer: visitors to San Francisco only need to take standard safety precautions when visiting. Although many other developed cities worldwide are still safer than San Francisco, the city may rank among the safest in the United States (London, Paris, Sydney, and Tokyo, to name but a few in the world).

Read Also:

Share on Social Media

Abdul Aziz Mondol is a professional blogger who is having a colossal interest in writing blogs and other jones of calligraphies. In terms of his professional commitments, he loves to share content related to business, finance, technology, and the gaming niche.

Leave a Reply

Your email address will not be published. Required fields are marked *

title-img Related

READ MORE Protect Your Passport

5 Tips To Protect Your Passport While Travelling Abroad

BY  Abdul Aziz Oct 4, 2021

Any visitor's worst nightmare is losing their phone, wallet, or, worse their passport in an unfamiliar location. You have no prior knowledge of the country, its inhabitants, or its language. And if you lose your essentials while traveling overseas, what was supposed to be a relaxing vacation becomes a full disaster. Losing your passport is the worst thing that can happen to you. Because it raises the most fundamental question: how will you get back home? But have no fear: every problem has a solution, and this one is no exception. So, if you ever find yourself in a situation like this, try not to freak out. Inhale deeply and exhale slowly. And once you've searched every nook and cranny and are certain it's gone, there are five basic things you should do if your Indian passport is misplaced while traveling abroad. File An Official Report For Lost Or Missing Passport To begin, locate the nearest police station and register a missing or lost passport complaint. Any travel insurance policy must include this step. It's also crucial information that you should bring to the attention of the embassy or consulate. However, keep in mind that this may not always expedite the procedure of apply for a new passport. Nonetheless, it is critical. A police report can also help you with embassy formalities like obtaining an emergency certificate or a new passport. Visit The Nearest Indian Embassy Or Consulate Next, go to the Indian embassy or consulate in your area. They will assist you in obtaining a new passport. Make an appointment ahead of time by calling ahead. It's also crucial to notify the embassy if your passport has been stolen. Find the one closest to you and acquire their phone number and email address so you may communicate with them. Keep All The Supporting Documents Ready As your appointment with the Indian embassy approaches, it would be preferable if you prepared the necessary documentation to replace your passport. When you visit the embassy, you will be required to submit some documents in addition to the application. It will take around a week to replace a new passport. For this, you must submit the following documents: Personal application stating the need for the new passport's prompt issuance Photocopy of lost passport (front and back pages), passport lost or stolen police report Passport size photos (4 to 6) Photocopy of air tickets and visa You also don't have to wait for a new replacement passport if you need to return to India right away. Simply fill out an application for an Emergency Certificate. This is a travel document that can only be used once. It allows an Indian citizen who has misplaced their passport to return to India without difficulty. You'll need to get your visas stamped anew for both of these alternatives. The following documents are required to apply for an Emergency Certificate: Application by giving an EAP-2 form Passport size photos (4 to 6) Photocopies of passport (Front and back pages) Police report for a lost or stolen passport. Appy For Re-Issue Of Your Visa If you lose your passport while traveling abroad, whatever visas you may have will be lost as well. As a result, you can reclaim your visa by going to the nation's embassy that issued it in the first place. For this process, you'll need a copy of your old visa as well as the police report that was submitted. It would also be beneficial if you had your new replacement passport. Reschedule Your Flight & Claim Travel Insurance On Return If your passport is lost or stolen, you will be unable to travel outside of the foreign nation until you acquire a new passport or an Emergency Certificate. As a result, you may need to reschedule your flight if necessary. Call your airline and let them know what's going on. The sooner you notify the airlines, the more likely you will avoid wasting your money on rescheduling your journey. Before going abroad, it's always a good idea to get travel insurance. If you've done all of this, make a claim for your travel insurance when you get back to India. Make a claim for a missing passport to redeem your insurance. Contact your insurance company as soon as possible, and preserve the police report and any other documents connected to the expenditures paid as a result of the loss of your passport on hand. So, if you lose your passport or it is stolen while on vacation overseas, these are the five things you must do. Above all, remember to be cheerful, take a deep breath, and avoid panicking. If you keep your cool, you'll be able to get through this scenario faster and with less stress. Read Also: Rejection Of China Tourist Visa In Atlanta – Some Possible Reasons How To Book A Driving License Slot Online?

READ MORE Great Barrier Island camping tips

The Best Great Barrier Island Camping Tips: Ultimate Guide To The Best Camping Spots On Great Barrier Island, New Zealand 

BY  Sibashree Nov 17, 2025

Spotting the burrows of the black petrels at Glenfern Sanctuary and the hillside was like magic! The burrows had eggs in a cream shade with tan freckles. They almost looked like the eggs of a hen, though slightly larger. Also, some chicks were chirping their hearts out inside the burrows. They looked like those squishy dog toys. Now, spotting birds is one of the most fulfilling activities when you are camping on Great Barrier Island, New Zealand. Furthermore, if days were about hiking and spotting the birds, the nights were about indulging in the surreal beauty of the celestial bodies at this designated Dark Sky Sanctuary. Moreover, camping in Great Barrier Island is a true off-grid and remote experience. No Streetlight!  No Public Rubbish Bins!  And, No Powered Camping Sites!  It’s just you, the camping tent, and the rugged beauty of New Zealand’s Hauraki Gulf. Hi, in today’s blog, I will talk about the Great Barrier Island camping tips. Here, you will learn about the must-book DOC sites, the non-negotiable biosecurity rules, and everything else you need to plan your adventure.  Camping In Aotea, Great Barrier Island: Setting The Right Mindset For Biosecurity And Sustainability View this post on Instagram A post shared by Department of Conservation (@docgovtnz) Aotea isn't a place that just hands you its beauty. It's a place that makes you earn it. It's a true adventure that rewards you for being self-sufficient.  It's the thrill of waking up to the raucous call of a Kākā parrot, not an alarm clock. It's the magic of watching the Milky Way rise over the dunes at Medlands Beach, and the peace of having a rugged, white-sand cove all to yourself.  Also, it is one of the rare islands that serve as sanctuaries, and with 60% of its area protected by the Department of Conservation, Great Barrier Island demands the utmost care for biosecurity and the adoption of sustainable practices. So, before you want to explore the best camping spots on Great Barrier Island New Zealand, you have to build your mindset. This is your invitation to join a small community of travellers who value wild, authentic, and responsible adventure.  1. Offering The True Off-Grid Experience  The campsites of the Great Barrier Island are exactly what the island is. They are not powered, and they have basic amenities. Furthermore, open fire is not allowed in these campsites. So, you will have to bring fuel-powered or gas cookers. Furthemore, the Department of Conservation camping sites have only a specific number of tents. So, you need to make the booking well in advance. Contact the Department of Conservation (DoC) at 0800 275 362. 2. The Golden Rule: "Pack In, Pack Out”  Zero waste and recycling are important for the sustainability and environmentally friendly practices of the Great Barrier Island. However, the island does not have public rubbish bins. So, whatever you carry to the island, you will have to take it back. You must use the official Orange Council bags with stickers for trash disposal. 3. Biosecurity Is Most Important  Protecting the Kauri trees from the infamous “Kauri Dieback disease” and the island's endemic animals requires a high level of biosecurity. So, when you leave for the Great Barrier Island from Auckland, you will have to check for ants and rats. Also, when you leave Great Barrier Island, check the tents and packs for skinks. In addition, the Phytophthora Agathidicida attack on the kauri trees has been a serious concern. Stopping the soil movement is crucial to stopping the attack of this dieback disease. Soil movement can happen through pigs, footwear, and vehicles. Therefore, the Department of Conservation (DoC) cleaning stations play an important role in cleaning and removing soil from your gear and footwear before entering a kauri forest on Great Barrier Island, New Zealand. In addition, you have to stick to the marked routes when hiking through the best Great Barrier Island hiking trails. 4. How To Book The Camping Sites: DOC Vs. Private  If you are camping in any of the DoC sites, you have to make the booking online well in advance. Private camping sites can be booked directly. Here is the step-by-step guide for booking a DoC Campsite on the Great Barrier Island. First, visit the Department of Conservation site for the particular campsite. For example, let’s talk about the Akapoua Bay Campsite. On the dedicated Akapoua Bay Campsite page, you will get to know about the campsite and the fees. The fees for the Akapoua Bay Campsite are $18 per night for adults, $9 per night for children ages 5 to 17, and $0 per night for infants ages 0 to 4. In addition, you can book a campsite pass from the Department of Conservation of New Zealand. It will give you access to all the bookable and non-bookable campsites in the country. If you need any assistance in booking the campsite pass, you can avail of that at a service tax of $10. For adults, the camping pass will cost $295.00 (365 nights), and for children between 5 and 17 years, the pass will cost $147.50. Moreover, for children below 5 years, the camping pass is free. If you need any assistance regarding the booking of the 1-year campsite pass or a pass for any specific site, you can contact Whakatū/Nelson Visitor Centre at +64 3 546 9339 or email them at nelsonvc@doc.govt.nz. The Kauaeranga Visitor Centre (+64 7 867 9080/kauaerangavc@doc.govt.nz) also offers the same assistance. What Are The Best Camping Spots On Great Barrier Island New Zealand?  View this post on Instagram A post shared by Department of Conservation (@docgovtnz) Digital detox has been a trending thing these days, and if you want to truly experience that and shut all the noise in your head, the camping spots on the Great Barrier Island will be the best for you. Further, the real magic of camping on Aotea starts after sunset. You haven't lived until you've watched the Milky Way rise over your tent from the dunes at Medlands. However, along with the Medlands Beach, there are 5 other DoC campsites in the Great Barrier Island, New Zealand. Here are the details. 1. Akapoua Bay Campsite  The sheltered waters of Port FitzRoy have a beautiful camping ground, which is like a gateway to the many walking tracks of the Great Barrier Island, New Zealand. From waking up with a 60-second dash of a cold shower to exploring the paths graced by the pohutukawa trees, the Akapoua Bay Campsite will offer you a peaceful and off-the-grid experience. The maximum number of campers on this site can be 75. Moreover, the camp is hosted from Christmas to the end of January. 2. Harataonga Campsite  This campground is very close to Harataonga Beach. So, it is an ideal camping site for swimmers and snorkeling enthusiasts. It can accommodate 120 campers, and this campsite is surrounded by bush and farmland. and camping takes place between Christmas and mid-February. Harataonga is for the romantic escape. 3. Awana Beach Campsite  The Awana Beach Campsite is a surfer’s dream. It has beautiful dunes and farmlands around. It can accommodate 120 campers, and the campground remains open from Christmas to the end of January. The only problem with this camping site is mosquitoes. So, you have to carry mosquito repellents. 4. Medlands Beach Campsite  The sound of the waves at Medlands. This is the music you will listen to when you go to sleep or wake up at the Medlands Beach Campsite. Medlands is like an all-rounder. It is ideal for families and surfers alike. The campsite remains open from Christmas to mid-February, and it can accommodate 120 campers. 5. The Green Campsite  You can boat in or walk in the Green Campsite, which remains open from 1st December to the end of February. With a capacity of accommodating only 30 campers, this campsite has a rich history associated with whaling, kauri logging, and timber milling. The waters of the Whangaparapara Harbour make it an idyllic retreat, and it is also the base of the Aotea Track. 6. Whangapoua Campsite  The Whangapoua Campsite is a surfer’s paradise, and it is located on the edge of the Whangapoua estuary. It is also a favorite camping site for fishing. With an accommodation capacity of 150 people, this campsite remains open from Christmas to the end of February. However, the biggest highlight of this camping site is the views of Rakitu Island and Mount Hirakimata. A Comparison Summary Table Of The DoC Camping Sites On The Great Barrier Island, New Zealand  DoC Campsite Access Landscape Facilities Activities Dog Access Fees Akapoua Bay Campsite Campervan, Car and Caravan Coastal Boat Launching, Cooking Shelter, Cold Shower, Non-Flush Toilets for Men and Women Boating, Fishing, Walking, and Tramping No Adults: $18 per night, Children of 5-17 years, $9 per night, and Children below 5 years: free Harataonga Beach Campervan, Car and Caravan Coastal Cooking Shelter, Cold Shower, Non-Flush Toilets for Men and Women Swimming, Snorkeling, Fishing No Adults: $18 per night, Children of 5-17 years, $9 per night, and Children below 5 years: free Awana Beach Campsite Campervan, Car and Caravan Coastal Cooking Shelter, Cold Shower, Non-Flush Toilets for Men and Women Kayaking and Canoeing No Adults: $18 per night, Children of 5-17 years, $9 per night, and Children below 5 years: free Medlands Beach Campsite Campervan, Car and Caravan Coastal Boat Launching, Cooking Shelter, Cold Shower, Non-Flush Toilets for Men and Women Fishing, Surfing, Swimming No Adults: $18 per night, Children of 5-17 years, $9 per night, and Children below 5 years: free The Green Campsite Boat, Foot Coastal Cooking Shelter, Non-Flush Toilets for Men and WomenHiking, Boating No Adults: $18 per night, Children of 5-17 years, $9 per night, and Children below 5 years: free Whangapoua campsite Campervan, Car and Caravan Coastal Cooking Shelter, Cold Shower, Non-Flush Toilets for Men and WomenFishing, Surfing No Adults: $18 per night, Children of 5-17 years, $9 per night, and Children below 5 years: free  Insider Tips For Camping At DoC Campsites On The Great Barrier Island If you are camping in a caravan or campervan, remember that the gravel roads leading to the camping sites, especially the Harataonga Campsite, are steep and winding. Also, the sites are off-the-grid. Furthermore, the campervans are not usually allowed on the beaches. The Best Private & Unique Camping Options On The Great Barrier Island View this post on Instagram A post shared by Department of Conservation (@docgovtnz) 1. Great Barrier Island Campground  The Great Barrier Island Campground, spanning over an area of 12 square acres, is an ideal camping ground for access to different beach activities. The camping site is located at a distance of just 200 meters from the beach. The camping fee at the Great Barrier Island Campground is $10 per person per night. You can contact them at 021 298 8905 for booking. 2. Mickeys Place  The O'Shea Family farm in Awana houses the Mickey's Place camping ground. It is a family-friendly camping site with the following facilities. A Communal Cooking Area  Flush Toilets  Showers  Patrick, Sean, and Mickey are the hosts of this campsite, and you can contact them at 09 4290 140. 3. Stray Possum  Stary Possum in Tryphena is an ideal camping site for backpackers. If you are camping here, you will have access to the kitchen, toilets, and showers of the adjacent Stray Possum Lodge. This camping site has 14 tents, and you can call 09 4290 109 for booking details. 21 Essential Great Barrier Island Camping Tips  I promised you tips, and here they are. Do not go to Great Barrier Island without reading this checklist.  • Packing And Food  1. Bringing a Gas Cooker  Open fires are banned in the Camping sites of the Great Barrier Island. So, you will have to bring a gas burner for preparing your food. 2. Packing Your Food  Groceries are not available everywhere, and they are even very expensive. So, it is better to collect and pack the groceries you will need before leaving Auckland. 3. Bringing a Good Chilly Bin  You will need this insulated chest for storing warm and cold food items. 4. Bringing a Red-Light Torch  The island is a Dark Sky Sanctuary. A red torch lets you stargaze without ruining your night vision.  5. Bringing Cash  EFTPOS (debit) is unreliable, and many camping sites only accept cash. 6. Packing Warm Clothes  The weather can suddenly become cold, even on summer days. So, you will have to pack layered clothes.  7. Carrying Mosquito and Insect Repellent  Sandflies and mosquitoes are notorious on Great Barrier Island. So, you will have to carry an insect repellent.  • On-Site & Facilities  8. Cold Showers  Most shower stations on the Great Barrier Island are cold water shower stations. This is great as the dash of cold water in the morning, literally works as the eye opener. 9. Long-Drop Toilets  The long-drop toilets are basic and waterless. Using these pit toilets can be challenging for some campers. 10. Drinking Water  The tap water available at these sites is not ideal for drinking unless it is purified or boiled. 11. Pet-Friendly  The DoC camping grounds are not accessible to dogs. This is crucial for the protection of wildlife, the safety of the pets, and soil movement, causing the resurrection of pets and parasites affecting the local flora and fauna. 12. Booking  The slots for camping sites such as Medlands, Akapoua get sold more than 6 months in advance for the Christmas and New Year periods. So, it is indeed a year-long planning. 13. Alcohol Rules  The consumption of alcohol can be banned in various camping sites, especially during the peak seasons. So, check with the camping site authority. • Transport & Logistics  14. Having a Vehicle  Having a vehicle is a must for moving around the rugged and large Great Barrier Island. You cannot walk between the sites.  15. Renting a 4WD (or 4WD-Capable)  The roads to various campsites are challenging. The road to Harataonga, especially, is very difficult. So, you will have to rent a 4WD-capable vehicle. 16. The Motorhome/Campervan Reality  The gravel roads are narrow, steep, and winding, and if you are planning to camp in a large RV, you will definitely struggle. 17. The Dump Station Nightmare  There is only one dump station in Claris, and it is only for black water or toilet waste. You will have to carry your grey water or sink with you. 18. Freedom Camping  Freedom camping on the Great Barrier Island, New Zealand, is a fascinating idea. However, the reality is quite different. It is heavily restricted, and sticking to the DoC sites is the best option.  • Safety & Etiquette  19. Using a Paper Map  Mobile network and GPS will not function in various parts of the Great Barrier Island. So, you will have to carry a paper map. 20. Tell Someone Your Plans  If you are hiking on the Great Barrier Island, you have to keep someone informed. The wilderness and remote locations of the hiking trails can throw many challenges, despite having an easy to moderately difficult level.  21. Being a Good Neighbour  You must respect the quiet, off-grid, and nature-first vibe of the Great Barrier Island. So, you have to keep the noise level down. How To Reach The Aotea Great Barrier Island With Your Camping Gear? For campers, especially the ones with campervans, traveling by the ferry from SeaLink is the best option. It is the only mode of transportation in which passengers and cars are both transported. It is a 4.5-hour picturesque journey from Auckland. Your Great Barrier Island Camping Adventure Is Calling Camping on the Great Barrier Island, New Zealand, is the right mix of adventure, soaking in nature, and cherishing the off-the-grid living of the island. However, it’s not going to be easy with the amenities at the campsites being basic, and even the gravel roads posing challenges for the big RVs and campervans. Also, you will have to take care of biosecurity and all the sustainability guidelines to ensure that the island, a sanctuary of wildlife, does not get impacted negatively. Conservation as a pristine sanctuary is the reason why camping in the Great Barrier Island allowed us to see a billion more stars and birds than I have ever seen in my life.

READ MORE statue of liberty view point

Statue Of Liberty View Point – Top Spots To See The Statue Of Liberty (Free Spots Too)

BY  Barsha Nov 23, 2022

There are so many things that most definitely be on your NYC bucket list! And one of those things happens to be visiting the Statue of Liberty viewpoint. Yes, there is more than one. Today, we will be discussing all the best spots to see this historical symbol of emancipation. And not just see - we have also determined where you can take the best pictures.  Come on! Lady Liberty is iconic in NYC! So you can’t just ignore her. It only makes sense to take a few photos of the original First Lady of America. What we liked to call ‘one for the gram!’  Keep reading to find out all the best spots to check out the Statue of Liberty. Snap a few shots for the gram - you just have to stick to the very end!  Visiting The Statue Of Liberty View Point - 10+ Spots To See The Statue Of Liberty (Free Spots Too) There’s no accurate answer to the very popular ‘how to see the statue of liberty?’ question! Located literally in the south of Manhattan, this Lady of Liberty prefers to chill in the middle of the water. It makes the nearby areas perfect for taking aesthetic photos! But isn’t that the best part of visiting New York? So many people visit the city that never sleeps in the hope of living a free life. Isn’t that what the Statue of Liberty stands for? When people cross the Atlantic Ocean towards the United States Of America, they see the Statue of Liberty. It gives them hope of the promised land where class doesn’t matter.  So without wasting any more time, scroll down to find out which is the best Statue of Liberty viewpoint!  Brooklyn Bridge: You don’t need to look for Statue of Liberty views. You can enjoy one of the best views of the Statue on your visit to the Brooklyn Bridge. The Bridge is iconic pop culture and the best part? You can enjoy stunning views of the city skyline. The Bridge serves as a beautiful Statue of Liberty view point. You don’t have to spend a single penny on the same! Read More: Great Places To Take Pictures In London Battery Park City Esplanade: The view of Statue of Liberty from Battery Park in Lower Manhattan is truly one of the best views of the Statue you will get to witness. When you are walking the long stretch of the beautiful seaside sidewalk, it will feel like you have simply stepped inside a black-and-white movie. Plus, it’s the perfect spot for one of those caught-in-the-camera-very-candid pictures! One World Observatory: The historic World Trade Center happens to be another beautiful Statue of Liberty view point. It is also located in the Lower Manhattan region. You just have to reach the One World Observatory. Unfortunately, you have to pay around 43 dollars for a basic ticket to the Observatory. But that’s fine because it’s NYC, baby! Green-Wood Cemetery: The Green Wood Cemetery is hauntingly beautiful in its own way, but you also get some crazy views of the Statue of Liberty from here. The twisted cobblestone pathways, the graves of famous figures such as Jean-Michel Basquiat or Horace Greeley, and even the breathtaking views of the Statue - all come together to make this place a must-visit on your trip to the city that never sleeps.  Louis Valentino Jr. Park & Pier: Another Statue of Liberty view point based in Brooklyn, the Louis Valentino Jr. Park & Pier, is located in the Red Hook waterfront, the industrious neighborhood of Brooklyn. This one’s also free, so there’s no reason why you won’t check out the best symbol of American liberty from this spot. You can also enjoy stunning views of Staten Island, Governor’s Island, and the city skyline. Museum Of Jewish Heritage: The Museum Of Jewish Heritage is one of the lesser-known spots that offer crazy views of the Statue of Liberty. Another one of the Battery Park Statue of Liberty views, the Museum is entirely devoted to honoring Jews and as a Holocaust remembrance. If you love history, then you can’t miss out on this spot.  Staten Island Ferry: One of the fun yet lesser-known things to do in New York is to take the ferry from Manhatten to Staten Island. You do not just get to enjoy breathtaking views of the City skyline and Staten Island, you will also have the best view of the Statue of Liberty while you are commuting between Staten Island and Manhattan.  Governor’s Island: If you are ready to invest around 3 dollars, you can visit Governor’s Island - And you will find yourself at the perfect Statue Of Liberty view point. You just need to reach the hills here and explore the trails. You might just find yourself enjoying not just stunning views of the Statue but also that of the entire Lower Manhattan! Liberty State Park:  There’s no mystery behind this one. Everyone knows that the Status of Liberty is located in the waters of New Jersey. So New York is not the only place with stunning views of this iconic statue, even the state of New Jersey has some crazy unexplored views. You can also try out some canoeing in the timeless Hudson river.  Brooklyn Heights Promenade: Another beautiful Statue Of Liberty view point in Brooklyn, the beatific Brooklyn Heights Promenade, sits proudly over the Brooklyn Queens Expressway or BQE. The beautiful esplanade definitely needs a visit as it offers stunning views of the New York Harbor and the Brooklyn Bridge Park.  Read More: Traveling To New York? Here Is Where You Should Stay And It’s A Wrap!  You might have been looking for the one perfect Statue Of Liberty view point, but we have managed to provide you with so many options! One Statue, multiple viewpoints, and that, my friend, is the best part of New York! You don’t have to be happy with one when you can have several - be it your Cosmopolitan or the perfect viewpoint.  So tell us, what do you think about visiting the Statue of Liberty? And if you already have, what was your experience like? Tell us in the comments below! Read Also: Does New Jersey Have Good Nightlife? Let’s Find Out! Best Restaurants In Honduras To Visit While Traveling Which Is The Best Time To Visit Spiti Valley? – Travel Guide