


 Related
Things To Do In Leeds: Dive Into The Dynamic Heart Of Yorkshire
BY Abdul Aziz Nov 22, 2023
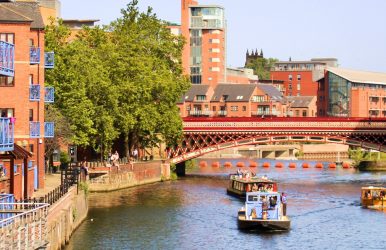
Do you want to travel without breaking the bank? Leeds offers affordable options for city breaks that let you discover new things. We've compiled some ideas for ways Leeds is an inexpensive city destination for singles, families, and couples. It offers inexpensive nights out to the fascinating year-round calendar of festivities as part of Leeds 2023. Most museums and galleries in Leeds are free to enter. Let's explore and find out the best things to do in Leeds. Things To Do In Leeds cloudfront.net Leeds has gained a reputation in recent years as the liveliest city in the UK, with a broad and welcoming cultural scene. Leeds is a city full of culture, from venues and organizations that are breaking new ground to street art trails. This is partially attributable to Leeds' abundance of museums and galleries, the majority of which offer free admission. A few of the best art galleries in the city may be found in the cultural district of Leeds, including the Henry Moore Institute, Leeds Art Gallery, Leeds Central Library, and Leeds City Museum, all of which are only a two-minute walk apart. Leeds City Museum offers amazing exhibitions and artifacts that let you travel through time and experience amazing history. Leeds Art Gallery features exhibits of Victorian art, sculptures, paintings, and portraits. It also has one of the best exhibits of 20th-century modern art outside of London. The Henry Moore Institute, one of the biggest sculpture exhibitions in Europe, honors the art of sculpture. The Leeds Central Library holds a great collection of books from all over the world. Things To Do In Leeds: Museums & Art jaga.co.uk There are always plays or other forms of entertainment in Leeds because of the city's outstanding theaters and touring companies. Leeds Grand Theatre - one of the UK's most stunning Grade II listed theaters - offers shows for as little as £15. This is home to Northern Dance and Opera North, the only resident dance and opera companies in the country outside of London. Some of the most well-liked Westend productions, including Sister Act, The Bodyguard, and Dirty Dancing, are also available online for a reduced price. Do you need more excuses to visit? Leeds is hosting its Year of Culture in 2023, which makes it an extremely interesting year for the city. A calendar of events is planned for the entire year, all throughout Leeds, with the goal of "letting culture loose." There are countless options for events and activities that highlight the vibrant arts and culture of the city and its residents. Most events are either free or "pay as you feel." Some of the highlights include 90 painters from throughout the city on display at Leeds Art Gallery. They will be showcased at the "The Leeds Artists Show" through April 30. Pay what you feel for "As You Are," a sound, walk-in musical experience designed by South African cellist Abel Selaocoe. It will be held for the Orchestra and Chorus of Opera North. There is still a lot to look forward to. Things To Do In Leeds: Food & Cuisine welcometoleeds.co.uk Searching for a culinary-themed staycation? Leeds is the ideal place to be. The city, which is home to a booming independent food industry, has several cafes, bars, pubs, and restaurants. Leeds is the unofficial gastronomic capital of the North. Not sure what you want to do? Visit Trinity Kitchen. Trinity Kitchen is a great spot to visit for lunch, supper, or even an afternoon snack. It features rotating street food vendors serving it all, from pizza to Pho. It has a laid-back, distinctive setting for you to enjoy lunch, dinner, or afternoon snack. Kirkgate Market also has a similar street food setup. Kirkgate Market, where M&S first made its appearance, is currently the largest indoor market in Europe. Its recently renovated food hall is home to some delicious treats. There is the award-winning Manjit's Kitchen- a vegan Punjabi street food vendor. There is also Fat Annie's- an entirely plant-based restaurant serving American-inspired burgers and hot dogs. You must also visit the renowned Yorkshire Pudding Wrap Company to indulge in one of their delicious wraps. Searching for new openings in the food and beverage industry? Leeds can take care of that. The brains behind Doh'nut, the greatest doughnuts in town, opened Things in Bread, a brand-new gourmet sandwich store right in the middle of the city center. You're onto a winner when you find traditional sandwich flavors made with premium ingredients and freshly baked bread. Things To Do In Leeds: Parks & Greens There are numerous ways to enjoy Leeds, so a trip to this city offers more than just the bustle of the city center. You can find some of the most breathtaking natural beauty in the UK beyond the nightlife, museums, shops, and restaurants. Roundhay Park, a few miles outside the city center, has more than 700 acres of parkland, lakes, woods, and gardens. Get hot beverages and snacks from the on-site Lakeside Cafe. Visit the nearby Tropical World for a family-friendly island experience. In the desert, meerkats stand boldly, while exotic butterflies and birds are free to roam throughout the recreated rainforest habitat. Adult admission to Tropical World is £7.20, £3.80 for children, and kids under five enter for free. One of the most well-loved tourist destinations in the city is the medieval ruins of Kirkstall Abbey. It is located just outside of the city. Tickets are £5 for the ruins and expanse of grounds to check out; children under five are admitted free of charge. The Leeds-Liverpool Canal runs alongside Kirkstall Abbey, so why not take a leisurely stroll down it first? Things To Do In Leeds: Architecture & Heritage travel-assets.com Leeds is also an ideal starting point for discovering the splendor of the surroundings. The Yorkshire Dales National Park, which is home to some of Yorkshire's most famous landscapes and attractions, such as the Yorkshire Three Peaks, Ilkley Moor, Bolton Abbey, and the adjacent ancient towns of Harrogate and Knaresborough, is conveniently accessible from Leeds station. The industrial towns of Yorkshire are also well worth a day trip. Nestled next to the Leeds-Liverpool canal, Saltaire is a UNESCO World Heritage Site. It's a great place to spend a leisurely afternoon strolling through its charming alleys or visiting the well-known Salts Mill. It's certainly worth the journey, with a magnificent variety of Hockney artwork, literature, flowers, cuisine, and 21st-century business, and free admission. When you take an inexpensive city holiday to Leeds, you may discover all of this and more. Things To Do In Leeds: Lodging nationalparks.uk Book a stay at Art Hostel for consistently reasonable and distinctive lodging. It is the first establishment of its kind in the UK and the ideal spot to unwind after a strenuous day of sightseeing. Regional artists from East Street Art designed imaginative, reasonably priced, and distinctive lodging. It is a vibrant, artist-run company that spearheads avant-garde art initiatives and shows. The Art Hostel's themed rooms are all the product of the creative minds of Leeds-based artists working with regional artisans. Wrapping Up Leeds is a great place to take an inexpensive staycation in the UK because there is a lot to do there. The city is filled with events that do not break the bank. Use this guide to figure out how to spend your time here, whether you have 24, 48, or 72 hours. If you have thoughts to share or questions to ask about things to do in Leeds, please leave a comment below. We would love to hear from you! Read Also: Brighton Bliss: Crafting Your Perfect Coastal Getaway Itinerary Unmissable Urban Delights: Things To Do In Glasgow UK City Hidden Gems: Things To Do In Manchester