

The Best Bungee Jumping In India: Check These Spots Out!

Aug 22, 2022

Last Updated on: Sep 28, 2026

Travel Guides

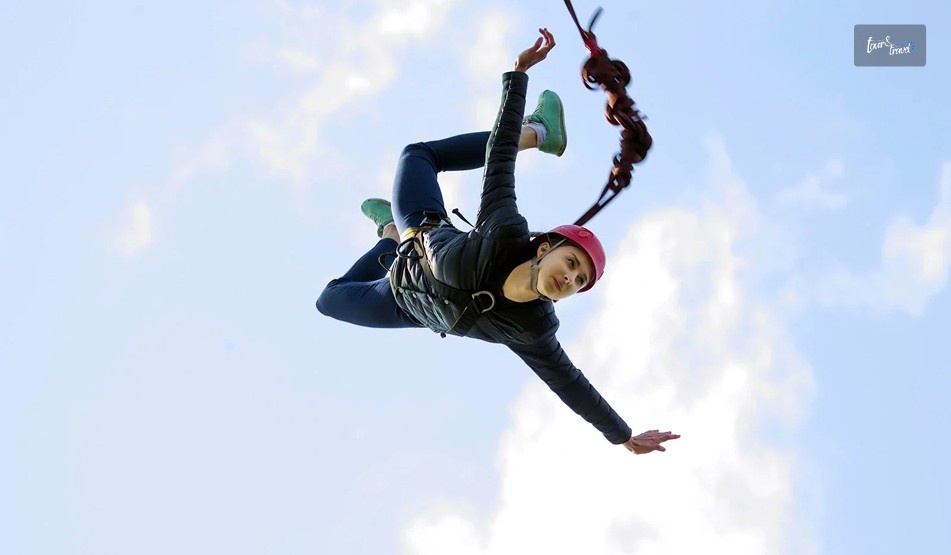
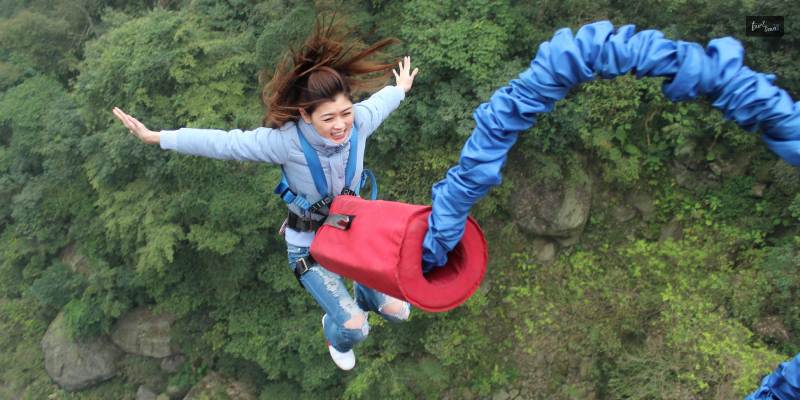
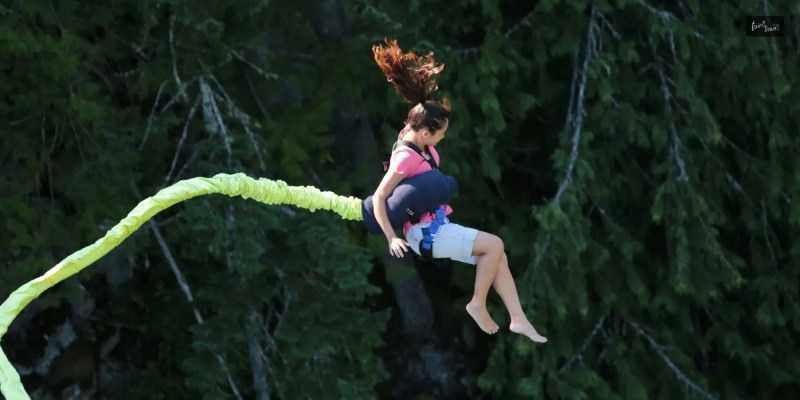
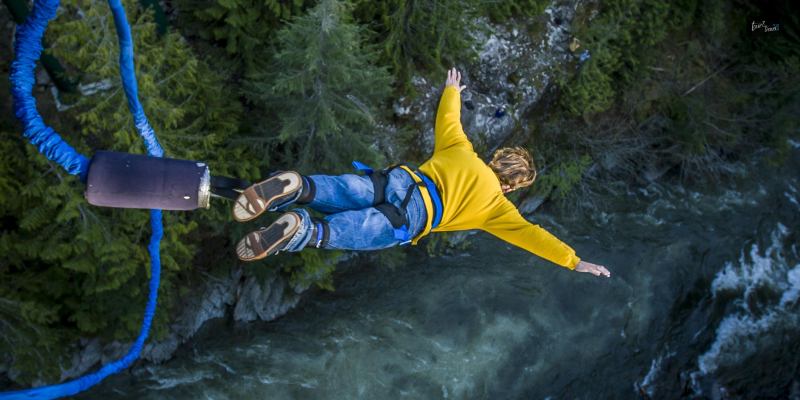
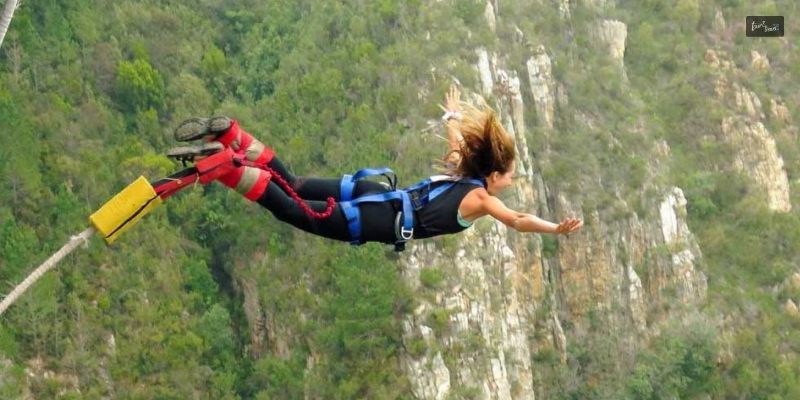
The thrill of falling without the deadly consequence of hitting the ground is what I call bungee jumping.

If you are seeking thrilling recreational activities, going bungee jumping can be the single most interesting thing you can do.

Especially if you are from India and looking for the best places for the highest Bungee jumping in India, then I might be able to help you.

In this article, I have talked about the highest bungee jumping point in India with details about the location and the price, and other required info for a jump.

The Top 8 Spots For Bungee Jumping In India: The List Will Surprise You! 

The Top 8 Spots For Bungee Jumping In India The List Will Surprise You

So, without any delay, let me take you bungee jumping in the best bungee jumping locations in India.

  • Jumpin Heights, Rishikesh 
  • Lonavala, Maharashtra 
  • Bir Billing, Himachal Pradesh 
  • Ozone Adventures, Bangalore 
  • Gravity Zone, Goa 
  • Chhattisgarh, Jagdalpur 
  • Wanderlust, New Delhi 
  • Himvalley Camps, Manali 

1. Jumpin Heights, Rishikesh

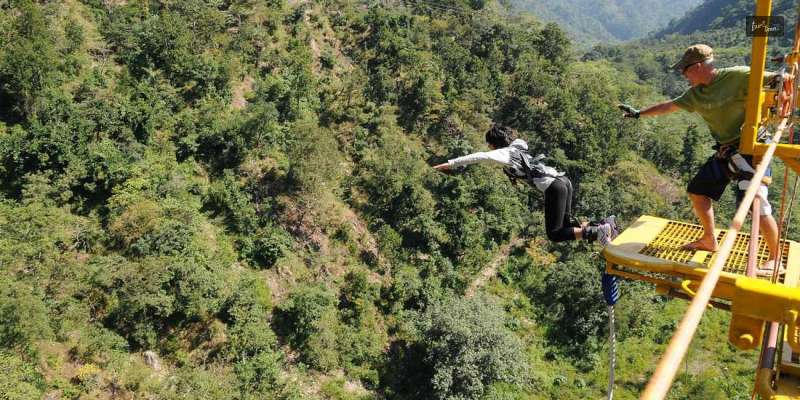
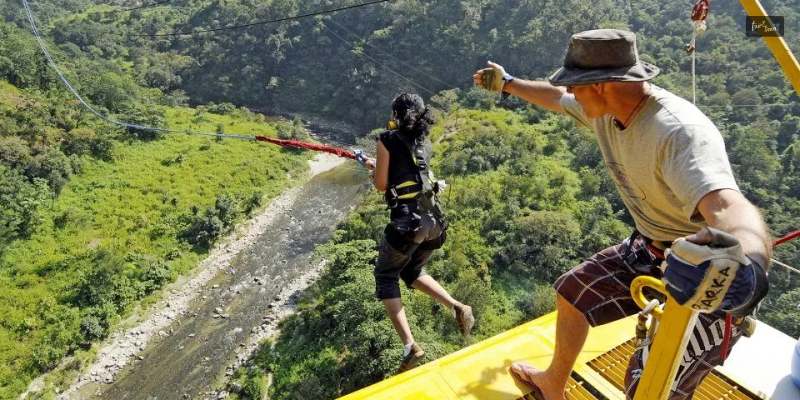
The Jumping Heights in Rishikesh offers you the highest Bungee jumping in India.

Jumpin Heights is at Mohan Chatti village in Rishikesh.

Most importantly, it is the only place in India where you can experience Bungee jumping from a fixed place.

There is a cantilever platform made over a rocky cliff.

The platform is 83 meters from the ground.

They have experienced staff to take care of all the safety precautions.

If you are up for it, Rishikesh can be your Bungee jumping location.

  • Location: Mohan Chatti village in Rishikesh.
  • Bungee Jump Height: 83 m
  • Minimum Age: 12 years.
  • Cost Per Jump: INR 3500

2. Lonavala, Maharashtra

Another great place for the highest Bungee jumping in India is Lonavala.

On the outskirts of Pune, a tiny hill station, this is a proper location for thrilling Bungee Jumping.

The jumping location is an adventure park. It is known as Della Adventures.

The equipment is equipped at a height of 150 ft. The jump lasts for around and lasts about 7-10 minutes.

If you are above the age of ten and weigh above 35 kg, then you are allowed to enjoy it from here.

There are instructors helping you with the safety measures and instructions before the jump.

The funniest part of all is that they offer you a certificate saying that you have overcome your fear of heights.

  • Location: Maharashtra, Della Adventures in Lonavala.
  • Bungee Jump Height: 45 m
  • Minimum Age: 10 years
  • Cost Per Jump: INR 1500

3. Bir Billing, Himachal Pradesh 

Bungee jumping in Bir Billing is an exhilarating adventure that is hard to forget.

Imagine standing on a suspension bridge 50 meters above the ground, surrounded by breathtaking views of lush green mountains all around you.

It truly feels like a leap of faith as you prepare to take the plunge.

With experienced instructors guiding you every step of the way and strict adherence to safety standards, you can focus on the thrill of the jump without worrying about anything else.

This adrenaline-pumping activity is available year-round.

However, the best times to experience both bungee jumping and the stunning paragliding are during March to May and from October to November.

Whether you’re an adrenaline junkie or just looking for a unique experience, bungee jumping in Bir Billing promises an unforgettable rush! 

  • Location– Gunehar, 2-3 km from Bir bus stop, Himachal Pradesh 
  • Bungee Jumping Height– 50 m 
  • Minimum Age– 12-14 years 
  • Cost Per Person (INR)– 3300 

4. Ozone Adventures, Bangalore

If you love adventure, then you will love Bungee jumping from a crane.

Yes, unlike the other locations, Ozone Adventures offers you the highest Bungee jumping in India from a height of 80 ft.

Most interestingly, the equipment is attached to a 130 ft tall crane.

Doing Bungee jumping from a crane/ unfixed platform makes it riskier for jumpers.

The staffs here are helpful, and they offer to take all the precautionary measures before you jump and also give you valuable instructions before you make your jump.

  • Location: Ozone Adventures, St. Mark’s Road, Bangalore, Bangalore
  • Bungee Jump Height: 25 m Platform and 40 m Crane
  • Minimum Age: 18 to 60 years.
  • Cost Per Jump: INR 400

5. Gravity Zone, Goa

Beach hopping is not the only thing you can do in Goa. You can also go bungee jumping.

It is not the highest bungee jumping point in India, but Anjuna beach has its reasons for the attraction.

If you are new to bungee jumping, then this is indeed the place you can go to. Gravity Zone is a 25 m high tower and is perfect for first-timers to experience Bungee jumping.

Compared to other locations, it is a smaller location for jumping.

Also, the place does not charge you too much.

  • Location: Gravity Zone, Anjuna Beach, Goa.
  • Bungee Jump Height: 25 m
  • Minimum Age: 14 years
  • Cost Per Jump: INR 500

6. Chhattisgarh, Jagdalpur

Another good and less overwhelming place to try Bungee jumping is Jagdalpur.

If you are afraid of heights and still want to try out bungee jumping, then this is not the highest Bungee jumping in India to scare you too much.

You can fight your fear of heights from the 30 m bungee jumping location.

  • Location: Jagdalpur, Chhattisgarh.
  • Bungee Jump Height: 30 m
  • Minimum Age: 14 years.
  • Cost Per Jump: INR 500

7. Wanderlust, New Delhi

If you are from Delhi and thinking of going to other states to try out bungee jumping, then we have good news.

Wanderlust in New Delhi offers this sporting activity.

Most interestingly, the equipment for jumping is imported from Japan.

The crew there is trained in Germany.

The jumping equipment is attached to a 130 ft high crane.

They also provide you with a certificate and a T-shirt and cap.

  • Location: Wanderlust, New Delhi
  • Bungee Jump Height: 52 m
  • Minimum Age: 14 years.
  • Cost Per Jump: INR 3000

8. Himvalley Camps, Manali 

Bungee jumping at Himvalley Camps is an exhilarating experience that takes you 25 meters up to enjoy stunning views of the valleys near Manali.

While it might not be the highest jump out there, the thrill of free-falling against the backdrop of the majestic Himalayas is truly something special.

Safety is a top priority at this campsite, with international standards in place and trained instructors ready to guide you through every step of the jump.

It’s a fantastic adventure for anyone aged 16 to 65, as long as you weigh between 35kg and 140kg.

Just remember, if you’re under 18, you’ll need parental consent to take the plunge! 

  • Location– Leh- Manali Highway, Manali 
  • Bungee Jumping Height– 62.5 m 
  • Minimum Age– 18+ 
  • Cost Per Person (INR)– 4000 

Frequently Asked Questions (FAQs):

If you are looking for the best bungee jumping locations in India, then these are the locations you may go to.

However, here are some popularly asked questions and answers that I have answered.

1. What Is The Highest Bungee Jump?

The highest bungee jump in the world is Bloukrans Bridge in the Western Cape of South Africa.

It is the highest commercial and natural bungee jump in India.

2. Does A Bungee Jump Hurt?

Indeed it is a thrilling and recreational activity.

But, some free fallers experience serious injuries like compression fractures or herniated discs.

Other serious injuries might also happen from Bungee jumping. 

3. What Is The Cost Of Bungee Jumping In Rishikesh?

If you are going to Jumpin Heights, then you will be charged INR 3500 for Bungee jumping.

The entry ticket costs you 100 rupees.

But if you also want to do Giant Swing, you will be charged Rs 6500.

A bungee jump and Flying fox combo cost you Rs 4750.

4. Where Is The Scariest Bungee Jump?

If you are looking for the scariest bungee jumping location, then you have to go to Macau Tower ( 764 feet in China).

You will definitely be thrilled and have goosebumps.

5. Which Place Is Best For Bungee Jumping In India? 

The best bungee jumping in India is at Rishikesh.

It offers the highest and most scenic experience, with platforms up to 87 meters high, operated by the reputable Jumpin Heights. 

Choose Your Ideal Bungee Jumping In India 

When looking for the highest Bungee jumping in India, you need to first visit Rishikesh.

It is the best location for Bungee jumping from the highest location in India.

The experience is thrilling, and you should be ready to feel your heart in your throat.

All the bungee jumping locations talked about in this article are great to experience.

Did you decide on where to go on Bungee jumping?

Please let us know where you will go. Also, if you have any additional queries, you can leave them in the comment section.

Share on Social Media

Sibashree is a travel, culture, and leisure writer who has been writing since the age of 12 and professionally since 2014. With more than a decade of travel writing experience and journeys across India and several parts of the world, she brings a deeply personal and thoughtful perspective to her work. A student of English Literature and Mass Communication, Sibashree has always viewed travel as more than movement — for her, it has been a way of understanding people, cultures, and herself. Her passion for spiritual exploration has also led her to many unusual and meaningful destinations over the years. Outside of writing, Sibashree enjoys watching European cinema, reading about global politics, and reflecting on the stories hidden within everyday places.

Leave a Reply

Your email address will not be published. Required fields are marked *

title-img Related

READ MORE Portland to Seattle

What Is The Portland To Seattle Distance? How To Travel By Road, Train, Tram, And Air? 

BY  Sibashree Mar 23, 2026

Are you planning a road trip in the Pacific Northwest? The Portland to Seattle journey, covering a distance of more than 170 miles, is one of my favorites in the region.  I love this route simply because of its diversity. You will find state parks, downtowns, and a beautiful coastline on the way.  So, in this blog, I will talk about a beautiful road trip from Portland to Seattle, the other modes of travel, and the main attractions on the way.  What Is The Portland To Seattle Distance?  The distance between Portland and Seattle is around 174 miles or 280 km. Furthermore, the travel time between two destinations is around 2 hours and 45 minutes.  Also, the main route to travel from Portland to Seattle is via Interstate 5 (I-5).  However, the travel time between Portland and Seattle will depend on the mode of transport you choose.  So, here is a quick summary.  Portland to Seattle Modes of TransportTravel Time By Car2 Hours and 45 MinutesBy Bus3 to 4 Hours and 30 MinutesBy TrainAbout 3 Hours and 30 MinutesBy Rideshare About 3 to 4 HoursBy Air53 Minutes Furthermore, the Portland International Airport is around 12 miles away from the city. Also, the Seattle-Tacoma International Airport is about 14 miles away from Seattle.  So, consider the travel time to and from these airports by road.  On the other hand, the Portland Union Station is 1 mile away from the city, and the King Street Station serves the Seattle area. From the train station, the Downtown and other main attractions are within walking distance.  How To Travel From Portland To Seattle?  The fastest way to travel from Portland to Seattle is to take a flight. However, if you love TheLowDownUnder Travel philosophy and want a more local experience, you can also plan a road trip by car or take a ride share.  Buses and train services are also available between these two destinations. So, here are the details. 1. How To Travel From Portland To Seattle By Car?  Traveling the Portland to Seattle distance of 174 miles by car takes around 2.5 hours. The route through I-5 North is quite straightforward, and some important stops on the way are Washington, Olympia, and Tacoma.  Furthermore, you start the ride early in the morning, before 7 AM. 7 AM to 9 AM and 4 PM to 6 PM are the busiest times on the route. Also, there is an alternative route via US-101, which passes through Astoria to the coast.  Nevertheless, based on the route you take and the vehicle you choose, the car rental price will be around $34 to $50. 2. How To Travel From Portland To Seattle By Bus? Flixbus and Greyhound are the main bus services from Portland to Seattle. The bus services start from as early as 7 AM, and the last bus leaves Portland at 10 PM.  The bus leaving at 10 PM is also the fastest, completing the journey in just 2 hours and 50 minutes.  Furthermore, the buses leave from the Portland Curbside Bus Stop, and the popular drop stations are the Seattle Tacoma International Airport, Seattle Bus Station, and Seattle 6th Avenue S and S Lane Street.  Moreover, the ticket price starts from 30.48 Euros. 3. How To Travel From Portland To Seattle By Train? Amtrak runs seven daily from Portland to Seattle. Furthermore, the ticket price starts from $27.  Also, check out the timings of the train from the Portland Union Station to the King Street Station in Seattle in the table below.  DepartureArrival 6:45 AM10:10 AM8:30 AM11:50 AM10:40 AM2:05 PM2:10 PM5:37 PM3:56 PM7:51 PM5:55 PM9:20 PM7:25 PM10:50 PM 4. How To Travel From Portland To Seattle By Flights? As I have mentioned, the flights from Portland International Airport (PDX) to Seattle-Tacoma International Airport (SEA) take around 55 minutes.  American Airlines and Delta Airlines are some of the popular services on this route. Furthermore, the ticket price will be around $350.  Moreover, the travel time by road from Portland to the Portland International Airport (PDX) and the Seattle-Tacoma International Airport (SEA) is around 20 minutes. 5. Portland To Seattle Rideshare Or Taxi Shuttle services such as Portland Express, Uber, and Lyft are other ways to travel from Portland to Seattle.  Uber and Lyft services are a little expensive, costing around $60 for the ride.  On the other hand, a ride on the Portland Express from Portland to Seattle will be around $50-$70 based on the vehicle and the group size.  What Are The Important Stops From Portland To Seattle?  Portland is one of the best family vacation spots, and Seattle is one of the safest places for women solo travelers.  Furthermore, on the way, it has some wonderful attractions such as the Columbia River Gorge, the Oregon Coast, Mount St. Helens, Mount Rainier, and Tacoma.  Also, throughout the journey, you will find small but wonderful cafes. Don’t forget to spend some time understanding the local vibes at these cafes. Portland To Seattle: Frequently Asked Questions (FAQs)  Here are the frequently asked questions and answers about the Portland to Seattle distance. 1. How Much Is A Train Ride From Portland To Seattle? A train ride from Portland to Seattle starts from $27 and goes up to $68 for standard coaches. Furthermore, the ticket price for business coaches costs around $80 to $90. Moreover, the private room amenities come at $182.  2. Is It Worth Driving From Seattle To Portland? Yes, the Portland to Seattle journey is every bit worth it. It is an easy and quick journey, However, the short route offers the best experiences with various culinary stops, mountain views, and the beauty of the Pacific Northwest.  3. Can You Do A Day Trip From Portland To Seattle? Yes, you can easily plan a day trip from Portland to Seattle. The travel time by road is around 3 hours to 4 hours and 30 minutes. So, you can easily complete the ride, explore the attractions en route, and come back by evening. However, you have to start really early to avoid the traffic. 

READ MORE Which Is Colder Minus 40°C or Minus 40°F

Minus 40°C Or Minus 40°F: What To Know Before Planning Your Next Mountain Escapade?

BY  Barsha Feb 3, 2026

Which is colder: Minus 40°C or Minus 40°F? The question appears simple, at least at a glance. But if you think about it, it does open an interesting window into the dynamic world of temperature, rather, how we tend to measure temperature.  Moreover, it also gives insight into why different people use different measurement systems across the globe.  The most fascinating part? How do these systems even relate to extreme temperatures?  The answer might actually surprise you. -40°C and -40°F are exactly equal. Yep! That’s right - it is the point of meeting for the two temperature scales.  On that note, let’s dissect and unpack why this even happens.  More importantly, what else do you need to know about the two temperature scales before you can plan your next mountain escapade.  Celsius Vs Fahrenheit: What’s The Difference? To make things super easy for you to understand, I have laid out the difference between Celsius and Fahrenheit in simple terms below: AspectsCelsiusFahrenheitOriginAnders Celsius, a Swedish astronomer, developed the Celsius scale in 1742. Daniel Gabriel Fahrenheit, a German physicist, developed the Fahrenheit scale in 1724.Definition“of or using a scale of temperature in which water freezes at 0° and boils at 100°.” (Oxford Dictionary)“of or using a scale of temperature in which water freezes at 32° and boils at 212°.” (Oxford Dictionary)Used InMost places in the world, including Europe, Australia, Africa, Asia, and most scientific work. Primarily in the United States of America and some Caribbean countries.Conversion Formula°F = (°C × 9/5) + 32°C = (°F − 32) × 5/9 So, Which Is Colder: Minus 40°C or Minus 40°F? I already answered this question in the very beginning - both are the same! It is the point at which the two scales meet.  So, if you use the conversation formula I have listed above, then: -40°C × 9/5 + 32 = -40°F Also, this is the only point where Fahrenheit and Celsius readings match.  Then, why does it confuse all of us? It is mainly because of three primary reasons, as per my understanding:  Most individuals don’t really encounter extreme weather conditions. So, they do not really come across this overlap point.  Secondly, in most countries, the education system teaches only one scale. As a result, there is little or no intuitive comparison.  Finally, Fahrenheit readings are usually larger for both outdoor and room temperatures. For example, 50°F is equivalent to 10°C. This automatically makes most individuals assume that the two scales don’t match.  Where Does It Hit -40 On Earth? Places like Greenland, Northern Canada, Siberia, and some regions of Scandinavia go down to -40 regularly during the winter months.  For example: In February 2021, temperatures dipped to -43°C in Sweden.  Siberia, Canada, and Yukon also experience these levels regularly.  In these regions, both Fahrenheit and Celsius are the same - you will shiver equally.  In this context, I have a fun fact about the coldest temperatures recorded on Earth: In 1983, Vostok Station, located in Antarctica, recorded −128.6°F (-89.2°C) (Source: Britannica)  That is literally double what you will feel at -40°. More importantly, it is a real-world reminder that extreme weather conditions and environments exist on Earth.  How Cold Does It Feel At -40°? The truth is that whether it is -40°F or -40°C, you will feel the same. And trust me, I’m not kidding - you will literally shiver!  In February 2021, I experienced -40°C in Yukon. My thermometer read -40°F, and I experienced frostbite risk within minutes. Whether it’s -40°C or -40°F, the result is the same: Your skin will freeze within minutes without the right protection.  Vehicles might not even start. Metal will stick to the skin.  Your eyelashes might freeze.  At -40°, it is dangerously cold regardless of what scale you are using.  Also, the wind is so chilly that you will shiver and can fall sick or even die without the right gear and equipment.  How -40° Feels On The Human Body? So, I can’t just keep telling you guys that it is going to be dangerously cold.  Instead, it is much better to give you all the real picture of how the human body is bound to react at sub-zero temperatures:  Temp (°F/°C)Impact On The Human Body-76°F/-60°CIt is painful to even breathe. Also, exposed body parts, including eyes, will freeze.-40°F/-40°CSkin will freeze in two minutes. Also, metal will stick to the skin. -22°F/-30°CExposed and unprotected skin, including eyelashes, will freeze in ten minutes. -4°F/-20°CNumbness begins to set in, with an increasing risk of frostbite. 14°F/-10°CThe skin begins to sting, with a risk of frostnip if exposed. 32°F/0°CBreathing becomes visibly tough. Also, fingers stiffen in a few minutes.  Even without any chilly winds, subzero temperatures are hazardous, especially if you are not prepared.  At -40°, both Fahrenheit and Celsius, there is only one brutal truth: without protection and preparation, it is dangerous and life-threatening.  Winter Hiking Hazards You Should Know About: Winter can alter any landscape radically, striking a balance between mesmerizing beauty and quirky dangers.  And while it is impossible to talk about all hazards in detail, I’ve compiled all the possible winter hiking hazards and their mitigation strategies below: Winter Hiking HazardMitigation StrategyFrostbite & HypothermiaCheck the weather, pack extra clothes, and layer well.Slip & FallUse microspikes or crampons and trekking poles.Getting LostUse a compass, maps, and a GPS. Also, try mapping your route.Fatigue & DehydrationEat frequently, stay hydrated, and pack extra food (and water).Falling Into Ice or WaterAlways test the ice and be careful while crossing icy terrains. CornicesAvoid walking under or on the edges of ridges. Equipment FailureKeep electronics warm. Also, carry gear repairs and physical maps. Tree WellsIn deep snow, avoid the base of trees. AvalanchesCheck forecasts for avalanches. Also, avoid steep terrains. Short Daylight HoursStart early, carry spare batteries, and definitely wear a headlamp. In addition, I’ve touched upon the common (but very dangerous) hiking hazards that you can come across at sub-zero temperatures in the mountains in detail: 1. Ice: Of course, you need to worry about ice! In the winter months, melt-freeze cycles turn hiking trails into slippery ice. Similarly, this can also happen on popular tourist routes where snow is compressed over a long period of time.  If you slip on these icy trails, it will lead to bruises and bumps. Moreover, a bad slip and fall can lead to serious wrist, ankle, or back injuries.  As a result, it is best to carry metal-tipped trekking poles and traction for additional stability in such conditions.  2. Avalanches: In the United States, avalanches (as per avalanche.org) kill between 25 and 30 people every winter. Moreover, the injury rates are much higher.  Most victims are ice climbers, snowmobilers, snowboarders, and backcountry skiers. However, oblivious hikers do get caught in avalanches occasionally.  The worst part? Nearly 95% of avalanches begin on slopes that are between 30 and 45 degrees in steepness.  However, the snow ends up traveling down to the flat terrain - and it even appears to be safe to an untrained eye.  As a result, it is vital to consult topo maps, check trip reports, and talk with local experts before you set out. That is your best shot at safety in the face of an avalanche.  3. Glaciers: Many of the iconic summits in the United States are guarded by glaciers.  While there are several snowfields across the western part of the United States - mostly misnamed as glaciers - you will find true glaciers mostly in the Pacific Northwest and in the far north.  Moreover, these are active glaciers that moves around, forming cracks with time. As a result, these fissures, A.K.A crevasses, lie under the snow, hidden from the human eye. Naturally, fatal falls - and unexpected ones - become a major possibility.  So, it’s best not to step out on glaciated terrain unless you have some experience in both glacier navigation and snow travel. This also includes improving your fissure-rescue skills.  4. Steep Snow: The challenge and adventure of climbing snow-covered, steep slopes is certainly thrilling.  Recently, I had the opportunity to try out snow climbing, and while it was thrilling, I can’t overstate the importance of safety and experience.  It’s so much more technical than it appears visually - if you slip even once, you can slide down the steep slope. Also, you have to know: How can you assess the snow conditions around you? Use crampons.  Take a fall with the help of an ice axe.  Additionally, it is best to be familiar with avalanches and safety first. Because a majority of snow climbs will require you to cross terrain prone to avalanches.  What To Know Before Planning Your Next Mountain Escapade? 9 Tips That Can Keep You Safe! Safety in weather extremes, especially in the mountains, requires careful preparation, specialized equipment, and a constant awareness of your body’s condition.  Moreover, the combination of high winds, rapid changes in weather, and freezing temperatures leads to life-threatening conditions. And that too in minutes.  This includes the risk of both frostbite and hypothermia. Moreover, preparing for freezing temperatures is incomplete without strict layering, high-calorie nutrition, and waterproof gear. And still it’s not enough - surprised? Well, don’t be! Instead, scroll down for the internet’s most comprehensive list to prepare for survival in freezing temperatures in the mountains. 1. Stay Hydrated: Problem: Dehydration is very common in freezing temperatures, much like hotter regions with arid weather conditions.  How? The cold weather conditions can easily suppress thirst. But the dry air in the mountains and high levels of physical activity will make your body dehydrated - and this will happen faster than you can possibly imagine.  Moreover, dehydration can lead to dizziness, fatigue, and headaches.  Solution: As a result, you should try carrying a thermos with herbal teas (like chamomile, tulsi, or ginger) or just warm water with lemon and honey. These can hydrate you, keep you warm from the inside, and boost immunity.  Also, on this note, avoid caffeine or any caffeinated drinks since they will dehydrate you faster.   2. Nourish Yourself: Problem: Your body will burn a lot of calories to stay warm in freezing temperatures.  As a result, even if you think that a bowl of hot Maggi seems like an appealing meal for the mountains, it is crucial to balance comfort and nutrition.  Solution: So, you should focus on energy-dense and high-calorie food items like seeds, whole grains, and roasted nuts to ensure high energy levels in the body.  Moreover, you can consider adding warming ingredients to your food. Ingredients like turmeric, garlic, and ginger can fight cold and improve digestion.  Also, if you do end up eating a steaming bowl, then add boiled eggs or vegetables for a healthy, protein-packed version.  On that note, here’s a list of things you can eat: Beef jerky.  Trail mix. Nuts. Milk chocolate. Pretzels or chips. Cheese and deli meat. Tortillas or crackers. Pizza slices. Pumpkin or banana bread. Peanut butter sandwiches. 3. Protect Your Lips And Skin From Dryness: Problem: Cold and dry air is not good for the skin - it strips the skin of moisture. And this in turn leads to dry hands, irritated skin, and cracked lips.  This is highly uncomfortable and causes skin damage if you don’t address it within minutes.  Solution: As a result, always use a moisturizer that is thick and nourishing before stepping out. Moreover, while doing so, focus on different areas like your face, neck, and hands, which are prone to getting exposed.  Also, do not forget to apply lip balm on your lips - and ensure the lip balm comes with SPF for protection against the UV rays of the sun and the cold, both of which are strong at high altitudes.  In addition, eat food items that have a high percentage of omega-3s. This includes flaxseeds and walnuts, both of which are perfect for hydrating your skin from within.  4. Stay Active For Proper Blood Circulation: Problem: When you are absolutely stationary in freezing temperatures, your blood circulation will slow down. This, in turn, makes you feel colder.  Solution: The only solution here is not to sit in the same spot for too long.  So, try out light activities such as walking, stretching, or even a few squats to ensure proper blood circulation. Also, it feels good to do light physical activities after a long day of trekking.  5. Take Care Of Your Altitude Sickness: Problem: At high altitudes, you can expect oxygen levels to fluctuate and drop. This, in turn, can cause fatigue, nausea, or dizziness.  Solution: You should give enough time to your body - that way, your body will be able to adjust. As a result, it is best to take it easy on day 1.  Moreover, drink lots of water and eat food items that are rich in antioxidants. This includes berries, nuts, and fresh fruits. That way, your body will be able to fight the stress and pressure of altitude.  If you are feeling unwell at any point, don’t push too hard. Rest is very important.  6. Support Your Body’s Immune System: Problem: The blend of altitude and cold weather can easily weaken your body’s immune system. This, in turn, will make you prone to illnesses.  Solution: Incorporate food items that are rich in Vitamin C, like amla or oranges, in your daily diet in the mountains to boost your body’s immune system.  Moreover, warm soups are also great - but ensure these have vegetables, lentils, or even chicken stock. Why? Because it offers warmth, hydration, and nourishment together.  Also, ensure you can sleep well - a good sleep cycle will recharge your body.  7. Look After Your Feet: Problem: Remember that cold or wet can lead to chilblains, frostbite, and lots of discomfort. Solution: Invest in insulated and waterproof boots. Moreover, you can consider wearing thick woollen socks to ensure your feet are dry and warm.  Also, don’t forget to carry an additional pair of dry socks - that way you can change socks if your feet feel too damp. In addition, you can try massaging your feet with a nice, warm balm. Why? It will prevent dryness and improve circulation.  8. Breathe Smartly For Avoiding Cold-Air Effects: Problem: If you directly breathe in icy, cold air, then it will irritate your lungs.  Trust me on this one! It has happened to me. And then you will start coughing. Some people also feel a tightness in their chests.  Solution: When you start feeling chilly, try to breathe through your nose and avoid doing it through your mouth. This will keep you warm, moisturizing the air even before it can reach your lungs. Also, this will help you to keep respiratory problems at bay.  9. Prioritize Mental Wellness: Problem: The beautiful solitude of the mountains can be very peaceful. However, at times it can get very overwhelming. As a result, staying healthy mentally is just as crucial as looking after yourself physically.  Solution: Take some time for yourself so that you can practice mindfulness - and while doing so, don’t forget to appreciate the beauty around you.  Moreover, you can consider carrying a journal for jotting down your reflections and thoughts.  Also, it is healthy to count on your group to stay connected. Why? Sharing experiences together can motivate everyone and lift spirits. 

READ MORE seven magic mountains

This Is The Best Time To Visit The Seven Magic Mountains In Vegas!

BY  Mashum Oct 19, 2023

Do you know what the seven magic mountains are? Listening to the name brings excitement, especially for those who love traveling! When traveling interstate across Las Vegas, you catch a magical and interesting sight! Curiosity gets the better of you when there are colorful boulders kept one above another, thus creating an eye-catching spectacle. Yet humans have marked the place with their secretion of waste and garbage! So, instead of looking magical, it seems like a forceful creation of human afterthought! Many tours have been organized around it, and people go crazy with their cameras and photographs! Want to know more about this colorful beauty amid the desert? I was hoping you could read the article where I will discuss the artist, his inspiration, and his creation. You will also learn how to visit the seven magic mountains and the right time to go! There are some other factors necessary to know before you go, which we will discuss here in detail! What Are The Seven Magic Mountains? Image Source The 7 Magic Mountains is a large-scale public artwork by renowned Swiss artist Ugo Rondinone. The painting is 30 to 35 feet high and is located in a desert outside of Las Vegas, visible across the desert landscape when traveling on Interstate 15. The location where you can see the seven magic mountains gives off an otherworldly vibe! It is symbolically and physically representative of beauty and showcases the integrity of Las Vegas as a destination. When traveling across the highway, you will check out the mountain ranges, Jean Dry Lake in the background, and the desert! Overall, the seven magic mountains' symbolic representation is both artificial and natural! The place is swarming with tourists, especially because the highway is constantly ebbing with traffic between Las Vegas and Los Angeles. When you pass the site, you feel like you are crossing over to a portal where you will find the remnants of artificial and natural! Is It Man-Made Or Natural? sevenmagicmountains.com The public artwork is an artificial large-scale exhibition that features seven towers made of locally sourced boulders, which seem like dayglow totems! It is a creative and unique approach to creating a monument across the desert, which creates beautiful visuals! The Seven Magic Mountains is more like the representation of a destination like Las Vegas, integrating both the natural and the artificial elements. The art has been produced by the Nevada Museum of Art in Reno and the Art Production Fund in New York! It was located 10 miles south of the St. Rose Parkway in Henderson and Las Vegas Boulevard! It was in the 1960s when another art was created by Jean Tinquely and Michael Heizer, pretty close to the Jean Dry Lake. Seven magic mountains at night is one of the unique sights to encounter! Artist! news.artnet.com The creator of the Seven Magic Mountains is Ugo Rondinone from Switzerland, who lives and currently works in New York! He was born in 1964 and has become popular based on his expansive emotional range, channeling his creativity through art! By embracing fluid and diverse media and forms, the artist uses his profound insight and psychological expressivement to relay the relationship between nature and human beings! The artist highlights the human conditions through his work. The artist brings romanticism, the natural world, and existentialism together to encapsulate symbolization and representation. The profound instinct he uses to create the art underpins the purpose of the exhibitions. Producers! nevadaart.org The Nevada Museum of Art has been at the root of art in Nevada, and it is one of the producers of the Seven Magic Mountains. New audiences are efficiently reached through a partnership with the Art Production Fund located in New York. Contemporary art expands awareness among people! Many ambitious public art projects have inspired people regarding symbolization, understanding of social issues, practicality, and interpretation of human concerns and relationships. The AAM-accredited art museum in Nevada is the Nevada Museum of Art, where they are integrating grants, gifts, sponsorship, and membership. The Reno-based institution was founded in 1931 as a non-profit organization. They provide opportunities for artists to engage people on a wider range where their educational experiences and range of art are well recognized. There are Museum schools, original exhibitions and programming, and permanent collections. The center archives unique materials and has been created by over 1,000 artists who work across seven continents! Spreading awareness across people, the museum has sponsored a range of art and beauty. This Is The Best Time To Visit The Seven Magic Mountains In Vegas! Image Source If you want to visit the Seven Magic Mountains Las Vegas, you must see it as it is open for visitation. There is no need for reservation, nor are people cordoned off at a certain distance from the art! Even though there has been a proper reason why people were prevented from going closer to the art! People throwing garbage across the art installation place and painting graffiti on the boulders led to serious hampering of the art. It is informed that people have been requested to maintain social distancing and caution! People are asked to maintain healthy habits when visiting the art, considering it is a public place! When visiting the Seven Magic Mountains, there is no price for Seven Magic Mountains tickets as they are free for the public to see. The installation has been highlighted as interpretive signage has been used to prompt people to learn more about the art, the artist, the artwork, and the land on which the art has been installed! What We Need To Know? anothermag.com The best time to visit is any time of the year as long as there are flash flood events! It is well-known that there might be flash floods in the desert! To protect yourself from these sudden extreme weather conditions, you must check the weather forecast before visiting. A Guide-By-Cell is offered in Spanish and English so that the visitors can have a better and deeper engagement. They have also given a number, 702.381.5182, on which you can call and learn more about the art and the artists in South Nevada! You will not be getting any amenities at the artwork site, nor will you be able to access any restroom facilities. You need to know this because you cannot beat nature's call. Hence, it is important to consider that the nearest restroom you can access is five miles from the Jean site. From the artwork's location, the nearest businesses you will find are at the intersection of Las Vegas Boulevard and St. Rose Parkway! This location is almost 10 miles away from the area, so it may be difficult for you to access any public restrooms in the middle of the desert. You must carry water, especially because it is in the desert, so you cannot access it publicly. Nourishment necessary in the desert must be taken while you visit the seven magic mountains! How To Go There? squarespace-cdn.com If you are going from Las Vegas, you must follow the I-15 S to Sloan Road and exit 25. You then have to turn left or east to Las Vegas Boulevard. After turning, keep driving for 7 miles south on Las Vegas Boulevard! You can check out the artwork, which will be on your left! If you are traveling from Los Angeles, you will be driving north on I-15 Jean and take an exit on NV 12! Turning east or right on NV-161 to Las Vegas Boulevard would be best. You must then keep driving on Las Vegas Boulevard for approximately 5 miles! You can see the artwork on your right or the east when you are coming from Los Angeles. Also, You can park in an onsite parking lot, considering street parking is discouraged! There is no public transportation at the installation site, so you have to walk up there! Tours! squarespace-cdn.com The producers have been involved with the tours they create around the seven magical mountains. There are no tours separately, nor is there a guided tour! They have not encouraged any transportation from the ATV operators. Several organizations have tried to offer options to visit the Seven Magic Mountains, but I need to find out how authentic they are! Do not go for it if they are trying to collect entrance or parking fees! Accommodations! vvdailypress.com There is no accommodation available, nor is there overnight camping available! It is strictly prohibited, and the visitation hours are quite clear, extending from sunrise to sunset. The artist and the producers have also informed us that they do not take any extra responsibility for injuries or harm to the visitors while visiting the art! Other Things To Do Near The Seven Magic Mountains! simpleviewcms.com Apart from the art, you can check out other places near the Seven Magic Mountains! If you have planned a trip around the whole site, it is quite fun because you will acquire the beautiful experiences of a lifetime! Please read the article to know more about the places you can visit and what they are about! This will help you create an amazing itinerary and enjoy your heart out! Madame Tussauds Las Vegas venetianlasvegas.com You have to visit Madame Tussauds, considering it is one of a kind! The institution performs a survey to learn about the latest attractions or celebrities, thus selecting them based on their popularity. A wax figure takes around 6 to 8 months to be constructed; hence, after the survey, they finalize the theme or the individual and create the wax statue accordingly! Everything from clothing preference to facial expressions and hairstyle is researched! Sometimes, celebrities are requested to visit Tussaud's stylists for the correct measurements! Almost 200 photos and 150 measurements are taken to create the perfect look! They use an oil-based paint, which helps in giving a realistic skin complexion to the statue. For the statues, steel, and clay are also used apart from wax! There are celebrities across the world who have been directly involved in the statue-making process. So what can be more fun than checking out these life-sized dolls of your favorite celebrity and clicking some pictures? Shark Reef Aquarium At Mandalay Bay thrillophilia.com Take a taxi, shuttle, or car to visit the Shark Reef Aquarium at Mandalay Bay! You can also opt for the free Excalibur-Luxor-Mandalay Bay Tram and reach the aquarium while wandering around the tunnel, considered one of the largest exhibits! The shark exhibit is one of the largest, with a shipwreck surrounded by 4.9 million liters of water, thus creating a unique ecosystem for the sharks! There are also freshwater fish, saltwater fish, golden crocodiles, giant rays, and sea turtles. Some younger visitors love the touch pool, where they can have their collection of animals to touch! They will have certified divers who help them with the touching and create an opportunity to dive in the tanks, i.e., scuba diving! There are many passes in Las Vegas for multi-attraction sightseeing; the aquarium is included in the passes. Closer to Mandalay Bay Resort, the Shark Reef Aquarium is located near the South Convention Center's end of Las Vegas Boulevard. High Roller nbcnews.com Visiting Las Vegas and not going to the High Roller is a spoilsport! It is one of a one-of-a-kind experience with Happy Half Hour cabins at the High Roller Observation Wheel. You will have a bartender, an open bar, along with a 30-minute rotation of the wheel! There is a self-guided curriculum sheet along with a 30 to 40-minute lesson plan. You can discuss technology, science, math, geography, and architectural design. Keep The Travel Shoes On… The Seven Magic Mountains is an artificial art that bridges the gap between the synthetic and the natural! With the mountains and a lake as a backdrop, the art acts like a portal, making visitors realize the significance of the relationship between nature and human beings. In my opinion, the artist also tries to highlight how people can connect to nature; it is a sacred place! Hence, the boulders are an inspiration and a place to pay homage to the beauty of the desert and its significance in our lives. Comment below regarding your perspective on the art and how you interpret it! Read Also: Maldives’ Luminescent Secret: The Mesmerizing Sea Of Stars! The Stairway To Heaven Hawaii: Hiking Adventure’s Hidden Gem Walking On Sunshine: Exploring The Magic Of Vietnam’s Golden Hand Bridge!