

What Are The Best Food Tours In Europe? Plan Your Culinary Vacations Now 

Aug 11, 2023

Last Updated on: May 11, 2026

Travel Blog

For food enthusiasts, Europe is a gastronomic wonderland that promises an exquisite journey of flavors and culinary delights. From hearty Italian pasta to delicate French pastries, each country in Europe offers a unique and delectable culinary experience.

If you’re a foodie at heart and dream of savoring the best dishes the continent has to offer, look no further.

In this blog post, we will explore the best Europe tour packages for foodies to help you embark on a mouthwatering adventure through the flavors of Europe.

Furthermore, I will discuss the rise of Lisbon in Portugal as one of the most coveted destinations for food tours in Europe. 

What Are The Best Food Tours In Europe?

What Are The Best Food Tours In Europe

Have you checked the list of Tasteatlas 100 Best Cuisines in the World for 25/26? Among the top 5 places, the top 4 positions are occupied by European cuisines. 

The only exception is the Peruvian cuisine, which stands tall in the third position, representing South American food. 

Nevertheless, the Italian cuisine opens the list, followed by the Greek cuisine, Peruvian cuisine, Portuguese cuisine and Spanish cuisine. 

It is also interesting to see the rise and rise of Portugal. It is interesting to see Portugal solidifying its position as the best food tour in Europe. 

However, while I have referred to the Tasteatlas rankings, I have also created the ranking based on the data shared by the experts at Guide to Europe. 

1. The Art Of Italian Cuisine: A Taste of Italy

Italy, with its rich culinary heritage, is a paradise for food lovers. From the tantalizing aroma of freshly baked pizza in Naples to the indulgence of creamy gelato in Florence!

 Italy captivates taste buds like no other.

The “A Taste of Italy” tour package takes you on a gastronomic journey through iconic cities like Rome, Venice, and Milan. 

Sample authentic pasta dishes, feast on sumptuous seafood along the Amalfi Coast.

Moreover, you can raise a toast with fine wines from Tuscany. 

With the “A Taste of Italy” package, every meal becomes a celebration of the art of Italian cuisine.

2. Flavours Of France: A Culinary Odyssey

France, renowned for its culinary prowess, offers a feast for the senses that will leave foodies spellbound. The “Flavors of France: A Culinary Odyssey” tour package takes you on a delectable adventure through Paris, Lyon, and Bordeaux.

Indulge in buttery croissants for breakfast, savor velvety escargot for lunch, and delight in a gourmet dinner at a Michelin-starred restaurant. From wine tastings in Bordeaux to a boulangerie tour in Paris, this package allows you to immerse yourself in the refined art of French cuisine.

3. Tapas And Tempranillo: Spain’s Culinary Delights

Spain’s vibrant culinary scene is a celebration of bold flavors and regional specialties. The “Tapas and Tempranillo” tour package showcases the best Spanish cuisine in cities like Madrid, Barcelona, and Seville.

So, treat your taste buds to an array of tapas, from sizzling patatas bravas to succulent jamón ibérico. Discover the magic of paella in Valencia and sip on velvety Tempranillo wines in the picturesque vineyards of La Rioja. With the “Tapas and Tempranillo” package, Spain’s culinary delights are yours to savor.

4. Greek Gastronomy: A Mediterranean Culinary Odyssey

For a taste of the Mediterranean, Greece beckons with its wholesome and flavorful dishes. The “Greek Gastronomy: A Mediterranean Culinary Odyssey” tour package whisks you away to Athens, Santorini, and Crete, where you can indulge in the simplicity and goodness of Greek cuisine.

Feast on tangy tzatziki, delight in fresh seafood by the Aegean Sea, and taste the beloved moussaka. This package also offers the opportunity to learn the art of traditional Greek cooking from local chefs, ensuring you bring home the tastes of Greece to savour forever.

5. A Journey Through The Spice Route: Moroccan Delicacies

Morocco is a culinary gem that beckons foodies with its intoxicating blend of spices and aromatic dishes. The “A Journey through the Spice Route” tour package takes you on a culinary adventure through Marrakech, Fes, and Chefchaouen.

Immerse yourself in the vibrant souls, where the air is infused with the scent of exotic spices. Savour the iconic tagine, try delicate pastries like baklava, and sip on refreshing mint tea. The “A Journey through the Spice Route” package offers a sensory journey through the flavors of Morocco.

6. Portuguese Cuisine: Celebrating Everyday Food Culture 

Portugal, as I have mentioned, is the 4th best cuisine in the list of the Tasteatlas, and also TUI Musement has designated Lisbon in Portugal as one of the top three food tours in Europe. 

The two cities to stand in the 1st and 2nd positions are Rome and Bologna. However, Lisbon is not the only city to feature on the list. The list also has Porto in the 9th position.  

Furthermore, Lisbon is not a city that just celebrates its flashy dining facilities and Michelin-star restaurants. With the backing of the quintessential seafood tradition, it celebrates its food every day. 

In the same TUI Musement report, we can see that 74% of tourists want to visit Portugal with plans of exploring historic quarters, street food stalls, and markets. 

Alfama, Bairro Alto, and Baixa are the three historical districts where you can enjoy the best of Portuguese food. 

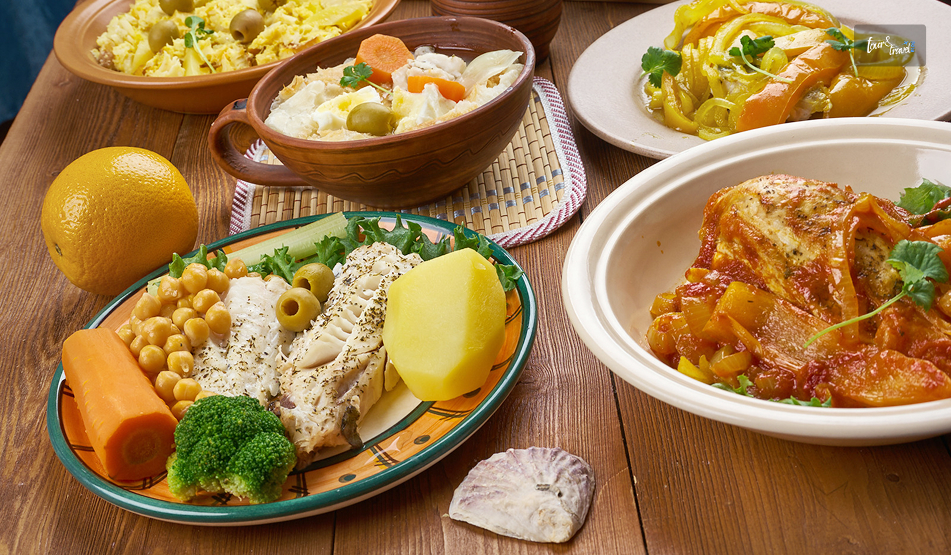
So, if you are planning the best food tours in Europe, you must try kale soup, grilled sardines, crusty bread, and salted cod. 

European Delicacies: A Continental Sampler

If you’re torn between the delectable cuisines of multiple European countries, the “European Delicacies: A Continental Sampler” tour package is the perfect choice. This package allows you to savour the best dishes from Italy, France, Spain, Greece, and more in one delectable journey.

Indulge in pasta in Rome, enjoy a leisurely wine tasting in Bordeaux, experience the lively atmosphere of tapas bars in Barcelona, and embrace the Mediterranean charm of Santorini. The “European Delicacies: A Continental Sampler” package is a whirlwind culinary adventure that caters to the diverse palates of foodies.

How to Choose the Best Europe Tour Package for Foodies

Selecting the ideal Europe tour package for foodies depends on your culinary preferences, budget, and the countries you wish to explore.

Here are some tips to help you make the best choice:

1. Cuisine Preference

Consider which European cuisine excites you the most. If you’re a pasta lover, Italy is a must; for seafood enthusiasts, Spain and Greece offer delightful options.

2. Activities And Experiences

Look for packages that include culinary activities, such as cooking classes, wine tastings, and food tours, to enhance your gastronomic journey.

3. Duration And Itinerary

Review the duration and itinerary of the package to ensure it aligns with your travel preferences and available time.

4. Local Expertise

Check if the package offers the guidance of local experts who can provide insights into the culinary culture and hidden gems of each destination.

5. Budget And Inclusions

Compare the cost of each package and the inclusions, such as accommodations, meals, and guided tours, to find the best value for your money.

Read Also:

Share on Social Media

Sibashree is a travel, culture, and leisure writer who has been writing since the age of 12 and professionally since 2014. With more than a decade of travel writing experience and journeys across India and several parts of the world, she brings a deeply personal and thoughtful perspective to her work. A student of English Literature and Mass Communication, Sibashree has always viewed travel as more than movement — for her, it has been a way of understanding people, cultures, and herself. Her passion for spiritual exploration has also led her to many unusual and meaningful destinations over the years. Outside of writing, Sibashree enjoys watching European cinema, reading about global politics, and reflecting on the stories hidden within everyday places.

Leave a Reply

Your email address will not be published. Required fields are marked *

title-img Related

READ MORE GPS navigator system

Explore New Horizons With GPS On Your Smartphone And Don’t Get Lost In The Wilderness

BY  Sibashree Jan 27, 2026

Getting lost in the forest or mountains is an unpleasant prospect that can ruin even the most exciting hike.  However, modern technology allows travelers to feel more confident far from civilization.  A smartphone, properly prepared and equipped with the right apps, can replace bulky navigators and become your reliable companion even where there is no cell signal at all.  Use the capabilities of digital maps and GPS to stay on track and enjoy your route without unnecessary stress. So, if you are wondering how the GPS navigator system works, I have got the perfect guide. Here, I will delve into the diverse aspects of the GPS on smartphones. So, keep reading to know more! How To Assess The GPS Navigator System’s Capabilities On Smartphones? A smartphone with a GPS module can perform most tasks that were previously available only on specialized devices.  Its advantages are obvious: always at hand, easy to use, supports many navigation apps, and weighs less than a classic GPS navigator.  However, the phone has its limitations. That is, it is more vulnerable to— impacts,  moisture, low temperatures, and  draining battery. A specialized GPS navigator has better battery life and durability, but is less convenient in terms of interface and is more expensive.  GPS watches can be useful for tracking activity and basic navigation, but their screen and functionality are limited.  If your route runs along popular trails and you are ready to thoroughly prepare your smartphone, a separate navigator is not necessary.  In challenging conditions, on long autonomous hikes, or in extreme climates, it is better to take both devices. How Does The GPS Navigator System Work On Smartphones? Many people think that GPS on a phone works only when there is a mobile signal. In reality, the smartphone receives coordinates directly from satellites, not from cell towers.  This means that even in the remote taiga or high mountains, you can determine your location. Topographic maps are used for navigation—  special diagrams showing terrain,  trails,  bodies of water, and  other important features. A GPX track is a digital route that can be loaded into an app and followed. To avoid being left with a useless dot on a blank screen, download the necessary offline maps in advance.  Without them, the phone will show only your position but won't provide information about trails and landmarks. Choose The Best GPS Navigator System For Your Hike The market for navigation apps for smartphones is rich and diverse. Here is a brief overview of the most popular solutions: • Gaia GPS — user-friendly interface, many maps, supports creating routes and waypoints. Downside: some features are paid, and sometimes there are privacy concerns. • Topo Maps+ — aimed at iPhone users, easy map downloading and printing, and detailed elevation profiles. Downside: iOS only, takes time to learn. • CalTopo — a powerful tool for advanced users, supports complex layers and terrain analysis. Downside: complex interface, some features require a subscription. • OnX — informative maps with a focus on land ownership and access, convenient for multisport. Downside: fewer specialized tools for hiking. • Goat Maps — new app for iPhone developed by enthusiasts, focuses on simplicity and essential features. Downside: currently limited in functionality. • FarOut — leader among apps for long-distance routes and trekking, contains data on key points and verified tracks. Downside: most routes are paid. • OutMap — 3D maps, slope and avalanche risk analysis, fast synchronization between devices. Downside: relatively new product, not all regions covered. • Maps.me — convenient for car routes and short hikes, works completely offline. Downside: limited terrain detail. Things To Keep In Mind With The GPS Navigator System Prepare your smartphone for the hike and download everything you need in advance. So, here are a few things to keep in mind while using the GPS in your phone— • Download detailed topographic and satellite maps of the area you need for offline use. • Find and download GPX files of the route and points of interest (campsites, water sources, junctions). • Check GPS functionality in your chosen app without internet access. • Get familiar with the interface, try building a route, and viewing the elevation profile. • Make sure all necessary maps and tracks are available offline. How To Keep Devices Charged And Protect Them During Hiking? In the wilderness, it is important to use your phone's battery wisely. Use airplane mode and power-saving mode to turn off unnecessary functions.  Do not record tracks constantly so as not to drain the battery. Close all unused apps and turn off your phone when you are not using it. People often get distracted by short gaming sessions and forget to close games.  This is according to data from experts we consulted while preparing this article.  According to data we find on the playplinkogames.com, gaming sessions in Plinko can last for hours.  Often, nothing happens in the game itself, which indicates open but unused apps. Such apps consume battery power, including due to their constant internet connection. Keep your device in your sleeping bag at night — cold quickly drains the battery. Take a power bank with you to recharge your phone on the go.  Protect your smartphone from moisture and impacts with a waterproof and shockproof case. Use straps on backpack shoulder straps for quick access to your gadget. What Are The Safety Measures To Take While Hiking? To ensure you are embarking on a safe journey while planning the hike, you need to consider a few things. So, some of these key considerations include— 1. Check All Settings And Test Your Apps Before The Hike Technology is not something you can trust blindly. So, better to take it on a test hike before considering it for the final plan. That is, you can test out the GPS navigator system with a simple walk around the block or a known hiking ground. This way, you can test its capabilities before fixating your trek plan on it. So, you need to check how the tool works without any internet connection, location determination, and rerouting as needed. This way, the actual features and capabilities of the tool can be tested and verified. Making it easier to use the navigation without facing any sudden issues. 2. Keeping Manual Maps And Compass Handy Moreover, do not completely trust the technology. It can be quite foolish to trust only the GPS and go ahead with a trek plan. Rather, keep paper maps, a compass, and manually manageable topographic maps handy. So, when technology fails, you can still have something to find your way back. In addition to this, learn to read a topographic map. So, you can instantly find your location on the paper. Also, you need to keep it waterproof. So, put on a plastic cover over the paper map. This will protect the paper map from dust, dirt, and rain during the trail. 3. Ensure Safety And Emergency Communication In The Mountains Again, safety measures should not completely rely on technology. What if your battery drains? Or worse, the device stops working due to a malfunction. So, make sure you carry separate devices to send SOS signals over the satellites. This way, you can manage emergencies with a proper device that comes with two-way communication. SPOT Gen4 only sends messages, but it is simple and reliable. Garmin inReach Messenger offers advanced features, including color maps and a digital compass.  These devices often save lives in difficult situations when regular communication is unavailable. Before heading out, thoroughly prepare your smartphone and check all settings. Always take a paper map and compass with you.  Don't forget a power bank and a waterproof case. Combine modern technology with traditional navigation skills — and any adventure will bring joy, not stress.

READ MORE card-img

Rio de Janeiro Travel Guide: What Your Brazilian Real Gets You

BY  Sibashree Sep 20, 2025

Rio de Janeiro sweeps you up the moment you arrive. Golden beaches stretch for miles, samba rhythms spill from bars in Lapa, and cable cars glide up Sugarloaf Mountain for some of the best views on Earth.  Life here is colorful and fast-moving, and part of slipping into that rhythm is knowing how far your Brazilian real will take you - from a chair on Ipanema beach to a plate of feijoada in a neighborhood café. Before we go on, here is a quick Rio de Janeiro travel guide. Just a quick note: exchange rates and prices don’t stay still. At the moment, 1 US dollar equals about 5.4 Brazilian reais, but it’s best to check the latest rates and costs before you travel. Rio de Janeiro Travel Guide: What To Expect? Rio de Janeiro is one of the best cities you can explore. It is one of those few places that has a care-free energy and will make you feel alive. The beaches, food, and major attractions will draw you to it without even trying too hard. Here is a simple Rio de Janeiro travel guide. Beaches - Rio’s Living Rooms The beaches of Copacabana and Ipanema are more than postcards - they’re part of daily life. Locals jog along the promenade in the morning, families gather for a swim, and groups of friends set up for impromptu games of beach volleyball or footvolley. Tourists blend right in, renting chairs and umbrellas from vendors for around R$10-15 per piece. Snacks come to you. Vendors walk the sand offering everything from ice-cold coconuts (R$8-10) to grilled queijo coalho (cheese skewers) for about R$12. You can even try a caipirinha mixed fresh on the spot, usually for R$15-20. These are usually cash-only transactions, and the small notes feel like part of the ritual - bargaining isn’t common, but handing over a few reais feels easy and authentic. Spend an afternoon at Arpoador, the rocky point between Copacabana and Ipanema, and you’ll see why locals gather here at sunset. It doesn’t cost more than a bus ride (R$5) to get there, and yet it’s one of the richest experiences you’ll take home. Food: From Street Bites to Sit-Down Meals Rio has a huge range of food. Starting from some humble bakeries to some fancy rooftop restaurants, Rio has it all. Start with breakfast like a local: pão de queijo (cheese bread) and strong coffee, often no more than R$10-15.  Step into a juice bar and you’ll find tropical flavors like passion fruit, guava, or the ever-popular açaí bowl, usually under R$20 for a generous portion. At lunchtime, the prato feito is king. This “set plate” of rice, beans, salad, and a protein such as beef, chicken, or fish costs R$25-35 and will keep you full all day.  You will get various self-service buffets that charge by weight. You will get roasted meats, vegetables, and farofa, and you will have to pay around R$30-40. For dinner, you can choose what you prefer. You can try something casual or something fancy. If you prefer a mid-range seafood meal along with drinks, it will cost somewhere around R$80-100 per person.  However, a proper night out in Ipanema at a fancy fine-dining spot might cost around R$200-250.  You can even visit Churrascarias, which is a Brazilian steakhouse. It is an event in itself. They have endless skewers of grilled meats, side dishes, and salad bars. You can expect to pay somewhere around R$120-180 per person. However, this does not include drinks. All these places accept cards, but it is better to keep some cash handy for bakeries and street food. Attractions: Big Names And Hidden Gems There are various major icons in Rio, and those are actually worth it. You can take the Sugarloaf Mountain cable car for around R$150, and the ride itself is a major part of the thrill. The glass walls will give you a 360-degree view of the way from above the city. You can visit Christ the Redeemer, resting on Corcovado Mountain, for R$100. The moment you stand at its feet and see the city from there, you get an amazing view. You can carry cards as both attractions accept payment in cards. However, it is better to carry some cash for small vendors, tacos, or snacks. Rio is also filled with a lot of gems that you can see for free or for a low cost.  The Selarón Steps, covered in colorful tiles from around the world, cost nothing to climb. A stroll through Santa Teresa’s narrow streets will take you past murals, studios, and cafés where you can pause for a R$12 espresso. At night, head to Lapa to experience samba at its source. Entry to some clubs is around R$30-50, and drinks inside range from R$15-25. Smaller bars may only accept cash, especially if you’re outside the main tourist drag. Getting Around Rio is quite a big city, but it is not difficult once you understand the system. You can take the metro, it's quite safe and clean, and a single ride costs around R$5.  Moreover, if you have a rechargeable RioCard, it will save you a lot of time and work. You will be able to use it for different types of transport, including trains and buses.  You can take a bus, which goes almost to the city, and the fare is quite similar to the metro. Here, you can get taxis for around R$6, and cross-town trips generally range around R$40-60. Also, Uber and other apps like these are popular, and often offer rides at a cheaper rate than a taxi. If you want, you can pay in-app with the card, and that way, you will not have to use cash for payment.  For day-trips outside the city, you will get intercity buses. This will help you explore the outskirts within a budget. If you are planning to visit the historic mountain town, Petropolis, you can explore it for around R$40-50. Moreover, if you are planning to take a longer ride to Búzios, the beach town, you will be able to visit it for around R$70-80. You can get the bus tickets online or from the bus station as well.  How Much To Budget You need to prepare a budget for a trip. However, the budget depends on the kind of trip you want to have. Budget travel: It will cost you around R$200-250 for a day, including hostels, street food, public transport, and free attractions. Mid-range: It will cost you around R$600. You will get comfortable hotels, visit some of the major landmarks, and have some casual as well as sit-down meals. High comfort: This will cost you around R$1000 and above. You will get four-star hotels, fine dining, and guided tours at this range.  However, the prices in Rio rise during any carnival or New Year’s, and this also varies depending on the neighborhood.  Ipanema and Copacabana are some of the premium places that tourists visit, but there are some block islands that will offer the same charm but at a lower price range. Spend Smart In Rio Start your trip with at least a little Brazilian real in your wallet. It will cover your first taxi or ride-share, snacks, or that first fresh coconut without delay. From there, cards will carry most of your expenses, but having R$100-200 in cash each day is wise for small payments. Stick to ATMs inside banks or malls when you need to withdraw. They’re safer and usually give fair rates. Avoid exchanging money at the airport - the rates are often poor, and the fees stack up quickly. Think about how you balance cash and cards. Use your card for hotels, restaurants, and tours, and keep your reais for buses, bakeries, street snacks, and tips. It’s a system that works well in Rio and lets you move through the city without stress. Enjoy Your Journey Landing in Rio with a Rio de Janeiro travel guide and Brazilian real already in hand saves you time and makes the city easier to navigate. You’ll breeze through those first transactions - a cab, a snack, a metro ride - and step right into the energy of the city. Rio rewards travelers who embrace both the big icons and the small everyday moments. The real you spend on a chair at the beach, a cup of coffee, or a bus ride across town is more than just money - it’s your ticket into the rhythm of the city.  As mentioned before, exchange rates and prices may change, but the value of those moments never does.

READ MORE flair airlines

Flair Airlines Review: This Is How I Feel About Flair Airlines!

BY  Abdul Aziz Oct 5, 2023

For the longest time, Air Canada and WestJet have been dominating the Canadian airline industry, which has led to the prevalence of high airfare. However, with the emergence of new contenders, things are finally changing. Flair Airlines is one such competitor of the legacy airlines that have a strong hold on the Canadian Airline industry. It is a low-cost carrier that has been expanding its operations during the pandemic to include U.S. travel hotspots like Arizona, Florida, California, and Nevada, continuing to operate on an extensive Canadian route network that covers most major cities in the country. Here is my brief take on the Flair Airlines experience I had. Keep reading because this is going to be very useful. My Experience Of Flair Airlines Image Source: assets.bwbx.io Here is a first-hand experience or a Flair Airlines review of the recent travel I had flying from Toronto to Montreal. Read on to know if it was worth it. Booking Image Source: thepointsguy.global.ssl.fastly.net I booked my flight on Google Flights, searching for the cheapest flight from Toronto to Montreal. On my date of flight, both Flair and Air Canada had early morning flights, and yet Flair was priced at half of the Air Canada ticket. There was, of course, the added benefit of a full-size carry-on bag but even on a standard fee, Air Canada would be charging for seat selection. Flair is a solid selection if you are traveling light, even if it includes seat selection. The Flair Airlines baggage policy is a little icky if you are traveling heavy instead. A one-way flight on December 15 via Flair costs 40. Whereas WestJet’s and Air Canada’s cheapest flights are $135. I had to pay a minimum of $7.90 for seat selection. Check-in Image Source: thepointsguy.global.ssl.fastly.net It was a simple experience checking in at the Toronto Pearson International Airport. All of Flair’s Toronto flights depart from Terminal 3, so that is where I did my check-in. Flair has a few baggage drops and check-in counters located in the center of the terminal. Ground Experience Image Source: thepointsguy.global.ssl.fastly.net My flight was supposed to depart from Gate B38. I cleared my security in under 10 minutes. The airport was mostly empty, given the wee hours we were departing (7:30 a.m.) There were some shops open despite the timings, so I got a coffee and yogurt from Starbucks and sat away from the crowd for some uninterrupted breakfast. Flair does not have its own lounges. Cabins And Seats Image Source: thepointsguy.global.ssl.fastly.net The flight was one of Flair’s three 737-800 (read tiny) aircraft. The airline operates with economy-only cabins suited for its ultra-low-cost carrier. The interiors were nondescript and spotless. It is simply designed without any frills like over or seatback displays. The flight was made with the intention of taking a passenger from point A to point B. The seats were comfy enough at the cost I paid. They did not recline, but they were not as slim as other similar carriers in the U.S. The extra padding on the seats helped ease the other small space. The leg room was commendably larger than its other similarly ranged carriers. It also had a full-size tray that could easily fit a 16-inch Macbook Pro. Spirit Airlines offers only a small drink tray. Flair Airlines Amenities Image Source: thepointsguy.global.ssl.fastly.net There are no inflight amenities or entertainment. There is no wifi, streaming services, or outlets on the 737-800. Keeping that in mind, have your devices on a full charge and make sure to get a window seat to keep yourself entertained for these otherwise short flights. The food and beverage services could get you to pay $2.75 for a soda and $5.50 for a Molson beer. A coffee would cost $2.35. All that after currency conversion. My Verdict Image Source: runwaygirlnetwork.com I did not have much qualms about flying with Flair. It was a regular journey from one place to another. The airline’s internet service is also set to launch soon so that too can be an attraction for travelers. Flair’s rapid expansion is on its way to breaking through the expensive air carrier industry with its budget-friendly approach. Flair Airlines Tripadvisor Reviews Image Source: media.flyflair.com I told you what I felt from my experience. But if you want to know what others are saying about Flair Airlines, here are some of the Flair Airlines reviews left by real flyers on Tripadvisor. In case you are asking yourself, “Is Flair Airlines good” or “Is Flair Airlines safe,” here are all your answers: "My mom and I traveled to edmonton in the beginning of July to a convention, it was my first time on plane and was understandably nervous. The folks when I arrived at the gate was friendly and welcomed us! Everything was on time and found our seats okay, we will definitely upgrade next time but being it was only an hour 1/2 flight it was fine. If you are flying and bringing more than 1 bag and carry on, one thing I recommend to save $ is to purchase a package online and pre book. It's the one thing I wish I knew before hand. Otherwise baggage is pricey. Coming back from Edmonton it was a great experience too! Given the option I will choose Flair again to travel within Canada. Prices are good and the staff are very friendly. Even better, our flights to and from were 10 minutes early. So bonus!" Ashley P "After reading some questionable reviews about Flair i was convinced i was not going to have a good experience. I am blown away by the level of kindness and overall attentiveness of the flight attendants, along with the customer service i had received over the phone. Had bought our seats prior to both flights and we had no problems with keeping those seats unlike some other airlines that tend to mess that up every time. I highly recommend this airline to everyone and will gladly be returning!" Stefanie b "I am tired of people complaining in this industry. Covid changed many things, but I am grateful to travel again. We took a family trip out to Vancouver Island with Flair. Captain Tyler McDermot was wonderful and after the flight, I was invited for a picture with him. The crew were wonderful, check in was quick and our flight on time. Great job Flair!!!" Gail G "Booked online and purchased carryon only. Checked in online to avoid paying checkin fee at airport. Downloaded movies and brought my own snacks. People need to realize that Flair base prices only include your seat. Their website clearly states all extra costs. It would be great if Flair continues their Windsor to BC route throughout the whole year. I booked taking a chance, after reading all of the negative reviews about cancelling, I guess I was one of the lucky ones. It's nice to have a direct flight to BC from Windsor and avoid paying three times more, with other airlines and having connections, at either Pearson or Metro.” monicahumenny Wrapping Up Have you taken a Flair flight recently? How was your experience? Do you like how budget-friendly it is? Or do you feel like they could add something more to their services? If you have thoughts to share or questions to ask, please leave a comment below. We would love to hear from you! Read Also: This Is My Experience With Eva Air! This Is What I Felt About Aruba Airlines! Fly In Style: Your Ultimate Guide To Lot Polish Airlines Adventures! Journey To The Skies: Exploring The Legacy Of Northwest Airlines!