


 Related
All You Need To Know About Korean Currency Rate And Money
BY Abdul Aziz May 19, 2023
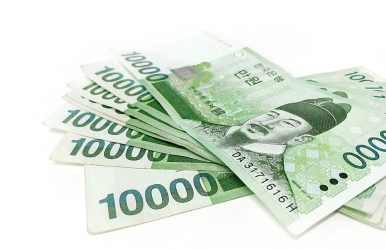
For avid travelers and investors, the Korean currency rate can be a fascinating topic of discussion. Understanding the fluctuations of the won against other currencies can give insights into its economy. Likewise, it could say much about Korea's political developments and investors' sentiment in the market. This article will explore everything about the Korean currency rate. As such, we will cover the basic conversion rates to the impact of major events on the Korean economy. History Of Korean Currency South Korean currency has rich historical data that dates back to the early dynasties of Korea. It all started with the use of cowry shells and pearls as currency. As time passed, metal coins and paper money became popular. The Japanese occupation of Korea introduced the Japanese yen as the official currency. Yet, in 1945, the Korean won was introduced and became the official currency. Interestingly, the won was initially divided into 100 jeon, but the jeon was eliminated in 1960. The won has undergone many transformations to ensure price stability and economic growth. In modern times, the South Korean won is the official currency used in South Korea. Today, the value of the South Korean won fluctuates with the global exchange rates. It’s one of the world’s top 20 currencies by value. Current South Korean Won Exchange Rate Knowing the latest exchange rate for the Korean won can be helpful in budgeting and forecasting your finances. As of January 2023, the exchange rate for Korean won is fluctuating depending on the global market and demand. Below are some of the latest conversion rates: 1 US dollar = 1,315.29 Korean won (USD to KRW) 1 Australian dollar = 893.35 Korean won (AUD to KRW) 1 Chinese yuan = 192.07 Korean won (CNY to KRW) 1 Japanese yen = 9.90 Korean won (JPY to KRW) However, exchange rates may vary depending on banks' locations and policies. Check exchange rates online through various currency converter websites to ease the currency conversion. Alternatively, download an exchange rate or currency calculator app. With these tools, you can convert your dollars to South Korean won (USD - KRW) or any other currency at the current rate. Banknotes And Coins Banknotes and coins in South Korea are not only used for daily transactions. Yet, they also hold significant cultural value. As such, these banknotes come in different denominations and colors. For instance, the 1,000-won note features a Confucian scholar. Then, the 10,000 won note features Admiral Yi Sun-sin, known for his naval victories against Japan. Meanwhile, the 50,000 won note features Shin Saimdang, a prominent female artist. Besides that, she was the mother of the famous Korean painter Yi I. These banknotes represent important historical figures and showcase various artistic designs. Similarly, Korean coins are equally fascinating, with 10, 50, 100, and 500 won denominations. Each coin features a different symbol that holds cultural significance. The 500-won coin features the portrait of King Sejong, who invented the Korean alphabet. Meanwhile, the 100-won coin features the image of a crane, symbolizing longevity and good fortune in Korean culture. When visiting South Korea, carry some local currency as most stores prefer cash transactions. Foreign exchange markets are available in major cities, but it is crucial to know exchange fees as they vary. Overall, banknotes and coins in South Korea hold monetary value and capture the country's cultural heritage. Visit the Bank of Korea to learn more about their banknotes and coins. Money-Handling And Etiquette As with any country, knowing the cultural norms when handling money in South Korea is good. As such, for Koreans, money is not just a means but a representation of energy. Below are some key points to note: Cleanliness is crucial. Many Koreans believe money represents energy and keep their bills and coins as clean as possible. Hence, you will rarely see crumpled or dirty bills in circulation. Besides that, many Koreans carry cash and coins in wallets and change purses. For them, it is not just a convenient way to have cash but a way to keep it clean and maintain the money's energy. Respectful giving and receiving. When giving or receiving money, using both hands for respect is customary. This act is particularly true when exchanging money with older people or of a higher status than you. No throwing or placing on the floor. Throwing money or putting it on the floor is considered disrespectful. If you drop a coin or bill, pick it up immediately. Likewise, people usually place money on a designated tray or hand it directly to the receiver. Cash vs. Card. Credit cards are widely accepted in Korea. Yet, having some Korean won for small transactions or in areas that only accept cash is always good. Keep this Korean currency rate information. Doing so will allow you to navigate financial transactions in South Korea with ease and respect for the country's cultural norms. Read Also: Traveling To Korea? Here’s Your Must-Try Korean Food 7 Reasons Why Phuket, Thailand Attracts Travelers Worldwide Top Hotels With Jacuzzi In Room In Las Vegas – Travel Guide