


 Related
What Is Luxembourg Known For? Why Is It A Popular Destination For Business Travel?
BY Sibashree Sep 10, 2025
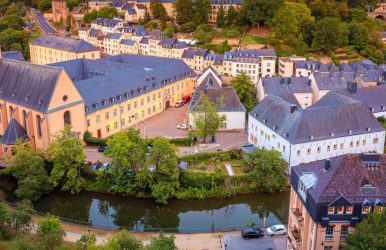
Luxembourg is known for being a powerhouse of private banking and investment management. It is one of the most significant players in the global economy. Furthermore, Luxembourg is the De Facto capital of the Eurozone and home to the European Investment Bank and the European Court of Justice. Luxembourg also offers tax optimization benefits and a high level of ownership rights protection. So, many global businesses look for a Luxembourg company formation or register their companies in Luxembourg. Naturally, with Luxembourg being a favorite global destination for business investors, it continues to be a global business tourism hotspot. Local and foreign entrepreneurs benefit here from a wide range of professional services, such as accounting and business consulting. However, there are more reasons behind Luxembourg having a booming business tourism sector. And in this Tour and Travel Blog, we will decode important factors. What Is Luxembourg Known For? A Well-Defined Strategy That Caters To Leisure And Business Tourism The best thing is that Luxembourg operates with a clear tourism strategy, and it is not after mass tourism. In a recent interview, Eric Thill, the Luxembourg Minister for Tourism and Culture, confirmed that the country wants to keep the tourism landscape selective and sustainable in business and leisure travel segments. The International Congress and Convention Association (ICCA) is also playing a major role in boosting business tourism in Luxembourg with the launch of the ICCASkills CICE Course at the ICCASkills Luxembourg Hub. This course, from 23rd to 25th September, will help participants understand the challenges in the global meetings and events industry and its impact on international tourism. They will also learn how to host high-profile business delegates to maintain Luxembourg’s reputation as a global event and business tourism destination. Why Is Business Tourism Having A Steady Growth In Luxembourg? You know why is Luxembourg known for in the business tourism sector? I find it only suitable to quote what the Luxembourg Convention Bureau has to say here. “The Grand Duchy of Luxembourg is a one-of-a-kind place, with a buzzing economy and at the same time political stability, openness to the world, and an impressively high quality of life. Luxembourg is a place where cultures, languages, and business opportunities all come together.” Moreover, Luxembourg is probably the country with the most “international” mindset in the entire European Union. People here are skilled in multiple disciplines and languages, hosting individuals from more than 180 nations worldwide. However, we must also forget the basics when figuring out why Luxembourg is so famous in the business tourism sector. Here are the reasons. 1. Luxembourg Is A Thriving Capital Of The European Union The Capital de Facto of the European Union, Luxembourg, is a growing hub of the following industries. Finance and Investment Health Technology (Alkom Digital, B Medical Systems) Automotive Components (Volkswagen, BMW, and Mercedes-Benz) Cybersecurity (Fujitsu) Space Mining (Moonscape) Furthermore, this powerful financial hub hosts many businesses globally operating in manufacturing, maritime operations, agriculture, and clean technology. So, with so many diverse businesses choosing Luxembourg as their base, business tourism in the country is bound to shoot up. 2. Luxembourg Is A Leader In Sustainable Finance Now, this is big. Luxembourg has utilized its position and expertise as a global leader in banking, investment, insurance, and other financial sectors to promote sustainable finance. As the second financial center in the European Union, Luxembourg started selling sustainability bonds in 2020. It helped the country to gather and mobilize funds for businesses and projects that will yield positive social and environmental outputs. Moreover, Luxembourg is the country that completely adheres to the definition of sustainability as mentioned by the United Nations. In the 987 Brundtland Commission report, sustainability is: “meeting the needs of the present without compromising the ability of future generations to meet their own needs.” In other words, Luxembourg is a country that gives equal importance to the three main pillars of sustainability. Economy Environment Society The increasing renewable energy capacity, the free public transportation, and the bicycle-sharing schemes are some of the most prominent examples of how Luxembourg has adopted sustainability in its every sector. The Cleanest And Most Efficient Public Transport Free Of Cost You can take the buses, trams, or trains in Luxembourg for a faster commute to your business meetings. These services are efficient. So, you will not have to worry about the delays. Furthermore, unless you are riding in a first-class compartment, you will not need to purchase a ticket. However, keep your ID handy as the conductors may ask for it sometimes. Moreover, Luxembourg City, the capital of Luxembourg, is very walkable. In fact, the lack of parking spaces in the city makes it a better option to travel by public transport than by private car. 3. Luxembourg Helps Businesses To Organize And Attend Sustainable Events Businesses that follow stringent sustainable policies also find Luxembourg to be the favorite destination for arranging and attending events. The Luxembourg Convention Bureau officially represents the country in the sector of business events. Here, the event professionals will help you connect to the industry leaders, and they will assist you in organizing an eco event. They will take care of the following areas related to the event. Venue Accomodation Catering Entertainment Supplying and Managing Visitor Information Managing Marketing Materials The Green Events, Green Logos, And Green Certifications: The Luxembourg Government Initiatives The country’s Ministry of the Environment, Climate and Sustainable Development has started a scheme called “Green Events.” When an event organizer follows the set criteria of incorporating eco-responsible and sustainable practices, they can apply for a Green Logo. Earlier, the Green Logo was only available for the organizers of public events. For quite some time now, it has also been available for business event organizers. However, the organizer will have to ensure that there has been: An Inclusive Event Zero Wastage Sustainable Catering Zero Net Carbon Moreover, depending on the industry you belong to, you can have green certifications, such as the Luxembourg sustainability certification (LENOZ), Leadership in Energy and Environmental Design (LEED), or a Green Key. When a business has a Green Logo or a Green Certification, it gains recognition for its eco-responsibility. This further results in boosting public image and customer satisfaction. Moreover, a recent Harvard Business Review has suggested that the demand for sustainability is rising. So, in a nutshell, what is Luxembourg known for? It is known for its growing business tourism sector that focuses on a selective and sustainable approach. Read Also: Where Is Yokohama Bay? What Is It Known For? (Sunset, Snorkeling, Food, And More) Why Is Kawasan Falls Known For? (Description, Location, Activities, Timing, And More) What Is Arches National Park Known For? Exploring The Famous Arches In The Park