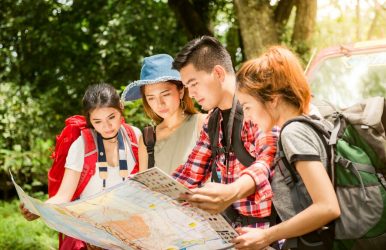
Traveling During Winter? Here Is A Winter Vacation Planning Checklist

Oct 13, 2023

Last Updated on: Aug 22, 2025

Travel Guides

Winter vacations come packed with numerous fun activities. If you like skiing, this is the best time for you.

The season is cold, allowing you to wear the warm clothes you have stuck away for a long time. You get to enjoy the warm coffee and cozy evenings. You can also enjoy watching the starry sky at night as you keep warm around a fire. Those who love being outdoors during the winter have the opportunity to plan a fantastic winter vacation.

A successful vacation begins with proper planning. So, develop a checklist and prioritize the important things. Part of planning is packing all the items you will need during your winter trip, and there are several things to remember. 

Here Are Ten Important Things For Winter Vacation 

Important Things For Winter Vacation

This article will present ten must-have things for winter vacation. This checklist will allow you to plan your winter holiday and enjoy the experience.

1. Medicines

Carrying your medicines is a vital thing when going on a winter vacation. It is cold, meaning you could get the flu. Carry an anti-fungal cream, a cold and cough syrup, a balm for the headache, and flu medicines. Because of the abrupt change in temperatures, you may experience various issues, hence the importance of being prepared for minor illnesses. It is also crucial to carry your menstrual pads and tablets.

2. Thermal Wears

It is vital to carry high-quality thermal wear when going on a winter vacation. The thermals maintain the warmth in your body during severe temperature drops. They are must-haves when packing for winter travel. Remember, thermal wear protects the entire body. It is allowed if you feel you cannot wear more clothes over the thermals, and the thermal wear will keep you warm.

3. Winter Jacket

Winter jackets are the most essential items for a winter holiday. The jacket forms an outer layer over your sweater or thermal wear, insulating you from the cold. A great winter jacket provides warmth throughout the trip. It is a vital addition to the packing checklist. So, choose down jackets or army-type jackets for more comfort. If you want a carry-on bag only, it will be wise to wear some bulkier items like the winter jacket. This will free up space for other things. Furthermore, if you wear bulky items like boots and coats, you can bring more layers in the bag to keep yourself warmer.

4. Shoes

No matter the time of the year you are traveling, carrying several pairs of shoes can be challenging and takes up space in the bag. Especially when traveling in the winter, packing several boots will only take up most of the space in the bag. You are not going to spend the whole holiday indoors. That means you will need quality winter shoes for the vacation. Your holiday will involve walking around and traveling. 

So, pack winter shoes with warm socks to keep your feet warm. Wear high winter boots for more protection if snow is in your destination. Select a boot that works when working on the snow and a clear road. If you must pack several shoes, stuff them with gloves, hats, socks, and scarves to utilize the space inside.

5. Gloves and Socks

Ensure your hands are warm throughout by wearing gloves. It is easy to ignore feet and hands essentials when packing for a winter vacation. If you don’t pack gloves and socks, you leave your hands and feet vulnerable to colds and infections. If you are going away with kids, ensure you carry woolen mittens to keep their tiny arms warm. By packing several gloves, hats, and scarves, you will change your daily looks without needing too much space in the bag.

6. Backpack

Choosing a quality backpack or suitcase to keep your items is also essential. It should be light and enough to accommodate all your belongings. Choose a travel bag with several pockets to keep your things organized and categorized.

It is advisable to avoid carrying a heavy load because managing it is tough, and you may miss the chance to have fun. Sometimes, you must pack bulky and thick items when traveling in cold weather. Fortunately, you can utilize packing cubes and compression bags to reduce the space hoarders in the luggage. These items can help maintain small luggage and keep your carry-on organized.

7. Sweaters

A winter vacation packing list is not complete without packing sweaters. They are crucial because they provide warmth by adding protective layers to your thermal wear and jacket. If possible, it is better to carry a thick sweater for more warmth.

8. Thermo Flask Or Water Bottle

Another crucial item on your packing checklist is a thermo flask or a water bottle. You will need to carry water or something warm like coffee in case there are no coffee shops in the area. Taking warm coffee, tea, or water in the flask will give you the warmth you need to relieve the cold.

9. Sunglasses

Sunglasses may be an unlikely option for winter vacation, but they are also essential for packing. The morning sun and snow cause a reflection that could damage your eyes. Furthermore, just because the sun is not hot does not mean it doesn’t have UV rays. Therefore, sunglasses are essential items on the travel checklist.

10. Scarves And Caps

Make sure your head and neck are well-protected from the cold. So, you need to pack some caps and scarves for this. Carry monkey caps since they provide warmth for the head and neck. Even though they may seem unattractive, these caps are the best to protect the whole head region from the cold. Ensure you also pack woolen scarves for the same purpose.

Related: Must Pack Business Travel Packing List Along With Tips

Enjoy Your Winter Vacation

Going on a beach vacation during summer may be the easiest to pack. You only pack light-weight clothes, a swimsuit, and flip-flops, and you are good to go. However, packing for a winter vacation comes with some challenges. For starters, you must carry everything you need to keep yourself warm. You may also have a space problem because most winter clothes are bulky, and you must squeeze them in the carry-on. However, having a checklist is helpful since it helps you pack enough items in the bag.

Read Also:

Share on Social Media

Ankita Tripathy loves to write about food and the Hallyu Wave in particular. During her free time, she enjoys looking at the sky or reading books while sipping a cup of hot coffee. Her favourite niches are food, music, lifestyle, travel, and Korean Pop music and drama.

Leave a Reply

Your email address will not be published. Required fields are marked *

title-img Related

READ MORE

Kootenay National Park Or The Land Of Ice And Fire (Experiencing Nature’s Game Of Contrasts)

BY  Sibashree Sep 12, 2024

No, it’s not the battle of the Starks, Lannisters, and other houses of Westeros. In Canada lies Kootenay National Park, the actual land of ice and fire. The glacier-made canyons and valleys sing the song of the ice, while the hot springs and grasslands keep the “fire” element alive here.  Also, the national park is a hub of ancient fossils, encouraging walks through the fossil trails. Moreover, you can take a scenic drive through the park, rich in Indigenous culture, history, architecture, and cultural landscape.   So, do you want a virtual tour of this Canadian national park? THIS is where your journey begins! THESE Are The Things You Will Do At Kootenay National Park With no cell service available in Kootenay National Park, you can get lost in the wilderness and explore the most fascinating landscape. However, being respectful to the wildlife is a must for this national park. This August, I came across disturbing news while doing my research on Kootenay National Park.  I have been in touch with a local from Radium Hot Springs for quite some time now. He told me that a grizzly bear coming out of Kootenay National Park was almost struck by an SUV on 19th August 2024.  This incident occurred on a busy highway in southeastern British Columbia, and fortunately, the Kia Sportage SUV made its way to the other side safely. Further, it was a lesson on why following the safety guidelines is crucial while driving in and around the Kootenay National Park. On the major routes of Kootenay National Park, you will have to maintain a maximum speed of 56 mph.However, on the minor routes, the highest driving speed limit will be 37 mph.  Also, around one month before the incident, on 24th July 2024, there was a minor fire in the  Sinclair Canyon slopes (near Radium Hot Springs) of the national park. It was called the Berland Ridge wildfire. This fire was under control thanks to a helicopter bucketing water on it. However, outside the park’s southern boundary, there was a blazing fire that was brought under control after pain-stricken efforts.  So, these incidents show how mindful and cautious you need to be while taking part in the following activities.  Hiking In Kootenay National Park (Hikers’ Favorite Trails) The hiking trails in Kootenay National Park are full of elevation gains and losses. Also, today, the national park has more than 70 hiking trails at easy, moderate, and difficult levels.  However, I have curated a few hiking trails in the table below. After interacting with a couple of hikers, I found out that these are the ones most preferred. Name of the Trail Difficulty LevelDistanceLocationHighlightsMarble CanyonEasy1.4 Km with 42 M Elevation Gain Located near Lake Louise, AlbertaHiking, snowshoeing, and running are the favorite activities here.It is a pet-friendly and kid-friendly trail. It is a year-long hiking trail. Stanley Glacier Trail Difficult 10.9 Km with 607 M Elevation Gain Located near Lake Louise, AlbertaSnowshoeing, camping, and hiking are popular activities on this trail.You can take your dog as a company.June to September is the best time to hike this trail. Sinclair Canyon via Juniper Trail Moderate5.8 Km with 291 M Elevation GainIt is close to Radium Hot Springs in British Columbia.You will have to hike through a beautiful cedar fir forest on this trail.The view of verdant Sinclair Canyon Falls and the Columbia Valley from this trail is breathtaking.Marble Canyon to Paint PotsModerate2.9 Km with 110 M Elevation GainRadium Hot Springs (Marble Canyon Parking Lot  - 89 km east of Radium Hot Springs, Paint Pots - 86 Km east of Radium Hot Springs).Explore a good mix of mature and burnt forest throughout the trail.Behold the Vermillion River running parallel to the trail. Floe LakeDifficult10.5 Km with 1,110 M Elevation Gain Near Radium Hot Springs (72 Km East)Backpacking and camping are popular activities on this trail. The trail leads to the Floe Lake Backcountry campground. This popular meadowy trail is known for its views of peaks, glaciers, and the beautiful Floe Lake. Numa CreeksModerate 6.3 Km with 385 M Elevation GainThe trailhead is near the Numa Falls, which is 80 Km east of the Radium Hot Springs. It is a forested trail.The trail leads to heavy avalanche paths in the park.  The hikers’ words about the trails in this national park are quite encouraging. Let’s find out what they are saying about the mesmerizing hiking trails.  “This is a beautiful, deep canyon hike. The trail crosses the canyon multiple times to view the ferocious Kootenay river below. Hiking boots aren't necessary since it is a well-traveled trail.” - Deborah Turcotte on the Marble Canyon Trail  “The trail was mostly dry and in very good condition. No snow on the trail, just a few short wet spots. Trek up is mostly sheltered but a bit chilly and windy in the bowl so bring layers as the temp changes quickly when the sun is behind clouds. Still lots of snow in the bowl. Found one rock with fossils. There are a few small waterfalls on Stanley Peak. Lots of boulders at the base of the bowl to sit and enjoy a lunch and 360 views. An easy to moderate 3-4 hour hike with nice views of Stanley Peak, Storm Mtn, and the Kootenay Valley.” - Sue W on the Stanley Glacier Trail  Kootenay National Park Camping  Kootenay National Park is a wonderful place for frontcountry and backcountry camping. You can even live in oTENTiks and spend some unforgettable days in the park under the sky.  Frontcountry Camping You can camp near the Vermillion, Kootenay, and Simpson rivers. Also, you can find some quiet spots near Radium Hot Springs village.  Summer is the best season for front-country camping in the national park. However, the sites remain crowded. So, you must go for a prior booking.  Further, the daytime temperature in the national park remains between 16-23 degrees centigrade. Still, the temperature at night can drop below 0 degrees centigrade. So, abiding by the camping rules is crucial, and especially, be particular about the things you will have to carry. Moreover, like camping in any national park, here also you have to ensure that you don’t leave any trace behind as you leave the site.  Backcountry Camping Backcountry camping and backpacking are the best ways to explore the wilderness of this Canadian national park. However, you must make a prior booking and carry a backcountry permit if you want to spend some days and nights amidst grizzly bears, black bears, wolves, elks, and cougars.  Further, there are six backcountry camping grounds in the park, five of which are located along the  Rockwall Trail. The  Verdant Creek Trail has the sixth camping ground.  Random camping is not allowed during summer, as protecting the landscape and vegetation is crucial. This restriction applies from May to October.  However, in the winter months, you can do random camping in the designated areas. You will still need a permit for this. As I have mentioned, the Rockwall trail is the most prominent place for backcountry camping in the park. This site is also popular for the presence of various multi-day hiking trails. These trails are: Honeymoon Pass and Verdant Creek Tumbling - Floe The Rockwall  Tumbling - Helmet - Ochre Loop Numa Creek Helmet Creek and Falls Tumbling Creek Helmet - Ochre Junction In the popular backcountry camping areas, the trails are maintained quite well. Further, there will be amenities like food storage cables, food lockers, picnic tables, and tent pads.  Living in oTENTik An oTENTik is a modern fusion of a cabin and a tent. In the park, you will find the oTENTik site on the Redstreak campground’s A loop.  If you stay in an oTENTik, you will wake up amidst nature, and taking a bath at the hot springs will be the most rejuvenating experience. Then, you can explore the nearby hiking trails and gorge on traditional meals cooked in the campfire.  Relaxing At Radium Hot Springs  Beneath the colorful Sinclair Canyon mountains lie the most refreshing hot springs. Further, the mineral-rich water of the hot springs does not have any odor, and you can take a bath with your entire family.  To reach the Radium Hot Springs, you must drive from Banff and Lake Louise for around 1.5 hours. Further, the journey is as interesting as the destination, as you will get to small turquoise lakes, falls, canyons, and bridges over rivers as you drive through the Kootenay National Park. Also, don’t forget to stop at the following locations to make the most of your journey. Continental Divide (The line diving the Pacific and Atlantic watersheds) Marble Canyon Hike Paint Pots Trail Numa Falls Kootenay Valley Viewpoint (It is the place to get the most beautiful view of Vermilion and Mitchell Ranges.)  Olive Lake Trail and Day-Use Area However, the highlight of the journey, of course, is the Sinclair Canyon, where you will also find big horn sheep roaming. As you hike through the Juniper / Sinclair trail, you will get a “bird’s eye view” of Sinclair Canyon.  Further, as you enter the Radium Hot Springs village, you will see an iconic steel horn sculpture. The “Bighorns Public Art Sculpture” was officially unveiled on 7th April 2021. Moreover, Clara Reinhardt, the mayor of Radium in 2021, said,  “We chose something that implies a sense of arrival to Radium, the Columbia Valley, and beyond. We captured the undeniable natural beauty of the curved horns through a Fibonacci spiral—the golden ratio in nature and art.” “We wanted to create a piece of art that speaks to both the history and the future of bighorn sheep in Radium. We captured the undeniable natural beauty of the curved horns through a Fibonacci spiral—the golden ratio in nature and art.” - Adam Meikle (Artist of the Bighorns Public Art Sculpture) Burgess Shale Fossil Hike  The Burgess Shale Fossil Hike in the national park will give you access to Mount Stephen and Walcott Quarry. These are UNESCO Restricted Sites. Further, you will get to see some of the oldest fossils in the world here.  However, in total, you have three routes to explore in the Burgess Shale Fossil Hike. Let’s discuss them in detail.  Walcott Quarry Starting Point: Takakkaw Falls Difficulty Level: Difficult  Elevation Gain: 825 Meters Duration: 11 Hours Return Distance: 22 Kms Walcott Quarry is a classic example of a fossil hike. Also, the top view of the Emerald Lake from here is amazing. Further, you will find Burgess Shale creatures here, which were found in fossilized conditions at the mountaintop in the Yoho National Park.  “The Burgess Shale organisms lived 508 million years ago in a time period that Geologists call the Cambrian, which began at 541 Ma (million years ago) and ended by 485.4 Ma. The first fossil occurence of most animal lineages (at the phylum and class levels) occur in the Cambrian. As a result of this fact, and because the fossils are well preserved, Paleontologists studying the Burgess Shale fossils can deduce a great deal about the ancestory of animal lineages.” The Burgess Shale fossils were discovered at the Walcott Quarry site in 1909 by Charles Doolittle Walcott. 1 Mount Stephen Difficulty Level: Difficult  Elevation Gain: 795 Meters Duration: 7.5 Hours Return Distance: 9 Kms As you hike through the Mount Stephen trilobite beds, you will get to overlook the “town of Field” in British Columbia. Railway workers in the 1880s used to call the town of Field the space of “stone bugs.”  Further, during this trek, you will see trilobite fossils (now extinct and one of the earliest marine arthropods), and the view of the Kicking Horse River from the trail is amazing.  Stanley Glacier Difficulty: Moderate Return Distance: 10 km Elevation Gain: 385 m Duration: 7.5 hours You will start hiking the Stanley Glacier in a fire-swept forest. The forest has lodgepole pine and wildflowers. Further, along your route, you will get to see a turquoise river, waterfalls, and the best view of the Stanley Glacier. Moreover, you will get to see the fossils of hyolithids, sponges, trilobites, and sponges here, and they are from the Eldon Formation.  Cambroraster, an ancient arthropod, and many other species are found in the quarry near the Stanley Glacier. Further, the shell of a Cambroraster looks like the Millennium Falcon spaceship in its shape. Important Kootenay National Park Data At A Glance  Before you start for the Kootenay National Park, don’t forget to have a look at the stats. Location: British Columbia, Canada Established: 21st April, 1920 Area: 1,406 km² Highest Landscape: Deltaform Mountain (3,102 m) Designation: UNESCO World Heritage Site in 1984 (As Part of the “Canadian Rocky Mountain Parks ) Visitor Center: Kootenay National Park Visitor Centre (7556 Main Street East; Radium Hot Springs, B.C.) How to Reach: Via Highway 1 from Banff, AB or Calgary, AB/Via Highway 95 at Radium Hot Springs, BC Also Read Why Include Whale Watching In Your LA Itinerary. Traveling On A Budget: Tips For Affordable Adventures. From Cocktails To Kickflips: Must-Try Activities In San Diego.

READ MORE Winter Camping

Winter Camping In Canada: Tips For Cold-Weather Adventures

BY  Arnab Nov 20, 2023

There are many reasons to travel to Canada in winter. You might have heard people immigrating to Canada for business and job purposes. They provide better opportunity for the young generation with better life style. However, if you are focusing on that part, you need immigration advice before you take further steps. You can set off to iconic mountain resorts, visit a Christmas market, or spend time at an ice rink. At the same time, even more adventures await you if you are ready for winter camping.  The list of perfect cold-weather destinations in Canada is simply endless. Snow-covered Banff National Park in Alberta, untouched nature in the Northwest Territories, and mind-blowing Mont-Tremblant in Quebec to name a few. You will certainly appreciate the silent beauty of the snowy forest in February and January, especially at sunset or dawn.  So, it would be great to pick up a car rental in Toronto and go towards a winter fairy tale. A large selection of Toronto Airport car rental deals allows you to find the perfect vehicle for your needs. If you are traveling with family or friends, consider a more spacious option - car rental for 7 people will be a balanced solution for your icy ride.  However, winter camping in Canada is as dangerous as it’s exciting. Low temperatures can cause hypothermia and the most severe consequences for your body. Thus, such experience requires a particularly careful approach. Here are a few cold-weather adventure tips to keep in mind before embarking on such an outing.  1. Use a layered clothing strategy  When it's hot during the day and cold at night, you need to carry a variety of outfits with you to stay comfortable at all times. Layering is one of the best ways to stay dry and warm without overheating.  Layering is an art and once you master it, you can easily regulate your body temperature depending on your activity level and weather changes. Using layers correctly allows you to add or subtract layers throughout the day so you feel comfortable no matter what.  Start with wool or synthetic thermal underwear. Also, avoid cotton. Cotton absorbs moisture and loses all its insulating properties when you sweat, making you feel much colder. The job of thermal underwear is to wick sweat away from your body and keep you dry and warm.  Thus, apply insulating layers such as a fleece, light down jacket, or synthetic jacket as your middle layer to help keep you warm. The greater the middle layer retains heat, the better. Finally, cover the previous two layers with a windproof jacket with a waterproof membrane to keep you warm.  The outer layer also serves to remove moisture evaporated from the body. Don't skimp on a high-quality outer layer if you expect to encounter some serious wind and rain. If it doesn’t cope with its functions, you can become seriously hypothermic. 2. Make sure your sleeping bag can handle low temperatures  Canadian winter camping expeditions require a sleeping bag - this is the golden rule for a hassle-free overnight stay. The temperature label on your sleeping bag can be confusing. For example, if your sleeping bag can withstand +5°C, this doesn’t guarantee that you will feel warm at +5°C. The fact is that sleeping bags have two temperature conditions: a temperature at which a tourist should feel comfortable, and a lower temperature limit at which a sleeping man should feel comfortable.  Temperature values are approximate and depend on multiple factors. Just in case, take a sleeping bag rated for temperatures 5–10°C below expected degrees. You can also add an extra blanket over your sleeping bag to help keep you warm. 3. Select and prepare a place to pitch your tent  Setting up a camp in winter is much more difficult than in summer, so first of all, plan your time correctly - you should arrive at the overnight site at least 30 minutes before sunset. Then, choose the right campsite, prepare it, and set up the tent. Here are some important snow camping hacks to follow.  Place a tent in a sparse forest, on the edge, in a gentle depression between ridges  Remove snow from the area of the tent + 0.5 m around, remove the top layers or clear to the ground if the snow is not deep  Build snow walls around the camp, especially in open areas  Use special elongated winter pegs, which can be replaced with trekking poles  Make an entry from the leeward side 4. Bring all your essentials into the tent Be sure to bring shoes, a backpack with food, a first aid kit and hygiene products, and gas cylinders inside the tent. Plus, put things like your phone and power bank in your sleeping bag. This way you will better conserve charge. If your trekking socks are wet, dry them too.  5. Ventilate your tent The only thing worse than waking up frozen on a hike is waking up cold and wet. It may seem counterintuitive, but opening tent windows for cross-ventilation is among the top priority cold-weather camping essentials. How does it work? When warm, moist air in your tent or RV meets cold surfaces such as tent walls or car windows, condensation occurs. Small droplets of water form and everything becomes wet. Therefore, ensure air circulation in your tent and prevent condensation by opening entrances and windows slightly. 6. Warm up before going to sleep Before you go to bed, warm yourself by the fire or take a walk - whatever you can to warm up. Having a warm drink or snack before bed can also help keep you warm since the process of digestion warms you up from the inside. Just try not to sweat. Wet clothing quickly lowers your body temperature and can contribute to condensation in your tent or camper. Avoid storing wet clothes in the sleeping area and always change into dry clothes before going to sleep. 7. Go to sleep in a dry change of clothes  Advice on how to sleep in a sleeping bag goes to one extreme or the other: some say to wear everything you can, others recommend sleeping in just your underwear. And the correct option is in the middle.  Winter survival techniques claim that thermal underwear is optimal for sleeping in a tent, ideally if it contains merino wool. You need to wear socks on your feet (maybe two pairs), thin gloves on your hands, and a thin hat and/or buff on your head. Provided that the sleeping bag and mat are suitable for the weather, this set will often be sufficient. If not, you can insulate yourself additionally.  Important! All sleepwear should be dry. Thus, be sure to change into a spare set before going to bed, and store it in a waterproof bag while hiking. 8. Use heating pads  A heating pad is definitely a must-have on a winter hike! That's why we advise you to stock up on such items. They are lightweight, easy to use, and provide gentle heat (about 50°C). You can choose among the following options:  Chemical heating pads. They are disposable, with enough heat to last all night and even in the morning (about 12 hours overall).  Reusable heating pads. Such items can radiate heat for about 2 hours. Then, you need to charge it by simply boiling it in water. A more advanced option is electronic heating pads with USB charging. Ultimately, use our winter survival techniques for your camping trip to Canada. Also, don't forget to adjust your plans to the current weather. The forecast can be changeable during the off-season, and you should be prepared for everything. This is especially important when traveling in mountainous areas, where rain and snow can make roads impassable. Read Also: Jet-Set In Style: Unveiling The Monos Luggage Collection For Your Next Adventure This Is The Best Time To Visit The Seven Magic Mountains In Vegas! These Are The 30+ Things To Do In Mexico City That You Must Try!

READ MORE Exploring Colorado As A Couple

Exploring Colorado As A Couple: 6 Cities You Should Not Miss

BY  Abdul Aziz Jan 14, 2023

The state of breathtaking landscape, endless outdoor fun opportunities, and history and culture truly make Colorado one of the most popular states in the country. International tourists, locals who want to find out more about this amazing state, and people looking for a new home – all agree on one thing, and that’s the fact that Colorado has it all. This state is particularly popular among couples, who want to have some fun and enjoy some astonishing views, but also check out potential places to settle down and start calling Colorado their home. To help you on your journey, we’ve made a list of the 6 cities you should not miss when visiting the Centennial State – check them out and start making the itinerary. Colorado For Couples: How It Feels Like Traveling With Your Significant One Traveling as a couple has so many more benefits than just getting to know Colorado as a state. This is also a way to work on your relationship and spend some quality time together. With the recent changes in lifestyle due to busy schedules and being surrounded by technology, spending time doing something meaningful has become incredibly important. When exploring Colorado as a couple you can improve your communication, get more intimate and learn more about each other, but also ignite romance and improve your sex life. Furthermore, exploring new cities is a great chance to see how you both like them as a potential new home, and maybe start making more serious plans about moving and starting a family. Colorado For Couples: You Must Not Miss Visiting These Places Colorado is one of the top 10 biggest states in the US, so it’s no wonder if you don’t know where to go on this journey. There are 6 cities you shouldn’t miss, though, as they are perfect for couples who want to have fun, but also learn more about this state. At Tour and Travel, we have curated places perfect for couples who want to have fun but also learn more about this state. 1. Denver, Colorado For Couples Let’s start with the most obvious item on this list – it’s Colorado’s capital, Denver. This is one of the fastest-growing cities in the country, and there are many reasons for it. The ‘Mile High City” is a place where you can’t miss good weather – it has over 300 days of sunshine per year. Place of cultural events, delicious food, and many museums, local breweries, and more. Even though it’s a cosmopolitan city, it has easy access to nature, and it’s surrounded by some of the most breathtaking sceneries. And for a more romantic turn on this visit, try places such as Home Sweet Dome, Gold Nugget Tree House, or Boulder Mountain Studio. If you decide you want to stay here for good, know that the area is well covered with professionals ready to help you out. Lakewood is one of the Denver suburbs favored by couples, and you won’t have trouble finding a hand here and making this place your home. 2. Fort Collins With just a short drive from Denver, you arrive in Fort Collins, one of the places you shouldn’t miss on your Colorado journey. The place of amazing local eateries, breathtaking views endless options for recreational activities. This city also has a vibrant nightlife, which is why many couples decide to stay a bit longer. You can also explore its picturesque old town, peep at charming local shops, and grab a beer from one of the local breweries. Finally, don’t forget to watch a football game at the CSU Canvas football stadium and feel the sports spirit of this lovely city. 3. Colorado Springs Even though it’s a bit smaller than Denver, Colorado Springs doesn’t offer fewer things to enjoy. Elevated at about 6,000ft, this place is rather unique and surely a must-visit place on your map. It’s perfect for couples who love outdoor activities and nature. You can go hiking and see spectacular rock formations of the Rocky Mountains, the Garden of the Gods park, Pikes Peak, Cave of the Winds Mountain Park, and or visit some of the numerous hot springs in the area. The city itself is filled with interesting spots such as Pioneer Museum, Cheyenne Mountain Zoo –`it. For a romantic stay, choose places such as Garden of the Gods Resort or the Broadmoor, where you can relax after a long day of sightseeing and have a dreamy stay with your significant other. Colorado Springs is actually one of the top choices for couples looking for a home in Colorado. Its amenities but also proximity to Denver make it very convenient for people who want to start a family here. .However, if you decide to relocate to Colorado Springs, make sure you work with experienced people who know the area well and can deal with your move easily. Don’t risk complicated relocation and potential moving frauds. 4. Durango Don’t be fooled by Durango’s size – this small place has a lot to offer. Apart from the historic gauge railroad, you can also come for some astonishing scenery, famous filming locations, historical places, and amazing food and beer.Durango is perfect for couples who enjoy skiing, hiking, and being surrounded by one-of-a-kind nature. 4. Loveland “Sweetheart City” is surely one of the cities you should not miss when exploring Colorado as a couple. If you’re an art lover, you’ll enjoy the City of Loveland, located in Larimer Country. It’s just a short drive from Denver, so don’t miss the chance to see its three sculpture parks, and if you’re here in the time of Valentine’s Day, you can participate in numerous events dedicated to all the lovebirds. 5. Aspen If you’re a winter lover, you’ve probably heard about Aspen, one of the top skiing destinations in the country. This is also one of the places you shouldn’t miss when exploring Colorado as a couple, as winter recreation can get pretty romantic here. There are four ski areas to choose from, but skiing is not the only activity you can do here. You can go fly fishing, hiking, and even do a romantic hot-air ballooning trip with your loved one. One thing is for sure – couples will enjoy everything Aspen has to offer, and this place can be a perfect way to finish this amazing Colorado adventure. 7. Aurora Aurora is a great place in Colorado to steal a kiss from your partner. It offers an eclectic experience in Colorado for couples. On the one hand, it has Stanley Marketplace, a gigantic food hall. On the other hand, it has Cherry Creek State Park. In fact, you can enjoy a special evening with your partner by watching musicals and entertaining events at Vintage Theater. The address of Vintage Theater is 1468 Dayton St, Aurora, CO 80010, United States. Also, you can contact them directly at +1 303-856-7830 to know about the ongoing productions.  Aurora Reservoir: The Highlight Of Visiting Aurora With Your Partner Another great place of attraction in Aurora is the “Aurora Reservoir.” Auro Reservoir is a hub of picnics, adventures, and many outdoor pursuits. You can take part in the following activities with your partner in Aurora. Swimming Boating Fishing Kayaking Paddle Boarding The views of sunrise and sunset here are very romantic. In December and January, the Aurora Reservoir Park remains open from 7 AM to 5 PM. In fact, every month has a different time of operation, and you must check with the authority by calling 303.739.7000.  Furthermore, as a tourist, you can buy a day pass to Aurora Reservoir. The pass will cost you between $10-15 based on the day you are visiting.  The Aurora Reservoir has been in focus recently due to the opposition to an oil and gas project near the Aurora Reservoir. STAR, or Save The Aurora Reservoir group, was behind this protest.However, despite the protest, the project of Lowry Ranch CAP continues as the Colorado Energy and Carbon Management Commission allowed the project in August 2024. The Save The Aurora Reservoir Group is now on a new mission, and they want to keep the actual drilling pads away from the community.  Read Also: The Best Resort Spa & Wellness Island Experience! 7 Key Points To Remember While Planning Your Honeymoon Trip What To Consider When Choosing Vacation Destinations For Families