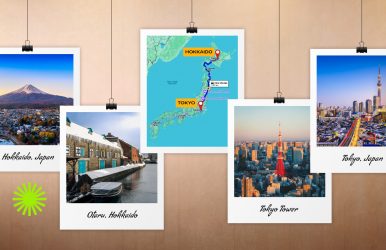
Winter Camping In Canada: Tips For Cold-Weather Adventures

Nov 20, 2023

Last Updated on: Nov 10, 2025

Travel Guides

There are many reasons to travel to Canada in winter. You might have heard people immigrating to Canada for business and job purposes. They provide better opportunity for the young generation with better life style. However, if you are focusing on that part, you need immigration advice before you take further steps. You can set off to iconic mountain resorts, visit a Christmas market, or spend time at an ice rink. At the same time, even more adventures await you if you are ready for winter camping. 

The list of perfect cold-weather destinations in Canada is simply endless. Snow-covered Banff National Park in Alberta, untouched nature in the Northwest Territories, and mind-blowing Mont-Tremblant in Quebec to name a few. You will certainly appreciate the silent beauty of the snowy forest in February and January, especially at sunset or dawn. 

So, it would be great to pick up a car rental in Toronto and go towards a winter fairy tale. A large selection of Toronto Airport car rental deals allows you to find the perfect vehicle for your needs. If you are traveling with family or friends, consider a more spacious option – car rental for 7 people will be a balanced solution for your icy ride. 

However, winter camping in Canada is as dangerous as it’s exciting. Low temperatures can cause hypothermia and the most severe consequences for your body. Thus, such experience requires a particularly careful approach.

Here are a few cold-weather adventure tips to keep in mind before embarking on such an outing. 

1. Use a layered clothing strategy 

When it’s hot during the day and cold at night, you need to carry a variety of outfits with you to stay comfortable at all times. Layering is one of the best ways to stay dry and warm without overheating. 

Layering is an art and once you master it, you can easily regulate your body temperature depending on your activity level and weather changes. Using layers correctly allows you to add or subtract layers throughout the day so you feel comfortable no matter what. 

Start with wool or synthetic thermal underwear. Also, avoid cotton. Cotton absorbs moisture and loses all its insulating properties when you sweat, making you feel much colder. The job of thermal underwear is to wick sweat away from your body and keep you dry and warm. 

Thus, apply insulating layers such as a fleece, light down jacket, or synthetic jacket as your middle layer to help keep you warm. The greater the middle layer retains heat, the better. Finally, cover the previous two layers with a windproof jacket with a waterproof membrane to keep you warm. 

The outer layer also serves to remove moisture evaporated from the body. Don’t skimp on a high-quality outer layer if you expect to encounter some serious wind and rain. If it doesn’t cope with its functions, you can become seriously hypothermic.

Use a layered clothing strategy 

2. Make sure your sleeping bag can handle low temperatures 

Canadian winter camping expeditions require a sleeping bag – this is the golden rule for a hassle-free overnight stay. The temperature label on your sleeping bag can be confusing. For example, if your sleeping bag can withstand +5°C, this doesn’t guarantee that you will feel warm at +5°C. The fact is that sleeping bags have two temperature conditions: a temperature at which a tourist should feel comfortable, and a lower temperature limit at which a sleeping man should feel comfortable. 

Temperature values are approximate and depend on multiple factors. Just in case, take a sleeping bag rated for temperatures 5–10°C below expected degrees. You can also add an extra blanket over your sleeping bag to help keep you warm.

3. Select and prepare a place to pitch your tent 

Setting up a camp in winter is much more difficult than in summer, so first of all, plan your time correctly – you should arrive at the overnight site at least 30 minutes before sunset. Then, choose the right campsite, prepare it, and set up the tent. Here are some important snow camping hacks to follow. 

  • Place a tent in a sparse forest, on the edge, in a gentle depression between ridges 
  • Remove snow from the area of the tent + 0.5 m around, remove the top layers or clear to the ground if the snow is not deep 
  • Build snow walls around the camp, especially in open areas 
  • Use special elongated winter pegs, which can be replaced with trekking poles 
  • Make an entry from the leeward side

4. Bring all your essentials into the tent

Be sure to bring shoes, a backpack with food, a first aid kit and hygiene products, and gas cylinders inside the tent. Plus, put things like your phone and power bank in your sleeping bag. This way you will better conserve charge. If your trekking socks are wet, dry them too. 

 Bring all your essentials into the tent

5. Ventilate your tent

The only thing worse than waking up frozen on a hike is waking up cold and wet. It may seem counterintuitive, but opening tent windows for cross-ventilation is among the top priority cold-weather camping essentials. How does it work? When warm, moist air in your tent or RV meets cold surfaces such as tent walls or car windows, condensation occurs. Small droplets of water form and everything becomes wet. Therefore, ensure air circulation in your tent and prevent condensation by opening entrances and windows slightly.

6. Warm up before going to sleep

Before you go to bed, warm yourself by the fire or take a walk – whatever you can to warm up. Having a warm drink or snack before bed can also help keep you warm since the process of digestion warms you up from the inside. Just try not to sweat. Wet clothing quickly lowers your body temperature and can contribute to condensation in your tent or camper. Avoid storing wet clothes in the sleeping area and always change into dry clothes before going to sleep.

7. Go to sleep in a dry change of clothes 

Advice on how to sleep in a sleeping bag goes to one extreme or the other: some say to wear everything you can, others recommend sleeping in just your underwear. And the correct option is in the middle. 

Winter survival techniques claim that thermal underwear is optimal for sleeping in a tent, ideally if it contains merino wool. You need to wear socks on your feet (maybe two pairs), thin gloves on your hands, and a thin hat and/or buff on your head. Provided that the sleeping bag and mat are suitable for the weather, this set will often be sufficient. If not, you can insulate yourself additionally. 

Important! All sleepwear should be dry. Thus, be sure to change into a spare set before going to bed, and store it in a waterproof bag while hiking.

Go to sleep in a dry change of clothes 

8. Use heating pads 

A heating pad is definitely a must-have on a winter hike! That’s why we advise you to stock up on such items. They are lightweight, easy to use, and provide gentle heat (about 50°C). You can choose among the following options: 

  • Chemical heating pads. They are disposable, with enough heat to last all night and even in the morning (about 12 hours overall). 
  • Reusable heating pads. Such items can radiate heat for about 2 hours. Then, you need to charge it by simply boiling it in water. A more advanced option is electronic heating pads with USB charging.

Ultimately, use our winter survival techniques for your camping trip to Canada. Also, don’t forget to adjust your plans to the current weather. The forecast can be changeable during the off-season, and you should be prepared for everything. This is especially important when traveling in mountainous areas, where rain and snow can make roads impassable.

Read Also:

Share on Social Media

Arnab is a professional blogger, having an enormous interest in writing blogs and other jones of calligraphies. In terms of his professional commitments, He carries out sharing sentient blogs.

Leave a Reply

Your email address will not be published. Required fields are marked *

title-img Related

READ MORE Saguaro National Park

The Hiking Trails In Saguaro National Park Are Calling! Pack Your Bags

BY  Sibashree Aug 12, 2024

Saguaro National Park has a massive footfall every year thanks to its delightful trails, mountains, and endless species of cacti. Despite being a favorite of hikers and equestrians, this park is also a delightful destination for family trips.  Further, exuding the essence of the Sonoran Desert, Saguaro National Park in Arizona is also home to creatures like the Gila monster, mountain lions, desert dogs, and coatis.  So, are you planning a vacation between October and April? Pack your bags and visit the trails and desert land in Saguaro National Park.  Know The Best Trails In Saguaro National Park The Saguaro National Park is divided into two sections, east and west. The east side has the more intriguing trails, whereas the trails in the west offer the most amazing scenic beauty.  Along with desert and mountain trails, you will also be able to go for short walks and explore the natural trails filled with cacti and saguaros.  So, let’s know the trails in the Rincon Mountain District in the east and Tucson Mountain District in the west.  Best Hikes In Saguaro National Park East (Rincon Mountain District) If you want to experience the pristine beauty of Saguaro National Park, your road must lead to the east. This side of the park has fewer tourists and old vegetation of cacti and saguaros. Also, are you an early bird? You can enjoy the best Sunrise view from the Saguaro Eastern trails.  Hope Camp and Ridgeview Trail Distance: 2 miles This trail is famous for the best views of the Rincon Peak and has an elevation of 400 feet. Toward the end of the trail, all your strain will be gone as you discover vibrant wildflowers and beautiful panoramic views.  As the trail ends at the top, the Box Canyon will appear before your eyes. If you are in the park during the wet season, the view of the waterfalls will give you the most fulfilling experience.  Freeman Homestead Trail Distance: 1 mile An old homestead foundation, large saguaros, and a desert wash are the highlights of Freeman Homestead Trail.  You can call this a “home in the desert,” and it is related to plant life and history. This Saguaro National Park East trail is one of the favorites of youngsters.  Loma Verde Loop Distance: 3.8 miles The Loma Verde Loop comes with a 60-feet elevation. The presence of mature mesquite trees along the trail gives the space a gothic vibe.  Here, you will cross a seasonal wash and climb onto bajada (Spanish), a gravel land at the mountain base.  Next, you will have to cross the Loma Verde Mine and continue through the Pink Hill Trail. Wait a while and keep hiking in a minor spur trail, offering a mesmerizing view of the cactus vegetation.  Further, take a right turn on the Pink Hill Trail and also take a right turn on the Squeeze Pen Trail. Finally, take a left on the Loma Verde Trail to head back to the trailhead.  As you can see, a lot of twists and turns await throughout the loop. So, keep a topographical map handy.  Garwood Dam and Wildhorse Tank Distance: 6.4 miles Garwood Trail is one of the best routes for you if you have come to the park to see cacti. As you take the steep section of the trail, you will visit Garwood Dam, built by Nelson Garwood.  Continue your journey through the switchbacks until you reach a ridge with the most amazing views.  Further, as you cross the ridge, you will find Wildhorse Trail. Turn right and take a steep of 0.3 miles to reach the Wildhorse Tank.  Tanque Verde Ridge Trail  Tanque Verde Ridge Trail is one of the most strenuous hiking routes in this National Park because the distance and elevation of the trail keep varying. The highest point in the trail is the Tanque Verde Peak, which is 7049 feet high.  However, as you advance through the route, you will get to see the most exciting views. Further, when you reach the top of the ridge, you will find many other ranges in the north, south, and west. The Tucson Basin also becomes visible from the ridge top. In addition, don’t forget to take snaps of “the Dome,” a “crested saguaro,” and the unique views.  Best Trails In Saguaro National Park West (Tucson Mountain District) Tuscan Mountain District has the largest cacti in the USA. This large saguaro is acknowledged as the universal symbol of the American West.  Hike through the trails in the west to meet a variety of cacti and the most amazing Sunset views.  King Canyon Trail Distance: 3.5 miles The King Canyon Trail ascends to the Hugh Norris Trail. Watch out for the stair-step-like rock formations in the wash bottom.  Hugh Norris Trail  Distance: 4.9 miles Hugh Norris Trail is the most delightful among other trails in the park. It leads to the Wasson Peak, the highest spot in the Saguaro National Park.  Along with scenic beauty, the rocks of various formations will grab your attention throughout the trail.  Sendero Esperanza Trail Distance: 3.2 miles Sendero Esperanza Trail hiking is a little arduous thanks to the constant ascends and descends. However, it is one of the most beautiful trails in the park.  Cam-Boh Trail Distance: 2.7 miles  Cam-Boh Trail works as a connection between the eastern and western trails of Tucson Mountain District. Further, it is a favorite of hikers for its connectivity to many hiking loops. You can also enjoy a horse ride through the trail.  Ringtail Trail Distance: 1 mile Ringtail Trail connects you to many other trails on the eastern side of the Tucson Mountain District. The trail can get moderately steep.  Sweetwater Trail Distance: 3.4 miles  If you want to visit the Wasson Peak from the east of the Tucson Mountains, you will have to take the Sweetwater Trail.  The trail starts at  El Camino del Cerro Road’s western end.  Cactus Wren Trail  Distance: 1.5 miles  This one-way trail stretches to the Signal Hill Picnic Area, a favorite of localities for family trips. You can start your journey from the “Sandario Road and Rudasill Road” corner.  You will see many desert washes on the trail.  Short Walks And Nature Trails In Tucson Mountain District The short walks and nature trails of the national park will make you familiar with the local ecosystem. Get ready to explore the following trails replete with various cacti.  Cactus Garden Trail - 100 yards Desert Discovery Trail - 0.5 miles Valley View Overlook Trail - 0.8 miles Signal Hill Petroglyphs Trail - 0.5 miles Organpipe Cactus, Pink Hedgehog, and Claret Cup Cactus are some of the most popular cacti species found across these trails.  Final Words  Saguaro National Park had more than 1 million (1,010,906) visitors in 2023. The easy trails with the best scenic views and the diversity of cacti here consistently attract visitors to this park. In the last five years, the park has welcomed more than a million visitors three times.  Perri Spreiser, the district ranger for interpretation at Saguaro’s Rincon Mountain District, has rightly said, “We are no longer a small park.”  The increasing popularity of the park has left a positive impact on the local community. They are proud of the park and ensure that everything is quiet and serene in the park. The park owes much of its popularity to the pristineness of its beauty. The local community does not want to ruin it. Do you want to explore beautiful desert trails, and are you a cacti-enthusiast? It’s time to pack your back and take a drive to the land of saguaros. Or have you already been to this wonderful national park that was designated in 1994? Don’t forget to share your experience with us.  Saguaro National Park FAQS  Is Saguaro National Park Worth Seeing? Yes, Saguaro National Park is worth seeing, as you can see the most amazing cactus and saguaros here. The place has a distinct rugged charm with flat desert and rocky mountains.  You can hike through the trails and enjoy the most beautiful Sunset views in the park.  How Many Trails Are In Saguaro National Park? Saguaro National Park has as many as 78 trails spreading across 200 miles. A combination of flat deserts and rocky mountains, Saguaro National Park, is a great place for hiking with family and beginners.  What Is The Most Scenic Trail In Saguaro National Park? Hugh Norris trail leading to the Wasson Peak, the highest point of the Tucson Mountains District of Saguaro National Park, is the most scenic trail.  You have to travel through a dense forest, and as you advance toward the peak, you will find a rocky landscape. You can enjoy an expansive view of the Sonoran Desert as you explore through this trail.  Opuntia, echinocereus, and barrel cacti are the most amazing cactuses found on this trail.  What Is The Best Place To See Sunset In Saguaro National Park? Saguaro National Park West is the best place to see the Sunset. You can enjoy the most beautiful view from Gates Pass, which is at the western end of Speedway Boulevard.  In Saguaro National Park East District, the Sunset looks most beautiful as you explore the  Tanque Verde Ridge trail. Javelina Rocks pull-out is another great spot to watch Sunset in the East District.  How To Spend One Day In Saguaro National Park West? A day in Saguaro National Park West will be filled with activities. Camping and hiking are the most adventurous activities here to explore.  The Tucson Mountain District is on the west side, and your trip to the west starts with the Red Hills Visitor Center. The west side of the national park has many cacti and large saguaros.  Also read Why Include Whale Watching In Your LA Itinerary. Traveling On A Budget: Tips For Affordable Adventures. From Cocktails To Kickflips: Must-Try Activities In San Diego.

READ MORE certified translation for immigration

How to Navigate Visa & Immigration Translations When You Travel Long-Term

BY  Sibashree Oct 22, 2025

Traveling long-term or moving abroad is an exciting adventure. But if your journey involves applying for visas, immigration permits, or residency, you’ll quickly discover that documentation is one of the biggest hurdles. Among the most common requirements are visa translation services and certified translations of official documents. Whether you are applying for a student visa, a work permit, or reuniting with family overseas, presenting correctly translated documents can make or break your application. Authorities want clear, accurate, and verifiable translations, and failure to meet those standards often leads to delays or even rejections. This guide explains everything you need to know about visa and immigration translations, including why certified translations are required, what documents usually need them, and how to avoid common pitfalls. Why Visa Translations Are Crucial When immigration officers review applications, they must be able to fully understand the documents submitted. If your birth certificate, marriage certificate, or bank statement is in another language, it must be translated into the official language of the country you are applying to. Here’s why translations are necessary: Legal clarity: Immigration authorities cannot legally assess documents they don’t understand. Consistency: Translations ensure names, dates, and details match across multiple documents. Compliance: Many countries require certified translations to confirm that translations are accurate and complete. What Are Certified Translations? Not all translations are equal. For immigration, you need certified translations. A certified translation includes: A complete and accurate translation of the original document. A signed statement (certificate of accuracy) by the translator or translation company confirming the translation’s authenticity. Contact details of the translation provider for verification if needed. This certificate is essential because it gives immigration officers confidence that the document is trustworthy and complies with their standards. Common Documents That Require Certified Translations When applying for visas or residency, the following documents are often requested in translated form: Birth certificates Marriage or divorce certificates Death certificates (in cases of dependent claims) Passports and ID cards Academic transcripts and diplomas Criminal record checks Medical records or vaccination certificates Bank statements and tax returns Employment contracts or pay slips Before submitting your application, carefully check the requirements of the immigration authority you are applying to, as these can vary from country to country. How to Handle Certified Translations for Visa Applications If you are preparing for long-term travel or immigration, here’s how to approach the translation process: Identify which documents need translationReview the checklist from the immigration authority. Don’t assume that only personal records need translation—financial and academic documents are often required too. Choose a reliable certified translation providerLook for services that are recognized by immigration authorities. For example, Certling offers certified translations accepted by USCIS in the U.S., UKVI in the U.K., and IRCC in Canada. Submit clear scans or photos of your documentsHigh-quality images prevent errors and ensure no details are missed in the translation. Check turnaround timesVisa applications often have strict deadlines. Many providers offer standard and express delivery options—use express services if you’re short on time. Verify acceptance guaranteesEnsure the translation provider guarantees compliance with immigration authorities. This gives peace of mind if your documents are ever questioned. Innovation in Visa Translations The translation industry has modernized significantly. Companies like Certling use AI and machine vision to analyze documents, count words instantly, and provide transparent per-word pricing. This innovation eliminates overcharging based on per-page pricing models and saves applicants money. Other key advancements include: Selective translation tools: Applicants can exclude unnecessary sections of documents, such as logos or stamps, lowering costs. Secure file handling: Professional providers use encrypted systems and delete documents after delivery to protect your data. Instant online quotes: You can now upload documents and get pricing within seconds, reducing guesswork. FAQs on Visa & Certified Translations Do I always need certified translations for visa applications? Yes, in most cases. Immigration authorities typically require certified translations of any foreign-language documents. Can I translate the documents myself? No. Self-translations are not accepted. Certified translations must come from a qualified translator or company. How long does the process take? This depends on the provider. Standard services may take a few days, while express options can deliver certified translations within 24 hours. What happens if immigration rejects my translation? Reputable companies often provide corrections or revisions free of charge if authorities raise issues. Certling, for example, includes this as part of their service. Are digital copies of certified translations acceptable? Yes, many immigration authorities now accept certified translations in PDF form. However, some may request physical copies, so confirm with your local authority. The Role of Certified Translation Services in Your Journey Securing a visa or residency isn’t just about submitting the right forms. It’s about presenting complete, clear, and compliant documentation. Certified translation is a critical part of this process. Providers like Certling specialize in certified translations for immigration and visa applications. They offer word-based pricing, fast turnaround, and acceptance guarantees for major authorities across the U.S., U.K., Ireland, and Canada. While your focus may be on the exciting parts of long-term travel, taking care of certified translations early ensures your journey won’t be delayed by paperwork. Final Thoughts Navigating the visa application process can be overwhelming, especially when traveling long-term or moving abroad. Certified translations are not just a formality—they are a legal requirement that can significantly affect your success. By understanding what certified translations are, why they matter, and how to get them done correctly, you’ll be better prepared to handle the complexities of immigration paperwork..

READ MORE Rome to amalfi coast

What Is The Rome To Amalfi Coast Distance? How To Reach Amalfi Coast From Rome? 

BY  Sibashree Mar 13, 2026

Traveling from Rome to Amalfi Coast is easy thanks to the availability of diverse public transportation.  So, if you want to give the notorious crowd in the Italian capital a miss, you can choose the enchanting coast.  Here is more about traveling the Rome to Amalfi Coast distance of around 278 km.  A Few Things To Remember Before Planning A Rome To Amalfi Coast Trip  If you are a first timer, you may find reaching the Amalfi Coast difficult. Also, the distance of 278 km may seem massive.  However, as I have mentioned, thanks to a well-connected network of public transport, you will travel the distance in less than 4 hours.  Having said that, you have to keep certain things in mind if you are planning a Rome to Amalfi Coast trip for the first time.  1. Avoid A Rome To Amalfi Coast Day Trip  Firstly, a day trip from Rome to the Amalfi Coast is not a suitable option. You will lose a lot of time traveling if you are planning a day trip or a round trip.  Instead, you can use the time to explore the beautiful villages on the Amalfi Coast.  Remember, it is the prettiest coast in Italy, one of the best summer destinations in Europe, and a UNESCO World Heritage Site.  Moreover, the Amalfi Coast is one of the best beaches in Naples, Italy.  So, it deserves a little more of your time. Also, if you want to fuse the rich coastal experience with luxury, you can stay at any of the Le Collectionist villas.  2. Travel In The High-Speed And Intercity Trains  Now, TheLowDownUnder Travel inspires me always. So, of course, I would recommend enjoying the journey from Rome to Amalfi Coast in a high-speed or intercity train.  These trains are the cheapest, most convenient, and they offer a culturally rich experience.  Also, around 58 high-speed trains ply from Rome to Salerno daily, and you have multiple options in intercity trains.  So, you can travel at a convenient time.  However, if you want to travel in a high-speed train, you must book the tickets a day before. Otherwise, the tickets for your chosen slot may become unavailable, or the ticket price can shoot up.  3. Enjoy A Ferry Ride From Salerno  If you are traveling from Rome, Salerno is the most convenient gateway to exploring the Amalfi Coast.  You will get the Sita buses easily from Salerno to reach the beautiful villages on the coast.  However, to make the journey unforgettable, you can try this trick.  The Salerno Railway Station, or Stazione di Salerno, is located at a distance of just 900 meters from the Piazza della Concordia or tourist port.  You can take a short walk for 10 minutes and then board Travelmar ferries to explore Amalfi by sea.  Multiple ferry rides are available on this route, and the ticket price is just 12,00 € for an adult.  4. Traveling From The Fiumicino Airport To The Amalfi Coast  If you are traveling from the Fiumicino Airport, you have to first reach the Roma Termini Station.  So, take the Leonardo Express, available every 15 minutes. Moreover, the ticket price is just 14 Euros.  Bus services such as Terravision and Sit Bus Shuttle are also available on this route. However, these take longer due to the city traffic. How To Travel From Rome To Amalfi Coast?  You can travel from Rome to Amalfi Coast by train via Salerno. Otherwise, you can rent a car or drive a private vehicle to reach the Amalfi Coast from Rome via Naples.  Here are more details.  1. Traveling From Rome To Amalfi Coast By Train  As I have mentioned, traveling by the intercity or high-speed trains is the best option for a trip to the Amalfi Coast from Rome.  Italia Rail has enlisted 58 high-speed trains on the route, and they help you cover the distance in just 1 hour and 26 minutes.  Moreover, the ticket price for these train rides starts from $12.  Furthermore, Rail Europe runs multiple trains on this route, and the first one leaves Rome at 6:26 AM and reaches Salerno at 9:23 AM.  Also, the fastest Rail Europe train on this route leaves at 7:30 AM and reaches at 9:05 AM.  The ticket price for these trains ranges between 25 and 59 Euros.  2. From Rome To Amalfi Coast Via Salerno  From Salerno railway station, you can walk for five minutes and find the Sita Bus Terminal. Also, from here, you will find buses to all the towns on the Amalfi Coast.  However, these buses are very busy during the summer months.  So, for a more peaceful and comfortable journey, you can reach the Piazza della Concordia.  From there, you will get ferries to the Amalfi Coast. The first ferry starts from Salerno Concordia at 8:40 AM and reaches the Amalfi Coast at 9:15 AM.  Moreover, the average time for this ferry ride is between 35 minutes and 1 hour and 10 minutes. Also, the ticket price is just 12 Euros.  3. From Rome To Amalfi Coast Via Naples  As an alternate route, you can take a train from Rome (Roma Termini) to Naples (Napoli Centrale). The high-speed trains are available from 7 AM to 9:53 PM in regular intervals.  Furthermore, the travel time is between 1 hour and 8 minutes and 2 hours and 11 minutes. Also, the ticket price for the high-speed trains is between 49 and 52 Euros.  Moreover, from Napoli Centrale, you can take the Circumvesuviana train to Sorrento. It departs from Piazza Garibaldi, the lower level of Napoli Centrale.  The travel time by this train is between 1 hour and 15 minutes and 1 hour and 30 minutes. Also, the ticket price is about 4 Euros.  Once you reach Sorrento, explore the beautiful coast and then take a Sita bus ride to Positano on the Amalfi coast.  Rome To Amalfi Coast Distance: Frequently Asked Questions (FAQs) Here are the frequently asked questions and answers about the Rome to Amalfi Coast distance. 1. Is There A High-Speed Train From Rome To The Amalfi Coast? Yes, around 58 high-speed trains are available from Rome to Salerno, the gateway to the Amalfi Coast. Thanks to these high-speed trains, you can now travel a distance of more than 200 kilometers in less than an hour. Moreover, the ticket price starts from just 12 Euros. 2. Is It Worth Going To Amalfi Coast From Rome? Yes, you must travel from Rome to the Amalfi Coast if you want to experience the iconic coastal life of Italy and its food. However, if you want a more relaxed itinerary, the Amalfi Coast can only suit you when you have at least 2 days for the trip. A day trip to the Amalfi Coast is exhausting. 3. How Far Is Amalfi From Rome By Plane? A flight journey from Rome to the Amalfi Coast takes around 50 minutes, and daily flights are available on this route. Moreover, ITA Airways, Air France, and Lufthansa are some of the main airlines operating on this route. Also, the flight ticket costs between 132 Euros and 4000 Euros.