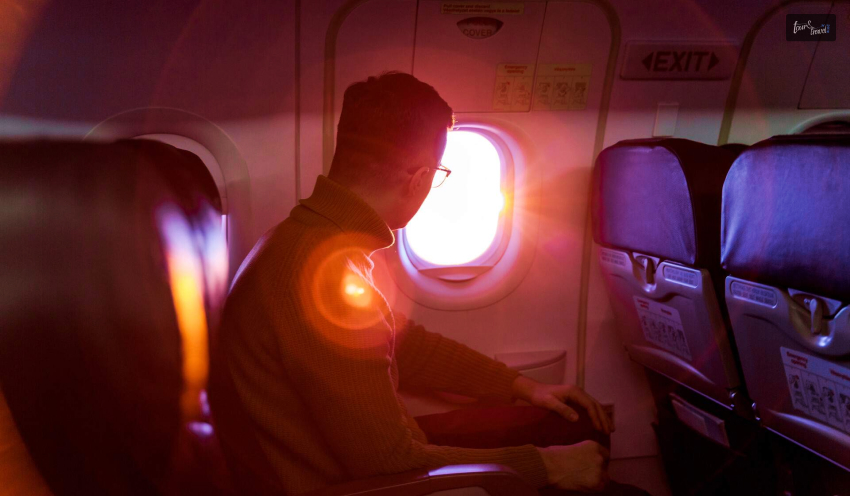
Red eye flights are those overnight journeys that take off late in the evening and land in the morning.
Now, you might be one of those travelers for whom this means sacrificing a good night’s sleep. this, which can lead to that telltale fatigue. And, of course, you will get red eyes after landing.
Interestingly, these flights tend to be longer and are more common in regions outside the Western world.
This is largely because many airports have strict curfews that limit flight schedules, like in:
Europe
Australia
North America
That said, it’s not like airlines in the Western world shy away from red-eye flights entirely. In fact, when it comes to westbound transatlantic routes, red eyes have become something of a standard among both European and American carriers.
In this article, I’ll dive into the reasons why red eye flights exist and will weigh their pros and cons. By the end, you’ll feel like you’ve experienced what it’s like to take a red eye flight for yourself!
What Is A Red Eye Flight?
Whether you enjoy these nighttime hauls or not, red eye flights are quite a regular thing for people flying long distances.
They depart from their home terminal at night and reach their destination in the morning.
They are so named because of the physical toll it takes on the passengers, causing them to get red eyes.
Most of these red eye flights take off when flying to the east side. For instance, when you fly from Los Angeles to New York or from New York to London.
But there are exceptions to such flights, such as when you are flying north or south between long distances.
For example, if you fly between North and South America or Europe and Africa.
The whole idea behind red eye flights is to save daylight and maximize your time spent at home and at your destination.
Flying through the night helps you avoid losing a day in travel. It also helps save money spent on a night stay at a hotel. They are cheaper than day flights, too, making it a cost-effective option for budget travelers.
In some cases, there are actually no other options but to take a red eye flight because your origin and destination do not have day flights to begin with.
My Red Eye Flight Experience From Bahrain To London
kayak.com
Recently, I had the experience of taking three flights for one destination. I flew three different classes of travel on a single ticket.
I bought a Premium Economy round-trip ticket from London to Bahrain ten months before my flight. In this firsthand red eye flight experience, I will share my pretty good experience with Lufthansa during my return journey from Bahrain to London Heathrow, which involved a layover in Riyadh.
The expenses of Lufthansa flights to the Middle East did not follow a linear increase as the departure day approached. I have included two charts below to show how the price of my flight changed leading up to the day of departure and after the flight’s schedule was revised.
Lufthansa operates a daily flight from its ground base in Frankfurt to Bahrain International Airport with a layover in Riyadh.
This is a usual setup as it’s a daily flight to Dammam via Kuwait. So, I couldnt book Both Bahrain-Riyadh and Kuwait-Dammam as fifth freedom flights.
Intriguingly, Lufthansa continuously adjusts its schedule for destinations in the Middle East. According to Routes Online, Lufthansa would originally fly to Bahrain via Doha in 2014, but it stopped in 2015 when services to Doha were renewed and and operations to Muscat instead.
Before Lufthansa stopped all flights to Doha in 2017, they operated Frankfurt-Kuwait-Doha flights. In 2017, flights to Bahrain were via Dammam, and in 2018, they were via Kuwait. When I bought my ticket in August 2018, my planned route was Heathrow-Frankfurt-Kuwait-Bahrain, but it changed to Heathrow-Frankfurt-Riyadh-Bahrain in September 2018.
Lufthansa used to operate Riyadh as a non-stop flight without onward legs in 2015, but after discontinuing Doha in 2017, they started flying Frankfurt-Riyadh-Dammam while also initiating flights to Bahrain via Kuwait. However, things were changed again in 2018.
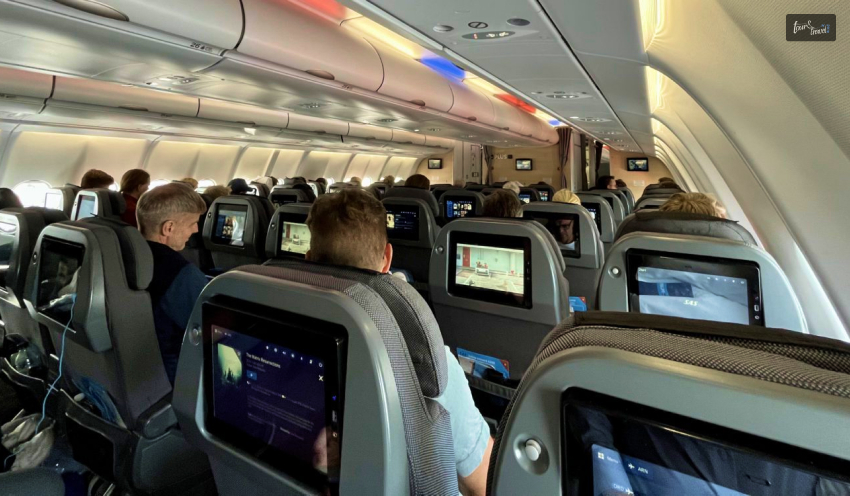
Flight 1: Premium Economy, Bahrain To Riyadh
thriftytraveler.com
When I was at Bahrain International Airport via Uber, I made it through passport control and security within 15 minutes.
The aircraft assigned for the flight was D-AIKN, which is an A330-343X. Boarding began at 23:20.
This was slightly late, but it didn’t matter since only 20 passengers were boarding the red-eye flight A330.
In fact, the gate push-off time was 11.42 pm, eight minutes early. The Premium Economy section of the plane had four rows with seven seats each.
There were only seven passengers, resulting in a load factor of 25% in this segment.
The legroom was spacious enough, allowing the passenger in front to recline without any pressure on the person seated behind.
The amenity kit for the Premium Economy included a toothbrush and toothpaste, a refreshment towel, a sleeping mask, earplugs, and a thick pair of socks.
Although the earplugs were weak and the face mask didn’t isolate light fully, the socks were comfortable. The IFE system was not as good as Emirates’, but it had decent options.
One of the few features was live GPS tracking of the aircraft. During the Bahrain-Riyadh journey, they played the movie “100 Things,” a 2018 German film.
Despite leaving Bahrain eight minutes early, the plane arrived in Riyadh five minutes late, as we had to wait for other people to vacate our gate.
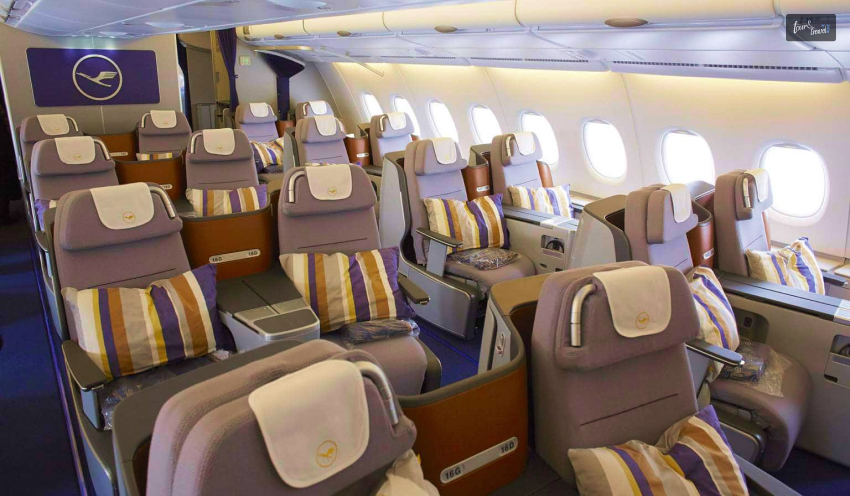
Flight 2: Business Class, Riyadh To Frankfurt
onceinalifetimejourney.com
During the second flight from Riyadh to Frankfurt, since it wasn’t a fifth freedom flight, passengers traveling to Frankfurt from Bahrain were not required to leave the aircraft in Riyadh.
After being told to stay seated for ten minutes while they were refueling the plane, a representative from Lufthansa’s Riyadh airport asked me to follow him into Business.
They gave me seat 10H since the Premium Economy and Economy classes were ready to fill up with passengers for the Riyadh-Frankfurt flight.
The flight from Riyadh to Frankfurt was entirely full in Economy, Premium Economy, and Business.
The headphones provided by Lufthansa in Business were exceptional, as they blocked out all noise.
The sound quality from the IFE was also excellent, allowing me to sleep soundly. They attached the headphones to the seat, so I couldn’t remove them.
My red-eye flight departed from Riyadh King Khalid at 2:10 am, 15 minutes late, and arrived in Frankfurt at 7:14 am, one minute early. The average delay for the flight LH637 is ten minutes.
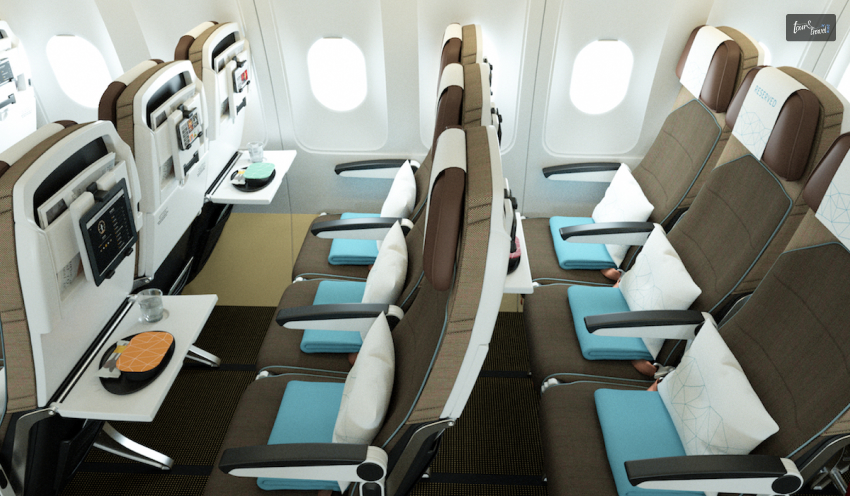
Flight 3: Economy, Frankfurt To London Heathrow
aircraftinteriorsinternational.com
Regrettably, the last flight of my three-flight sequence was delayed despite arriving early from its previous flight.
The reason for the delay was that the aircraft, which was Lufthansa’s first A320neo with the registration D-AINC, took over an hour to clean.
Although I managed to secure an emergency exit row window seat, which I chose for free during check-in, the legroom on short-haul flights with Lufthansa was a bit disappointing for me.
Moreover, the sandwich served on the flight contained cream and cheese, which was not suitable for me as I do not eat dairy. Unfortunately, there were no alternative options available for me.
Another slight disappointment was that I didn’t get any water from the crew before takeoff. So, I had to wait for a long time before we took off due to the delay.
The flight was full in Economy and Business class, and despite the plane being on time on average, we arrived 40 minutes late at our destination in London after pushing off from Frankfurt 29 minutes late.
Additionally, we spent a considerable amount of time circling around London. It was not a big inconvenience, but the service was not as good as my previous flights with Lufthansa.
However, I must acknowledge that Lufthansa quickly and smoothly compensated me with 600 Euros for the missed connecting flight during my outbound journey.
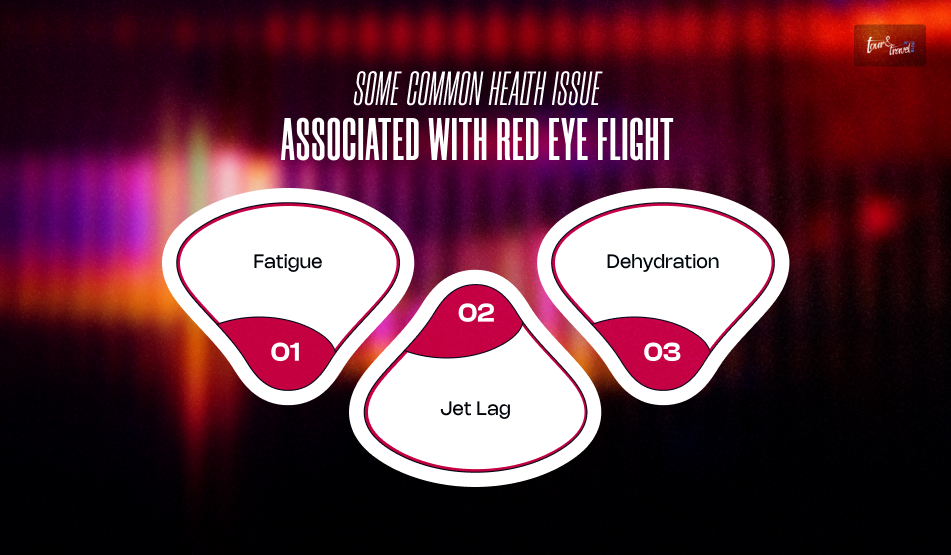
What Are Some Common Health Issues Associated With Red Eye Flight?
When it comes to red-eye flights, there are definitely some health concerns to keep in mind.
The term “red-eye” highlights the common experience of passengers landing with bloodshot eyes, often from feeling exhausted, dealing with jet lag, and battling dehydration.
1. Fatigue
strikes when you can’t get a decent night’s sleep. Unfortunately, finding that restful sleep on a plane can be quite challenging without taking some extra steps to make it comfortable.
2. Jet lag
It is something we typically think of with quick shifts in time zones, but it hits even harder on overnight flights. However, if you’re savvy about your body’s internal clock, you may be able to ease some of the negative effects of jet lag during these journeys.
3. Dehydration
It’s not as rare as you might think on flights. While cabin crew are usually attentive to serving food and drinks, red-eye flights might have fewer staff on duty, making it tougher to stay hydrated when you need it most.
If you often find yourself on these overnight flights, it’s important to be aware of the potential long-term health implications.
Regularly missing out on good sleep can weaken your immune system and lead to serious issues like sleep disorders, depression, and even an increased risk of heart attacks and cancer.
So, while those red-eye flights can be convenient, it’s wise to take care of your well-being.
Which Class Should You Choose While Opting For Red Eye Flight?
When it comes to red-eye flights, the health risks might sound pretty daunting, but thankfully, there are some effective ways to cope with them.
One of the most crucial steps you can take for your well-being during a night flight is to select the right class.
Sure, economy tickets can save you some cash, especially on these overnight flights, but there’s a reason they’re cheaper.
The lack of comfortable seating can make it really tough to catch some quality sleep. Plus, the passengers usually cram the economy sections, which only adds to the noise and can disturb your rest.
On the other hand, if you opt for business or a higher class, you’ll find much better seating and more appropriate lighting, and flight attendants who will cater to your needs by:—
Serving meals
Providing pillows
Helping you stay hydrated
You can manage some of these comforts on your own. Stil, I would say that investing in a better class ticket can definitely make a difference in how well you handle that long, overnight journey.
Frequently Asked Questions (FAQs)
1. Are Red Eye Flights More Dangerous?
No, red-eye flights are not inherently more dangerous than daytime flights in terms of safety; if anything, they are generally safer due to less air traffic and pilots flying more on instruments.
2. Are Red Eye Flights Cheaper?
Yes, red-eye flights are often cheaper because airlines price them lower to fill planes during off-peak overnight hours. This makes them attractive to budget-conscious travelers.
3. Is Red Eye Flight Booking Difficult?
Not at all. You can just visit an airline’s website or a flight comparison site. Then, you have to enter your origin and destination. Finally, you can filter for flights departing after 9 PM and arriving early the next morning.
Get Ready For Your Upcoming Red Eye Flight!
Honestly, their customer service impressed me so much that I would choose Lufthansa for all my future connecting red-eye flights.
If you have thoughts to share or questions to ask, please leave a comment below! We would love to hear from you!
Sibashree is a travel, culture, and leisure writer who has been writing since the age of 12 and professionally since 2014. With more than a decade of travel writing experience and journeys across India and several parts of the world, she brings a deeply personal and thoughtful perspective to her work. A student of English Literature and Mass Communication, Sibashree has always viewed travel as more than movement — for her, it has been a way of understanding people, cultures, and herself. Her passion for spiritual exploration has also led her to many unusual and meaningful destinations over the years. Outside of writing, Sibashree enjoys watching European cinema, reading about global politics, and reflecting on the stories hidden within everyday places.
Marketing is a staple in the business world. Whether it takes on a digital, traditional, or hybrid form is decided by the nature of the company. Even the people running it are responsible. However, regardless of the choice, marketing is a business fixture that cannot be ignored.
For a travel business, in particular, building attraction among potential customers using a mix of visuals. Furthermore, creative text is of the essence. One of the best content forms to utilize these elements is travel videography. Not only does travel videography provide interested clients with a snapshot of the experience that they’ll be getting. However it’s also great at creating brand hype and awareness.
Confused about how you can use travel videography to promote your travel business better?
Here are four simple ways how:
1) Put A Video On Your Instagram
Social media marketing is a must-do in today’s corporate environment! From following the latest #hashtag trends to creating viral reels to building exciting collaborations, it is a lot! With fellow companies and creators, there’s a lot that social media can do for your travel business. Additionally, the best way to utilize this online tool. They inculcate video in your SMM strategy, taking your content a step ahead! Worried about getting started? PosterMyWall’s Instagram reel video templates are a great guiding path.
Not only do they allow you to push out reels with both quality and time efficiency due to the pre-made templates, but they also facilitate extensive editing and customization, helping each brand achieve its own unique look. And the best part? You can take advantage of all this - and more - without having to pay a single dime.
Once your reels are made, you can post them on your Instagram feed, reshare them on your story, or even invite other profiles to join as collaborators, automatically expanding your reach. Of course, be sure to pair your video content with SEO-optimized captions and trending #hashtags to maximize your traction.
2) Enlist Paid Travelers
Ever heard of the concept of a paid traveler? These are people who are either content creators or travel videographers who often undertake vacations where they produce content for a brand in exchange for free services such as tickets, accommodation, food, and the like.
In order to promote your travel business, you can enlist the services of these paid travelers, sending them to capture content around areas that you’re operating in or areas towards which you want to generate tourist traffic. Once their content is made, the videos can be posted on their social media accounts such as Instagram, TikTok, and YouTube, as well as be used by your travel company in their own marketing material.
3) Get the Locals Involved
There’s nothing to get you in the mood for a vacation like the place itself speaking to you. And what better way to experience this than by connecting with the local people of the area themselves? It’s simple - hire a local videographer, get a couple of short videos made that highlight why the specific country or area is your ideal vacation destination, and then link it back to how your travel company can make this dream vacation a reality.
Since it’ll be local people highlighting the area your content will seem more authentic, drawing in more people to acquire about your services. As for the channels, social media as well as traditional television and paid Google advertisements are the route to go down!
4) Deck Out The Posters
While video content is great, it can sometimes need a helping hand to get across to the right audience. And what better-helping material than a poster? Not only are poster posts apt for generating hype about your business, but they’re also a great mix of visuals and text, making them easily digestible. And if you’re worried about nailing the design, then just head to PosterMyWall and browse their range of travel poster templates.
Fully customizable and with dozens to choose from, you’ll soon have your perfect design! With your posters ready, now it’s time to put them up. You can do everything from marketing your travel company’s video content by linking it to your poster to spreading general information about your services.
In either case, the more traction you get, the more the audience will be redirected to your travel videos.
So, if you’re looking to use travel videography to market your travel business, then these tips are your go-to. Just remember to customize according to your brand and you’ll be good to go!
Read Also:
Top 10 Business Travel Booking Platforms Of 2023
Tips For Earning Frequent Flyer Points In Business Travelling
Want The Best Travel Tips: Go Through Velvet Escape Travel Blog
Travel is all about enjoying the sunny weather with the light breeze blowing away your hair. But, unlike a sprinkle, torrential rain can literally ruin your entire trip. Making it one of the worst memories.
So, it is kinda wise to check the rainy season prior to visiting that place. This way, you can avoid unnecessary hassles and know when to travel and what to do during this time.
For instance, Bangkok’s rainy season spans from May through the beginning of November. And, when it rains there, it literally pours down buckets.
So, be prepared to get stuck in some muddy puddles and flooded metropolis. Making it tenfold difficult to travel to your destinations or go for a city walk.
But, if you are a rain lover, you should know about a few things before setting off to Bangkok. Here, I have brought you a complete guide on things to do in Bangkok’s rainy season.
Stay tuned!
Why Is Bangkok’s Rainy Season Considered Low Season?
During the rainy season, the temperature drops to 26 degrees with humid weather. So, you will feel stuffy while traveling to tour spots.
Moreover, the rain comes in bursts of torrential pouring. Turning the entire city into a flooded region. So, traveling or commuting becomes more difficult.
And to top it off, the sky is mainly overcast with clouds all the time. Just killing the vibes. So, you won’t be able to enjoy the place.
Naturally, this season earned the nickname of “Low Season” because of the mood-ruining weather and low tourist visits.
What You Should Do In Bangkok’s Rainy Season?
Here is a list of the things you need to do when you are stuck in Bangkok during the rainy season.
1. Wear Rubber Shoes
The last thing you need is to walk around with nothing on your feet; wear strong rubber flip flops/sandals that are made for wet weather, and you will have no issues.
A sturdy umbrella is always a wise thing to carry around in the rainy season, while a plastic anorak with a hood will save you if you get caught in a tropical downpour.
Staying in one of the best hotels in Bangkok Sukhumvit puts you in the centre of the action, close to BTS stations.
2. Keep Your Digital Device Dry
Buy one of those waterproof plastic bags for smartphones and store your device in there, along with paper money and your passport.
If you get caught in a tropical storm, your stuff is very likely to get wet, and with a few dry bags, your stuff won’t get damaged.
You can buy these online, and they come in packs of 10. Wear the bag around your neck and keep everything you need to keep dry inside.
3. Avoid Walking In Water
Imagine being in the middle of a busy market, with stalls everywhere and electric cables in use; accidents can and do happen, so avoid walking in water whenever possible.
Some foreigners take off their shoes and walk barefoot, which we don’t agree with.
This is dangerous for many reasons. For instance, you could stand on broken glass, and a foot infection could follow. Thailand is the number one destination for wellness retreats.
4. Take Cover In A Shopping Mall
If you are out and about and the heavens open, seek refuge in a nearby shopping mall, at least until the water has receded. A coffee shop would be the perfect solution, and they would welcome your business.
One place you should not take shelter is under a tree, as lightning is common in tropical storms. Also, you should not be holding an umbrella when thunder and lightning are happening.
5. Afternoon Showers
Rain typically falls in the late afternoon, and when it stops, the sun quickly dries everything out, and you would hardly know it had rained.
It rarely drizzles in Thailand, the rain is heavy and the sun quickly returns. The exterior electrics in Thailand leave a lot to be desired and water and electricity do not mix.
Use your common sense when it comes to being in water and avoid any situation you think might be dangerous.
6. Use The Canal Taxi Boats
A great way to get around in the monsoon season, using the electric boats is both cheap and fast; search with Google to find out where the different canals actually go.
Bangkok has many canals that wind through the city, and they are frequent and safe.
Rain And Bangkok: How To Enjoy A Flooded Trip?
Even though the weather is not perfect, sunny, and beautiful one which highlights the natural beauty of Thailand, it is a peaceful time to visit Bangkok.
However, going there without taking the right precautions can make it a frustrating trip. So, make sure you pack up your rainy gear to fight against the torrential bouts.
Also, given that most tourists avoid the place during Bangkok’s rainy season, you will find the tour spots less crowded. Letting you to actually enjoy a place in peace.
Mainly, the greatest and busiest attraction, Grand Palace in Bangkok, becomes a spot with relatively fewer people. So, you can spend some time enjoying the view and architecture without enduring the rushing crowds.
Additionally, you can book tickets for the annual arts festivals in the International Festival Auditorium. Then, enjoy exploring different art forms and cultural excellence without wetting your feet in the rainy puddles.
Along with that, you can go around Chinatown to dig into some of the mouthwatering delicacies. From exciting street foods to different flavored mooncakes, grab a bite of every kind of food.
So, turn the wet trip into a memorable one with the right activities and fun-filled experiences. Just take measures to avoid the rain and indulge in a peaceful Bangkok tour.
Read More:
Exploring Southern Utah’s Hidden Dive Sites
Haneda Vs Narita: Which Tokyo Airport Should You Choose For Your Next Trip?
Three Of The Best Must-See Attractions During Your Time On The Thai Island Of Phuket
Canada is bursting at the seams with festivals, wild celebrations, and lively events. You blink, and there’s probably something going on in every corner of the country.
Whether you’re catching the Montreal Jazz Festival’s energy or braving Quebec’s famous icy parties, these gatherings are honestly the stuff of bucket lists.
But, you know, any trip, especially the fun, hectic kind, can bring chaos you just didn’t see coming. And that’s exactly when having decent Canada trip insurance jumps from “optional” to “pretty necessary.”
It’s your safeguard for all those “Hope that doesn’t happen, but if it does…” moments.
Let’s break down why travel insurance Canada should be high on your checklist, what it actually covers, and—since it’s 2025—how to buy it without ever leaving your couch.
What Is The Significance Of A Canada Trip Insurance?
Honestly, the festivals and weirdly joyful events are half the reason people come here. However, let’s get real! They’re not stress-free.
Big crowds and moody weather aren’t just “quirky” perks. They can flip your trip from amazing to “why did I even get on the plane?” really fast.
A few solid reasons make having travel insurance for attending the festivals and events in Canada a must.
1. Medical Emergencies
You never plan for a medical emergency, but all that running around, dancing, and squeezing through crowds. Yeah, accidents happen.
The right policy grabs your back with coverage for surprise hospital visits, unexpected illness, and even wild scenarios (think: evacuations).
That means if things go sideways, you’re not left frantically Googling “nearest clinic open now.” You get the treatment you need, fast.
2. Unpredictable Weather
It can rain when it’s supposed to be sunny, or it can snow in June. The weather in Canada loves to throw curveballs at festival plans. Storms mess up flights, force cancellations, and generally make you question your packing skills. Travel insurance gives you a fallback, so changes in the forecast don’t wreck your whole trip.
3. Delayed Flights
Missed connections, endless airport coffee, or racing to an event that started without you! Delays are a special kind of festival pain.
Canada trip Insurance can at least help soften the sting with reimbursement for lost time (and sometimes lost money).
4. Lost Or Stolen Luggage
Are there jam-packed crowds at the airport, bus stations, or the festival venue? It is Awesome for energy, but not great for keeping track of your backpack.
If your stuff disappears or gets snatched, insurance can cover what you lost, saving you from the “how do I survive without my essentials?” panic.
While choosing Canada trip insurance, make sure that you compare various policies. You have to be specific about your budget, needs, and coverage limits.
Furthermore, you have to read the “exclusion” section carefully. Suppose you want to do rafting in Canada, and the policy you have chosen does not cover any injury that happens during that particular activity. You cannot claim compensation if such happens.
In addition, pick a policy that covers the pre-existing conditions.
How To Purchase Travel Insurance For Canada Online?
The days of slouching through long lines at insurance offices? Gone, luckily. Getting a travel insurance plan in Canada is basically a breeze—here’s the “pain-free” approach:
Step 1: Jump onto your insurance company’s website and poke around for the travel insurance section.
Step 2: Toss in some basic details (they’ll ask… it’s always something), and pick the type of coverage you want.
Step 3: Find Canada in the list—there’s always a dropdown. Add your departure and return dates, plus your phone number (they need it for confirmation, not for spam… supposedly).
Step 4: Click whatever version of “view plans” pops up. Now, you’ll be asked for traveler info.
Step 5: Hit “Next.” Browse through a few plan options, tweak the coverage amount for your stuff, and throw in any extras that seem smart.
Step 6: Another round of “Next” and fill out health details, whatever else they want, and you’re basically done.
Step 7: Pay up, sit back, and wait for your new insurance details—both an email and a shiny online document should show.
Tips For A Smooth Festival Experience With Canada Trip Insurance
If you want your Canadian festival trip to be something you’ll brag about (and not just complain about), make sure your travel insurance really covers the possible drama.
There are a handful of other little tricks for making the whole journey actually enjoyable.
1. Plan Ahead
Don’t just show up and read up on the festival, double-check where it’s happening, and figure out your route.
Sorting tickets and booking places to stay, way before the rush, saves future headaches when everyone else is panicking.
2. Stay Informed
Keep checking the weather (surprises are the default here), and watch for updates about the event. A last-minute change can throw off everything, unless you’re already in the loop.
3. Keep Records
Make copies of the stuff you don’t want to lose: your insurance info, tickets, ID, passport—that sort of thing. Having backups makes it way easier if you need to file a claim (or just find your way home).
4. Carry A First-Aid Box
Pack meds you actually use and a tiny first-aid kit, just in case. Minor emergency? You’ll thank yourself for thinking ahead.
Travel Insurance Canada Gives You The Coverage To Enjoy Your Trip
In the end, travel insurance isn’t just paperwork. It’s peace of mind. You get to throw yourself into the fun, knowing you can handle whatever hiccups the universe throws your way.
Go for coverage that fits your trip: delays, lost documents, and last-minute changes. That way, you’re not stuck worrying; you’re actually enjoying the festival (and maybe even finding a new favorite one).
Thinking about travel insurance for Canada right now? Give Niva Bupa Travel Insurance a look.
They’ve got a huge network (10,000+ hospitals) and claim to process things in under 30 minutes. One crore customers vouch for them, which honestly calms a lot of nerves. If you want to skip stress and just focus on the adventure, it’s worth checking their plans.
Read Also:
Ultimate Guide to Stress-Free Holiday Travel
Top 8 Travel Medical Insurance Trends to Consider
The Overlooked Connection Between Safe Travel And Strong Networks


 Related