






Best Time To Visit New York: Know New York Weather By Month

Sep 16, 2021

Last Updated on: Jun 1, 2026

Travel Guides

What is the best time to visit New York? 

Well, the answer is tricky. Google will tell you that the shoulder seasons are the best time to visit New York. 

New York is indeed delightful from April to May and September to October. However, a seasoned traveler knows that New York shows its beauty across all seasons. 

For example, you may spend the most happening Christmas in New York. So, for you, of course, December is the best time to visit New York. 

So, New York is a year-round destination, and the best time to visit New York depends on the experience you want and the places in New York you plan to visit. 

Best Time To Visit New York: Plan Your Trip Right

The temperature in New York is always pleasant, and it is always fine for us to visit New York. 

Having said that, New York has some specialties in every season.

When To Visit New York City?

When To Visit New York City

If you are asking for my recommendation? Then I would recommend from April to June, September to early November is the best time to visit New York.

During this period, the temperature in NYC is quite pleasant. But you might find the crowd a little uncomfortable during this season.

But if you wish to visit New York at low expenditure, then from mid-Jan to the end of Feb is the most fitting travel season for you.

If you are looking to visit New York in the best season possible, you need to plan well in advance for your hotel bookings.

New York sees a lot of tourists during the best seasons hence it is best that you work on the hotel and travel bookings with cozycozy.com. This will ensure that you have the best stay in New York City.

In my opinion, September is the best time to visit NYC. 

Let us check some of the best times in New York City which we can enjoy the most. 

2. Best Time To Visit New York For Good Weather Conditions

Best Time To Visit New York For Good Weather Conditions

The good weather in New York is usually found from May to October although from July to August it is usually very hot and humid. This time period can not be considered the best time to visit New York. 

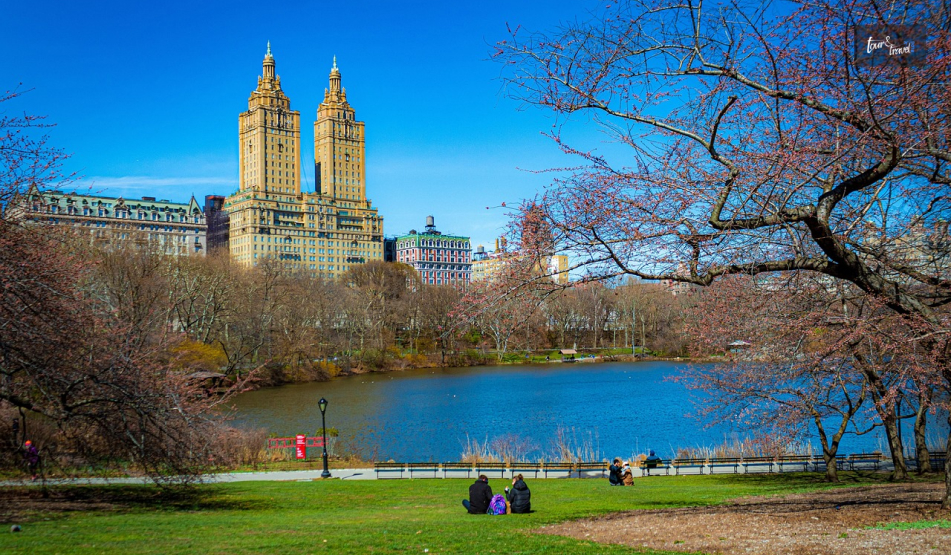
If you are visiting New York during the Spring, you are in for a treat. The bustling Central Park, the high-energy Wall Street, and other attractions really come into their own.

Open Bus Tours in New York City can be enjoyed during this period. The same will take you through the major city spots and allow you to enjoy the food, culture, and history of the place.

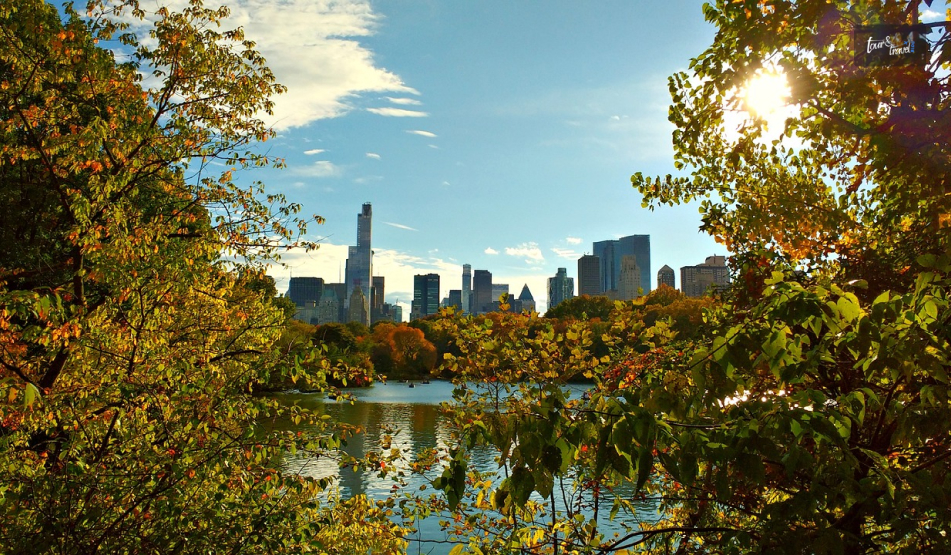
Further, Autumn, with all the leaves turning yellow and red, is the season of festivals, including Halloween and the Rockefeller Center Tree Lighting Ceremony. 

So, here, I present a table featuring the highest and lowest temperatures in New York by month.

MonthHighest Temperature (°C)Lowest Temperature (°C)Rainfall (Number of Days)
January5-38
February7-27
March1038
April1889
May22159
June271710
July302110
August292011
September29157
October25106
November1756
December1008

3. Best Time For Sight Seeing In New York

Best Time For Sight Seeing In New York

Summer and winters are both have different flavors essences. For the travel thirsty people, every season is the best time for sightseeing of course obviously without natural calamity.

April to November is the best time for sightseeing in New York.

However, the months of June, July, and August may throw some restrictions on outdoor activities as the days of rainfall are higher in these months.

4. Best Time To Explore The Nightlife Of New York

Best Time To Explore The Nightlife Of New York

The best time for nightlife in NYC has no boundaries, it can be done throughout the year. The nightlife in NYC throughout the year looks magnificent and unbelievably beautiful.

The night charm of New York City is full of entertainment. Manhattan is a popular area where you are going to get hundreds of street sidebars along with discos and pubs.

Most of these pubs and disc are remain open for the whole night. If you want to spend your whole night, focus on Manhattan city to enjoy your entire night with good food and drinks.

Best Time To Book Hotels

New York is one of the most expensive places to visit in the world, so one should make plans beforehand.

You must find out the best hotels in New York or the best hotels for a family stay in NYC.  You can Google or use apps to find out the best hotels in New York.  

Best Time To Do Shopping In New York

Best Time To Do Shopping In New York

New York is famous for its bargain market. At most shopping plazas, sales are available at least twice a year in New York. So there is no such great time to go shopping in New York.

New York is famous for shopping, so don’t worry, you are likely to meet any of the sale seasons whenever you visit are heading towards New York. 

Brookfield Place is the best shopping plaza for travelers. And Manhattan is the best place where you get the whole package of the entertainment shopping mall to restaurants everything is present in the same place.

Best Time To Avoid Crowd In New York 

Best Time To Avoid Crowds In New York

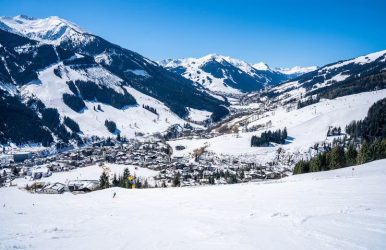
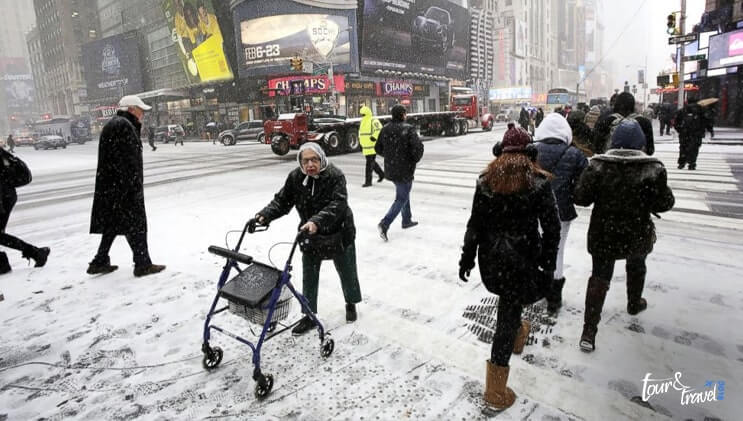
People usually do not like to visit New York during the chilly winter months that is from January to mid of March.

Usually, most of the families going to New York do not like to get into the crowd, or it is actually difficult to go sightseeing in very winter and the crowded places in New York.

The plus point of going to New York during crowd time is that you will get air tickets at a cheap cost, plus the stay in New York would be cheap.

New York City Events And Festival 

As I have already told you beforehand the new York is a great place to be all throughout the year.

But especially the events and the festival of New York City make the place even more charming and cheerful. Let’s Start month-wise, this information is something which I collected when I went to New York.

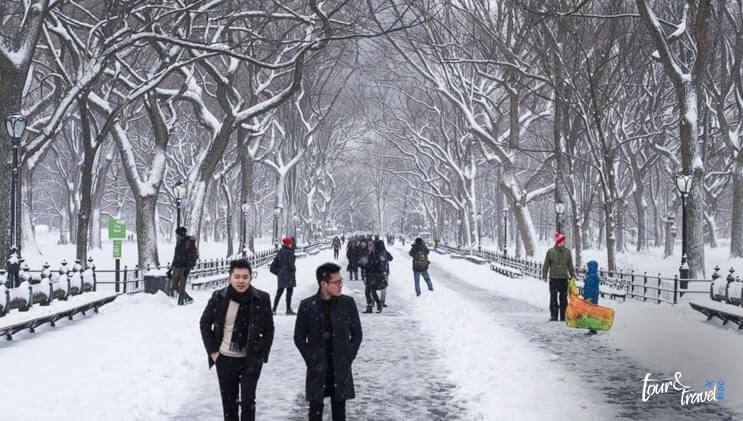
Best Things To Do In New York In January

New York In January

There is always something or the other going on in New York throughout the year. But in January, some special events happen in New York.

Out of everything that happens in the January season, I have chosen some of the best things to do in New York in January. 

New York is anyway famous for its Jazz Fest, which is held in more than 11 venues. Birdland and Blue note are the most famous jazz pub in New York.

In the entire month of January, there are at least 100 shows that are put up. There some Broadway shows. 

You can attend the Broadway show with one more person paying for one person.  In the month of January, January is the best month to enjoy food, during this month.

An entire week is solely dedicated to the Restaurants, which is why this week is called Restaurant’s week in New York.

Best Things To Do In New York In February

New York In February

As of February sets in the fashion week sets in New York, It is actually great to find out about New York’s Fashion Week which is held in the month of February.

All the best Designers of the world showcase their masterpieces in this fashion week. 

* The March and April months remain quite less-festive, there is barely any such eventful event that you will be covering in your visit. Then again the events set in from May month onwards. 

Best Things To Do In New York In May

New York In May

The three major things that happen in the month of May are the Ninth Avenue International Food Festival, Washington Square Outdoor Art Exhibition, and Fleet Week.

These eventsare taking placein New York in the month of February. These three festivals are facinginnumerable visitors from all over the world.

Hence,these events are famous all across the world. worldwide, so do not forget to visit this event to get a worldwide traveling experience.

Best Things To Do In New York In June And July

New York In June And July

This is the peak time when a lot of people fly to New York, so the most amazing events are hosted at this time.

The events are Belmont Stakes, Pride Festival and March, Shakespeare in the Park, NYC Restaurant Week, Lincoln Center Out of Doors Festival. 

Best Things To Do In New York From September To December

New York From September To December

This is the best time to visit New York and is famous for the festive season, rightfrom festivals to celebrations.

There are many best things which you can do in New York from September to December.

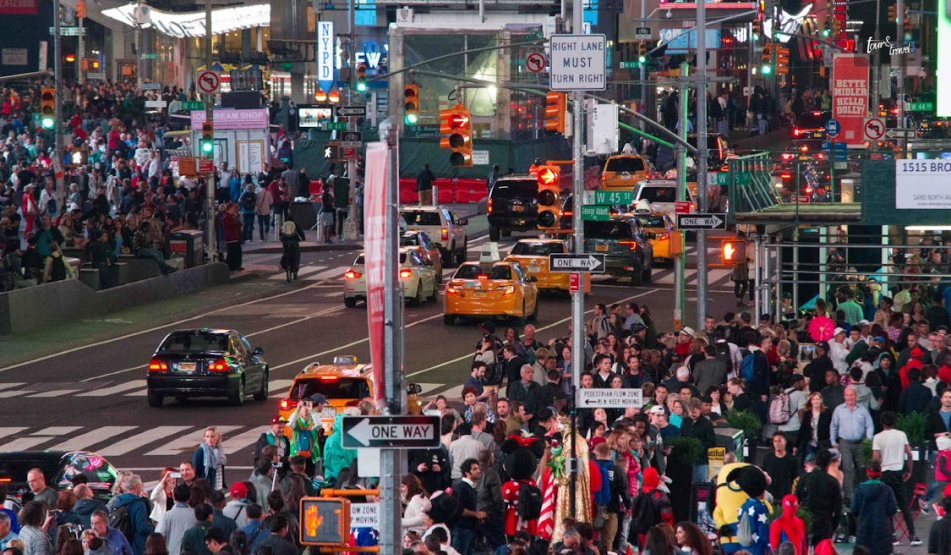
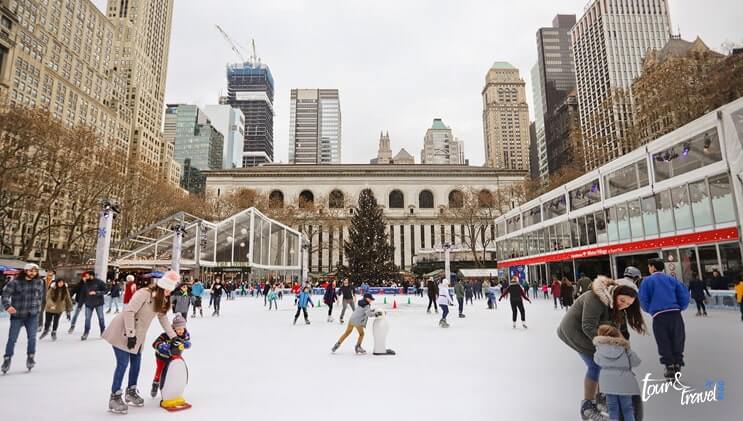
Such as the village Halloween Parade, Rockefeller Center Tree Lighting Ceremony, Ice Skating Rinks, Holiday Window Displays, New Year’s Eve at Times Square, New Year’s Eve Fireworks.

These all are the events of New York which New York events are make helping to makethe mood of the travelers. This time the aura of New York amazingly becoming unique and lovely. 

New York has many places that people are unaware of. But if you are in New York,then do not forget to visit Maryland and Manhattan.

It is advisable to makea wise decision by choosing the best time to visit New York according to you. These places are extraordinarily beautiful, and there are many things to do in New York, which I will discuss in my next article.

If you like this article, then keep tuned in to Tour and Travel Blog for more insights on New York.

FREQUENTLY ASKED QUESTIONS (FAQs)

What is the cheapest month to visit New York?

As you know the cheapest month of the year that is suitable to visit New York is from January to March. In these three months the costs of both flight and hotel are average for the whole year.

 Where should I stay for my first trip to New York?

Here is a list of places,

  • Middle Town
  • Upper East Side
  • Chelsea and Greenwich Village
  • Soho and Lower East Side
  • Queens

How many days do you need in New York?

You actually need three days to see the main things in New York. If you want to cut the three days in two, that can be done as well.

Should I stay in Times Square?

Absolutely, with no doubt. The main reason to stay in Times Square is for the location. You are basically in the heart of the city.

It’s a tourist attraction. At night it is perfect for walking with holding hands with your loved ones.

Share on Social Media

Abdul Aziz Mondol is a professional blogger who is having a colossal interest in writing blogs and other jones of calligraphies. In terms of his professional commitments, he loves to share content related to business, finance, technology, and the gaming niche.

Leave a Reply

Your email address will not be published. Required fields are marked *

title-img Related

READ MORE Which Is Colder Minus 40°C or Minus 40°F

Minus 40°C Or Minus 40°F: What To Know Before Planning Your Next Mountain Escapade?

BY  Barsha Feb 3, 2026

Which is colder: Minus 40°C or Minus 40°F? The question appears simple, at least at a glance. But if you think about it, it does open an interesting window into the dynamic world of temperature, rather, how we tend to measure temperature.  Moreover, it also gives insight into why different people use different measurement systems across the globe.  The most fascinating part? How do these systems even relate to extreme temperatures?  The answer might actually surprise you. -40°C and -40°F are exactly equal. Yep! That’s right - it is the point of meeting for the two temperature scales.  On that note, let’s dissect and unpack why this even happens.  More importantly, what else do you need to know about the two temperature scales before you can plan your next mountain escapade.  Celsius Vs Fahrenheit: What’s The Difference? To make things super easy for you to understand, I have laid out the difference between Celsius and Fahrenheit in simple terms below: AspectsCelsiusFahrenheitOriginAnders Celsius, a Swedish astronomer, developed the Celsius scale in 1742. Daniel Gabriel Fahrenheit, a German physicist, developed the Fahrenheit scale in 1724.Definition“of or using a scale of temperature in which water freezes at 0° and boils at 100°.” (Oxford Dictionary)“of or using a scale of temperature in which water freezes at 32° and boils at 212°.” (Oxford Dictionary)Used InMost places in the world, including Europe, Australia, Africa, Asia, and most scientific work. Primarily in the United States of America and some Caribbean countries.Conversion Formula°F = (°C × 9/5) + 32°C = (°F − 32) × 5/9 So, Which Is Colder: Minus 40°C or Minus 40°F? I already answered this question in the very beginning - both are the same! It is the point at which the two scales meet.  So, if you use the conversation formula I have listed above, then: -40°C × 9/5 + 32 = -40°F Also, this is the only point where Fahrenheit and Celsius readings match.  Then, why does it confuse all of us? It is mainly because of three primary reasons, as per my understanding:  Most individuals don’t really encounter extreme weather conditions. So, they do not really come across this overlap point.  Secondly, in most countries, the education system teaches only one scale. As a result, there is little or no intuitive comparison.  Finally, Fahrenheit readings are usually larger for both outdoor and room temperatures. For example, 50°F is equivalent to 10°C. This automatically makes most individuals assume that the two scales don’t match.  Where Does It Hit -40 On Earth? Places like Greenland, Northern Canada, Siberia, and some regions of Scandinavia go down to -40 regularly during the winter months.  For example: In February 2021, temperatures dipped to -43°C in Sweden.  Siberia, Canada, and Yukon also experience these levels regularly.  In these regions, both Fahrenheit and Celsius are the same - you will shiver equally.  In this context, I have a fun fact about the coldest temperatures recorded on Earth: In 1983, Vostok Station, located in Antarctica, recorded −128.6°F (-89.2°C) (Source: Britannica)  That is literally double what you will feel at -40°. More importantly, it is a real-world reminder that extreme weather conditions and environments exist on Earth.  How Cold Does It Feel At -40°? The truth is that whether it is -40°F or -40°C, you will feel the same. And trust me, I’m not kidding - you will literally shiver!  In February 2021, I experienced -40°C in Yukon. My thermometer read -40°F, and I experienced frostbite risk within minutes. Whether it’s -40°C or -40°F, the result is the same: Your skin will freeze within minutes without the right protection.  Vehicles might not even start. Metal will stick to the skin.  Your eyelashes might freeze.  At -40°, it is dangerously cold regardless of what scale you are using.  Also, the wind is so chilly that you will shiver and can fall sick or even die without the right gear and equipment.  How -40° Feels On The Human Body? So, I can’t just keep telling you guys that it is going to be dangerously cold.  Instead, it is much better to give you all the real picture of how the human body is bound to react at sub-zero temperatures:  Temp (°F/°C)Impact On The Human Body-76°F/-60°CIt is painful to even breathe. Also, exposed body parts, including eyes, will freeze.-40°F/-40°CSkin will freeze in two minutes. Also, metal will stick to the skin. -22°F/-30°CExposed and unprotected skin, including eyelashes, will freeze in ten minutes. -4°F/-20°CNumbness begins to set in, with an increasing risk of frostbite. 14°F/-10°CThe skin begins to sting, with a risk of frostnip if exposed. 32°F/0°CBreathing becomes visibly tough. Also, fingers stiffen in a few minutes.  Even without any chilly winds, subzero temperatures are hazardous, especially if you are not prepared.  At -40°, both Fahrenheit and Celsius, there is only one brutal truth: without protection and preparation, it is dangerous and life-threatening.  Winter Hiking Hazards You Should Know About: Winter can alter any landscape radically, striking a balance between mesmerizing beauty and quirky dangers.  And while it is impossible to talk about all hazards in detail, I’ve compiled all the possible winter hiking hazards and their mitigation strategies below: Winter Hiking HazardMitigation StrategyFrostbite & HypothermiaCheck the weather, pack extra clothes, and layer well.Slip & FallUse microspikes or crampons and trekking poles.Getting LostUse a compass, maps, and a GPS. Also, try mapping your route.Fatigue & DehydrationEat frequently, stay hydrated, and pack extra food (and water).Falling Into Ice or WaterAlways test the ice and be careful while crossing icy terrains. CornicesAvoid walking under or on the edges of ridges. Equipment FailureKeep electronics warm. Also, carry gear repairs and physical maps. Tree WellsIn deep snow, avoid the base of trees. AvalanchesCheck forecasts for avalanches. Also, avoid steep terrains. Short Daylight HoursStart early, carry spare batteries, and definitely wear a headlamp. In addition, I’ve touched upon the common (but very dangerous) hiking hazards that you can come across at sub-zero temperatures in the mountains in detail: 1. Ice: Of course, you need to worry about ice! In the winter months, melt-freeze cycles turn hiking trails into slippery ice. Similarly, this can also happen on popular tourist routes where snow is compressed over a long period of time.  If you slip on these icy trails, it will lead to bruises and bumps. Moreover, a bad slip and fall can lead to serious wrist, ankle, or back injuries.  As a result, it is best to carry metal-tipped trekking poles and traction for additional stability in such conditions.  2. Avalanches: In the United States, avalanches (as per avalanche.org) kill between 25 and 30 people every winter. Moreover, the injury rates are much higher.  Most victims are ice climbers, snowmobilers, snowboarders, and backcountry skiers. However, oblivious hikers do get caught in avalanches occasionally.  The worst part? Nearly 95% of avalanches begin on slopes that are between 30 and 45 degrees in steepness.  However, the snow ends up traveling down to the flat terrain - and it even appears to be safe to an untrained eye.  As a result, it is vital to consult topo maps, check trip reports, and talk with local experts before you set out. That is your best shot at safety in the face of an avalanche.  3. Glaciers: Many of the iconic summits in the United States are guarded by glaciers.  While there are several snowfields across the western part of the United States - mostly misnamed as glaciers - you will find true glaciers mostly in the Pacific Northwest and in the far north.  Moreover, these are active glaciers that moves around, forming cracks with time. As a result, these fissures, A.K.A crevasses, lie under the snow, hidden from the human eye. Naturally, fatal falls - and unexpected ones - become a major possibility.  So, it’s best not to step out on glaciated terrain unless you have some experience in both glacier navigation and snow travel. This also includes improving your fissure-rescue skills.  4. Steep Snow: The challenge and adventure of climbing snow-covered, steep slopes is certainly thrilling.  Recently, I had the opportunity to try out snow climbing, and while it was thrilling, I can’t overstate the importance of safety and experience.  It’s so much more technical than it appears visually - if you slip even once, you can slide down the steep slope. Also, you have to know: How can you assess the snow conditions around you? Use crampons.  Take a fall with the help of an ice axe.  Additionally, it is best to be familiar with avalanches and safety first. Because a majority of snow climbs will require you to cross terrain prone to avalanches.  What To Know Before Planning Your Next Mountain Escapade? 9 Tips That Can Keep You Safe! Safety in weather extremes, especially in the mountains, requires careful preparation, specialized equipment, and a constant awareness of your body’s condition.  Moreover, the combination of high winds, rapid changes in weather, and freezing temperatures leads to life-threatening conditions. And that too in minutes.  This includes the risk of both frostbite and hypothermia. Moreover, preparing for freezing temperatures is incomplete without strict layering, high-calorie nutrition, and waterproof gear. And still it’s not enough - surprised? Well, don’t be! Instead, scroll down for the internet’s most comprehensive list to prepare for survival in freezing temperatures in the mountains. 1. Stay Hydrated: Problem: Dehydration is very common in freezing temperatures, much like hotter regions with arid weather conditions.  How? The cold weather conditions can easily suppress thirst. But the dry air in the mountains and high levels of physical activity will make your body dehydrated - and this will happen faster than you can possibly imagine.  Moreover, dehydration can lead to dizziness, fatigue, and headaches.  Solution: As a result, you should try carrying a thermos with herbal teas (like chamomile, tulsi, or ginger) or just warm water with lemon and honey. These can hydrate you, keep you warm from the inside, and boost immunity.  Also, on this note, avoid caffeine or any caffeinated drinks since they will dehydrate you faster.   2. Nourish Yourself: Problem: Your body will burn a lot of calories to stay warm in freezing temperatures.  As a result, even if you think that a bowl of hot Maggi seems like an appealing meal for the mountains, it is crucial to balance comfort and nutrition.  Solution: So, you should focus on energy-dense and high-calorie food items like seeds, whole grains, and roasted nuts to ensure high energy levels in the body.  Moreover, you can consider adding warming ingredients to your food. Ingredients like turmeric, garlic, and ginger can fight cold and improve digestion.  Also, if you do end up eating a steaming bowl, then add boiled eggs or vegetables for a healthy, protein-packed version.  On that note, here’s a list of things you can eat: Beef jerky.  Trail mix. Nuts. Milk chocolate. Pretzels or chips. Cheese and deli meat. Tortillas or crackers. Pizza slices. Pumpkin or banana bread. Peanut butter sandwiches. 3. Protect Your Lips And Skin From Dryness: Problem: Cold and dry air is not good for the skin - it strips the skin of moisture. And this in turn leads to dry hands, irritated skin, and cracked lips.  This is highly uncomfortable and causes skin damage if you don’t address it within minutes.  Solution: As a result, always use a moisturizer that is thick and nourishing before stepping out. Moreover, while doing so, focus on different areas like your face, neck, and hands, which are prone to getting exposed.  Also, do not forget to apply lip balm on your lips - and ensure the lip balm comes with SPF for protection against the UV rays of the sun and the cold, both of which are strong at high altitudes.  In addition, eat food items that have a high percentage of omega-3s. This includes flaxseeds and walnuts, both of which are perfect for hydrating your skin from within.  4. Stay Active For Proper Blood Circulation: Problem: When you are absolutely stationary in freezing temperatures, your blood circulation will slow down. This, in turn, makes you feel colder.  Solution: The only solution here is not to sit in the same spot for too long.  So, try out light activities such as walking, stretching, or even a few squats to ensure proper blood circulation. Also, it feels good to do light physical activities after a long day of trekking.  5. Take Care Of Your Altitude Sickness: Problem: At high altitudes, you can expect oxygen levels to fluctuate and drop. This, in turn, can cause fatigue, nausea, or dizziness.  Solution: You should give enough time to your body - that way, your body will be able to adjust. As a result, it is best to take it easy on day 1.  Moreover, drink lots of water and eat food items that are rich in antioxidants. This includes berries, nuts, and fresh fruits. That way, your body will be able to fight the stress and pressure of altitude.  If you are feeling unwell at any point, don’t push too hard. Rest is very important.  6. Support Your Body’s Immune System: Problem: The blend of altitude and cold weather can easily weaken your body’s immune system. This, in turn, will make you prone to illnesses.  Solution: Incorporate food items that are rich in Vitamin C, like amla or oranges, in your daily diet in the mountains to boost your body’s immune system.  Moreover, warm soups are also great - but ensure these have vegetables, lentils, or even chicken stock. Why? Because it offers warmth, hydration, and nourishment together.  Also, ensure you can sleep well - a good sleep cycle will recharge your body.  7. Look After Your Feet: Problem: Remember that cold or wet can lead to chilblains, frostbite, and lots of discomfort. Solution: Invest in insulated and waterproof boots. Moreover, you can consider wearing thick woollen socks to ensure your feet are dry and warm.  Also, don’t forget to carry an additional pair of dry socks - that way you can change socks if your feet feel too damp. In addition, you can try massaging your feet with a nice, warm balm. Why? It will prevent dryness and improve circulation.  8. Breathe Smartly For Avoiding Cold-Air Effects: Problem: If you directly breathe in icy, cold air, then it will irritate your lungs.  Trust me on this one! It has happened to me. And then you will start coughing. Some people also feel a tightness in their chests.  Solution: When you start feeling chilly, try to breathe through your nose and avoid doing it through your mouth. This will keep you warm, moisturizing the air even before it can reach your lungs. Also, this will help you to keep respiratory problems at bay.  9. Prioritize Mental Wellness: Problem: The beautiful solitude of the mountains can be very peaceful. However, at times it can get very overwhelming. As a result, staying healthy mentally is just as crucial as looking after yourself physically.  Solution: Take some time for yourself so that you can practice mindfulness - and while doing so, don’t forget to appreciate the beauty around you.  Moreover, you can consider carrying a journal for jotting down your reflections and thoughts.  Also, it is healthy to count on your group to stay connected. Why? Sharing experiences together can motivate everyone and lift spirits. 

READ MORE card-img

Wonders of the Waves: RV Camping Along Oregon’s Coastal Beauty 

BY  Abdul Aziz Dec 30, 2023

RV-ers can choose from a wide variety of views, terrain, activities, and climates thanks to Oregon's diverse geography. Camping in Oregon offers a variety of locations. It includes open prairie grasslands, dense old-growth Douglas Fir forests, and a 5,000-foot high desert plateau. There is also the Willamette Valley, close to all the urban excitement, and campsites with expansive views of the Pacific Ocean. It's inviting to visit the coast. All along the coast, there are both public and private campgrounds that are ready to welcome guests. Stunning ocean views abound at these campgrounds. For others, it's a quick drive or stroll to the beach. You can find great surfing along the Oregon Coast in the Pacific surf. Bring a wet suit and board. Ultimately, the water remains chilly even in the summer. Winchester Bay RV Resort is yet another place you simply must visit. You won't be sorry if you can secure reservations at this well-known resort. Situated on an artificial peninsula projecting into the Umpqua River is the park. The park is beautifully manicured and furnished, and the peninsula creates views from all directions. Every site has paving, 50-amp electricity, sewage, and water. There are directional sites that optimize your view and accessibility to hook-ups, whether you're camping in a motorhome, travel trailer, or fifth wheel. If you have RV camping Oregon Coast on your mind, this article is for you.  RV Camping Oregon Coast  Are you excited by the prospect of taking the RV and just hitting the road? When it comes to RV camping Oregon Coast has some of the best options. Here are the places you must dig into if you are thinking about an RV and the Oregon Coast simultaneously. Take a peek: Bandon  If golf is your thing, you'll love Bandon, Oregon, where you can choose from six top-notch golf courses and play 18 holes of golf while taking in breathtaking views of the Pacific Ocean. Bandon Dunes, Pacific Dunes, Bandon Trail, Old MacDonald, Sheep Trail, and Bandon Preserve are the six internationally famous 18-hole courses just outside of Bandon. You can hone your putting skills on the Punchbowl Putting Greens or practice every stroke in the Practice Center. Since these courses host multiple tournaments each year, make sure to reserve your tee time when you make plans to play golf in Bandon. These are fantastic golf courses with breathtaking scenery to enjoy while playing. This one is another good option for RV camping Oregon Coast. Shore Acres State Park  Additionally, if you find yourself on the Southern Oregon Coast in December, make time to see the amazing Christmas light display at Shore Acres State Park. This display is like Christmas lights put on a higher gear. Throughout the year, the park is a beautiful botanical garden, but shortly after Thanksgiving, hundreds of volunteers arrive to decorate every tree, shrub, bush, and water feature. The outcomes are breathtaking, and you can stroll through the garden, savor hot apple cider and cookies in the guest house, and pick up some mementos and warm beverages at the gift shop before leaving. There is a small admission fee. Depoe Bay  A small town called Depoe Bay is halfway between Newport and Lincoln City. You can get fresh saltwater taffy there and keep an eye out for whale migration. Take some time to peruse the souvenir shops lining the waterfront and keep an eye out for the Spouting Horn, where water shoots over the sea wall. Tillamook Cheese Factory  Make time to visit the well-known Tillamook Cheese Factory, where you can observe the cheese-making process from covered observation decks that look out over the production areas. There is no competitor like Tillamook Ice Cream, and people from all over the world frequently wait in long lines at the ice cream counter. It's worth the wait, but if you're in a hurry, pick up a few pints to enjoy later in the freezer. Tillamook Cheese Factory is a great spot for RV camping Oregon Coast. Astoria Column  You won't want to miss the Astoria Column and the Astoria Bridge. If you're a fan of the film Goonies, these northern coast communities also have the Goonies' house. The rocks are lined up with the Doubloon and also the beach where the kids were reunited with their parents. Fort Stevens State Park  On the northernmost point of the Oregon Coast is Fort Stevens State Park. It boasts one of the biggest public campgrounds in the country, according to Oregon State Parks. In addition to 15 yurts and 11 deluxe cabins, the park features 302 electrical sites, 6 tent sites, and 174 full hookup sites. The park still has a military museum with year-round exhibits and marks the location of an abandoned military installation. In addition, there are miles of hiking trails and beaches to discover. Go to the Peter Iredale Shipwreck site, where the masts and rusted bow are still visible in the sand. Cape Lookout State Park  One of the most breathtaking places on the Oregon Coast is the Cape Lookout State Park. It is situated in Tillamook, Oregon. The state park offers visitors breathtaking views of the ocean day and night, encompassing both a lovely beach and a headland. The park offers a range of activities to its visitors, including camping, hiking, fishing, surfing, and beach combing. It is situated within the Three Capes Scenic Loop. There are lots of outdoor activities to enjoy at Cape Lookout State Park. The beach is ideal for beach combing, swimming, and surfing. The headland is a fantastic location for hiking, photography, and fishing, and it offers breathtaking views of the ocean. Harbor Vista RV Park  The Harbor Vista RV Park is situated in Florence, Oregon. With breathtaking views of the river and the surroundings, it boasts a prime location directly on the Siuslaw River. The family-run RV park is the ideal spot to unwind and take in Oregon's natural splendor. Large full-hookup RV sites are available in the park, and many of them can accommodate RVs up to 36 feet long. All of the locations have 20/30/50 amp electrical hookups, and some also have Wi-Fi and cable TV. The park's private marina is directly accessible from every site, making it the perfect place for a tranquil and restful vacation. Discover why guests adore Harbor Vista RV Park: the stunning vistas, the handy location, as well as the welcoming staff. The staff will make every effort to guarantee that each visitor has an amazing stay. For those who prefer to be active, the park also has a fantastic area for swimming, fishing, and kayaking, thanks to the private marina. Wrapping Up  Although Oregon is a beautiful state overall, the Oregon Coast is so unique that it was designated a national treasure in the 1960s, meaning that no beach can be developed for profit. Every beach in the nation is publicly accessible for your enjoyment and belongs to everyone. Bring your furry friends, and make plans to stay awhile. If you have thoughts to share or questions to ask about RV camping Oregon Coast, please leave a comment below. We would love to hear from you! Read Also: Florida Dreams: RV Camping Along the Sunshine State's Shore Planning A Vacation To Bali? Read This Blog!

READ MORE card-img

Kootenay National Park Or The Land Of Ice And Fire (Experiencing Nature’s Game Of Contrasts)

BY  Sibashree Sep 12, 2024

No, it’s not the battle of the Starks, Lannisters, and other houses of Westeros. In Canada lies Kootenay National Park, the actual land of ice and fire. The glacier-made canyons and valleys sing the song of the ice, while the hot springs and grasslands keep the “fire” element alive here.  Also, the national park is a hub of ancient fossils, encouraging walks through the fossil trails. Moreover, you can take a scenic drive through the park, rich in Indigenous culture, history, architecture, and cultural landscape.   So, do you want a virtual tour of this Canadian national park? THIS is where your journey begins! THESE Are The Things You Will Do At Kootenay National Park With no cell service available in Kootenay National Park, you can get lost in the wilderness and explore the most fascinating landscape. However, being respectful to the wildlife is a must in this national park. Also, this August, I came across disturbing news while doing my research on Kootenay National Park.  I have been in touch with a local from Radium Hot Springs for quite some time now. He told me that a grizzly bear coming out of Kootenay National Park was almost struck by an SUV on 19th August 2024.  This incident occurred on a busy highway in southeastern British Columbia, and fortunately, the Kia Sportage SUV made its way to the other side safely. Further, it was a lesson on why following the safety guidelines is crucial while driving in and around the Kootenay National Park. On the major routes of Kootenay National Park, you will have to maintain a maximum speed of 56 mph.However, on the minor routes, the highest driving speed limit will be 37 mph.  Also, around one month before the incident, on 24th July 2024, there was a minor fire on the  Sinclair Canyon slopes (near Radium Hot Springs) of the national park. It was called the Berland Ridge wildfire. This fire was brought under control, though, thanks to a helicopter bucketing water on it. However, outside the park’s southern boundary, there was a blazing fire that was brought under control after painstaking efforts.  So, these incidents show how mindful and cautious you need to be while taking part in the following activities.  Hiking In Kootenay National Park (Hikers’ Favorite Trails) The hiking trails in Kootenay National Park are full of elevation gains and losses. Also, today, the national park has more than 70 hiking trails at easy, moderate, and difficult levels.  However, I have curated a few hiking trails in the table below. Moreover, after interacting with a couple of hikers, I found out that these are the most preferred ones. Name of the Trail Difficulty LevelDistanceLocationHighlightsMarble CanyonEasy1.4 Km with 42 M Elevation Gain Located near Lake Louise, Alberta•Hiking, snowshoeing, and running are the favorite activities here.•Also, it is a pet-friendly and kid-friendly trail. •Moreover, it is a year-round hiking trail. Stanley Glacier Trail Difficult 10.9 Km with 607 M Elevation Gain Located near Lake Louise, Alberta•Snowshoeing, camping, and hiking are popular activities on this trail.•You can take your dog as a companion.•June to September is the best time to hike this trail. Sinclair Canyon via Juniper Trail Moderate5.8 Km with 291 M Elevation GainIt is close to Radium Hot Springs in British Columbia.•You will have to hike through a beautiful cedar fir forest on this trail.•The view of verdant Sinclair Canyon Falls and the Columbia Valley from this trail is breathtaking.Marble Canyon to Paint PotsModerate2.9 Km with 110 M Elevation GainRadium Hot Springs (Marble Canyon Parking Lot  - 89 km east of Radium Hot Springs, Paint Pots - 86 Km east of Radium Hot Springs).•Explore a good mix of mature and burnt forest throughout the trail.•Behold the Vermillion River running parallel to the trail. Floe LakeDifficult10.5 Km with 1,110 M Elevation Gain Near Radium Hot Springs (72 Km East)•Backpacking and camping are popular on this trail. •The trail leads to the Floe Lake Backcountry campground. •This popular meadowy trail is known for its views of peaks, glaciers, and the beautiful Floe Lake. Numa CreeksModerate 6.3 Km with 385 M Elevation GainThe trailhead is near Numa Falls, which is 80 Km east of the Radium Hot Springs. •It is a forested trail.•The trail leads to heavy avalanche paths in the park.  The hikers’ words about the trails in this national park are quite encouraging. So, let’s find out what they are saying about the mesmerizing hiking trails.  “This is a beautiful, deep canyon hike. The trail crosses the canyon multiple times to view the ferocious Kootenay River below. Hiking boots aren't necessary since it is a well-traveled trail.” - Deborah Turcotte on the Marble Canyon Trail. “The trail was mostly dry and in very good condition. No snow on the trail, just a few short wet spots. The trek up is mostly sheltered but a bit chilly and windy in the bowl so bring layers as the temp changes quickly when the sun is behind clouds. Still lots of snow in the bowl. Found one rock with fossils. There are a few small waterfalls on Stanley Peak. Lots of boulders at the base of the bowl to sit and enjoy a lunch and 360 views. An easy to moderate 3-4 hour hike with nice views of Stanley Peak, Storm Mtn, and the Kootenay Valley.” - Sue W on the Stanley Glacier Trail. Kootenay National Park Camping  Kootenay National Park is a wonderful place for frontcountry and backcountry camping. You can even live in oTENTiks and spend some unforgettable days in the park under the sky.  Frontcountry Camping You can camp near the Vermillion, Kootenay, and Simpson rivers. Also, you can find some quiet spots near Radium Hot Springs village.  Furthermore, summer is the best season for front-country camping in the national park. However, the sites remain crowded. So, you must make a prior booking.  Further, the daytime temperature in the national park remains between 16-23 degrees centigrade. Still, the temperature at night can drop below 0 degrees centigrade. So, abiding by the camping rules is crucial, and especially, be particular about the things you will have to carry. Moreover, like camping in any national park, here you also have to ensure that you don’t leave any trace behind as you leave the site.  Backcountry Camping Backcountry camping and backpacking are the best ways to explore the wilderness of this Canadian national park. However, you must make a prior booking and carry a backcountry permit if you want to spend some days and nights amidst grizzly bears, black bears, wolves, elk, and cougars.  Further, there are six backcountry camping grounds in the park. Also, five of them are located along the  Rockwall Trail. In addition, the Verdant Creek Trail has the sixth camping ground.  Moreover, random camping is not allowed during summer, as protecting the landscape and vegetation is crucial. Also, this restriction applies from May to October.  However, in the winter months, you can do random camping in the designated areas. You will still need a permit for this. As I have mentioned, the Rockwall Trail is the most prominent place for backcountry camping in the park. This site is also popular for the presence of various multi-day hiking trails. These trails are: Honeymoon Pass and Verdant Creek Tumbling - Floe The Rockwall  Tumbling - Helmet - Ochre Loop Numa Creek Helmet Creek and Falls Tumbling Creek Helmet - Ochre Junction In the popular backcountry camping areas, the trails are maintained quite well. Further, there will be amenities like food storage cables, food lockers, picnic tables, and tent pads.  Living in oTENTik An oTENTik is a modern fusion of a cabin and a tent. In the park, you will find the oTENTik site on the Redstreak campground’s A loop.  If you stay in an oTENTik, you will wake up amidst nature, and taking a bath at the hot springs will be the most rejuvenating experience. Then, you can explore the nearby hiking trails and gorge on traditional meals cooked by the campfire.  Relaxing At Radium Hot Springs  Beneath the colorful Sinclair Canyon mountains lie the most refreshing hot springs. Further, the mineral-rich water of the hot springs does not have any odor, and you can take a bath with your entire family.  To reach the Radium Hot Springs, you must drive from Banff and Lake Louise for around 1.5 hours. Further, the journey is as interesting as the destination. You will get to small turquoise lakes, falls, canyons, and bridges over rivers as you drive through the Kootenay National Park. Also, don’t forget to stop at the following locations to make the most of your journey. Continental Divide (The line dividing the Pacific and Atlantic watersheds) Marble Canyon Hike Paint Pots Trail Numa Falls Kootenay Valley Viewpoint (It is the place to get the most beautiful view of Vermilion and Mitchell Ranges.)  Olive Lake Trail and Day-Use Area However, the highlight of the journey, of course, is the Sinclair Canyon, where you will also find big horn sheep roaming. As you hike through the Juniper / Sinclair trail, you will get a “bird’s eye view” of Sinclair Canyon.  Further, as you enter the Radium Hot Springs village, you will see an iconic steel horn sculpture. The “Bighorns Public Art Sculpture” was officially unveiled on 7th April 2021. Moreover, Clara Reinhardt, the mayor of Radium in 2021, said,  “We chose something that implies a sense of arrival to Radium, the Columbia Valley, and beyond. We captured the undeniable natural beauty of the curved horns through a Fibonacci spiral—the golden ratio in nature and art.” “We wanted to create a piece of art that speaks to both the history and the future of bighorn sheep in Radium. We captured the undeniable natural beauty of the curved horns through a Fibonacci spiral—the golden ratio in nature and art.” - Adam Meikle (Artist of the Bighorns Public Art Sculpture) Burgess Shale Fossil Hike  The Burgess Shale Fossil Hike in the national park will give you access to Mount Stephen and Walcott Quarry. These are UNESCO Restricted Sites. Further, you will get to see some of the oldest fossils in the world here.  However, in total, you have three routes to explore in the Burgess Shale Fossil Hike. Let’s discuss them in detail.  Walcott Quarry Starting Point: Takakkaw Falls Difficulty Level: Difficult  Elevation Gain: 825 Meters Duration: 11 Hours Return Distance: 22 Kms Walcott Quarry is a classic example of a fossil hike. Also, the top view of Emerald Lake from the top here is amazing. Further, you will find Burgess Shale creatures here, which were found in fossilized conditions at the mountaintop in Yoho National Park.  “The Burgess Shale organisms lived 508 million years ago in a time period that Geologists call the Cambrian, which began at 541 Ma (million years ago) and ended by 485.4 Ma. The first fossil occurrence of most animal lineages (at the phylum and class levels) occur in the Cambrian. As a result of this fact, and because the fossils are well preserved, Paleontologists studying the Burgess Shale fossils can deduce a great deal about the ancestry of animal lineages.” The Burgess Shale fossils were discovered at the Walcott Quarry site in 1909 by Charles Doolittle Walcott. 1 Mount Stephen Difficulty Level: Difficult  Elevation Gain: 795 Meters Duration: 7.5 Hours Return Distance: 9 Kms As you hike through the Mount Stephen trilobite beds, you will get to overlook the “town of Field” in British Columbia. However, railway workers in the 1880s used to call the town of Field the place of “stone bugs.”  Further, during this trek, you will see trilobite fossils (now extinct and one of the earliest marine arthropods). Moreover, the view of the Kicking Horse River from the trail is amazing.  Stanley Glacier Difficulty: Moderate Return Distance: 10 km Elevation Gain: 385 m Duration: 7.5 hours You will start hiking the Stanley Glacier in a fire-swept forest. The forest has lodgepole pine and wildflowers. Further along your route, you will get to see a turquoise river, waterfalls, and the best view of the Stanley Glacier. Moreover, you will get to see the fossils of hyolithids, sponges, and trilobites here, and they are from the Eldon Formation.  Cambroraster, an ancient arthropod, and many other species are found in the quarry near the Stanley Glacier. Further, the shell of a Cambroraster looks like the Millennium Falcon spaceship in its shape. Important Kootenay National Park Data At A Glance  Before you start for Kootenay National Park, don’t forget to have a look at the stats. Location: British Columbia, Canada Established: 21st April, 1920 Area: 1,406 km² Highest Landscape: Deltaform Mountain (3,102 m) Designation: UNESCO World Heritage Site in 1984 (As Part of the “Canadian Rocky Mountain Parks ) Visitor Center: Kootenay National Park Visitor Centre (7556 Main Street East; Radium Hot Springs, B.C.) How to Reach: Via Highway 1 from Banff, AB or Calgary, AB/Via Highway 95 at Radium Hot Springs, BC Also Read Why Include Whale Watching In Your LA Itinerary. Traveling On A Budget: Tips For Affordable Adventures. From Cocktails To Kickflips: Must-Try Activities In San Diego.