


 Related
Journey To The Skies: Exploring The Legacy Of Northwest Airlines!
BY Mashum Aug 19, 2023
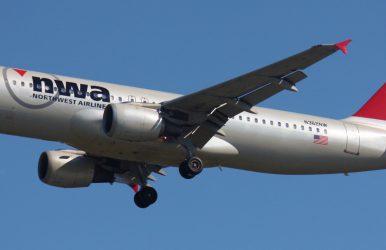
It was before me, but I have heard stories! Northwest Airlines' legacy was a legend, especially in the 1920s. What do you know about the airline? Let's discuss its features and drawbacks, giving you an idea of what today's airline brands are not! We need to know people's perspectives before we identify what went wrong! The bankruptcy resulted from the airline's inability to adapt to the changing trends of the low-cost carriers that ruled the 21st century. The rising oil prices and the slowing economy impacted the carrier's status! In this article, I will discuss some of the passengers' good experiences with the Northern Airline, considering it operated for a long time. We will also highlight some of the airlines' drawbacks based on the reviews of people from as early as 16 years ago! Journey To The Skies: Exploring The Legacy Of Northwest Airlines! To learn about the legacy of Northwest Airlines, we need to read about the first account-based narration that will show us the extreme competition under which the airline broke! Delta spent almost $2.8 billion acquiring Northwest, which had 309 aircraft in its fleet! The concern is that a flight company with 309 flights should not be shut down, but it shows that the brand needed to be more efficient. In the later few years, the company had serious maintenance issues with the flights, often leading to flight delays. I will be evaluating reviews about the airlines that will inform you about the way the airlines function. It will also make you aware of airline brands and their operations during the 1900s compared to low-cost airlines. About Northwest Airlines The airline has had several changes in its name over the years! So it can be confusing, but please bear with me as I discuss the important timelines of Northwest Airlines. The airline was founded in 1926 with the name "Northwest" and based in Detroit, Michigan. Initially, the airline moved mail across the United States but mostly focused on areas such as Minneapolis and the Midwestern cities of Chicago. It was late 1927 when passengers boarded the plane across the routes. It was in 1928 that the airline became an international one! Following mail scandals, the airline changed its name again to Northwest Orient Airlines. However, the airline's services were expanding, and by 1939, there were regular operations between Minneapolis and Chicago! Further destinations were added, such as Portland and Winnipeg. The airline further expanded its services to Asia and Japan by 1947. Manila, Hong Kong, Seoul, Shanghai, and other places were also included in the routes. With the Airline Deregulation Act passed in 1978, the airline expanded its services to the UK, Germany, and Scandinavia. In the 1990s and 2000s, with the rise of low-cost airlines, Northwest Airlines had tough competition leading to a loss of money. The direct services between the US and China could have done better! Further, in 2005 the demand fell along with the oil prices, especially with the 9/11 attacks. The Merger The airline was bankrupted in 2005; hence, they filed for bankruptcy protection! Once they were cleared after 2 years, they merged with Delta once it was approved at the end of the year 2008. The brand Northwest retired after the merging launch with Delta! Review Northern Airlines was doing well, especially when no other airline was in the market. With less competition, people were taking whatever they got! However, the airline faced severe issues with Northwest flight once the low-cost carriers came at the later end of the 2000s. The claims made by travelers who booked on this flight included all kinds of complaints starting from dumb staff to delays in flights. Another significant issue I have heard from people is that there was no announcement of flight delays. It isn't easy, especially when evaluating from the passenger's perspective. They might be coming from far off, and it would help if they were announced of the delay instead of waiting around the airport for hours! There are significant reasons why the airline closed, and if you read the drawbacks, I am sure you will know why! Benefits Certain features enabled the airline to function effectively in the previous days! However, in the long term, they could not maintain the quality of their services. Let me highlight the advantages that travelers experience when booking on NW Airlines flights. You would be charged if you ordered a specific meal or beverage on the airline. However, the snacks and water were free. The airfare was quite affordable, especially with the services Northern Airlines provided. It was quite a satisfactory price to pay for tickets at that time. Shortcomings Some of the shortcomings had the power to impact and influence the closing of the airline. It is because customers, at a certain point, became so dissatisfied with the services that the sales fell significantly. Along with the sales, there was also the issue of increasing oil prices, due to which the company needed help to function properly. Flight maintenance was deteriorating as it often became a significant reason for technical issues to crop up in aviation. It led to flight delays making passengers wait and suffer. One of my aunts once traveled on this airline and told me she had to wait a few hours due to technical glitches. Further, the staff members of Northwest Airlines have been stated as incompetent and lazy by many customers who have boarded flights. According to a review in Customer Service Scoreboard, an anonymous assessment informed that the company is failing its quality customer service. The seating space was quite cramped as the aircraft was smaller in size. It created severe issues with people having long legs. Matters were also faced by senior citizens who consistently suffered due to the seating arrangements and comfort. What Do We Know? So, Northern Airlines might be one of the best airlines at some point in history, but like the mighty dinosaurs, it could not adapt to the changing needs and times. The airline's downfall started in the 2000s when the low-cost carrier made it difficult to survive! Customers were also dissatisfied with the airline. Hence, the sales of tickets also dropped. It led to further economic losses along with the increasing oil prices. Comment below regarding your perspective of Northern Airlines and what they could have done to survive! Read Also: This Is My Experience With Play Airlines! Here’s What I Found Out About Aha Airlines! Condor Airlines: Is Booking Tickets On Condor Worth It? Fly In Style: Your Ultimate Guide To Lot Polish Airlines Adventures!