


 Related

6+ Fascinating And Fun Travel Destination Ideas In Africa For Vacation: Africa Tourism Guide
BY Abdul Aziz Mar 30, 2022
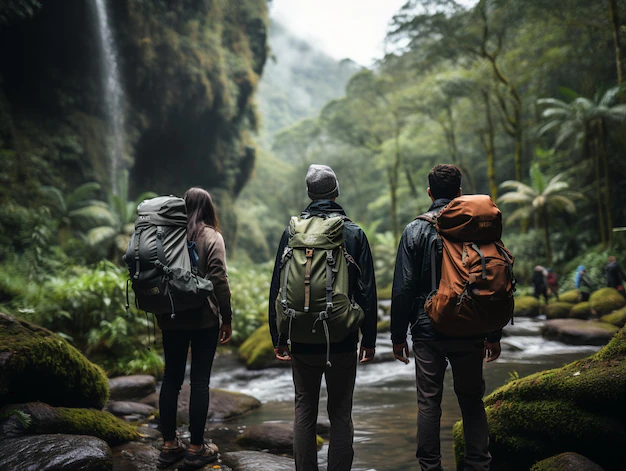
Africa is notable for its rich culture, exciting history, and extraordinary creativity of its people. Many people mistake Africa for a single country rather than an incredible continent of over 54 countries. Little did they know about the vast and exciting variations in the topography, landscape, culture, and activities of the people in this region. With over 54 countries inhabited by billions of people calling Africa a home, there is a lot to see, enjoy, and explore in this geographical location. Suppose you want to create unforgettable memories, unique culture, and visit heritage sites; it's time to step beyond the boundaries of Europe, Asia, and America. Let's dig into the fascinating and fun travel destinations in Africa where you can explore for vacations. You Must Explore These Travel Destination Ideas In Africa May to October is the best time to explore the fun travel destination ideas in Africa. These months are especially suitable for wildlife safaris. Further, during these months, you will find the animals hurdling near the water bodies. However, if you are planning a beach holiday in Africa, you must try it between November to March. Furthermore, exploring marine life, or watching whales is a fun activity to do in Africa. June to November is the ideal time for the same. Are you all set to explore the fun travel destination ideas in Africa? Here are the Tour and Travel top picks. 1. Explore the Serenity in the Sahara and Sea of Tunisia Tunisia is notable for being the most northern country in Africa. Hence, it is a sun-soaked destination with a gorgeous blend of European and Arab influences. It is a suitable destination for Europeans seeking to enjoy the winter sun and Arabs looking to feel the calming effect of the Mediterranean Sea. You can explore the unique feel of the Island Djerba before venturing into the unique scenery of the Sahara desert. You will find the rolling sea of orange sand in the Grand Erg Oriental region. You can sightsee this region on foot or camel's back. 2. Visit Mount Kilimanjaro (Tallest Mountain in Africa) In Tanzania Several landmarks and natural elements in Africa, but Mount Kilimanjaro claims a spot as one of the unique places. With a height of about 19,341 feet, it is undoubtedly the most elevated mountain in Africa and one of the tallest in Africa. Besides this unique height, this spot in Tanzania is also a fantastic backdrop for wildlife safaris. You can join the list of people who visit Tanzania to climb Mount Kilimanjaro to the summit. Interestingly, you won't have to battle any harsh weather typical for other similar heights. However, you will get the best of this region when you go on a guided excursion. 3. Amaze Yourself With Various Spots In Cape Town, South Africa Cape Town sits at the Southern tip of southern Africa, and it is one of the places that will get you to fall in love with Africa even on your first visit. You will also explore the Cape of Good Hope, where the Atlantic Ocean meets the Indian Ocean. The confluence of these two majestic oceans gave rise to gorgeous beaches with crystal shiny white sand. This beach is made even better by casting the 12 apostle rocks. Besides the beaches, there are also several other things to explore. You can watch the sunrise at the top of the lion's head mountain and feel the historical heritage in museums and galleries. 4. Find Your Way To The Historical Pyramid Of Giza, Egypt Egypt is one of the countries with the wealthiest culture in Africa, and the country is also notable for being the seat of the earliest civilization in Africa. The pyramid of Giza is one of the iconic spots, and the pyramid dates as far back as the 26th century BCE, and the Sphinx will offer experiences you will never forget. Moving around this area on the back of a camel and watching the sunset at the top of the pyramid are experiences to remember. Besides the pyramid itself, you will also have direct access to Cairo, the capital city of Egypt. You will also get a fantastic view of the iconic river Nile to enjoy the chaotic and buzzy feel of the wind. 5. Explore A Combine Trip To Zimbabwe and Zambia Do you wish to hunt down two birds with a single stone? Consider a double swoop of Zimbabwe and Zambia on your trip to Africa. Get a feel of the "Smoke that Thunders' when you visit Victoria Falls during the rainy season. The Victoria fall is located between the borders of Zambia and Zimbabwe, and it is heavily protected as a UNESCO World Heritage Site. Victoria waterfall has an impressive height (Over 300 feet) that makes the sound of the waters rumble like thunder and its 1.7-kilometer length. If you are brave enough, you can explore both Zambia and Zimbabwe's sides of the fall. 6. Masai Mara National Reserve, Kenya With an area of more than 373,000 acres, the grasslands of Masai Mara National Reserve are one of the best places to explore the wildlife of Africa. It is on our list of fun travel destination ideas in Africa because it is home to home to lions and elephants. Further, you will meet cheetahs and hippos here. Also, you can try a ride on horseback or a hot balloon ride if you want some serious adrenaline rush. July to August is the best time to visit Masai Mara National Reserve if you want to spot the big five animals, including hippos, lions, leopards, rhinos, and buffaloes. Furthermore, you will encounter many migratory animals in these months. Tour And Travel Tip While going on a safari in the Masai Mara National Reserve, you must take guides certified by the Kenya Professional Safari Guides Association. 7. Seychelles, East Africa Seychelles is one of the off-beat travel destination ideas in Africa. However, this small country in East Africa is made up of 115 islands in the Indian Ocean. Also, it is your ideal getaway if you want to relax and soak in the pristine beauty of nature. Beaches like Anse Lazio and Anse Source D'Argent do not get much crowd. So, you can have your me-time while travelling solo. These are great places for lounging even if you are travelling with your family. However, the biggest draw of this country is the Vallée de Mai Nature Reserve. It is a UNESCO World Heritage Site. Tour And Travel Tip: Finding lodging here is not easy because of limited options and they are also very expensive. However, you can avoid the extra charges by booking your lodging in advance. Fun Travel Destination Ideas In Africa: The Land Of Wall Arts And Souvenirs Africa is a great destination to explore, with several spots to visit. The sites above are one of the many hot spots in Africa waiting to receive you. Regardless of where or when you visit Africa, it is best to let the memory live with you. There are several ways to carry these memories and feelings, but one of the best ways is exploring African wall arts. Africa wall arts will help you preserve the unique feeling and vibe of this location. Even if you've not been to Africa, you can still integrate these wall arts into your space to create fantasy and keep the desire. Besides, African wall arts improve the décor of your space, create focal points, and add color.